FluentCommunity sends a lot of email on your behalf — new comment alerts, comment replies, post announcements, weekly digests, and more. For your community to stay active, those emails need to reliably reach the inbox instead of the spam folder or getting dropped entirely.
That’s where FluentSMTP comes in. FluentSMTP is a free WordPress mailer plugin that routes your site’s outgoing email through a trusted email service (like Amazon SES, SendGrid, Mailgun, Google Workspace, Microsoft 365, and many more). The result: much better deliverability and full visibility into what’s being sent.
The key thing to know: FluentCommunity does NOT have a separate FluentSMTP setting or connection to configure. FluentSMTP works at the WordPress level for your entire site. Once it’s installed and connected, every email FluentCommunity sends automatically goes through it — no extra wiring needed.
How the Two Work Together
Think of it as a simple hand-off:
• FluentCommunity decides what to send and who to send it to (the notification, the digest, the announcement) and sets the sending identity — your From Name, From Email, reply-to details, and footer.
• FluentSMTP takes that email and actually delivers it through your chosen email service, so it arrives reliably and is logged for your review.
In short: FluentCommunity handles the message; FluentSMTP handles the delivery. Together they make community email smooth and dependable.
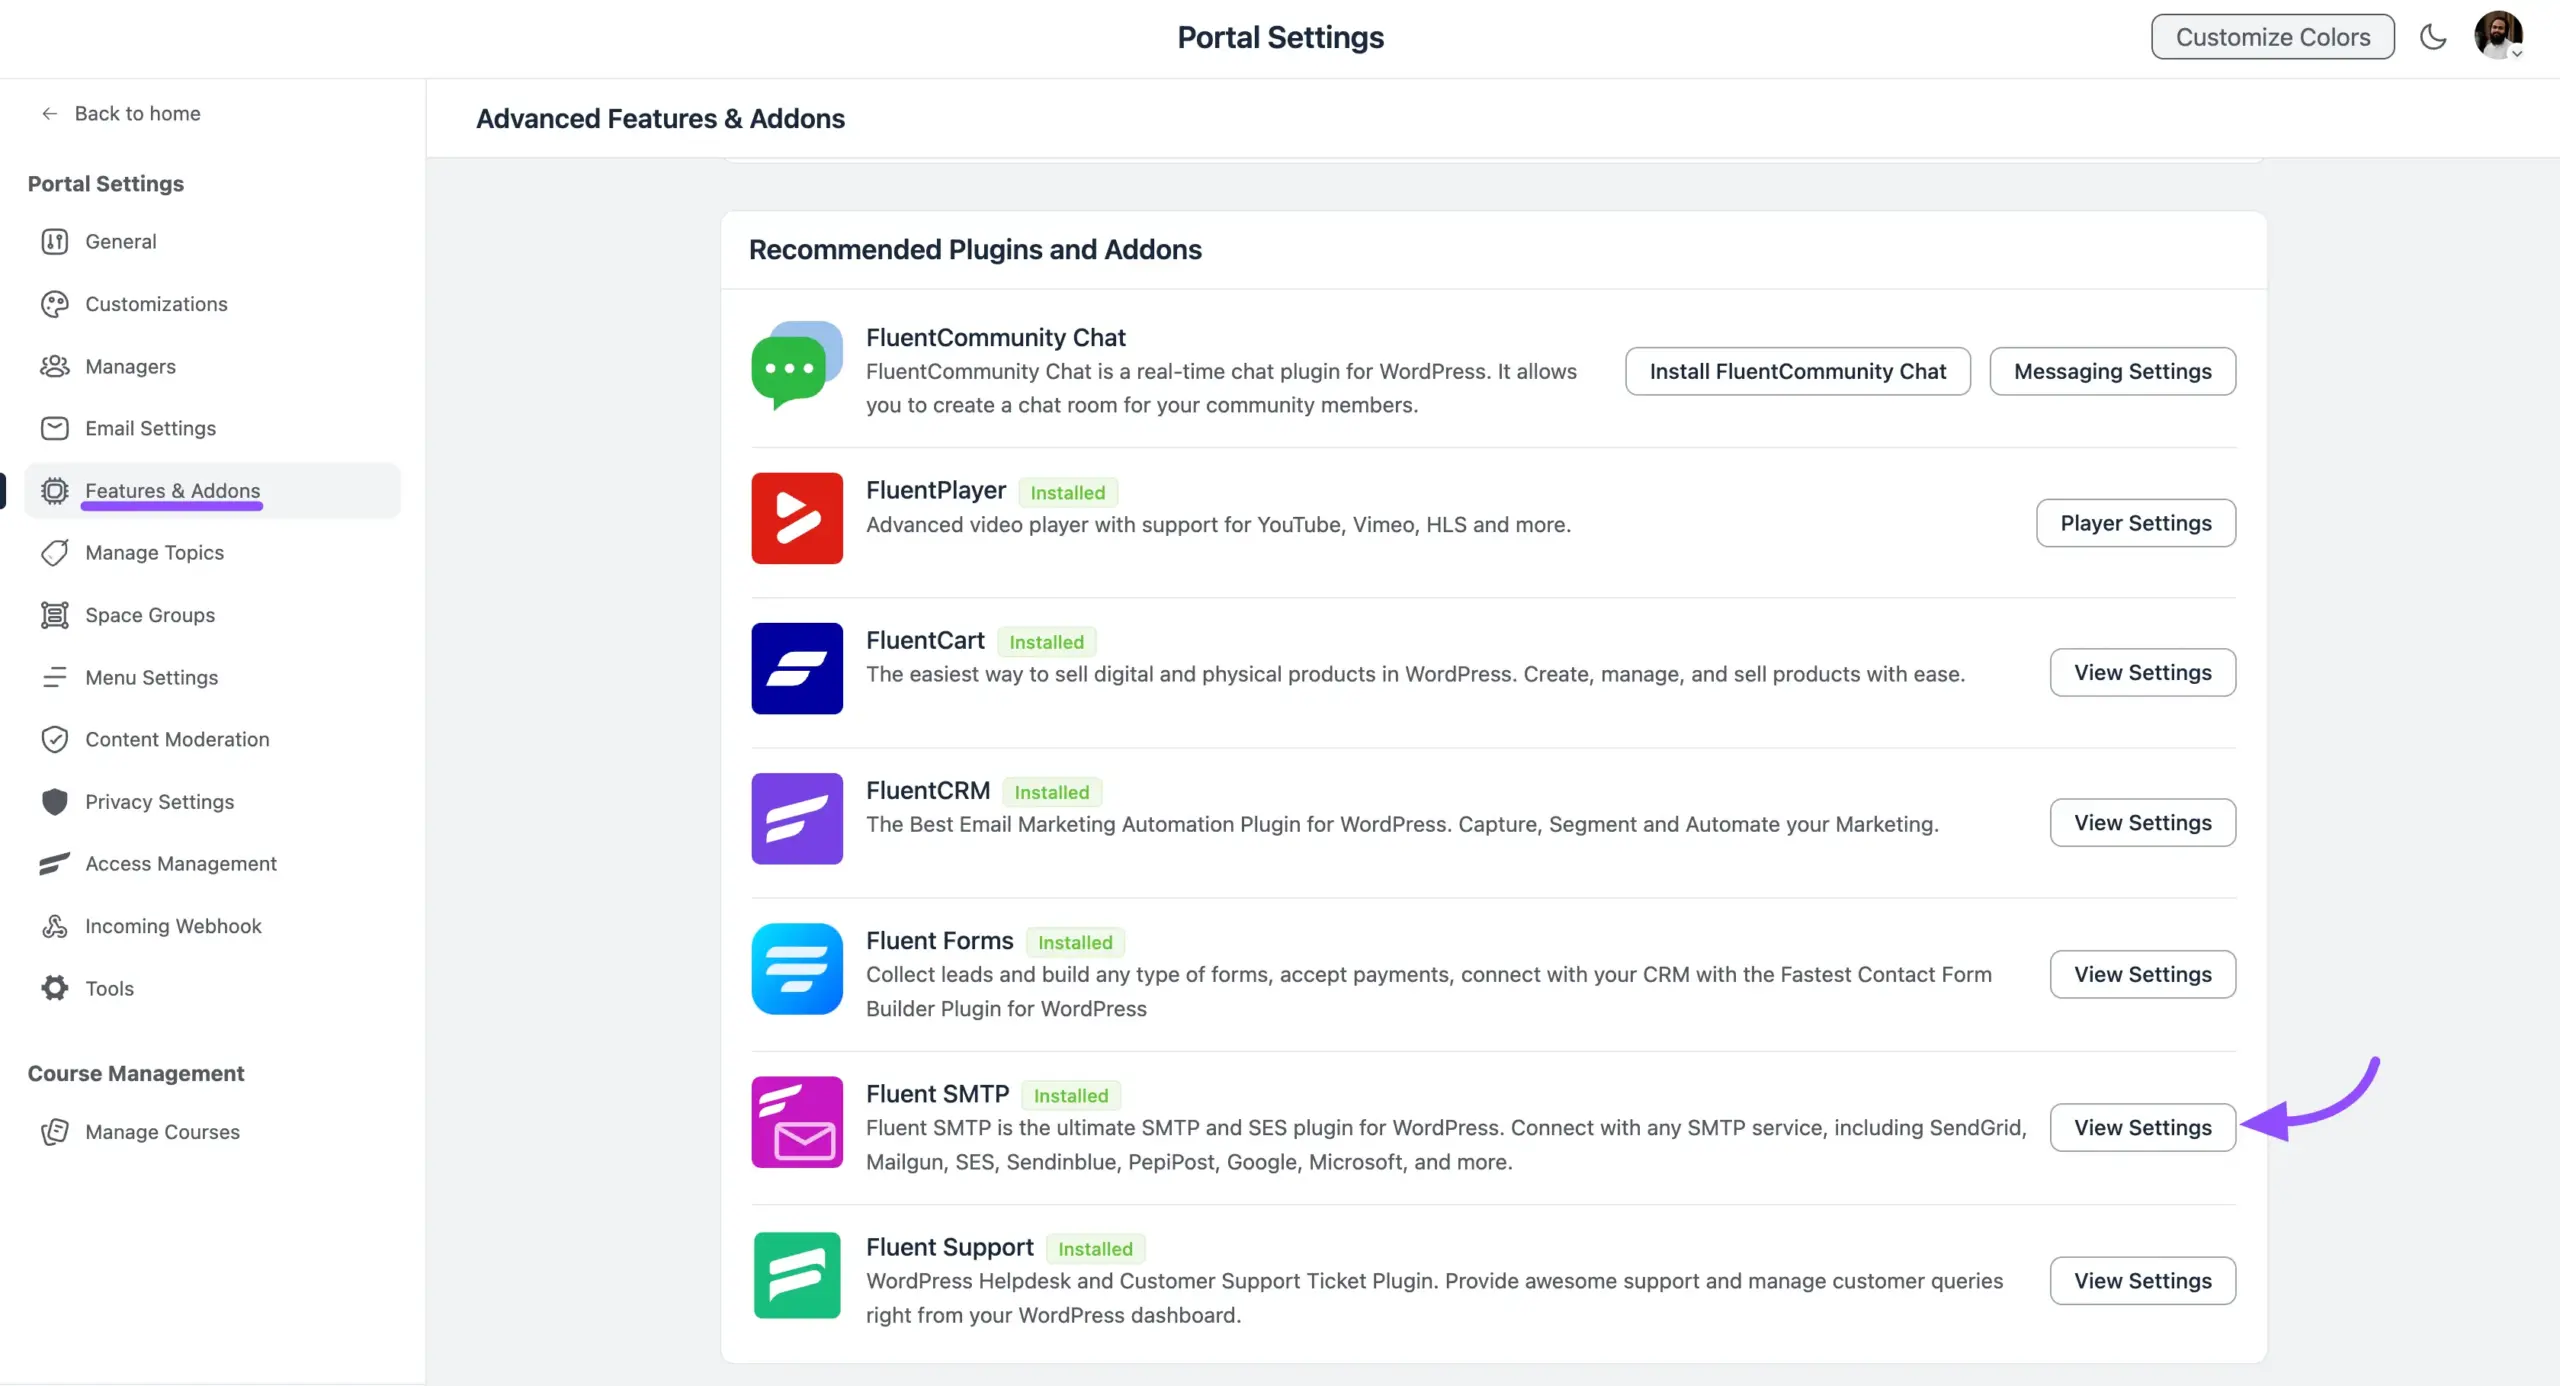
Connect FluentSMTP #
This is a quick, one-time setup that benefits your whole site — not just FluentCommunity.
1. From your WordPress dashboard, go to Settings → FluentSMTP.
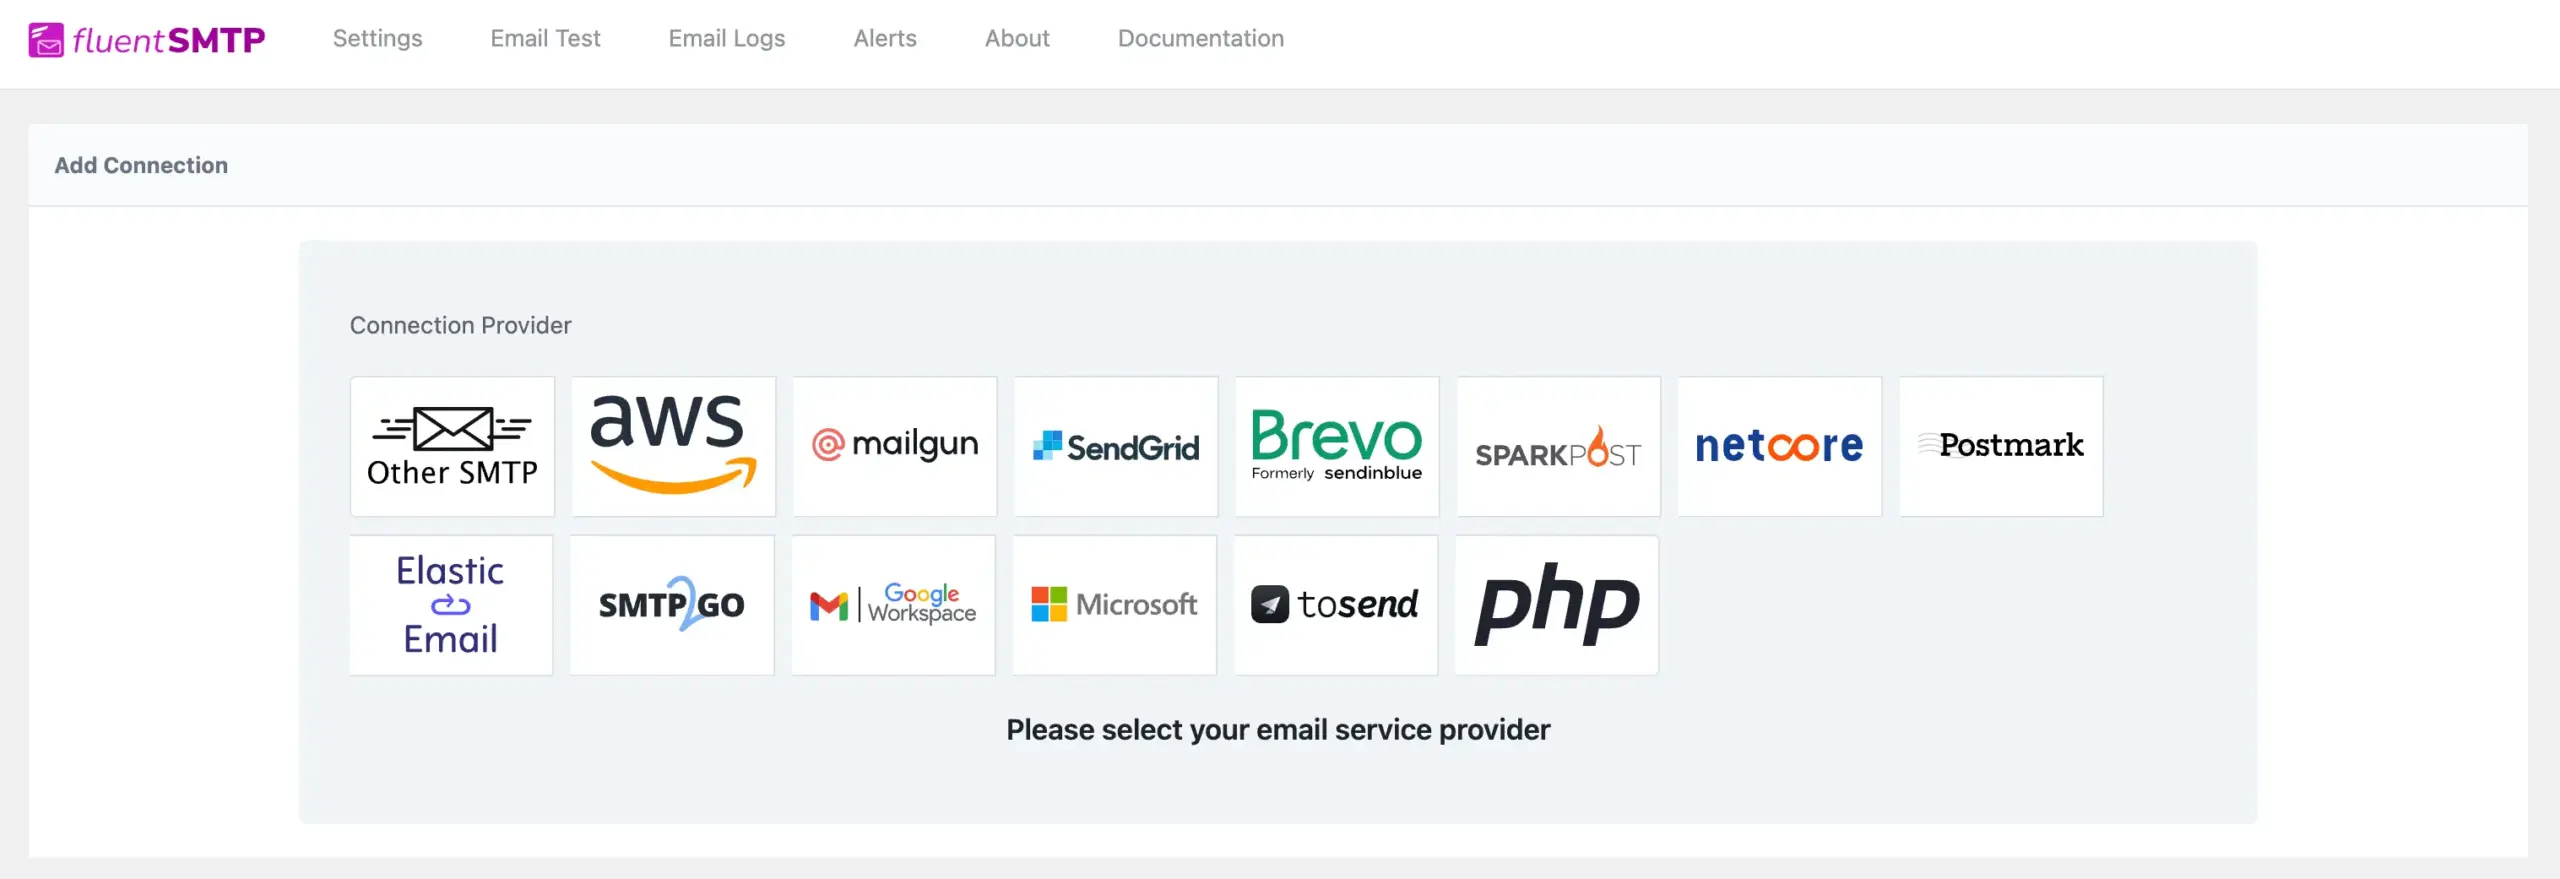
2. Click and choose your email service provider (for example, Amazon SES, SendGrid, Mailgun, Google Workspace, or SMTP).
3. Enter the From Email and From Name you want your site to send from, then add the provider’s API keys or SMTP credentials.
4. Save the connection, then use the Email Test tab to send a test email and confirm delivery works.
That’s it: Once this connection is active, all WordPress email — including everything FluentCommunity sends — is routed through FluentSMTP automatically. There is nothing to switch on inside FluentCommunity itself.
Set Your Sending Identity in FluentCommunity #
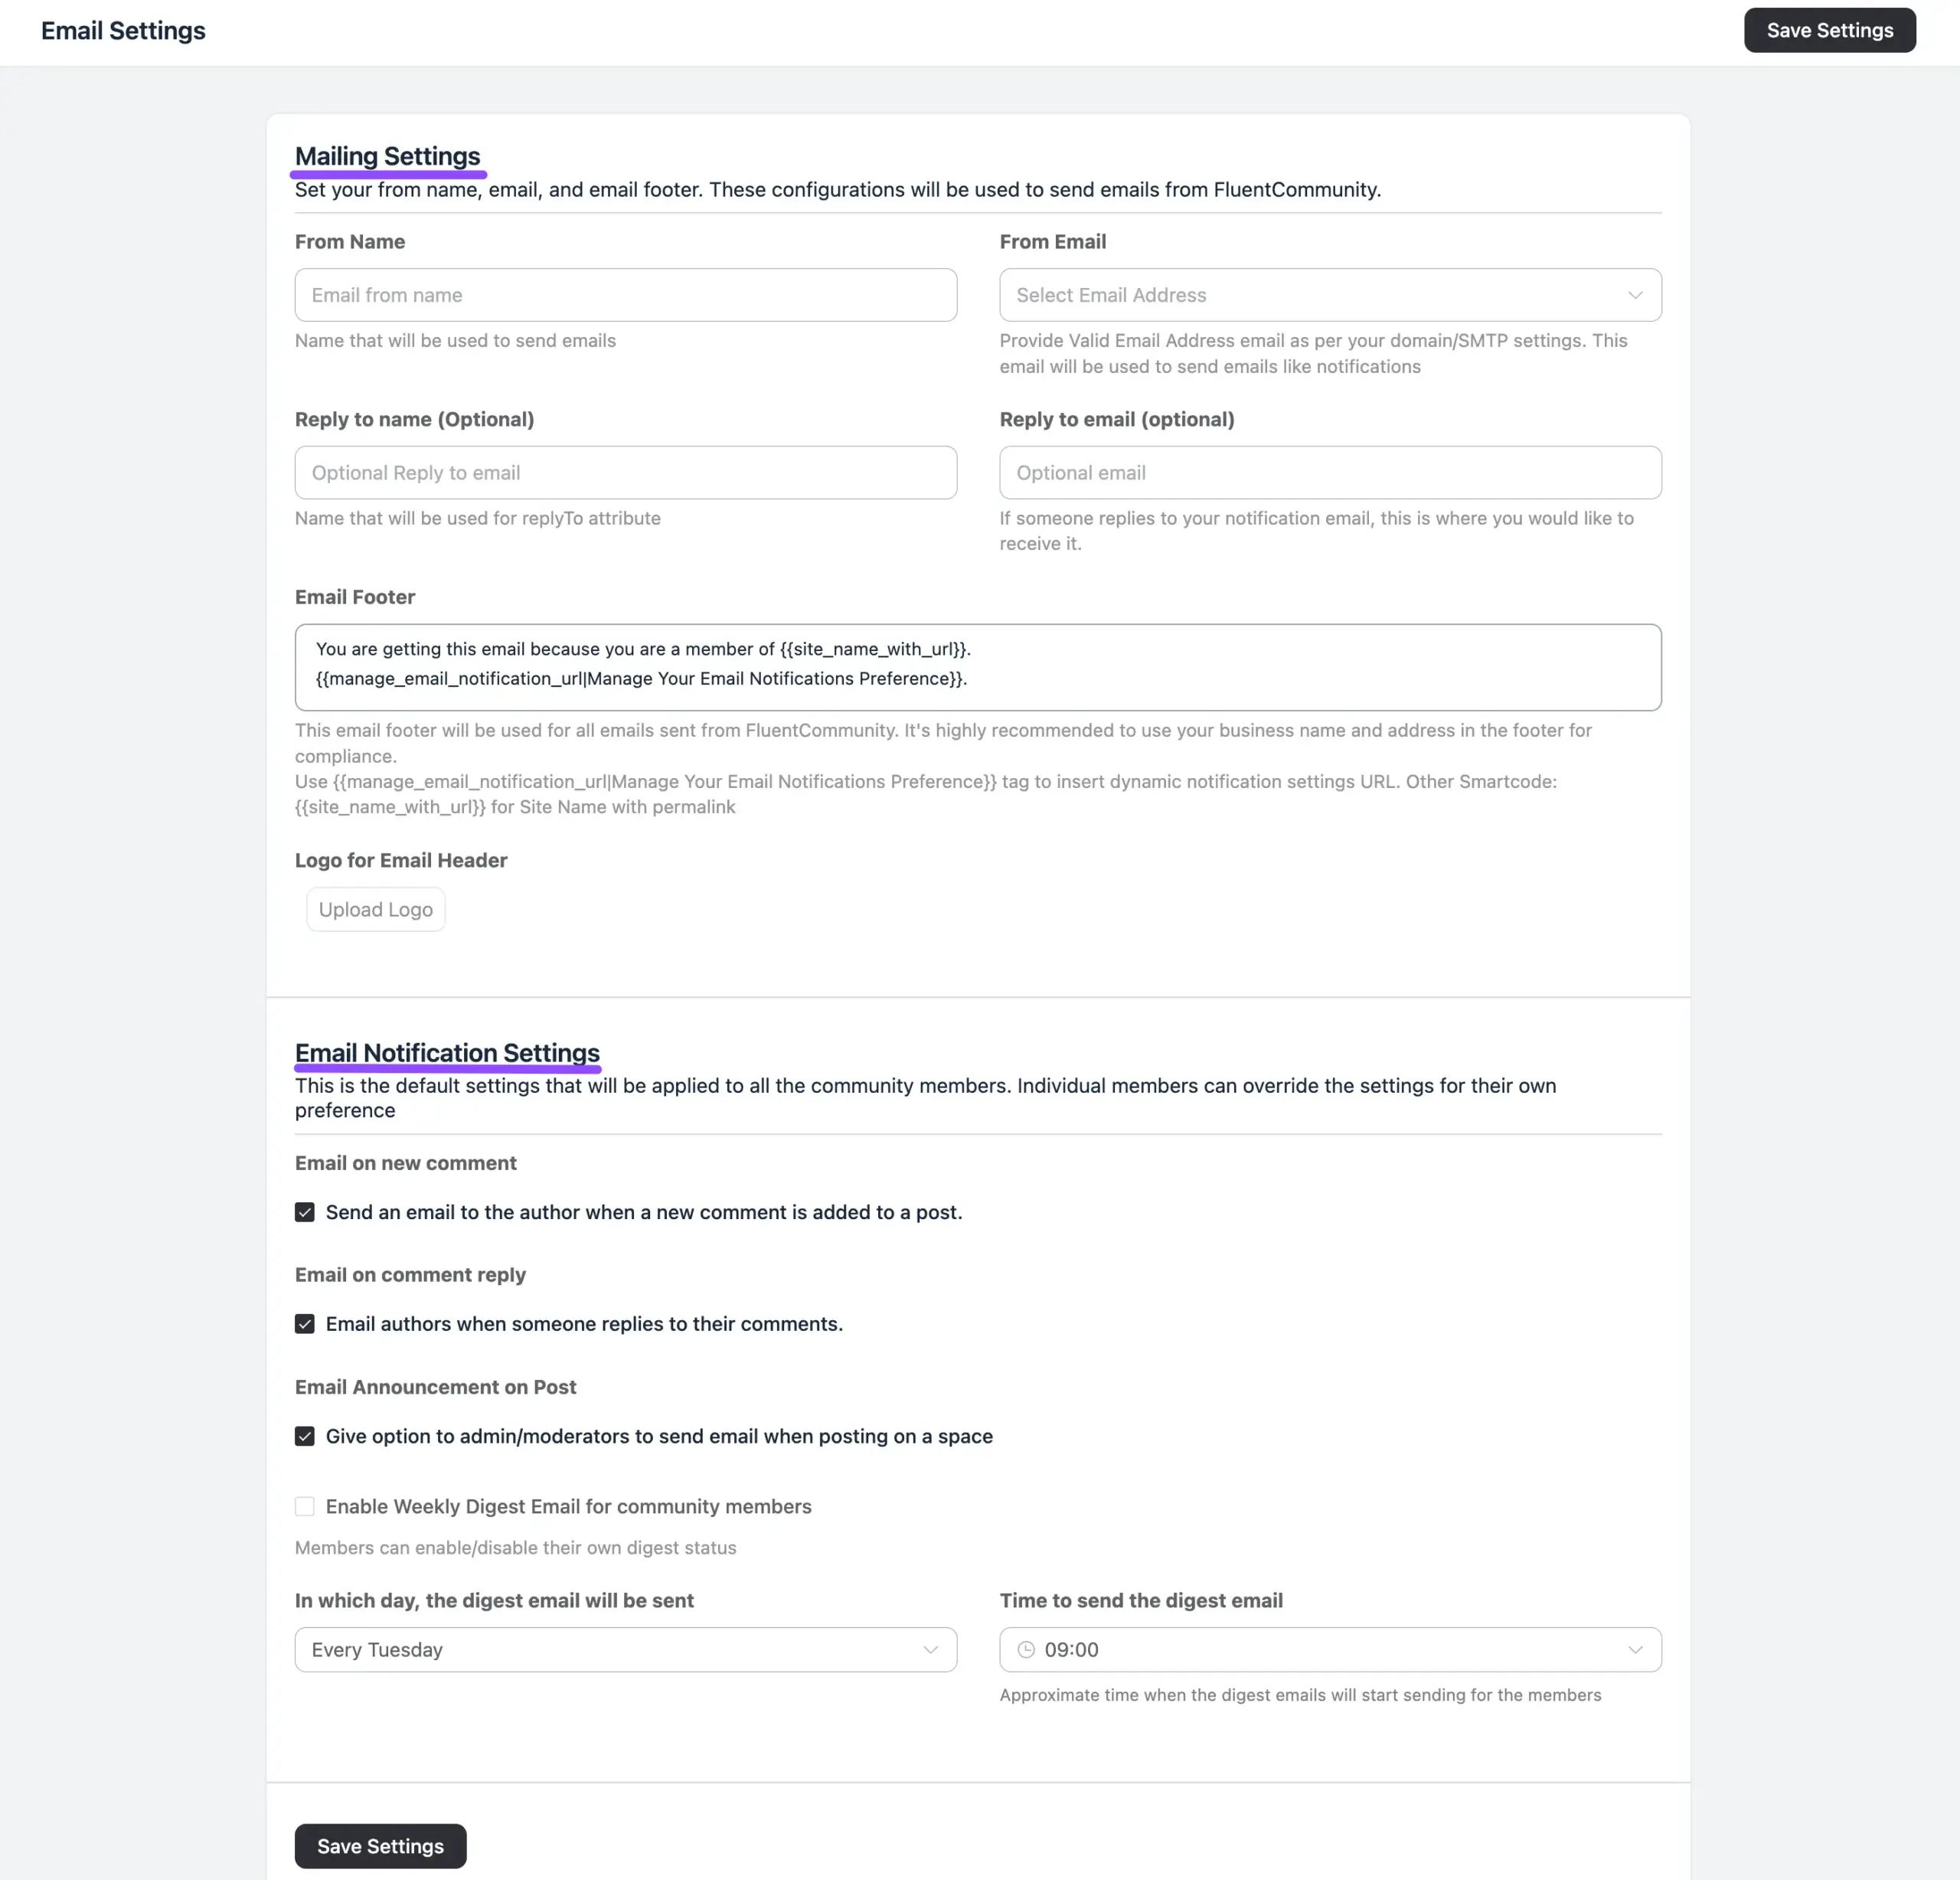
While FluentSMTP handles delivery, FluentCommunity controls how your emails look and who they appear to come from. You configure this on the FluentCommunity email settings page.
Go to your FluentCommunity settings and open the Mailing Settings section. Here you’ll find:
• From Name: The name your emails are sent from (for example, your community or brand name).
• From Email: The address your emails are sent from. Use a valid address that matches your domain and your FluentSMTP connection — this keeps deliverability high and avoids spam filters.
• Reply-to Name (optional): The name used for the reply-to address.
• Reply-to Email (optional): Where replies should go if a member responds to a notification email.
• Email Footer: The footer added to every FluentCommunity email. It’s recommended to include your business name and address for compliance. You can use smart codes like {{site_name_with_url}} and {{manage_email_notification_url|Manage Your Email Notifications Preference}} to insert dynamic links.
• Logo for Email Header: Upload a logo to brand the top of your emails.
Deliverability tip: Make sure the From Email here uses the same domain you authenticated in FluentSMTP (with SPF, DKIM, and DMARC set up at your provider). Matching them is the single biggest thing you can do to keep community emails out of the spam folder.
When you’re done, click Save Settings.
Choose Which Emails Get Sent #
Just below the Mailing Settings, the Email Notification Settings control the default emails sent to your community members. (Individual members can override these for their own preferences.)
• Email on new comment: Send an email to the author when a new comment is added to their post.
• Email on comment reply: Email authors when someone replies to their comments.
• Email Announcement on Post: Give admins and moderators the option to send an email when they post in a space.
• Enable Weekly Digest Email: Send members a weekly roundup of community activity. Members can turn their own digest on or off.
• Digest day & time: Choose which day (e.g., Every Tuesday) and the approximate time (e.g., 09:00) the digest emails start sending.
Every one of these emails is delivered through FluentSMTP behind the scenes. Click Save Settings once you’ve made your choices.
Test and Verify #
After setup, confirm everything is flowing correctly:
5. In FluentSMTP → Email Test, send a test email to yourself and confirm it arrives.
6. Trigger a real FluentCommunity email — for example, add a comment on a post — and check that the author receives the notification.
7. Open FluentSMTP → Email Logs to see a record of every email sent, including status. This is your go-to place if you ever need to confirm an email went out.
Troubleshooting: If an email doesn’t arrive, check the FluentSMTP Email Logs first. A failed entry there points to a delivery/provider issue (fix in FluentSMTP), while a successful entry means the email was sent and the issue is likely on the receiving side (spam folder, filtering, or a typo in the recipient address).
With FluentSMTP handling delivery and FluentCommunity handling the message, your community emails become fast, reliable, and fully trackable — all without a single extra connection to configure inside FluentCommunity. Set your sending identity once, choose your notifications, and let FluentSMTP do the heavy lifting.