Stay updated on your community activities with Email Notifications in FluentCommunity. This feature ensures that you receive timely updates and alerts directly in your inbox.
Setup Email Notifications Globally #
Before starting the process, configure a SMTP plugin in your WordPress website to get Email Notification on your email account.
To ensure getting email notifications in the easiest, fastest, and most secure way we recommend using the FluentSMTP(Free) plugin. To learn the basic use of the FluentSMTP plugin, check this Documentation.
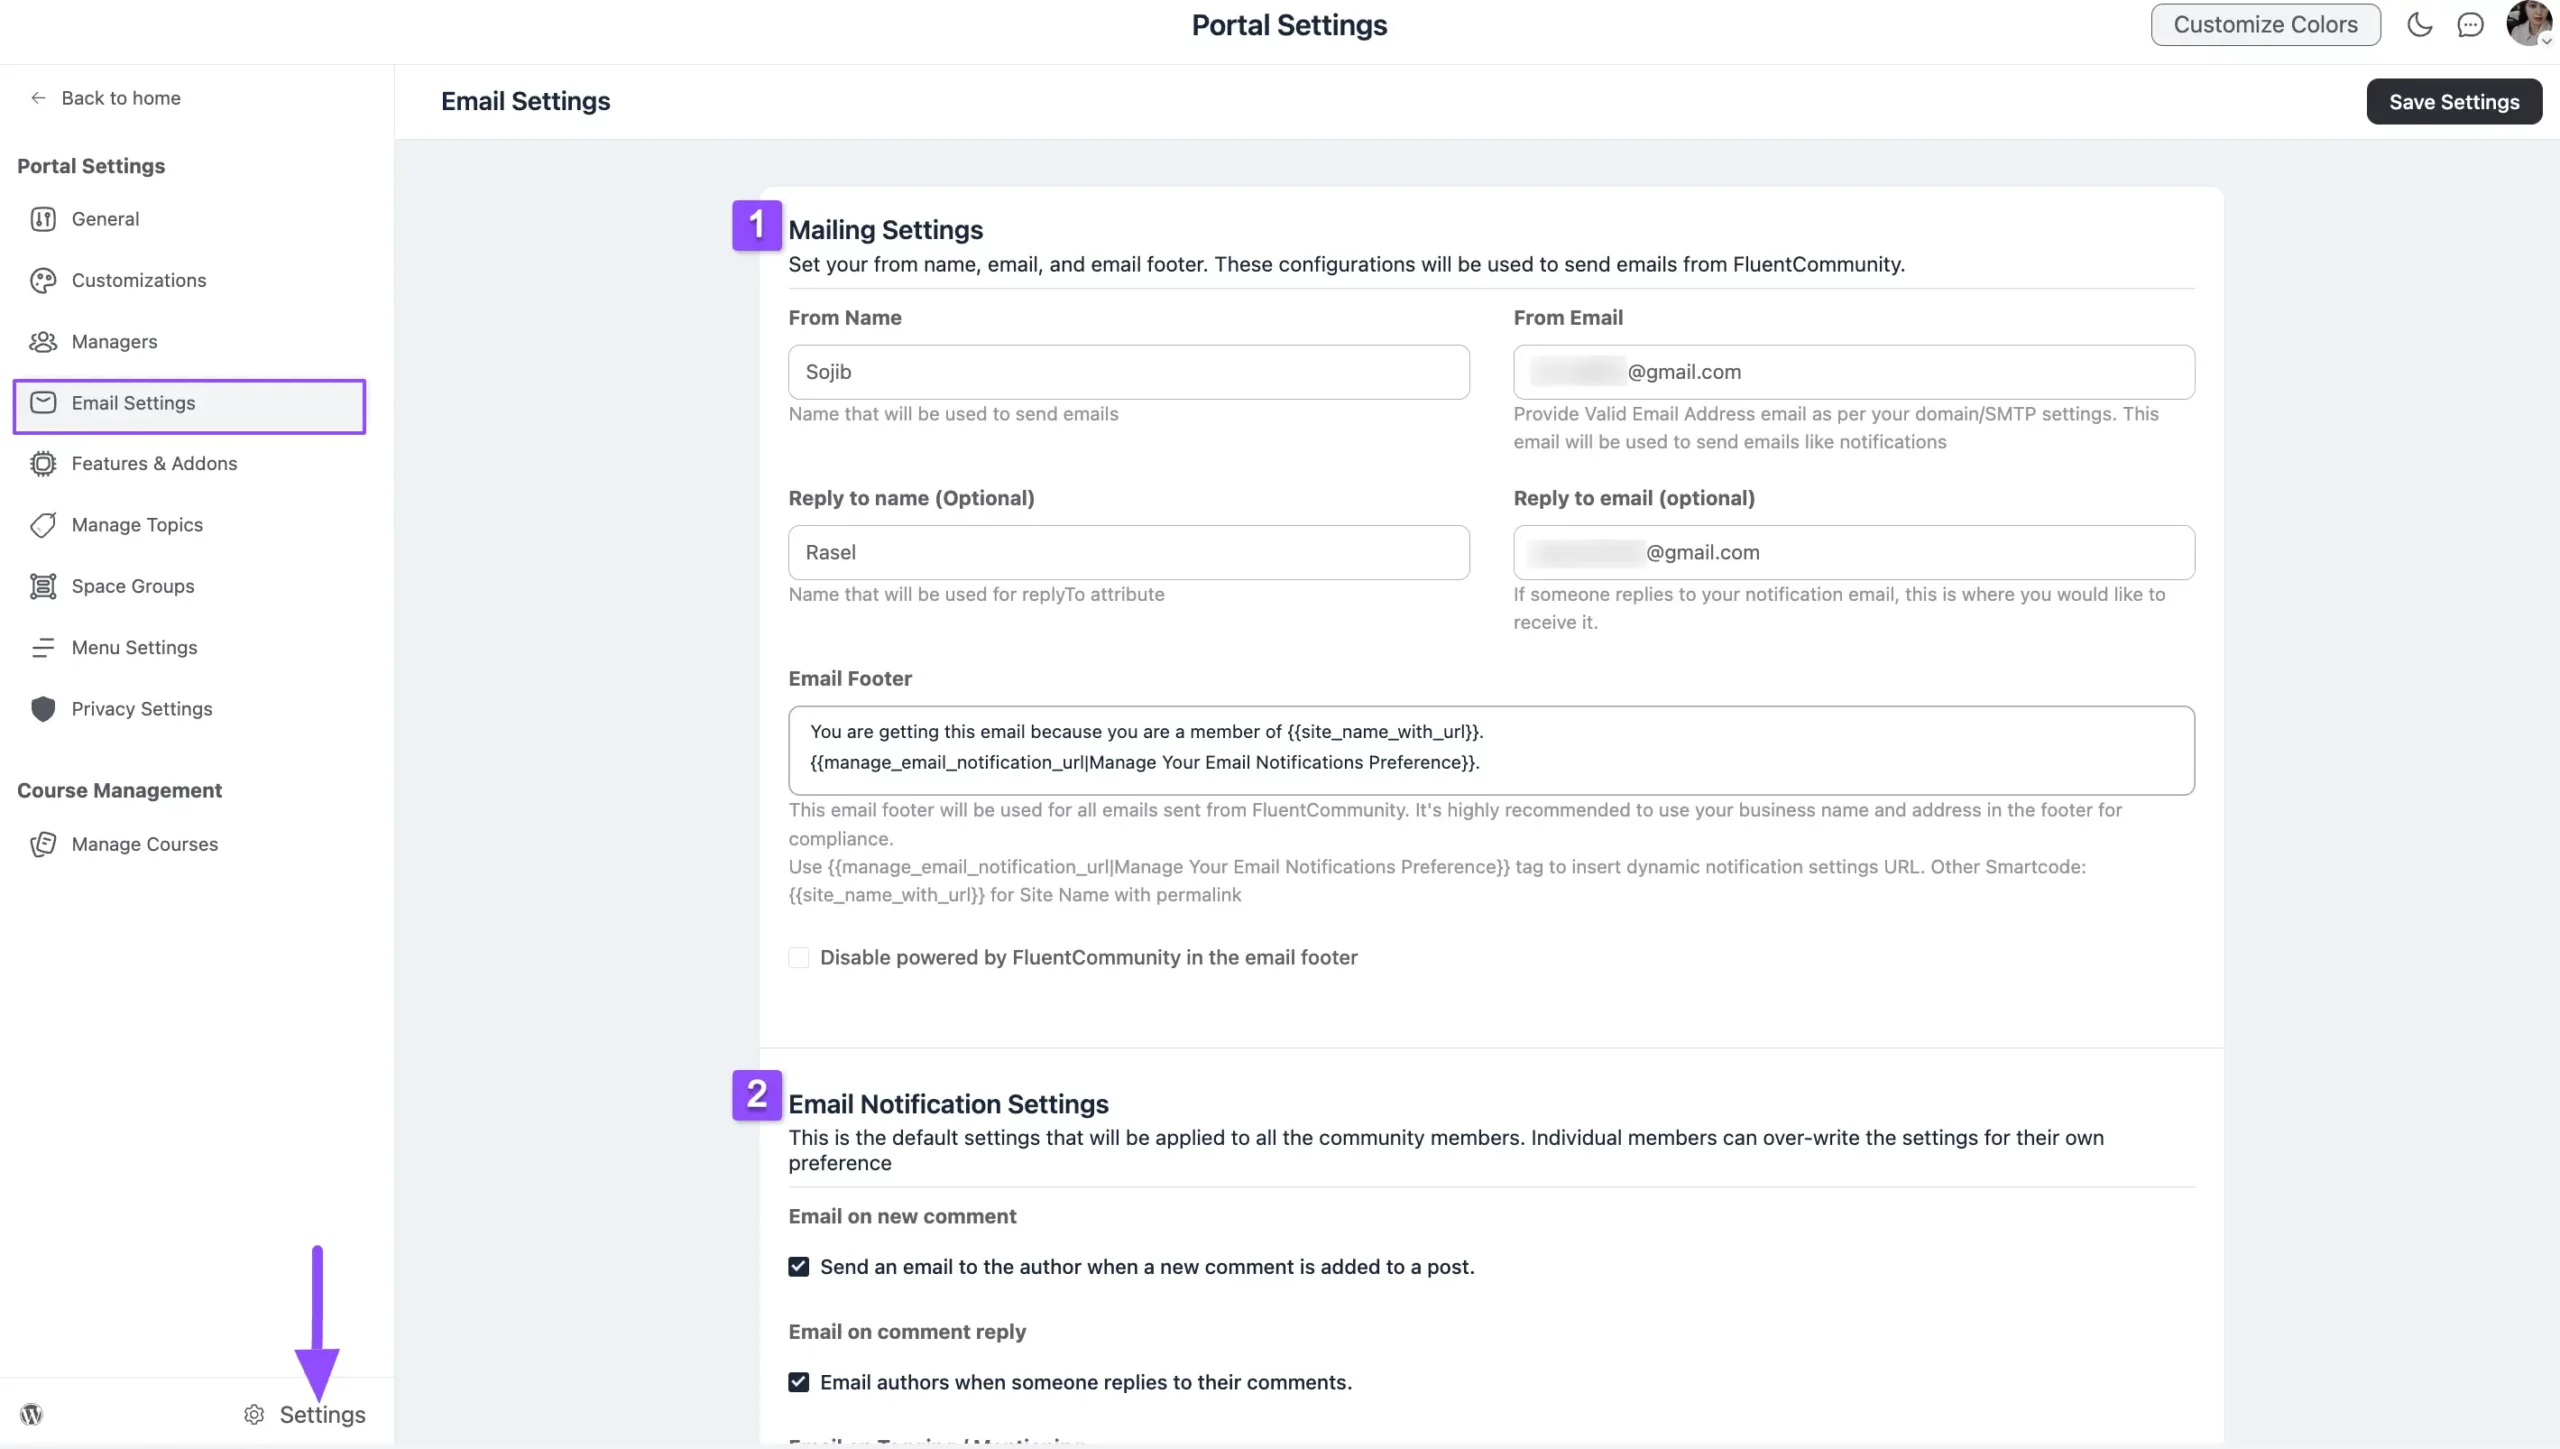
First, go to the Settings and then click on the Email Settings from the left sidebar.
Now, you will get Two Major Settings to set up your mail and email notifications globally. These are:
- Mailing Settings
- Email Notification Settings

1. Mail Settings #
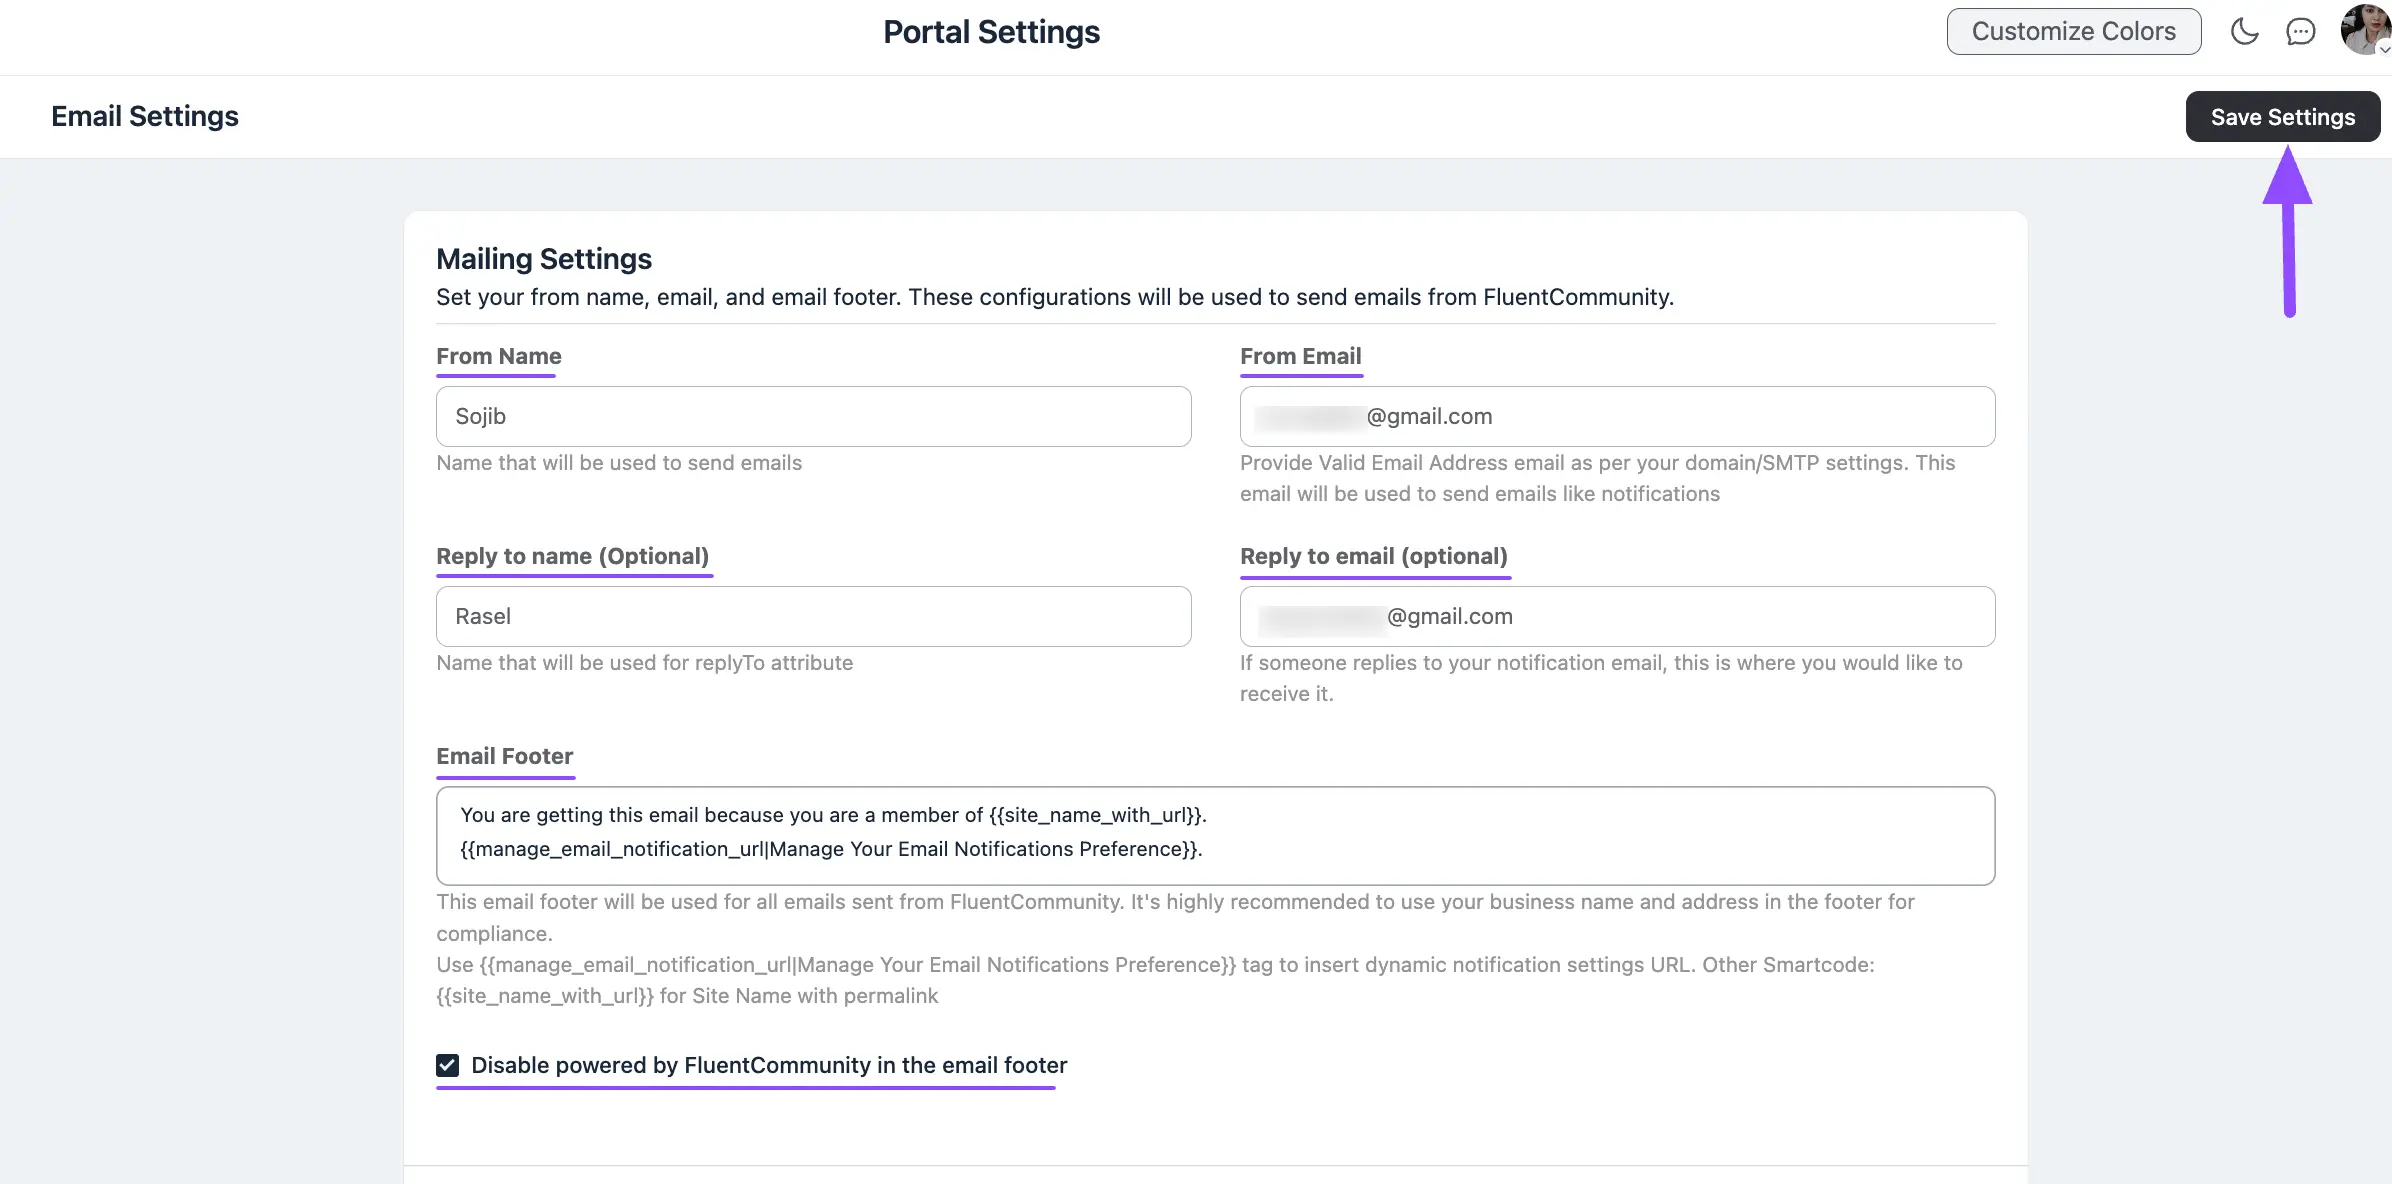
This will allow you to set the From Name and Email, Reply Name and Email, and Email Footer globally for the Email Notification.
From Name and Email: Here, you can specify the sender Name and Email in the From Name and From Email fields respectively for your notification.
Reply To Name and Email (Optional): Here, you can specify the receiver’s Name and an Email address for users to reply to the notification, ensuring you receive their responses. But these fields are optional. If you leave this field blank,
Email Footer: The email footer you set in this field will be used for all emails sent from FluentCommunity. It’s highly recommended to use your Business Name and Address in the Footer for compliance
Also, use this {{manage_email_notification_url|Manage Your Email Notifications Preference}} Tag to insert the Dynamic Notification Settings URL. Plus, you can use {{site_name_with_url}} this SmartCode for Site Name with the Permalink.
Disable powered by FluentCommunity in the email footer: If you check this option, the “Powered by FluentCommunity” text in the Email Footer will be disabled. Leave this option unchecked if you want this text to be visible in the Email Footer.
Click on the Save Settings button after making all the changes.

2. Email Notifications Settings #
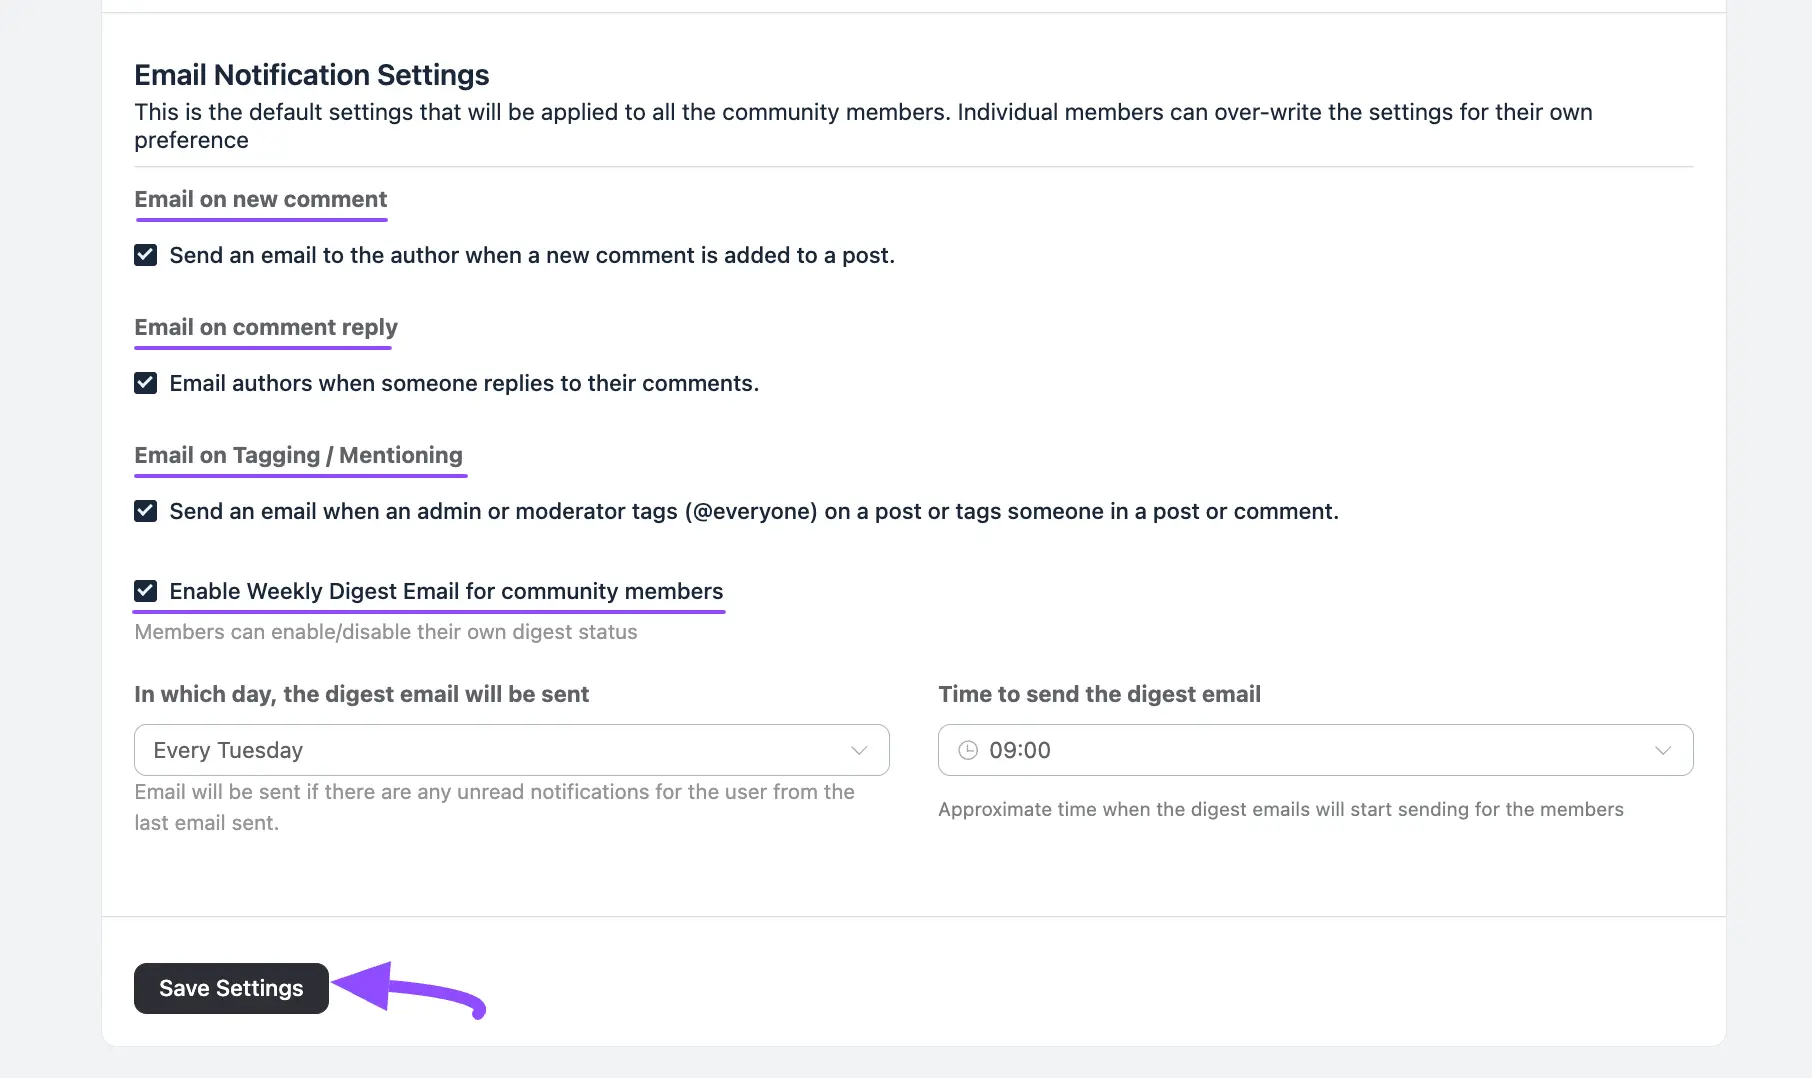
Simply check the boxes for the features below to enable your notifications.
Email on New Comments: In FluentCommunity, you will receive an email notification whenever someone comments on a post you’ve created. This ensures you’re always aware of interactions and discussions happening on your content.
Email on Comment Reply: Sends an email notification when someone replies to a user’s comment, helping users stay updated on conversations they’re involved in.
Admin and Moderator Tagging Alerts: By enabling this option, you will be notified via email whenever an admin or moderator tags you in a post or notification. This helps you stay informed on important updates or mentions that require your attention.
Email Digest for Unread Notifications: The Email Digest feature compiles a summary of all your unread notifications and sends them in a single email. Instead of receiving individual emails for every notification, you’ll get one digest at scheduled intervals (daily, weekly, etc.), making it easier to catch up on posts, messages, and updates you may have missed.
Click on the Save Settings button after making all the changes.

This streamlined approach helps you stay informed without being overwhelmed by multiple alerts.
If you have any further questions about this guide, please don’t hesitate to contact us.


