

FluentSocket is a high-performance socket server built specifically for the Fluent ecosystem. By connecting it to your community, you bypass the limitations of traditional web servers. This ensures that messages and notifications are delivered to your members the exact millisecond they happen no page refreshes required.
This guide will walk you through the simple process of creating a FluentSocket app and connecting it to your community.
Step 1: Create Your FluentSocket App #
To get the credentials needed for the integration, you first need to create an “App” within your FluentSocket account.
- Log In: Sign in to your FluentSocket account.
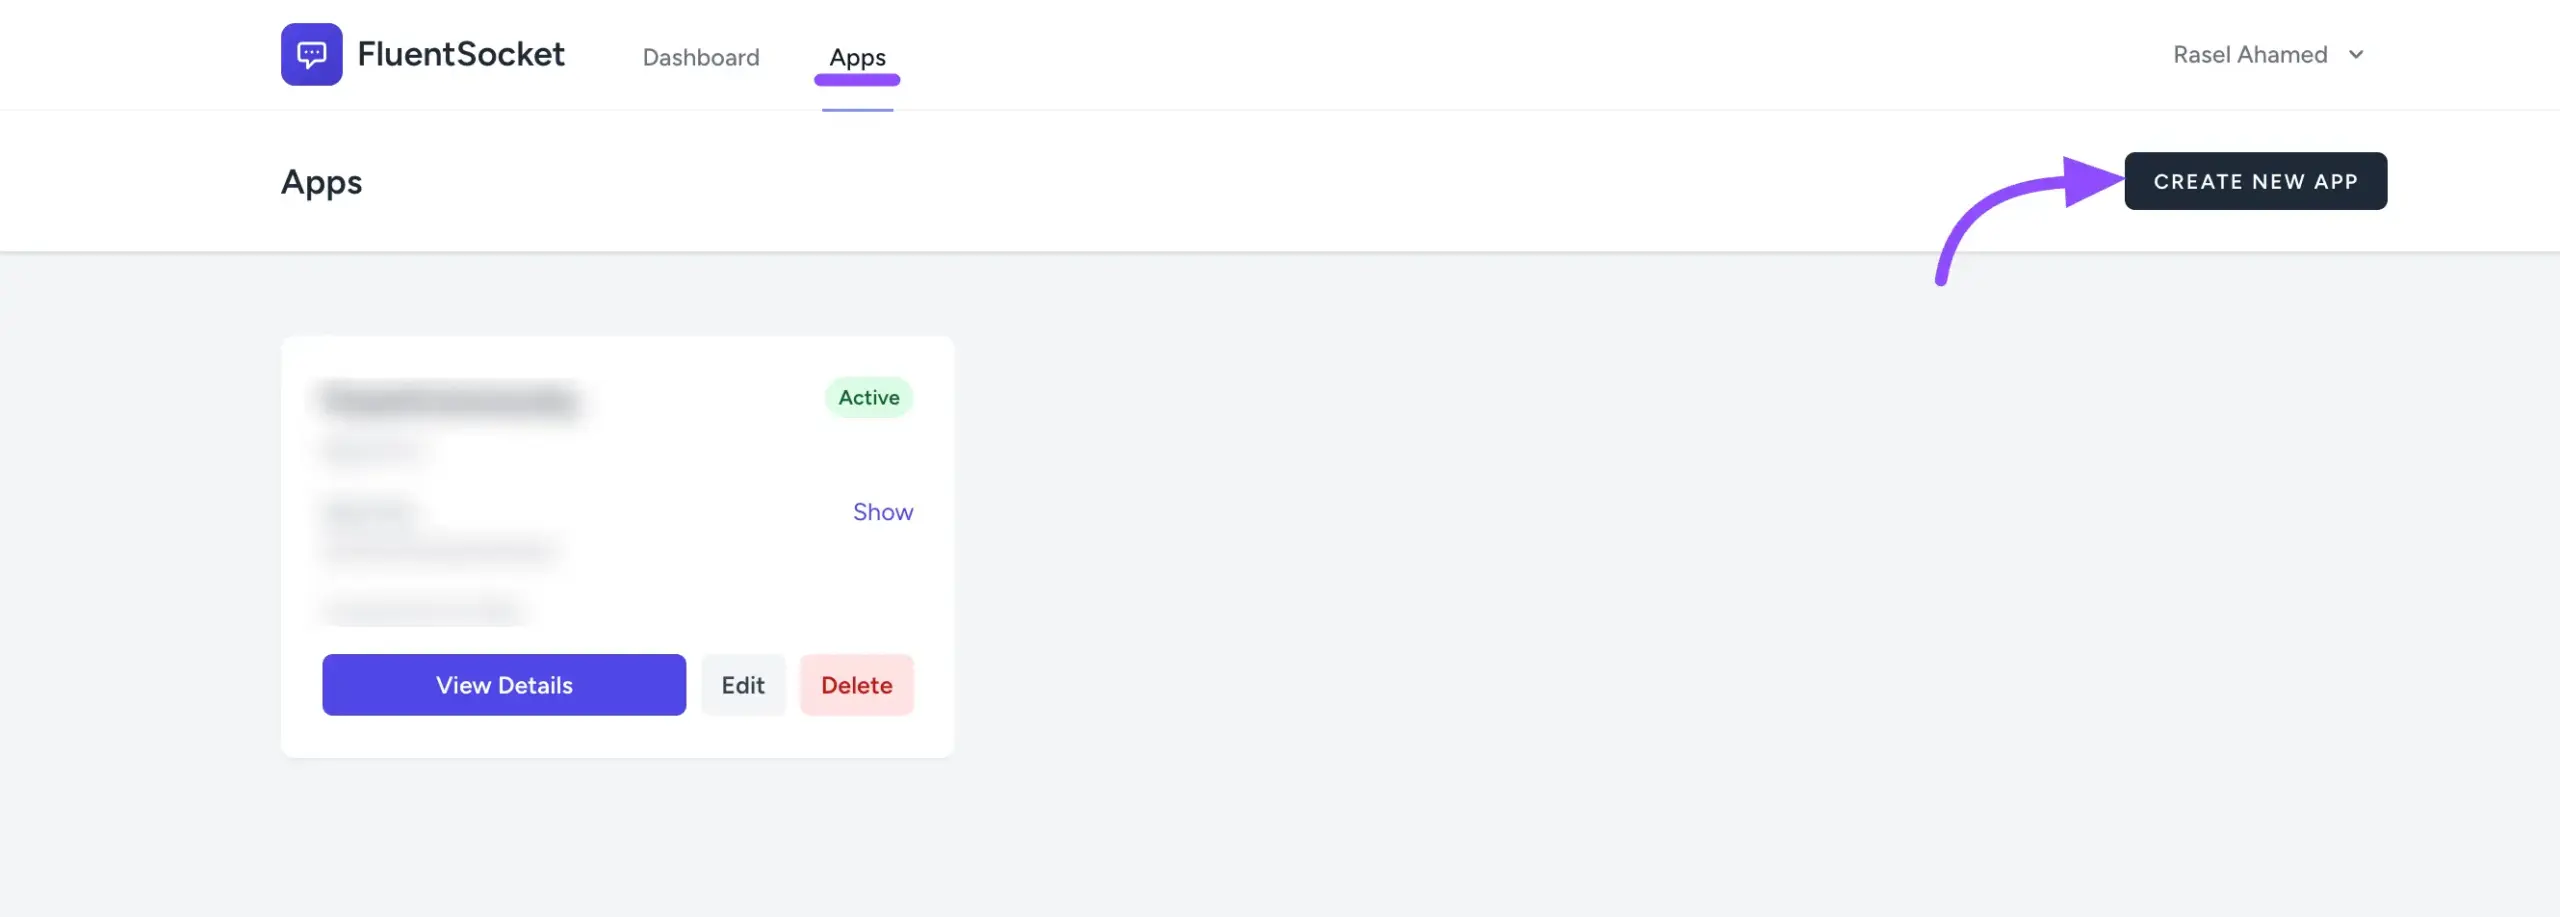
- Access Apps: Click on the Apps button located in the top navigation bar.
- Create New App: Click the Create New App button to open the configuration window.
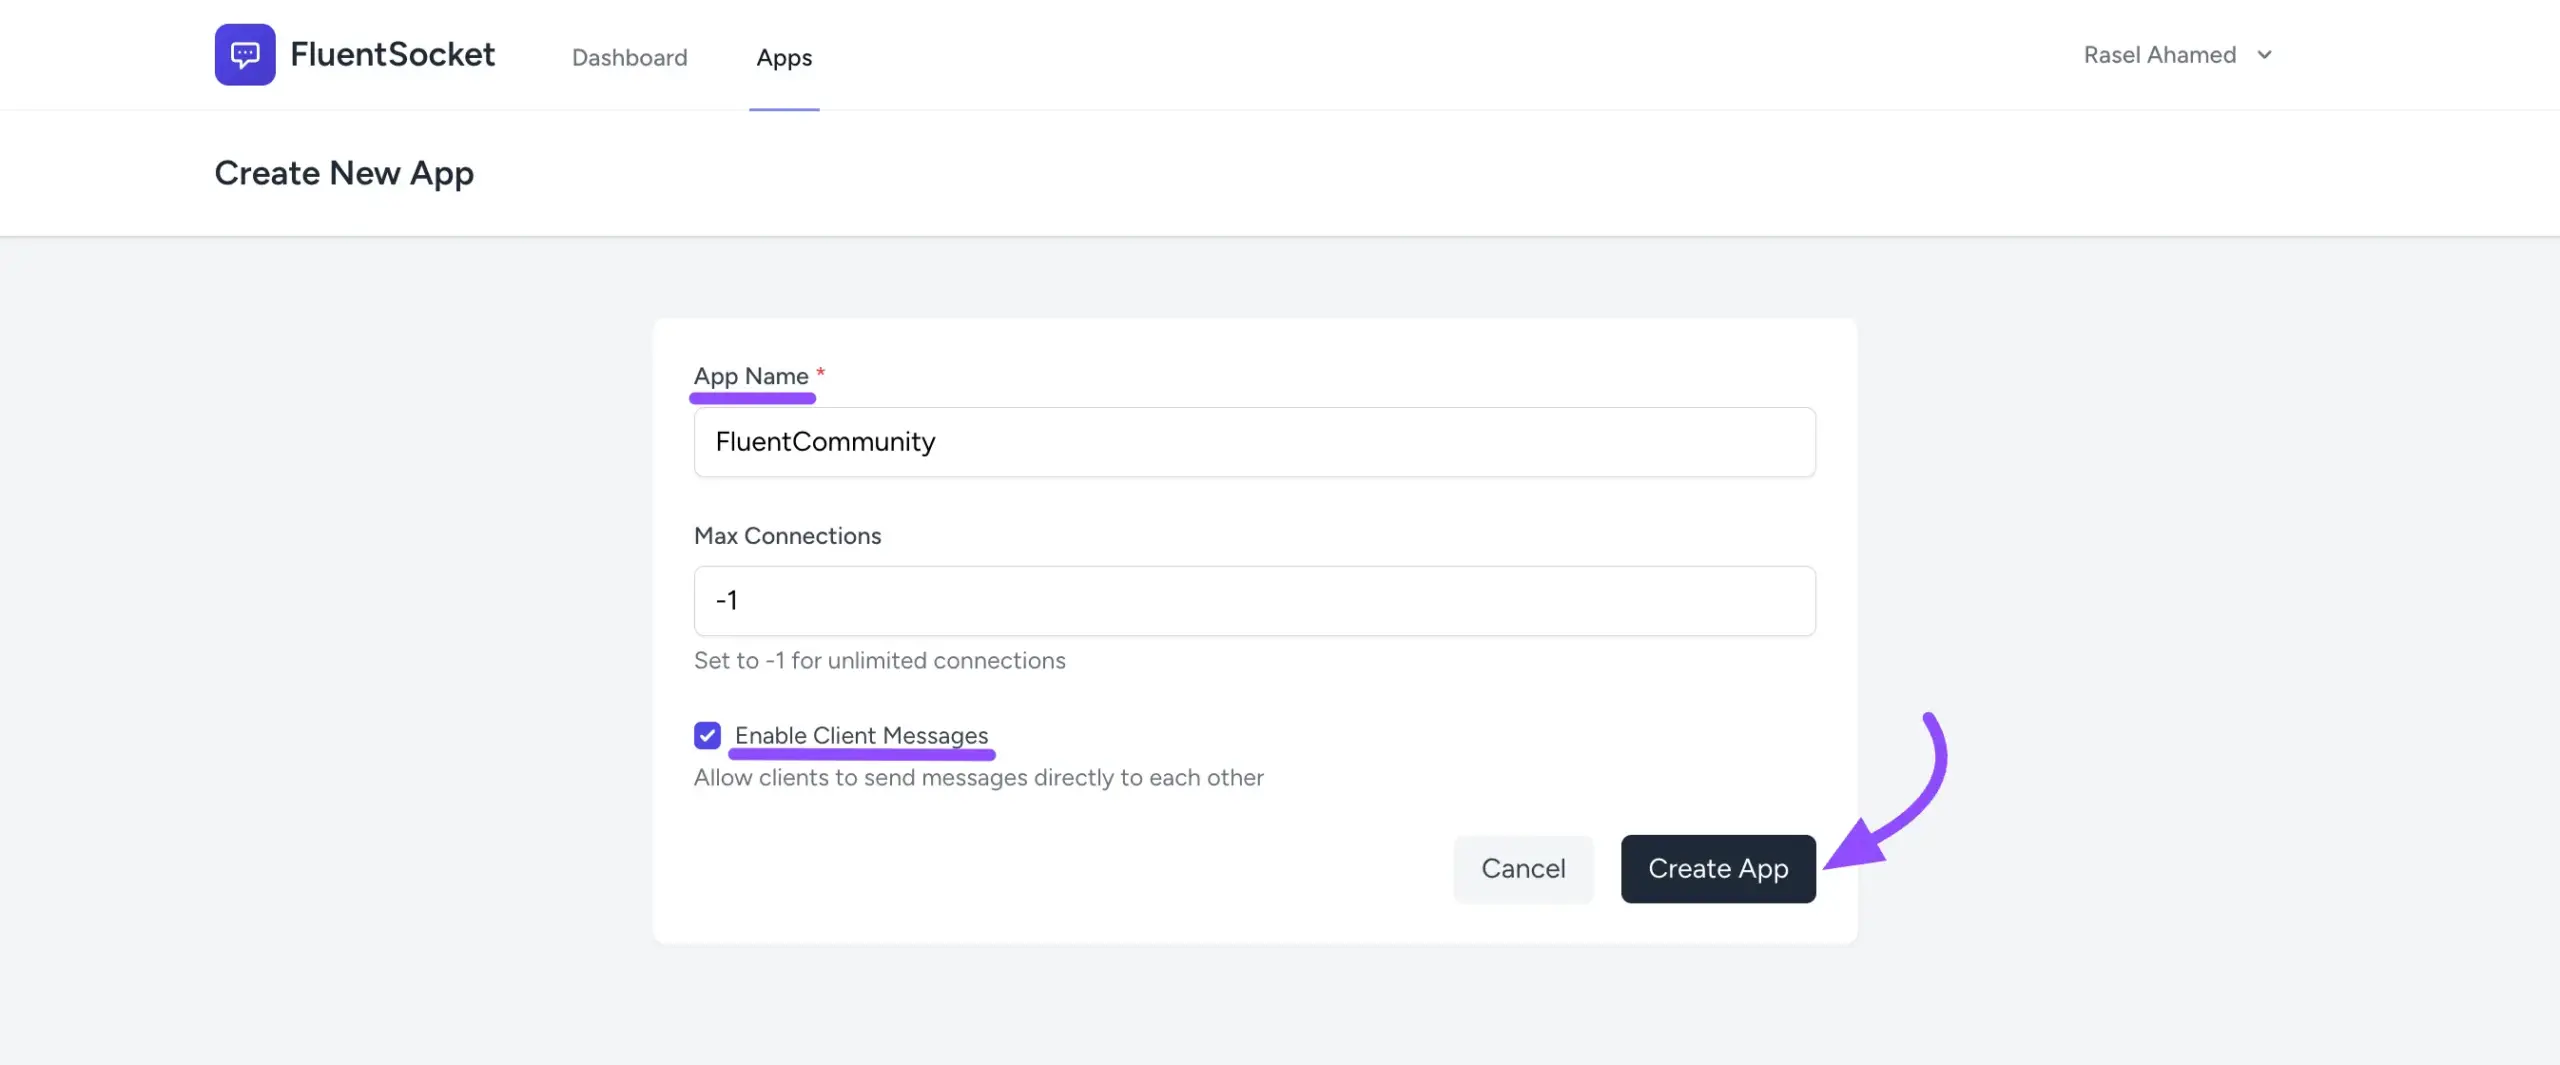
- Configure Your App:
- App Name: Give your app a clear name (e.g., “My Community Chat”).
- Max Connections: Set your preferred limit for simultaneous connections.
- Enable Client Messages: ⚠️ Important: Ensure you check the box for Enable Client Messages. This is a recommended setting for real-time chat to function correctly.
- Finalize: Click the Create App button.
Step 2: Collect Your Credentials #
Once your app is created, FluentSocket will generate unique keys to secure the connection.
- Locate your newly created app in the list.
- Find and copy the following three pieces of information:
- App ID
- App Key
- App Secret
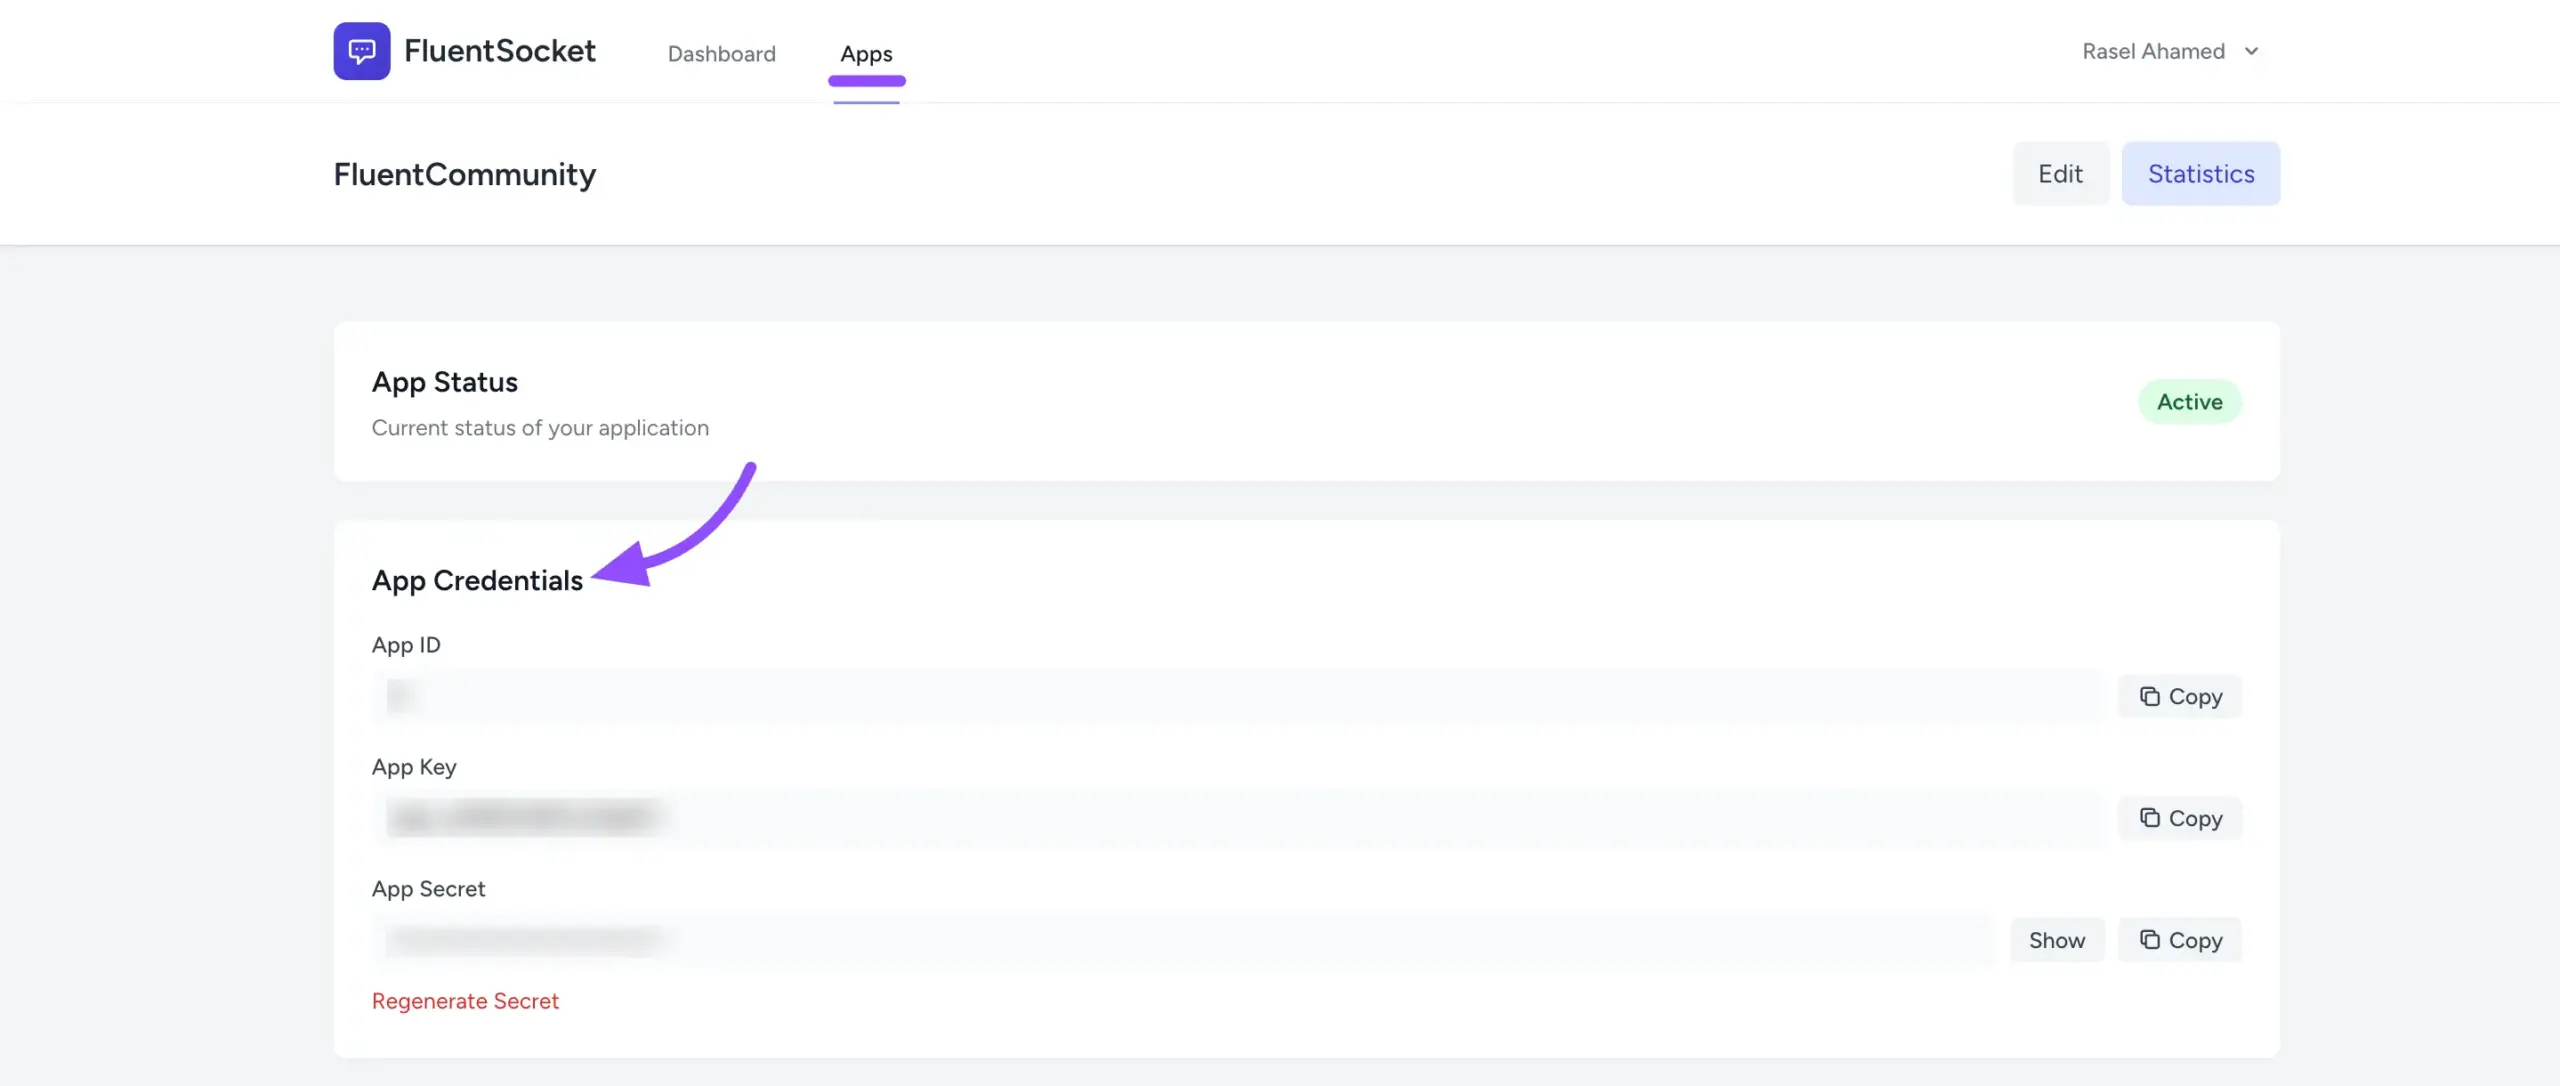
Note: Keep these credentials private, as they allow your website to communicate securely with the socket server.
Step 3: Connect FluentSocket to FluentCommunity #
Now that you have your credentials, you need to plug them into your WordPress site.
- Open Settings: Go to your WordPress Dashboard and navigate to FluentCommunity > Settings.
- Navigate to Messaging: Click on Features & Addons in the left sidebar.
- Access Chat Settings: Find the FluentCommunity Chat module and click the Messaging Settings button.
- Enable Real-Time Chat: Locate the Enable Real-Time Messaging toggle and turn it On.
- Configure the Driver:
- Select Fluent Socket as your real-time driver.
- Paste the App ID, App Key, and App Secret into their respective fields.
- Save: Click the Save Settings button.
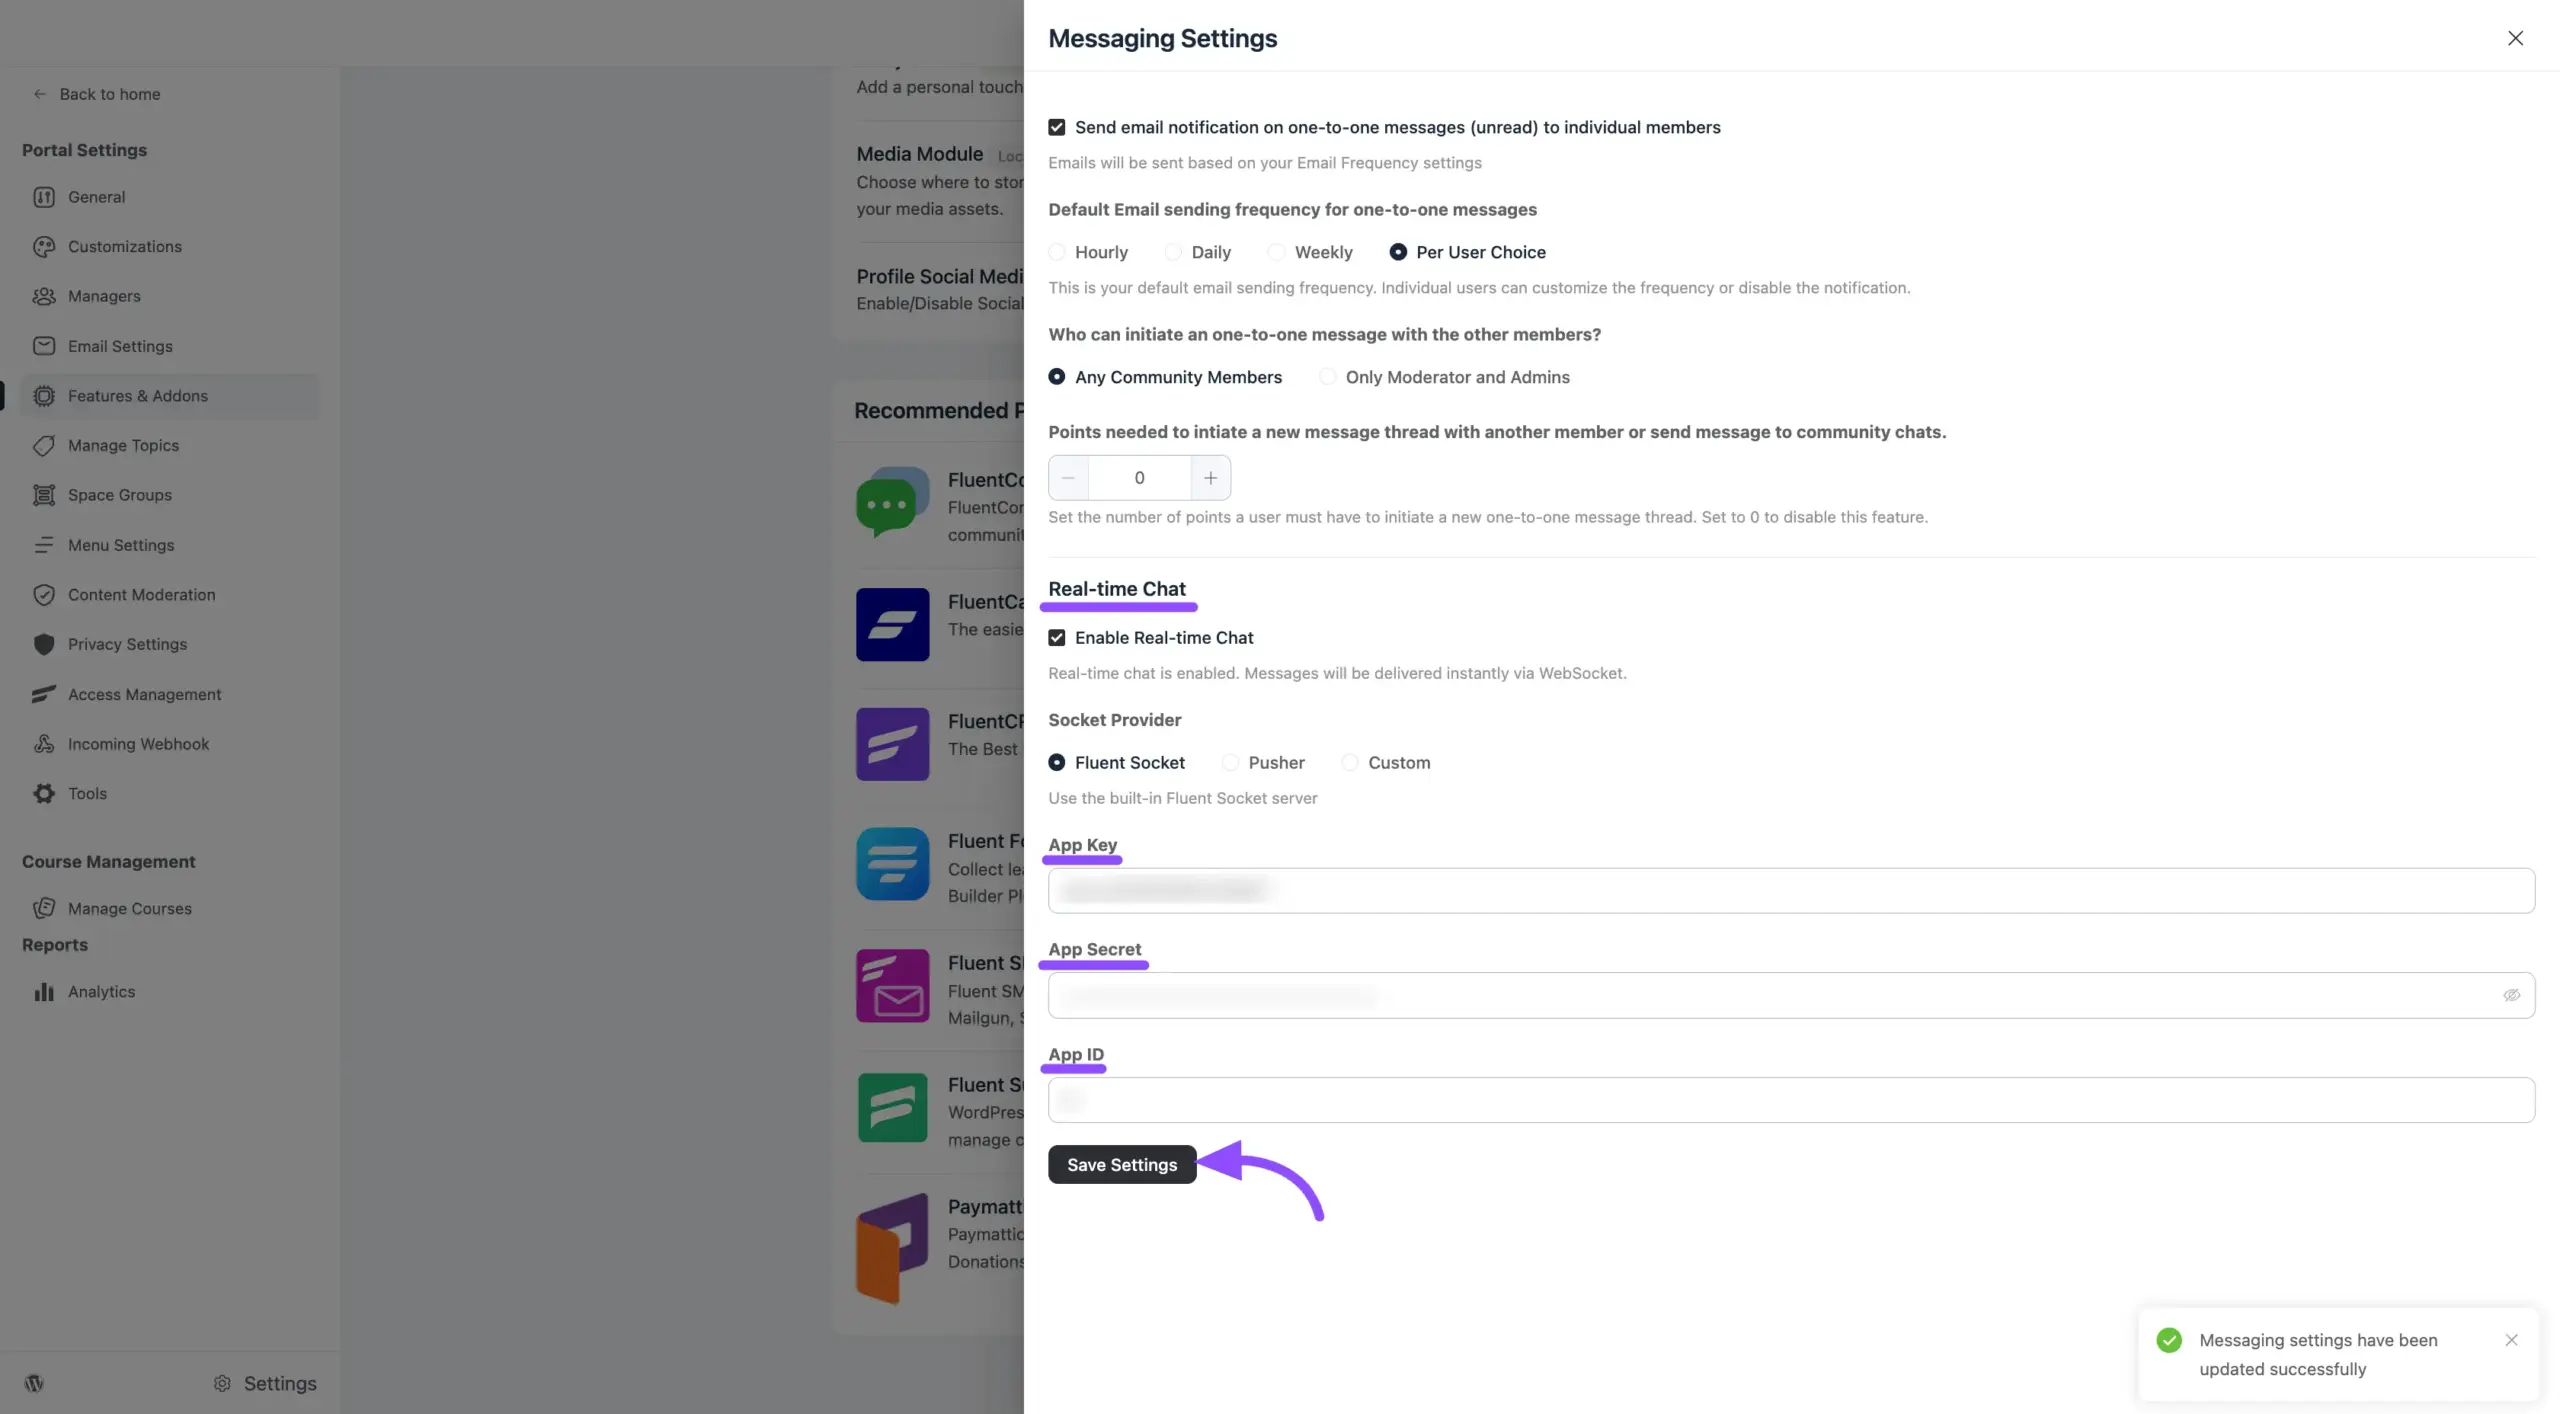
After clicking save, you should see a success notification. Your community is now powered by FluentSocket! You can test this by opening your portal in two different browser windows; messages sent in one should appear instantly in the other without any lag.


