The Real-Time Chat feature is a powerful upgrade for your community’s chat system. It enables instant updates, meaning you and your members will receive messages the exact moment they are sent—no page refreshes or manual loading required. This creates a smooth, modern, and “live” conversation experience that keeps everyone engaged in real-time.
To use this feature, you first need to have the core chat system active, and then you’ll connect it to a “driver” that handles the instant delivery.
Step 1: Activate the Core Messaging System #
Before you can enable real-time updates, the basic messaging system must be active in your community. If you haven’t done this yet, follow these steps:
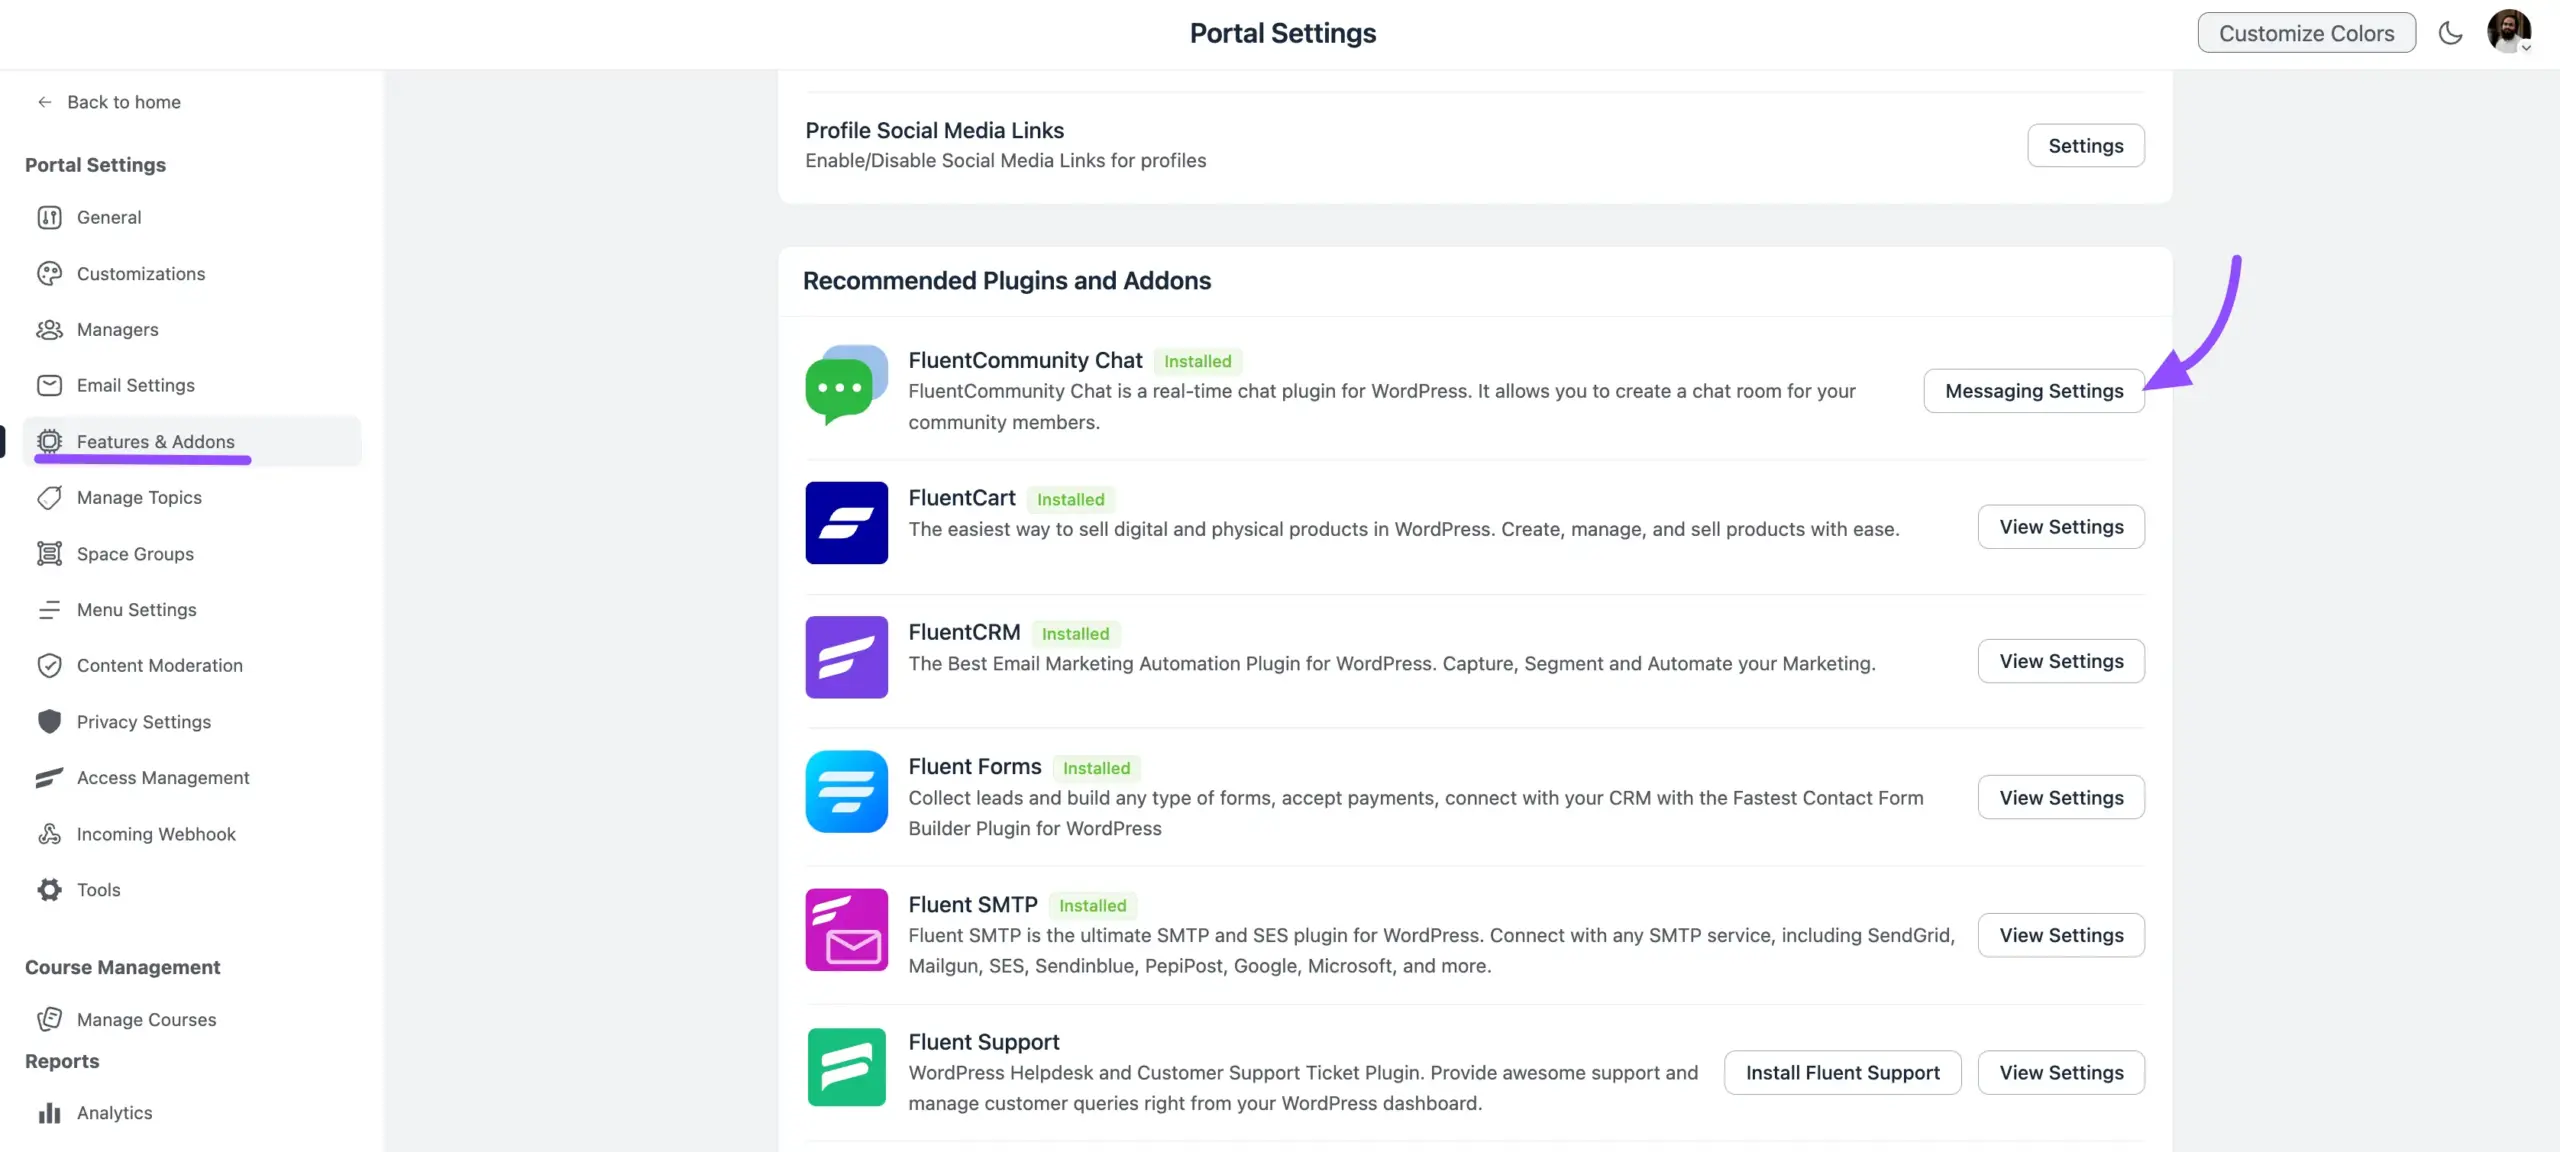
- Navigate to Settings: Open your WordPress dashboard and go to FluentCommunity > Settings.
- Go to Addons: Click on Features & Addons from the left-hand sidebar menu.
- Activate Chat: Find the FluentCommunity Chat module and click the Activate button. If it is already activated you will see the Messaging Settings button.
Once this is done, a Message box will appear for all your members, allowing them to start conversations.
Step 2: Enable Real-Time Messaging Settings #
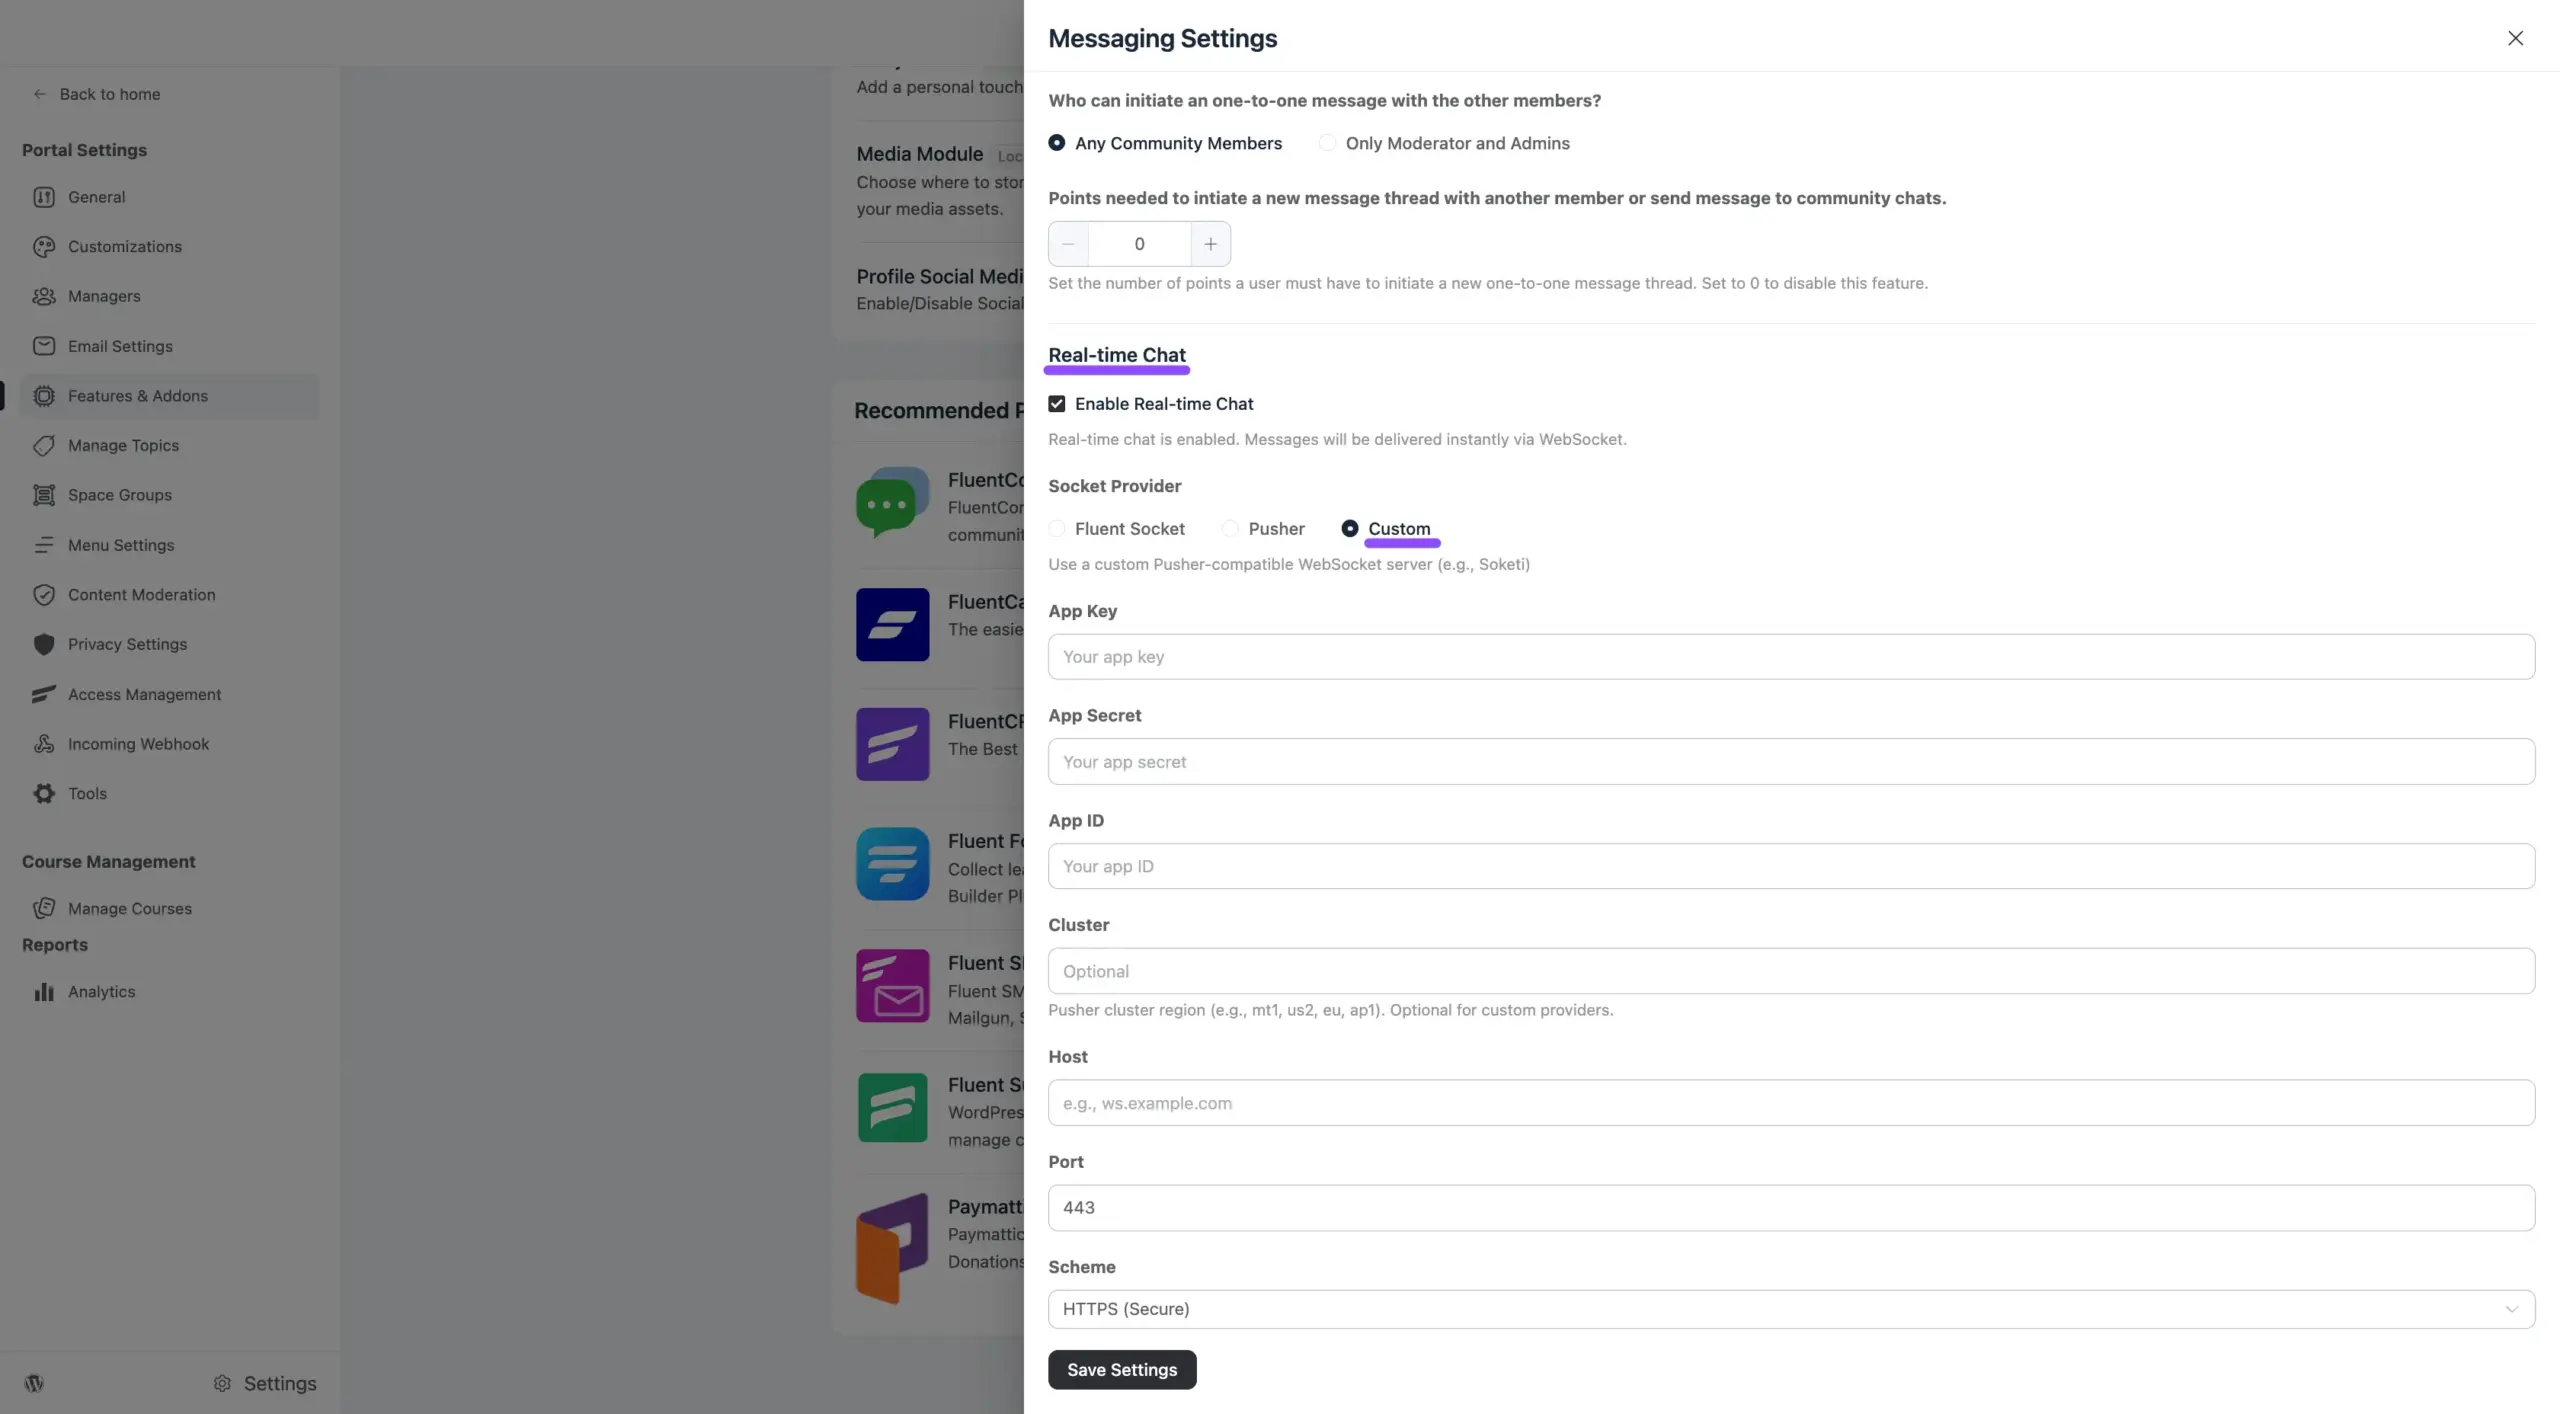
Now that your community has a working chat, you can turn on the “Real-Time” layer. This is the switch that tells the system to push messages instantly rather than waiting for a page reload.
- Open Messaging Settings: Click on the Messaging Settings button from the Features & Addons section.
- Real-Time Messaging: Locate the option for Enable Real-Time chat and check the checkbox.
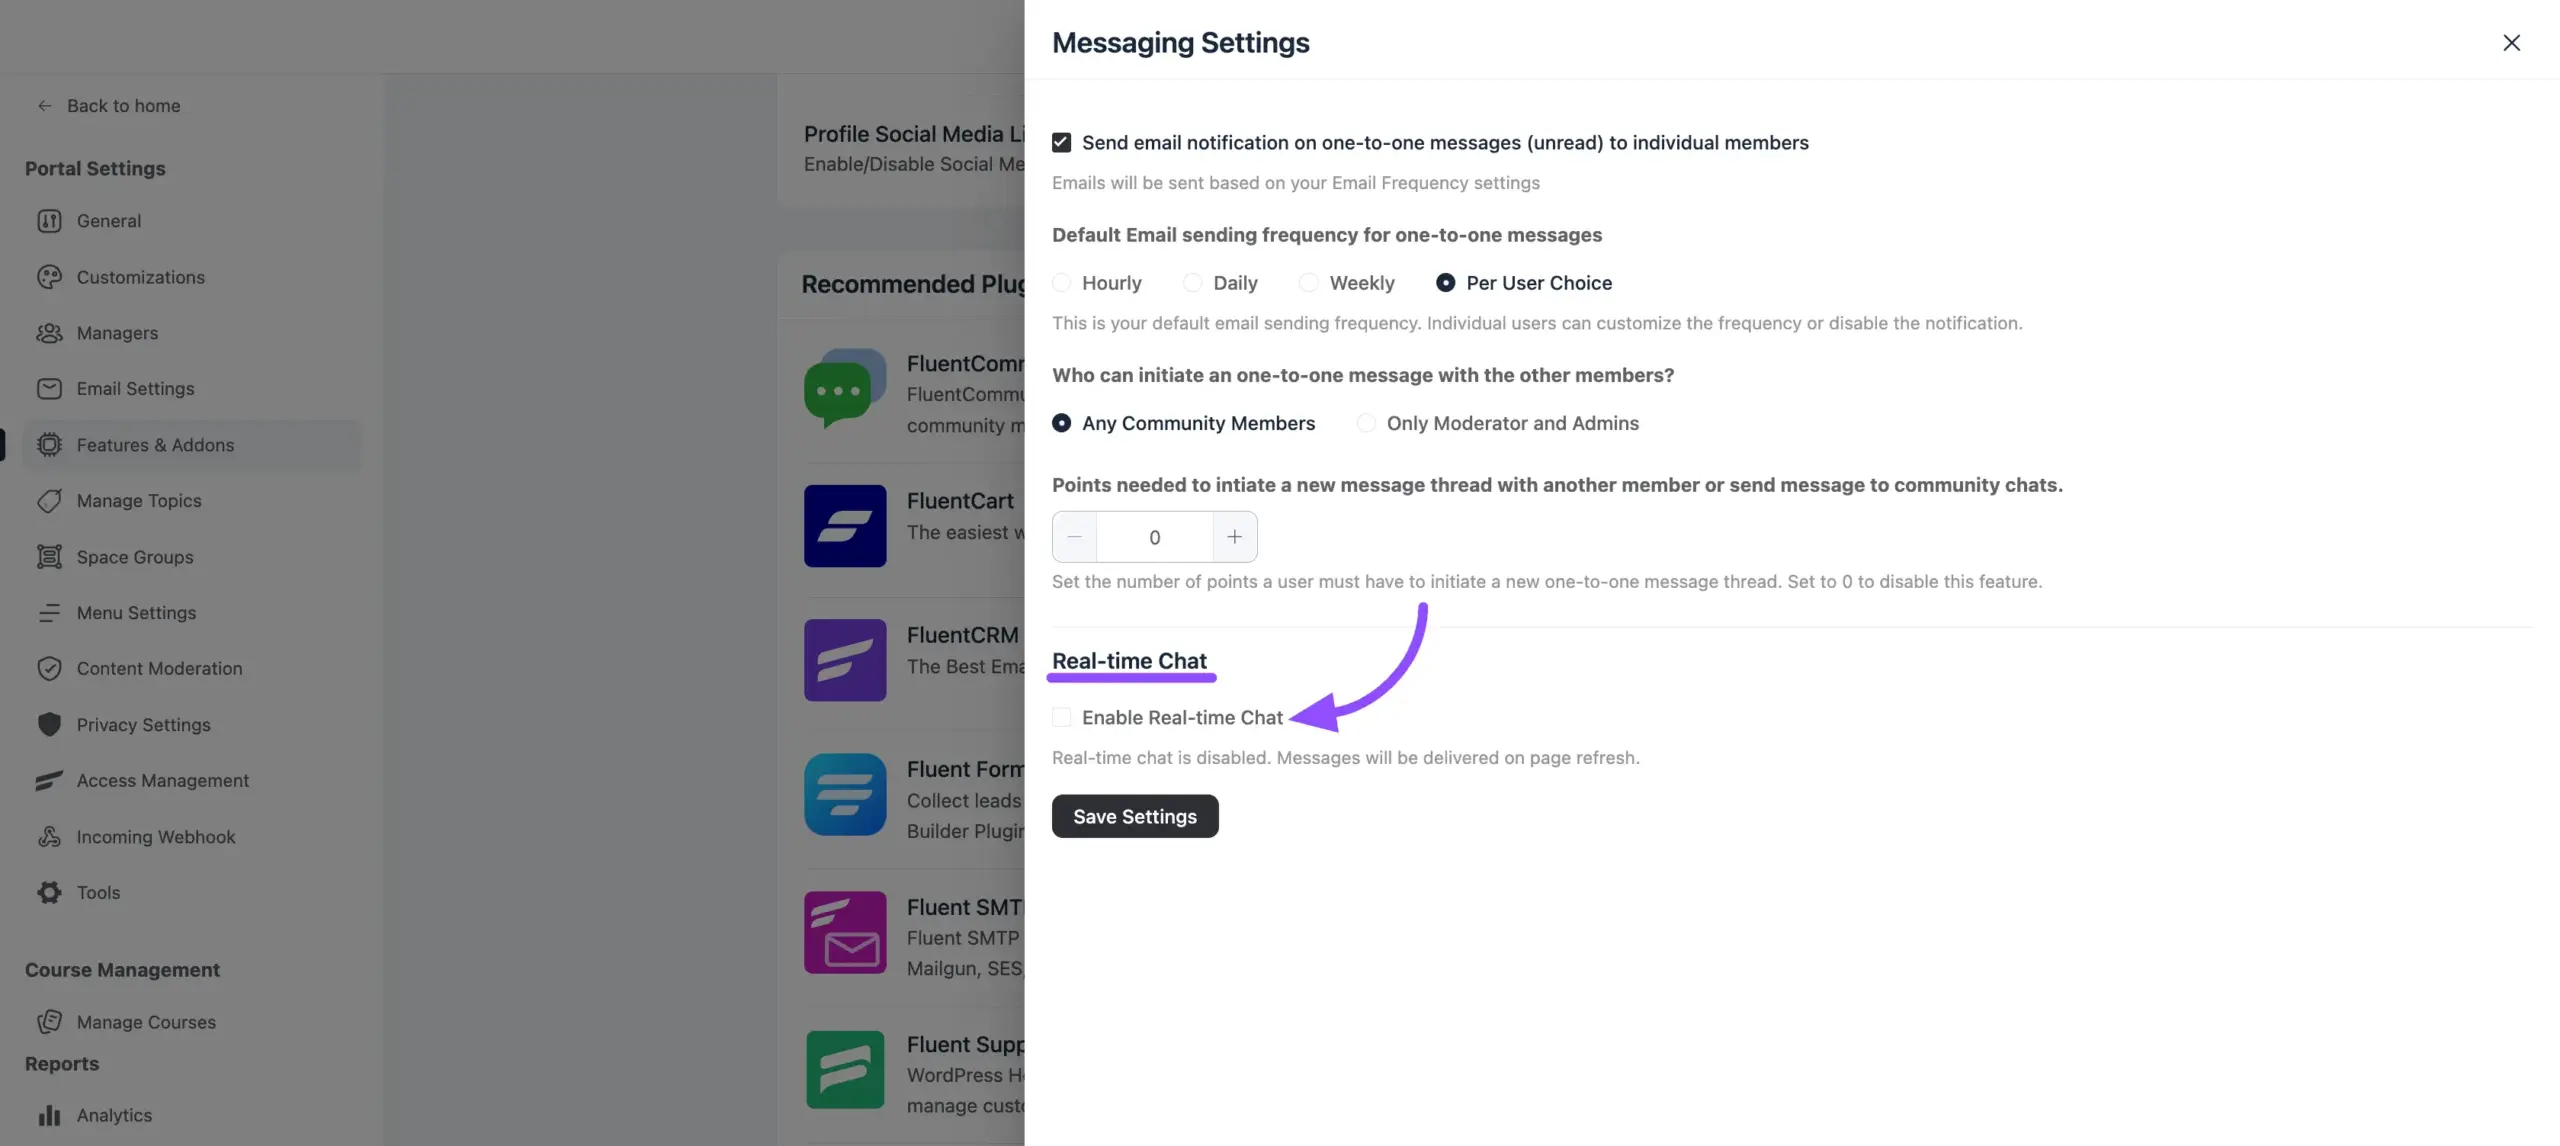
Note: Simply enabling this toggle isn’t enough for the system to work. Because WordPress itself doesn’t naturally “push” data to browsers instantly, you need an integration (a driver) to do the heavy lifting.
Step 3: Connect to a Real-Time Driver (Integration) #
To make the “instant” part of real-time messaging actually work, you must integrate FluentCommunity with a real-time delivery service. This service acts as a bridge between your server and your members’ devices.
You can choose one of the following integration methods:
- FluentSocket Integration: This is our high-performance, self-hosted solution designed specifically for the Fluent ecosystem. It is ideal if you want more control and want to host the socket server yourself. To connect with it, refer to this documentation.
- Pusher Integration: This is a popular cloud-based service. To use it, you will need to enter your Pusher App ID, Key, Secret, and Cluster in the integration settings. To see the integration process follow this documentation.
- Custom App: If you have a custom-built socket server or personal application for handling real-time data, you can configure the system to use your custom credentials here.