
The Quiz Module in FluentCommunity allows you to test your students’ knowledge easily. You can add quizzes to your course. This makes your courses more fun and effective!
This guide will show you how to set up and add quizzes to your course.
Add Quiz #
To use quizzes, you’ll first need to create a new course or edit an existing one. (If you’re not sure how to make a course, check out our other guide for help.)
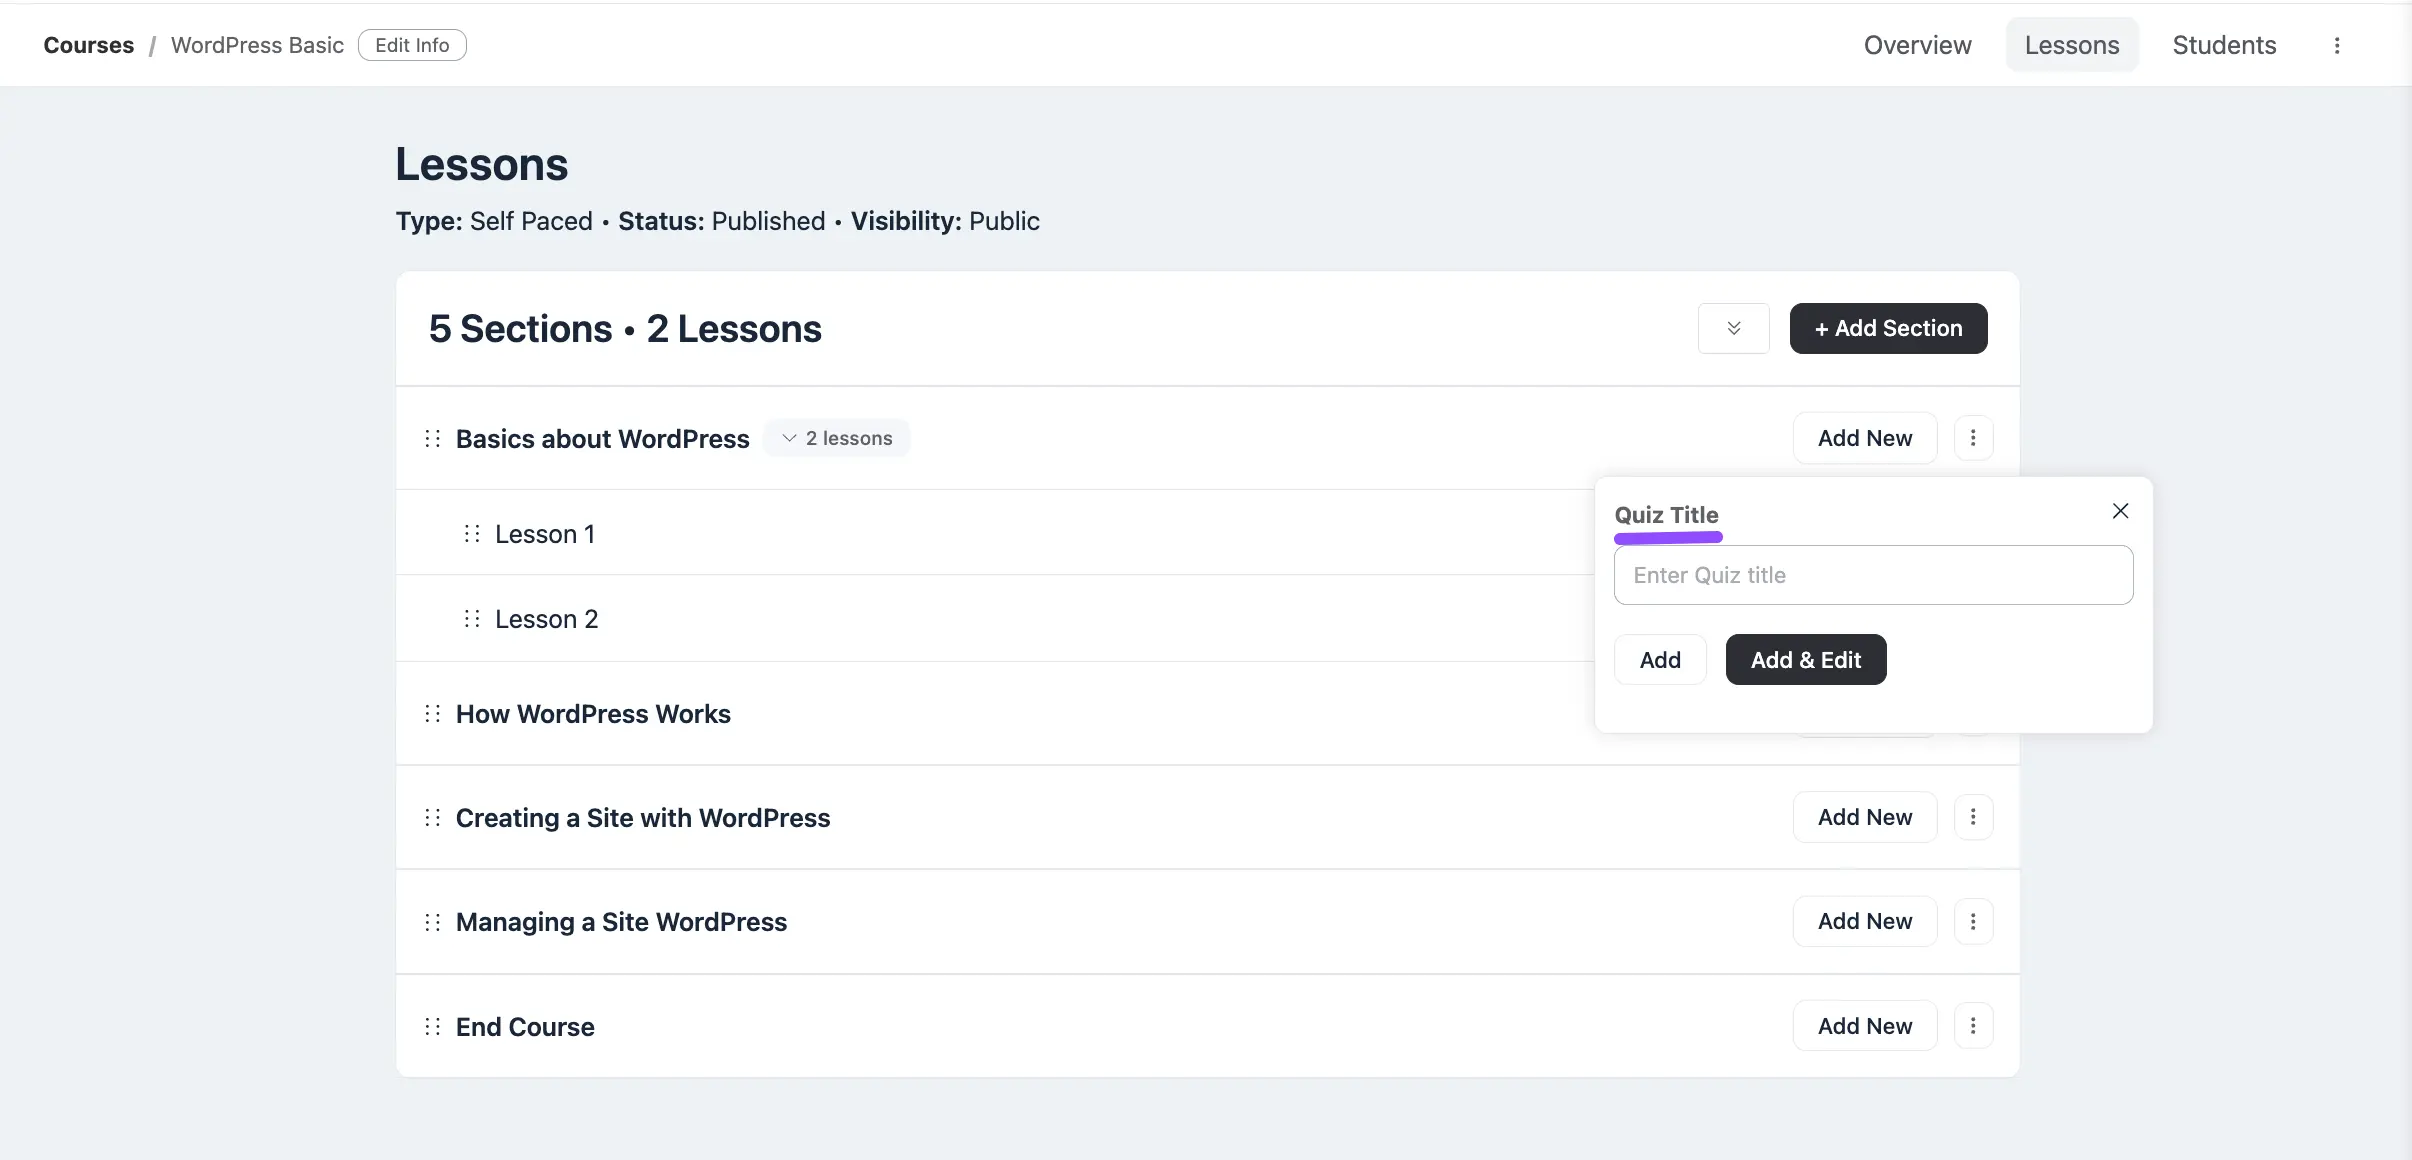
Once your course is ready, click the Add New button. From the dropdown menu, select Quiz.

A small pop-up will appear. Enter your Quiz Title (the name of your quiz). Then, click Add or Add & Edit.
Now you’re ready to build your quiz!
Configuring Your Quiz Settings #
After creating your quiz, you can configure its behavior and appearance using the settings panel on the left side of the editor. This panel is your control center for how the quiz functions for your learners.
Let’s go through each option one by one.
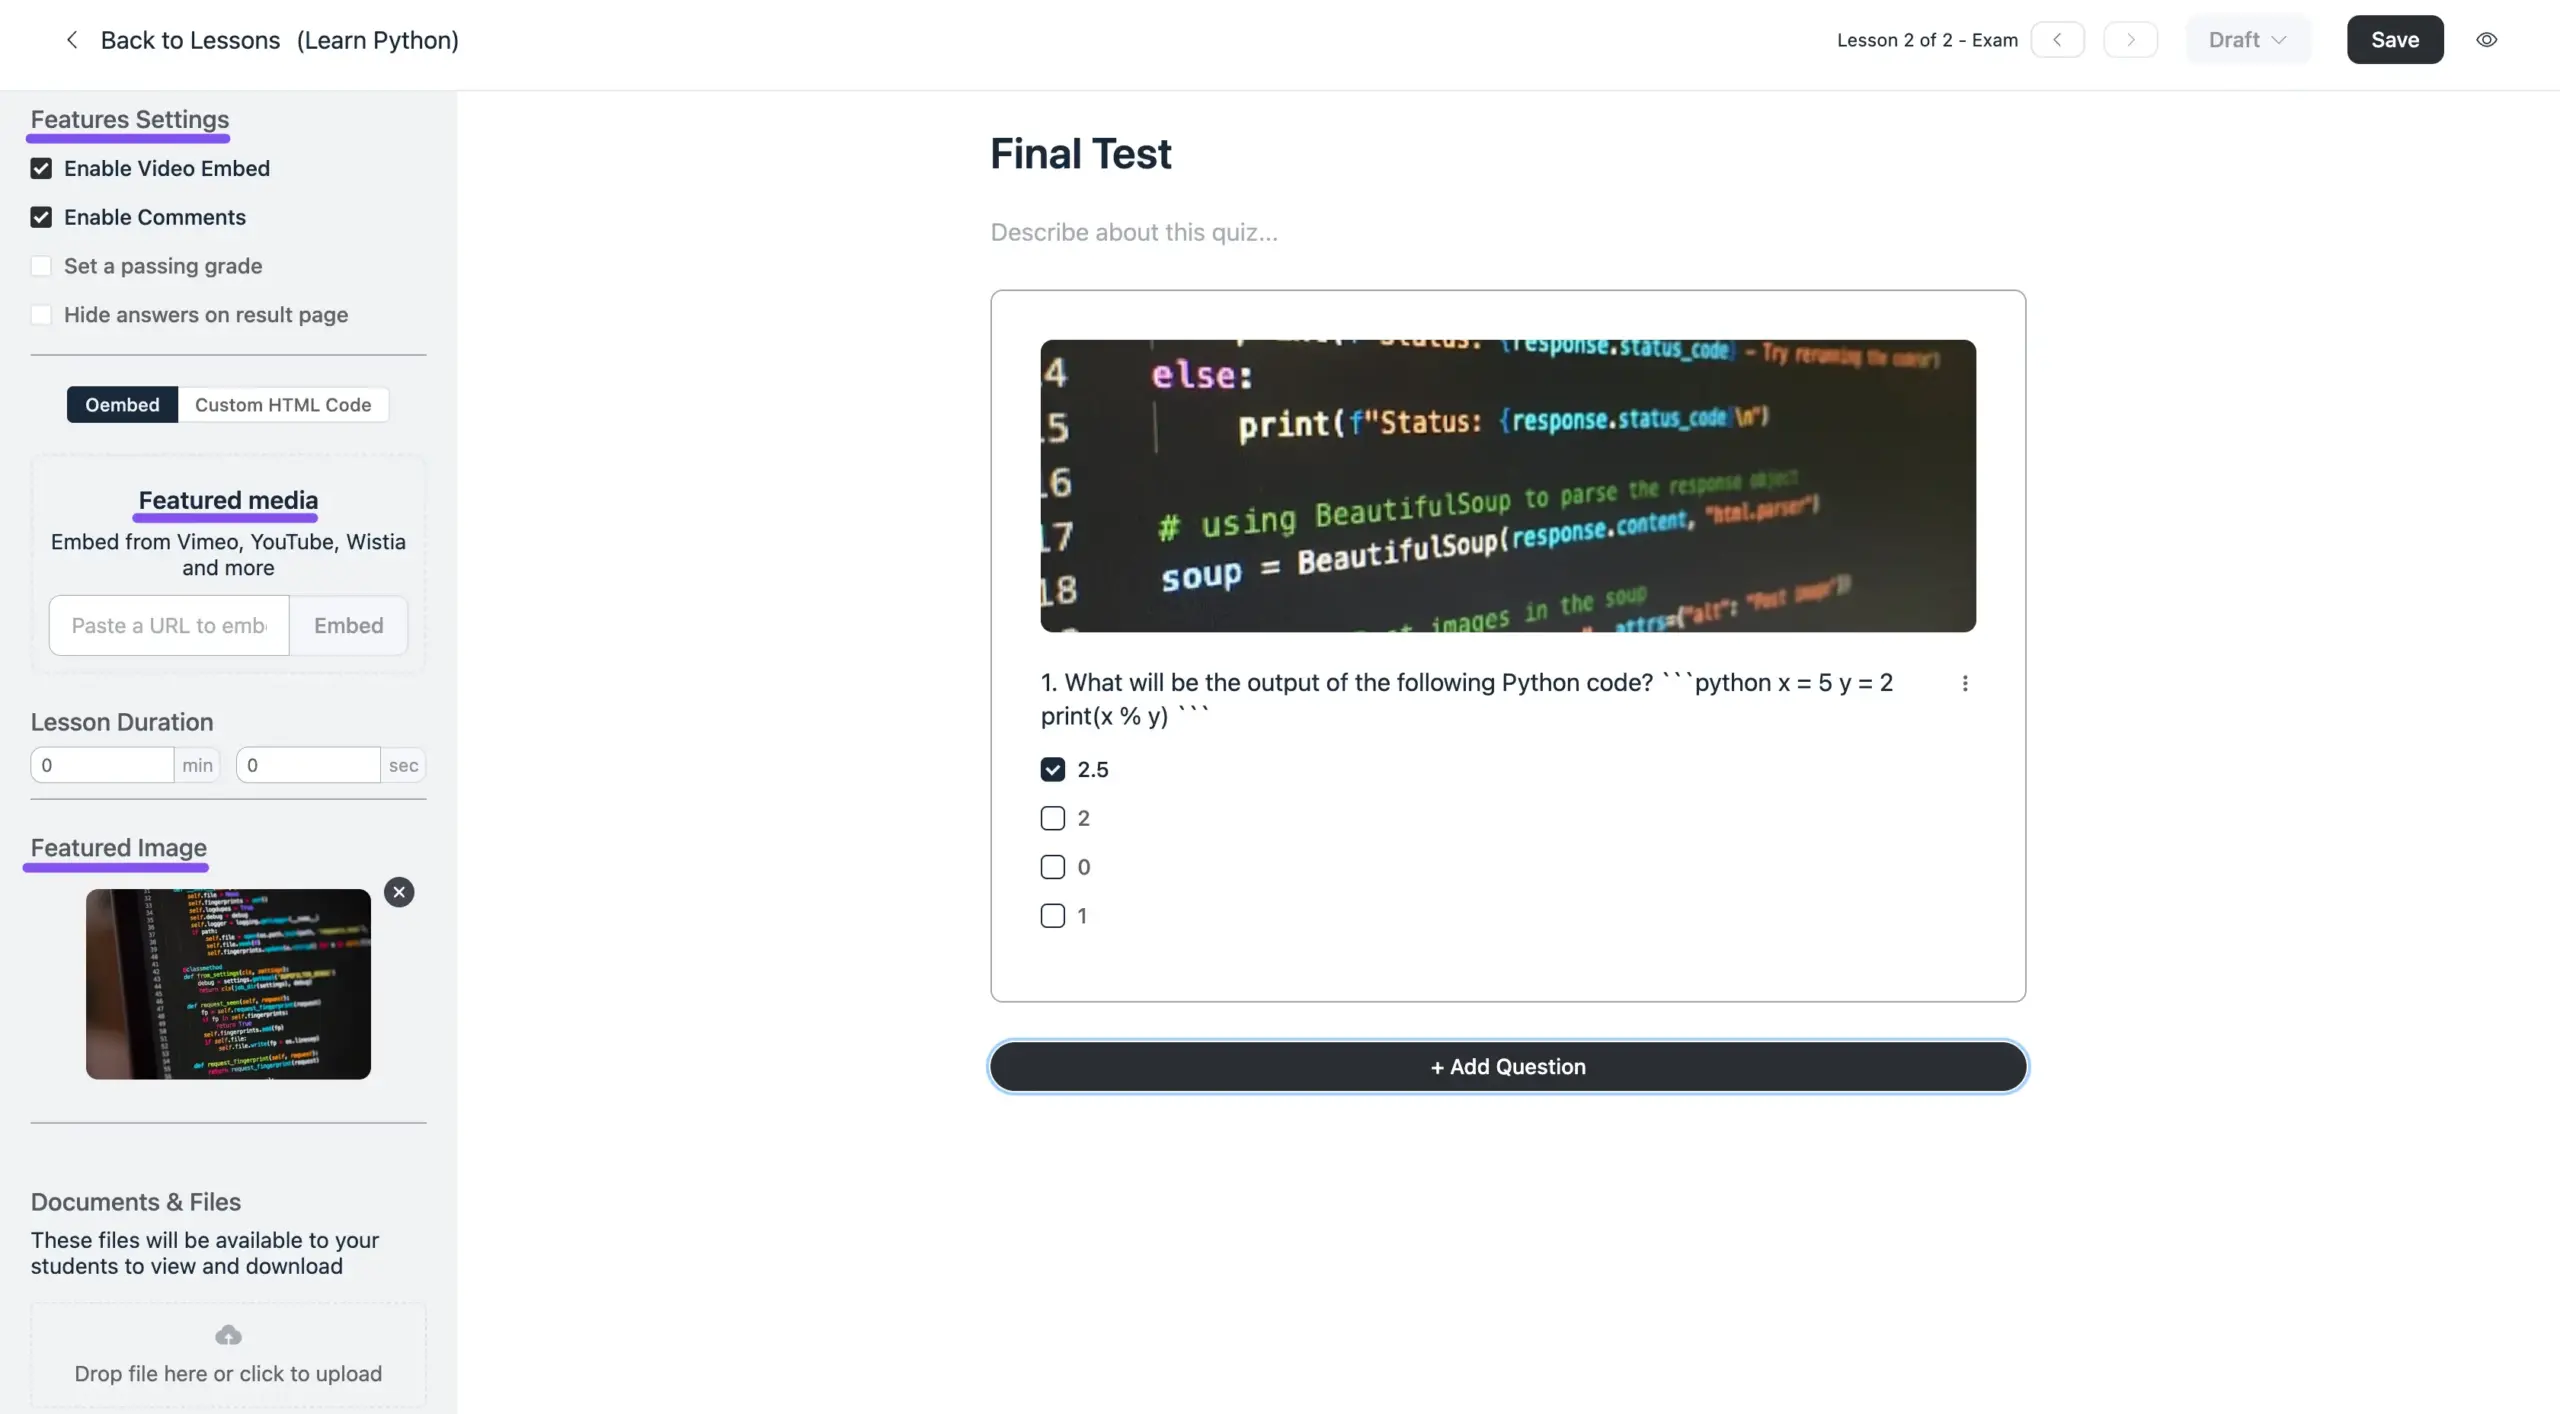
Features Settings #
This first section contains the main functional toggles for your quiz.
- Enable Video Embed: Check this box if you want to display a video at the top of your quiz. This is perfect for video-based questions or for showing a lesson that the quiz is based on.
- Enable Comments: Turn this on to allow your students to leave comments on the quiz page. This can be a great way to encourage discussion or let learners ask for clarification.
- Set a passing grade: Activate this option to set a pass/fail requirement. When you check the box, a new field will appear allowing you to enter the required score in percent (e.g.,
80for 80%). Students must achieve this score to officially pass the quiz. - Hide answers on result page: If you enable this, students will not see the correct answers after they complete the quiz. This is useful to prevent answer sharing if you plan to let students retake the quiz.
Featured media #
Here, you can embed a video to be displayed with your quiz.
- Embed Tab: Simply paste a video URL from a service like YouTube, Vimeo, or Wistia into the text field and click Embed. The video will appear at the top of the quiz page.
- Custom HTML Code Tab: For advanced use cases or unsupported video platforms, you can paste your full video embed code here.
Lesson Duration #
Set the expected time it will take for a student to complete this quiz. You can enter the duration in minutes and seconds. This information is displayed to the student on the course page.
Featured Image #
Click the Upload Image button to add a thumbnail for your quiz. This image will be used to represent your quiz on the main course page, helping to create a more professional and visually engaging learning experience for your students.
Documents & Files #
If you have any supplementary materials for your quiz, such as a PDF worksheet, a study guide, or relevant notes, you can add them here. Simply drag and drop the files into the box or click to upload them. These files will be available for your students to download from the quiz page.
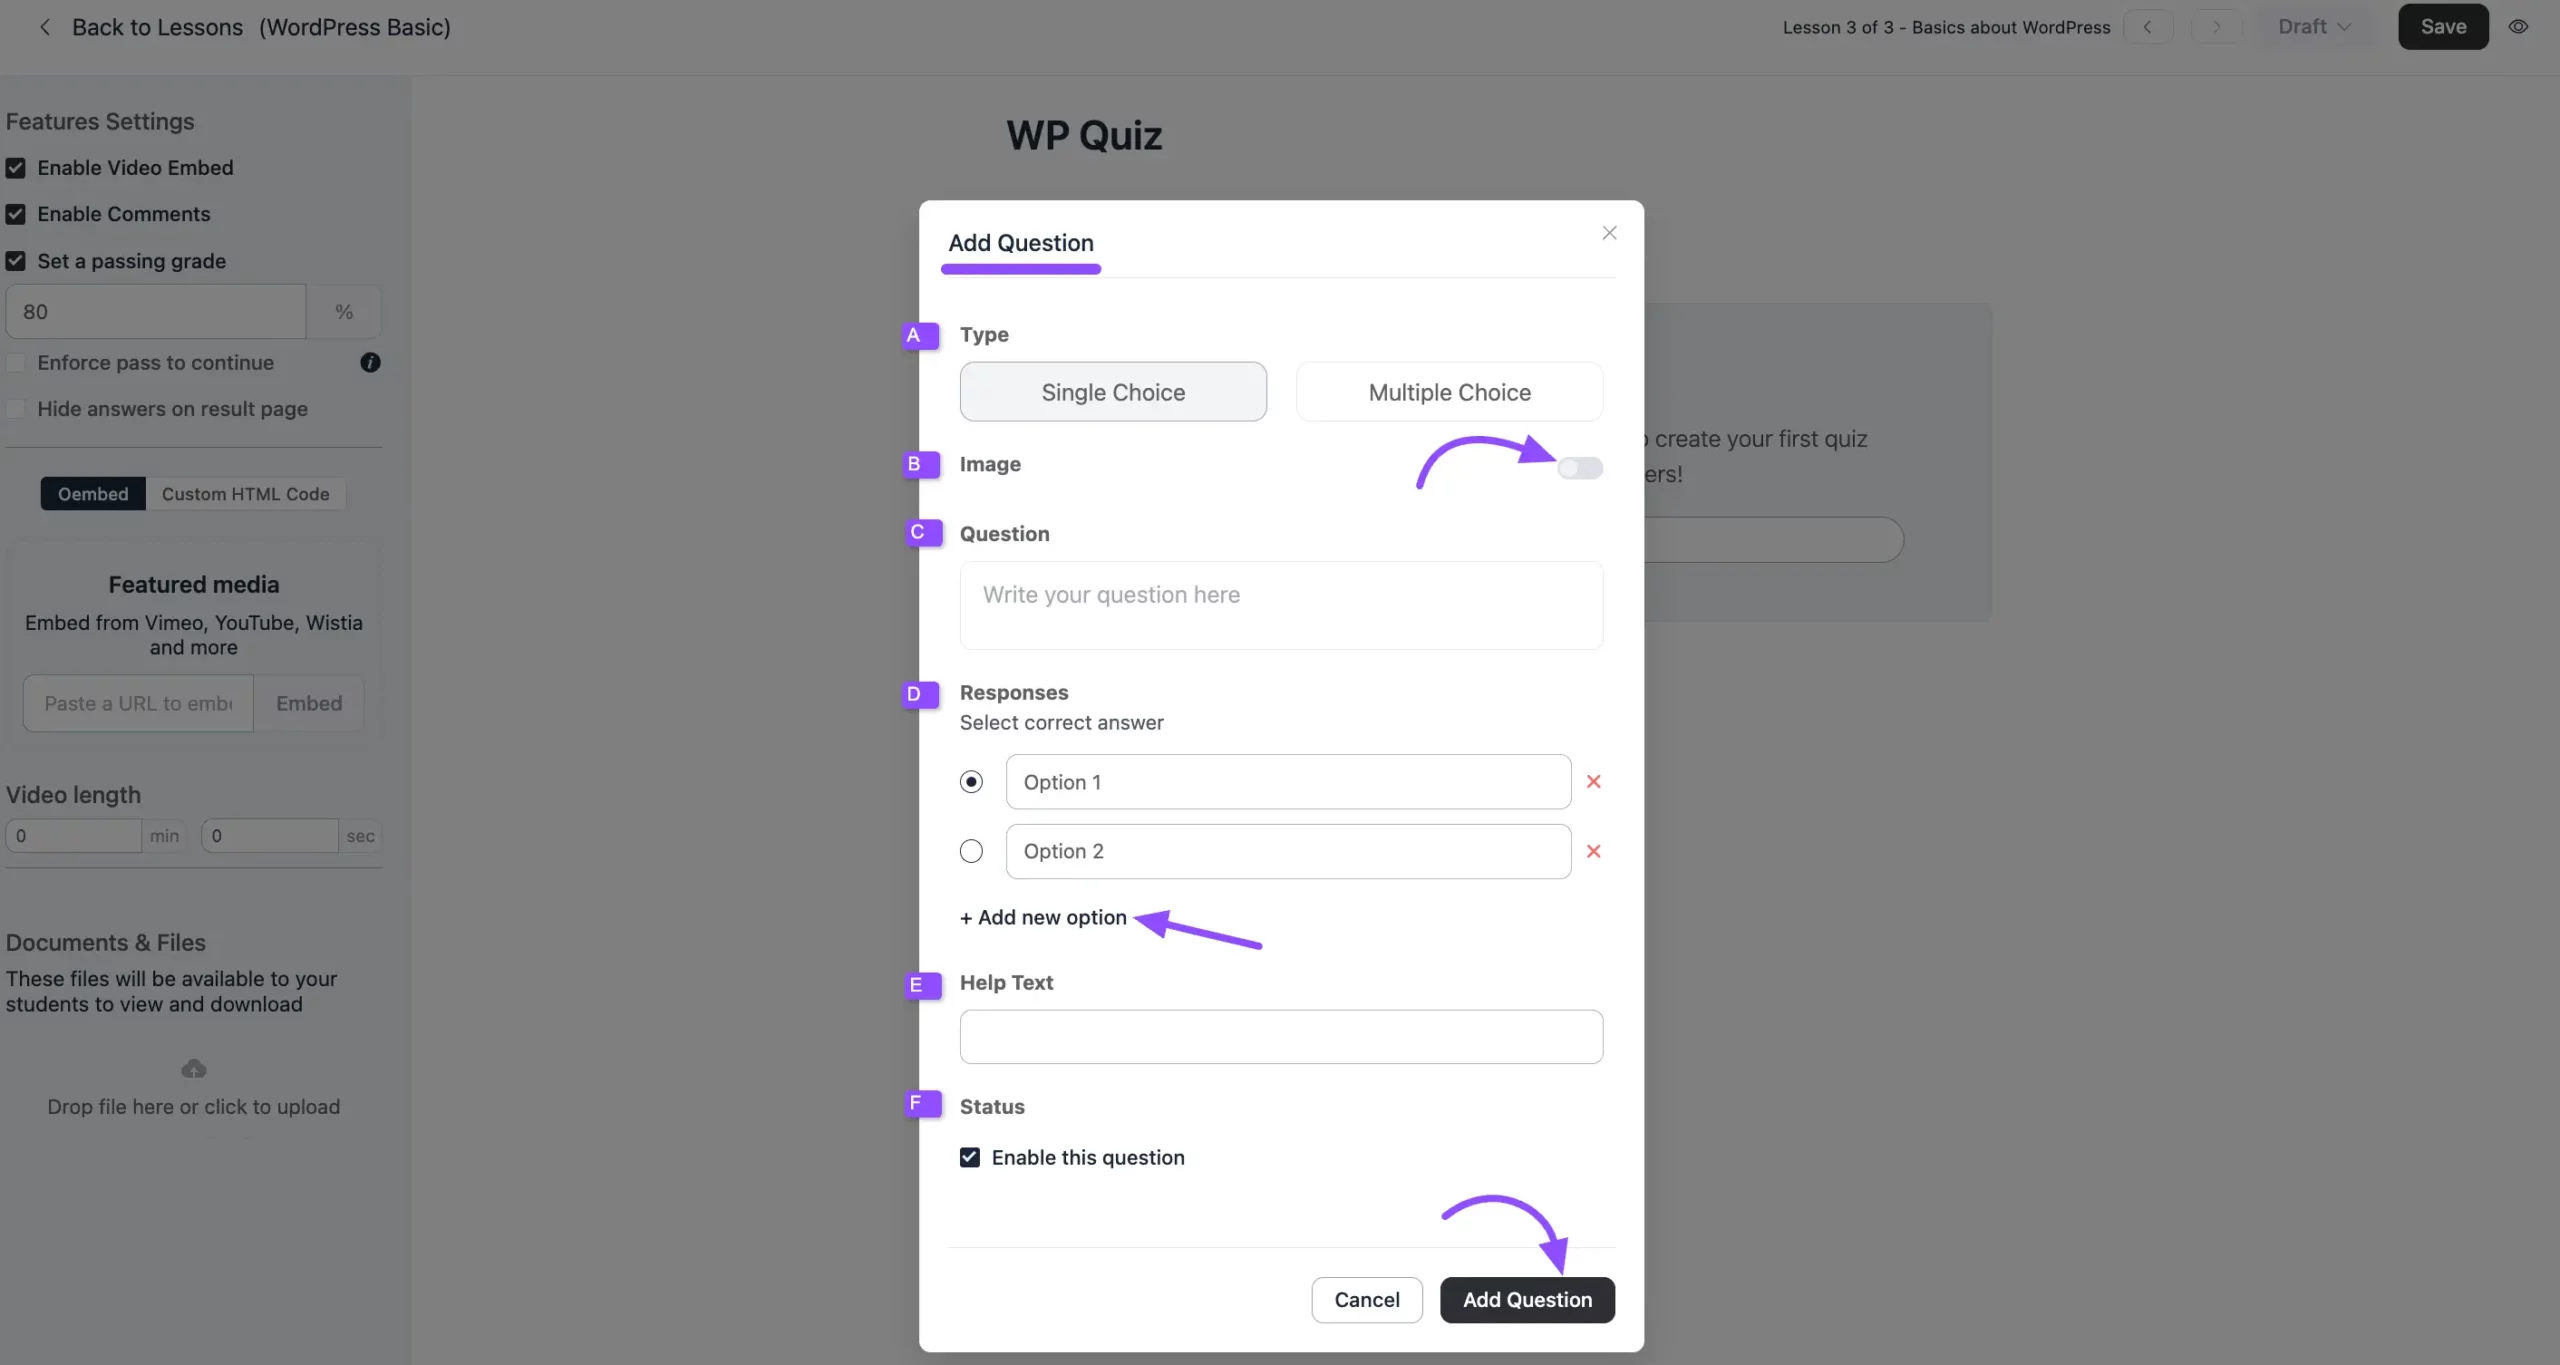
After configuring your quiz settings click on the Add Question button to add questions. A pop-up window will appear where you can set up your quiz question.
- Type: Choose the question type—Single Choice (only one correct answer) or Multiple Choice (more than one correct answer).
- Image: Toggle this on if you want to add an image to your question.
- Questions: Type your quiz question here.
- Responses: Add the answer options. You can choose the correct answer by selecting the small circle next to it. Click + Add new option to include more choices.
- Help Text: This is optional. You can add a short explanation or hint to help the student answer the question.
- Status: If you want this question to be active, make sure the Enable this question box is checked.
Once you’re done, click the Add Question button at the bottom right.
Repeat this process to add as many questions as you need for your quiz.
Manage your Quiz Questions #
Once you’ve added your quiz questions, you can easily manage them.
Click on the three-dot menu next to each question. From here, you can:
- Enable or disable the question
- Edit the question
- Delete the question
After making your changes, click the Save button in the top-right corner to keep everything updated.

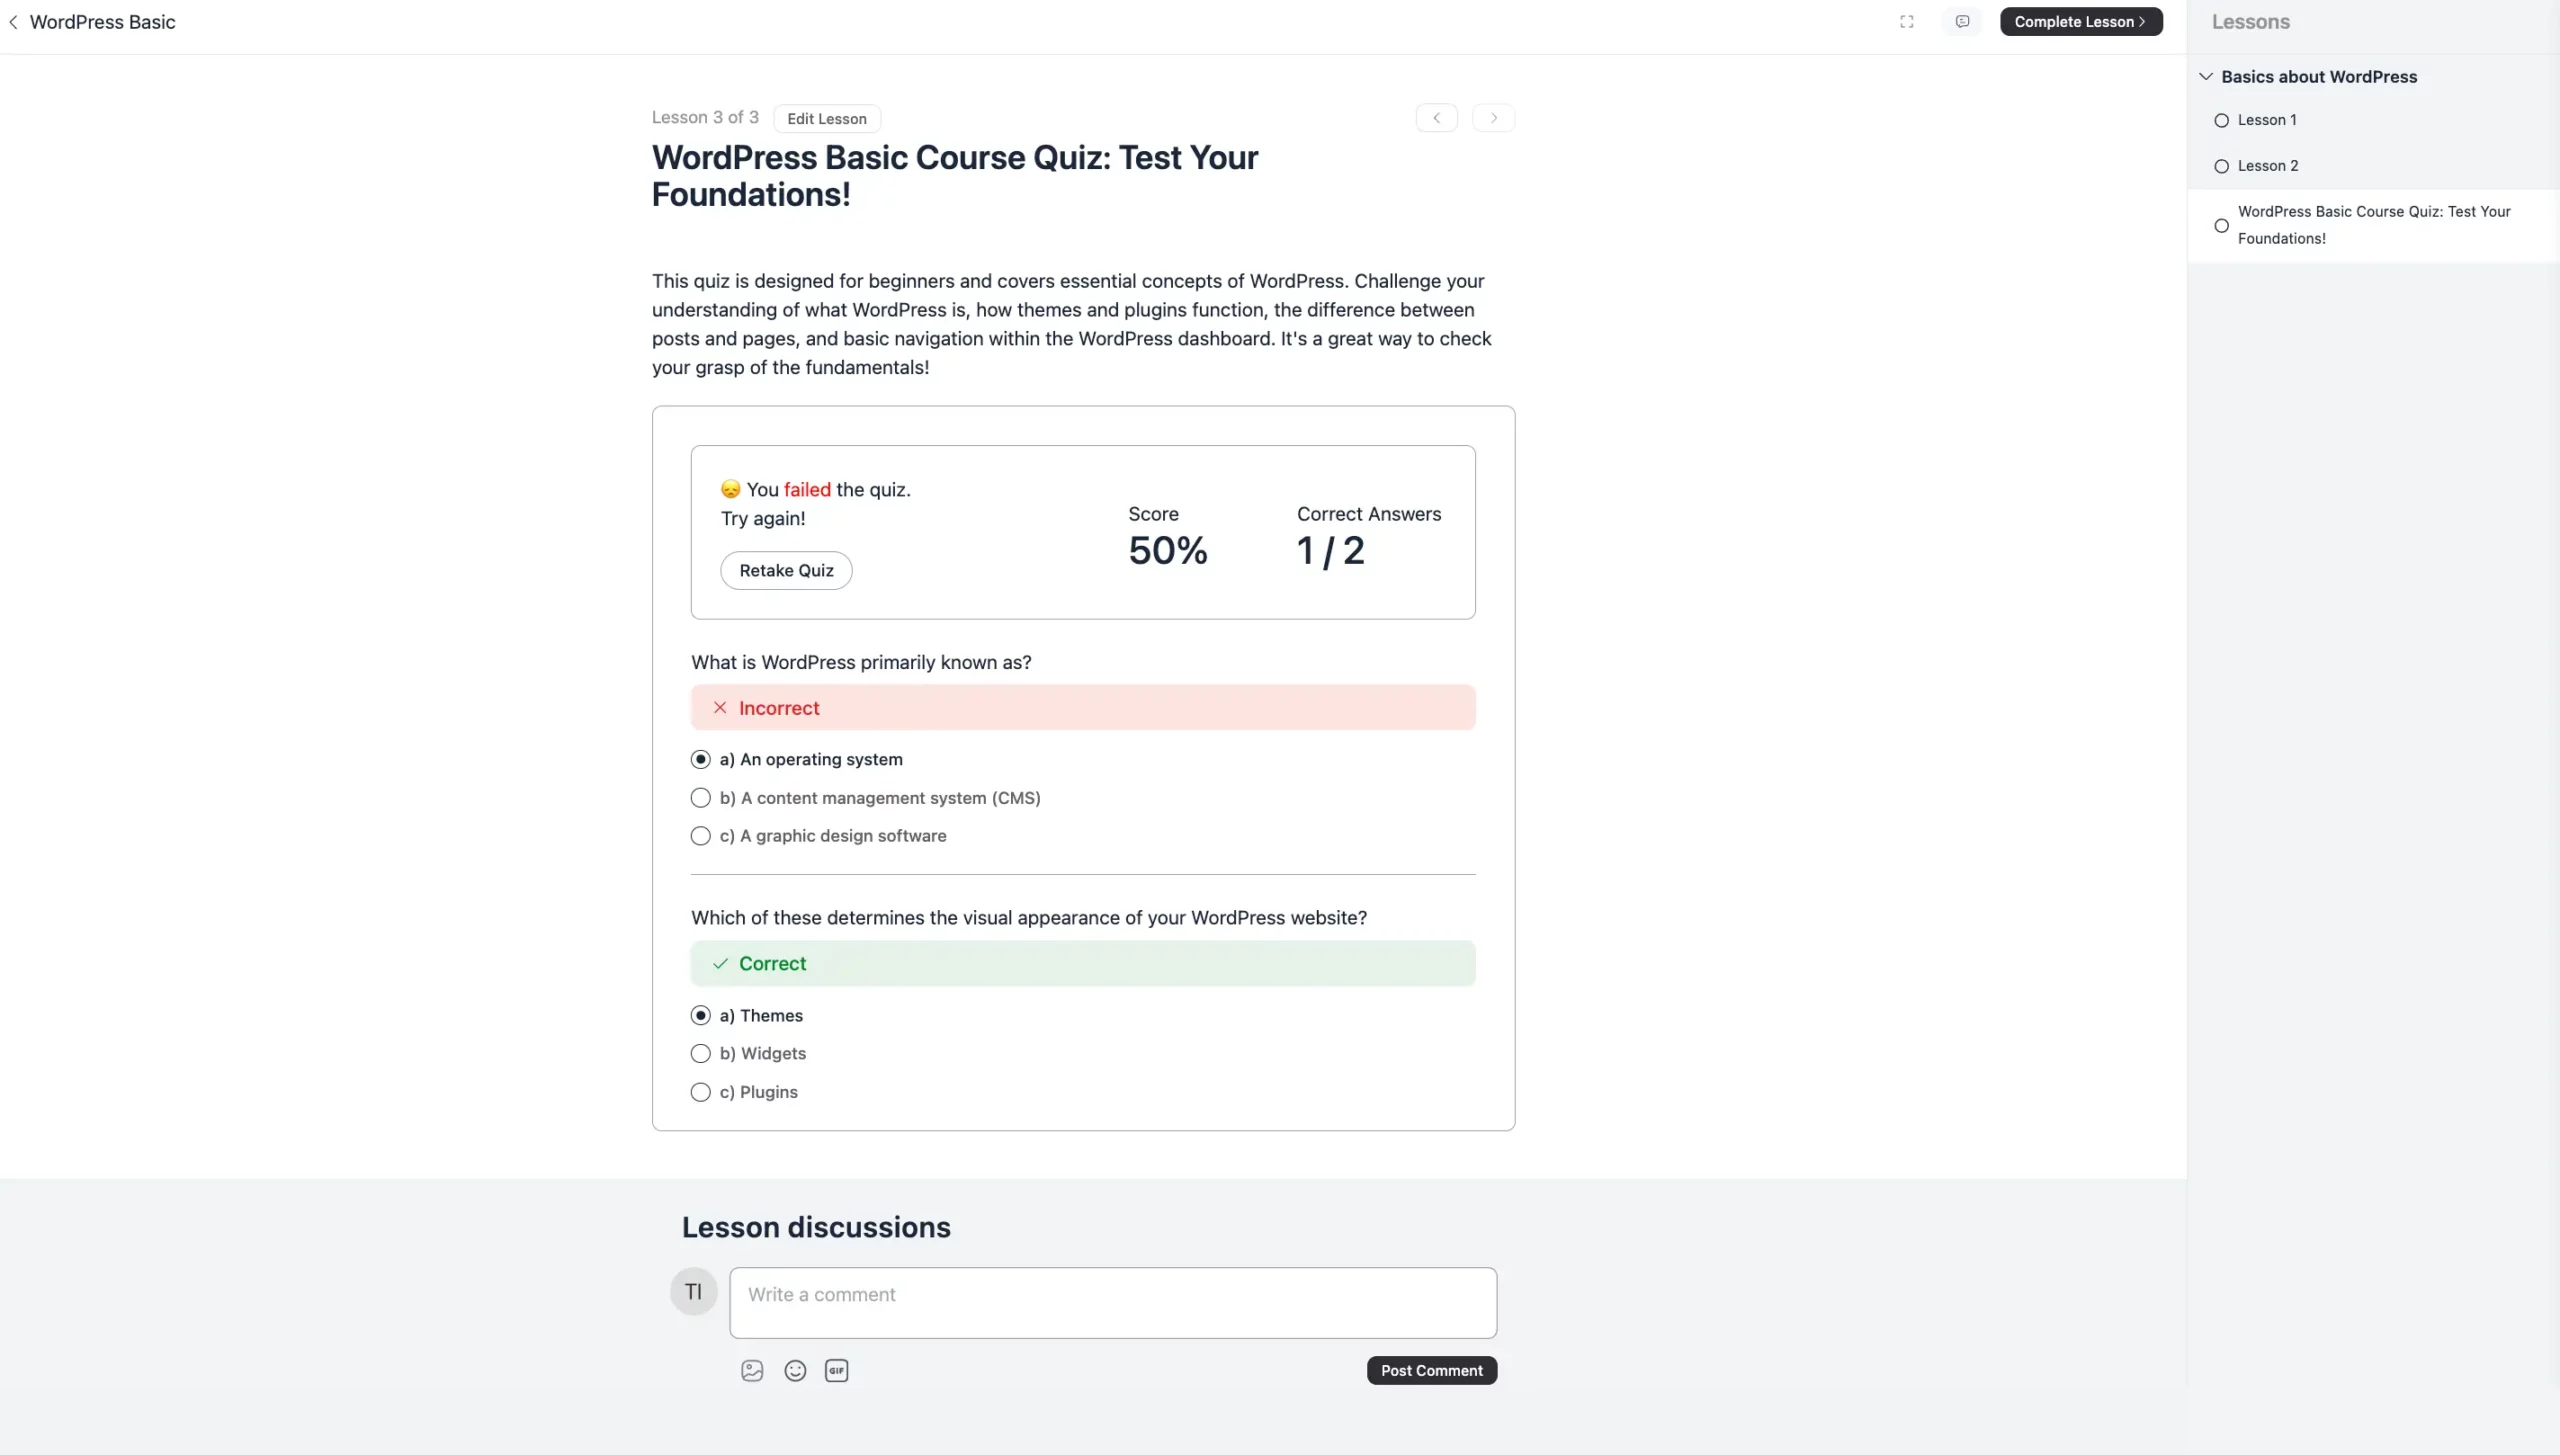
Quiz Module Preview #
When students take the quiz, they’ll see their results right away after answering.
Before students can see or take the quiz, make sure you publish your quiz questions!
If you have any questions, please don’t hesitate to contact our support team.


