
In FluentCommunity, creating and managing posts lets members easily share updates, thoughts, images, or polls, fostering interaction within the Space.
How to Create a Post #
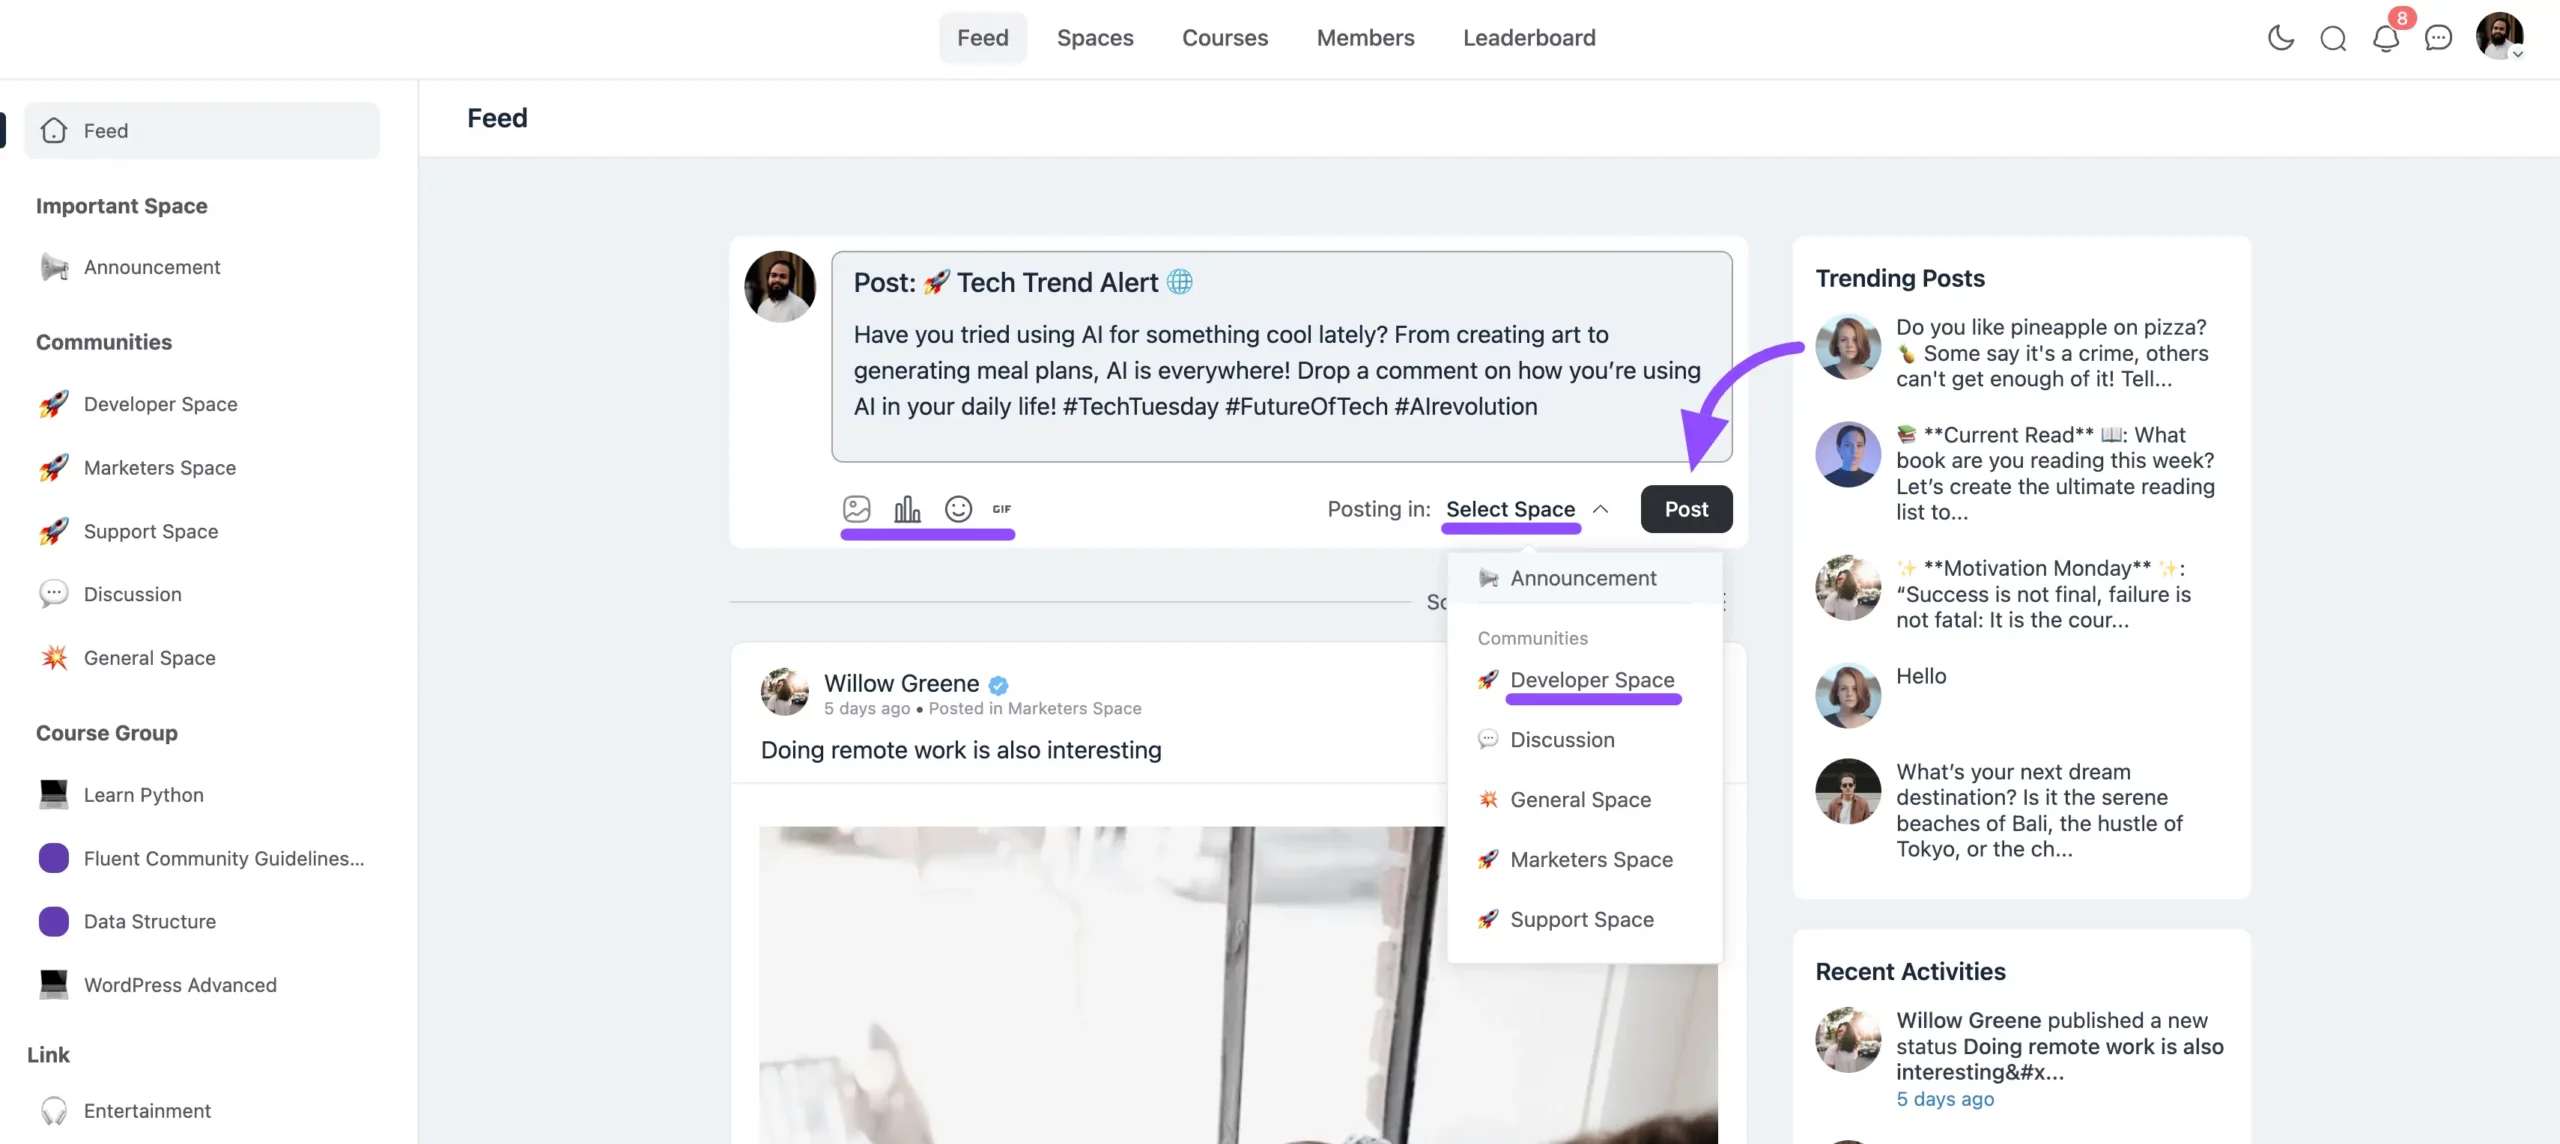
Access the Space Feed
- Log into your WordPress site and navigate to the FluentCommunity feed.
- You can share your post globally from the Post section by selecting Space.
- Also, if you want to share your post on any space click on the space where you want to share your post.
Create a New Post
- At the top of the space feed, you’ll see the Create Post section.
- Type your message in the text box, add any images or links, and choose if you want to include a poll or media. You can add multiple media attachments to your post inside your community.
- You can format your text, insert hashtags, or mention other users by using the “@” symbol.
- After crafting your post, hit the Post button. Your post will now be live in the feed, and visible to all members (depending on privacy settings).
Share the Post:
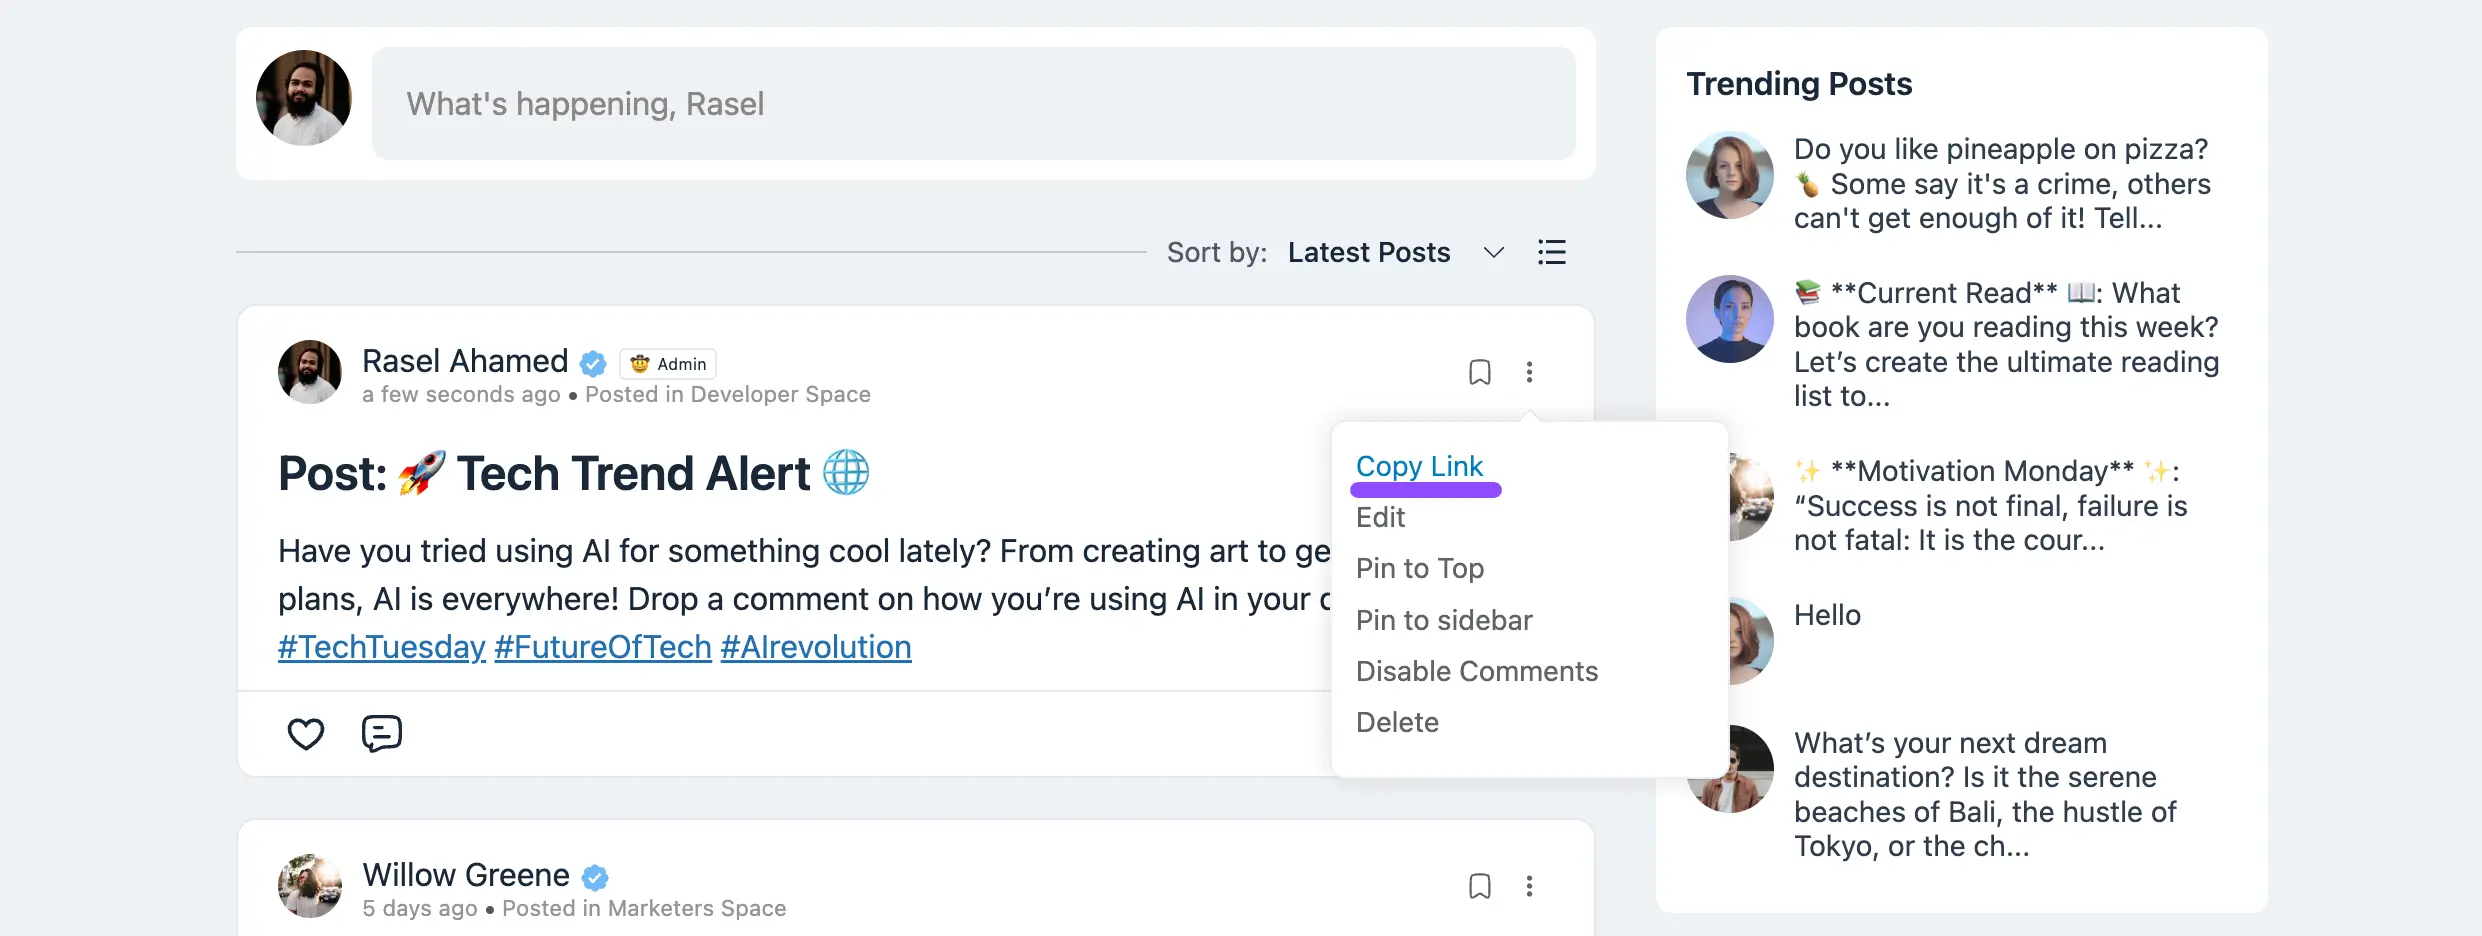
- You can also share the post with the link. To get the post link click on the three-dot button and you will find the link.
Managing Posts #
Editing a Post
- To edit a post, simply navigate to the post you’ve shared.
- Click the three-dot button in the top right corner of the post and select Edit from the dropdown menu.
- Make the necessary changes and click Update to save the edits.
Deleting a Post
If you wish to delete a post, follow the same steps as editing. Click the three dots on the post, then select Delete.
A confirmation prompt will appear to confirm the action, and the post will be removed from the feed.
Post Privacy & Visibility #
Posts follow the privacy settings of the community they’re shared in (Public, Private, or Secret).
FluentCommunity makes it easy for members to share content, engage, and manage their posts in an intuitive and user-friendly way.
Scheduled Post #
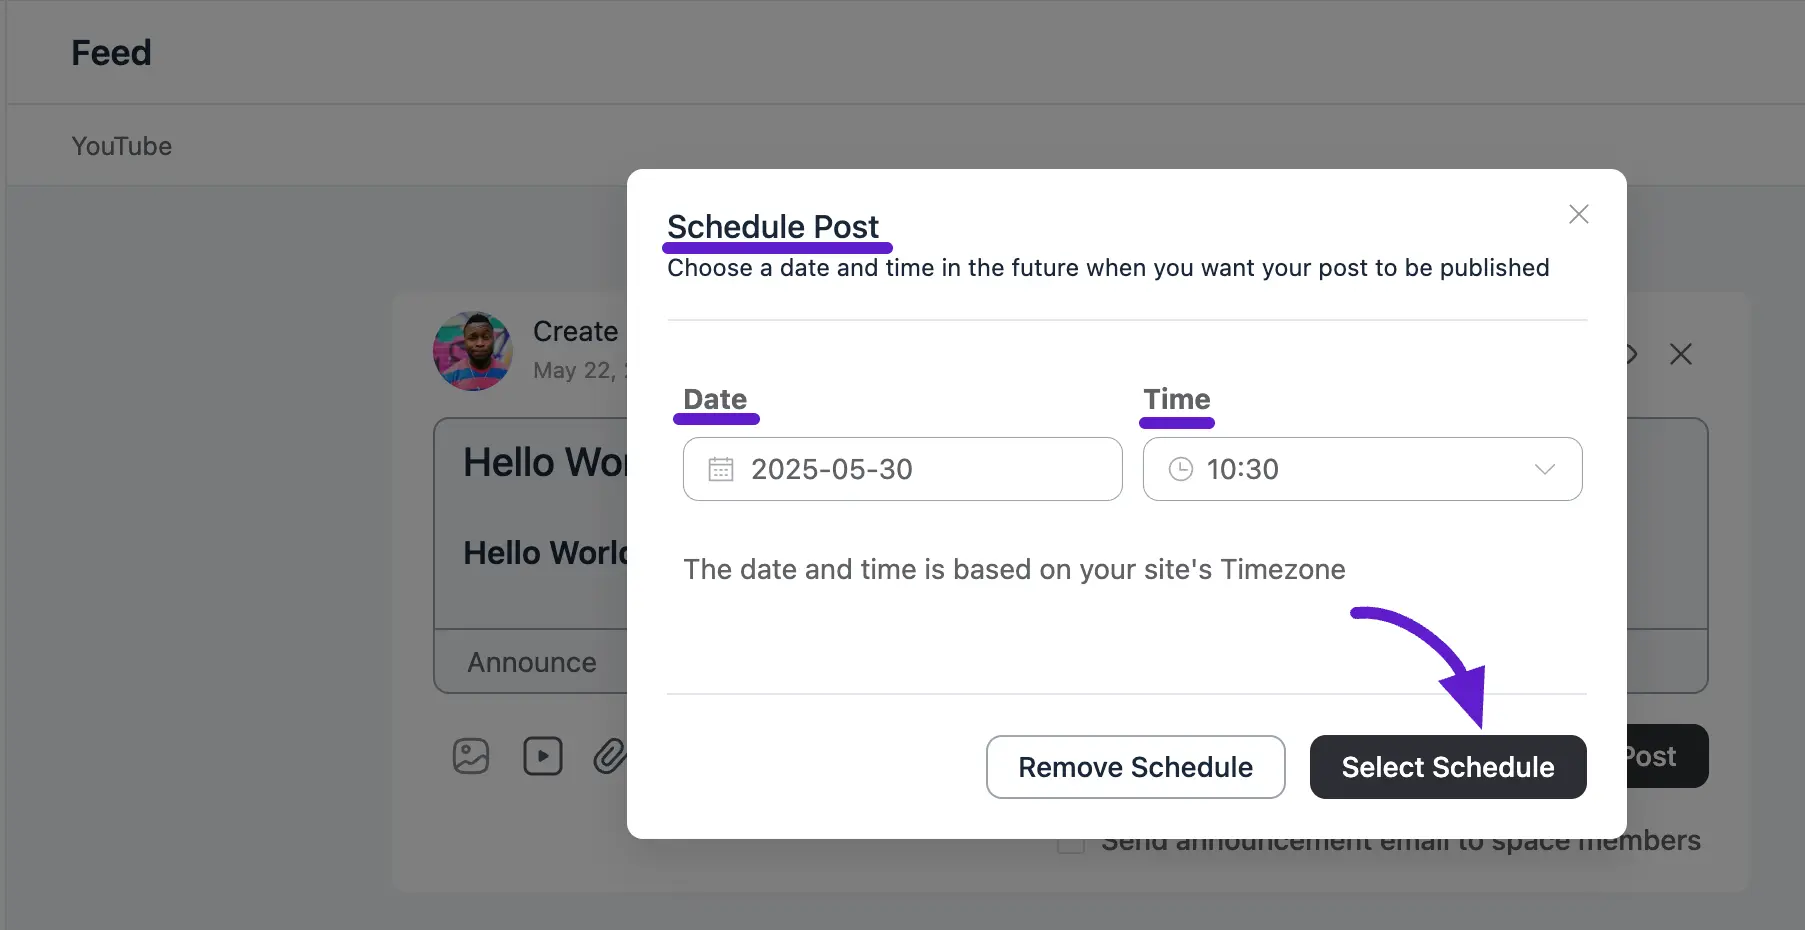
To schedule a post in FluentCommunity, simply click the calendar icon located in the top-right corner of the post editor section.
Note: Only at this time, Admins have permission to schedule posts in FluentCommunity.
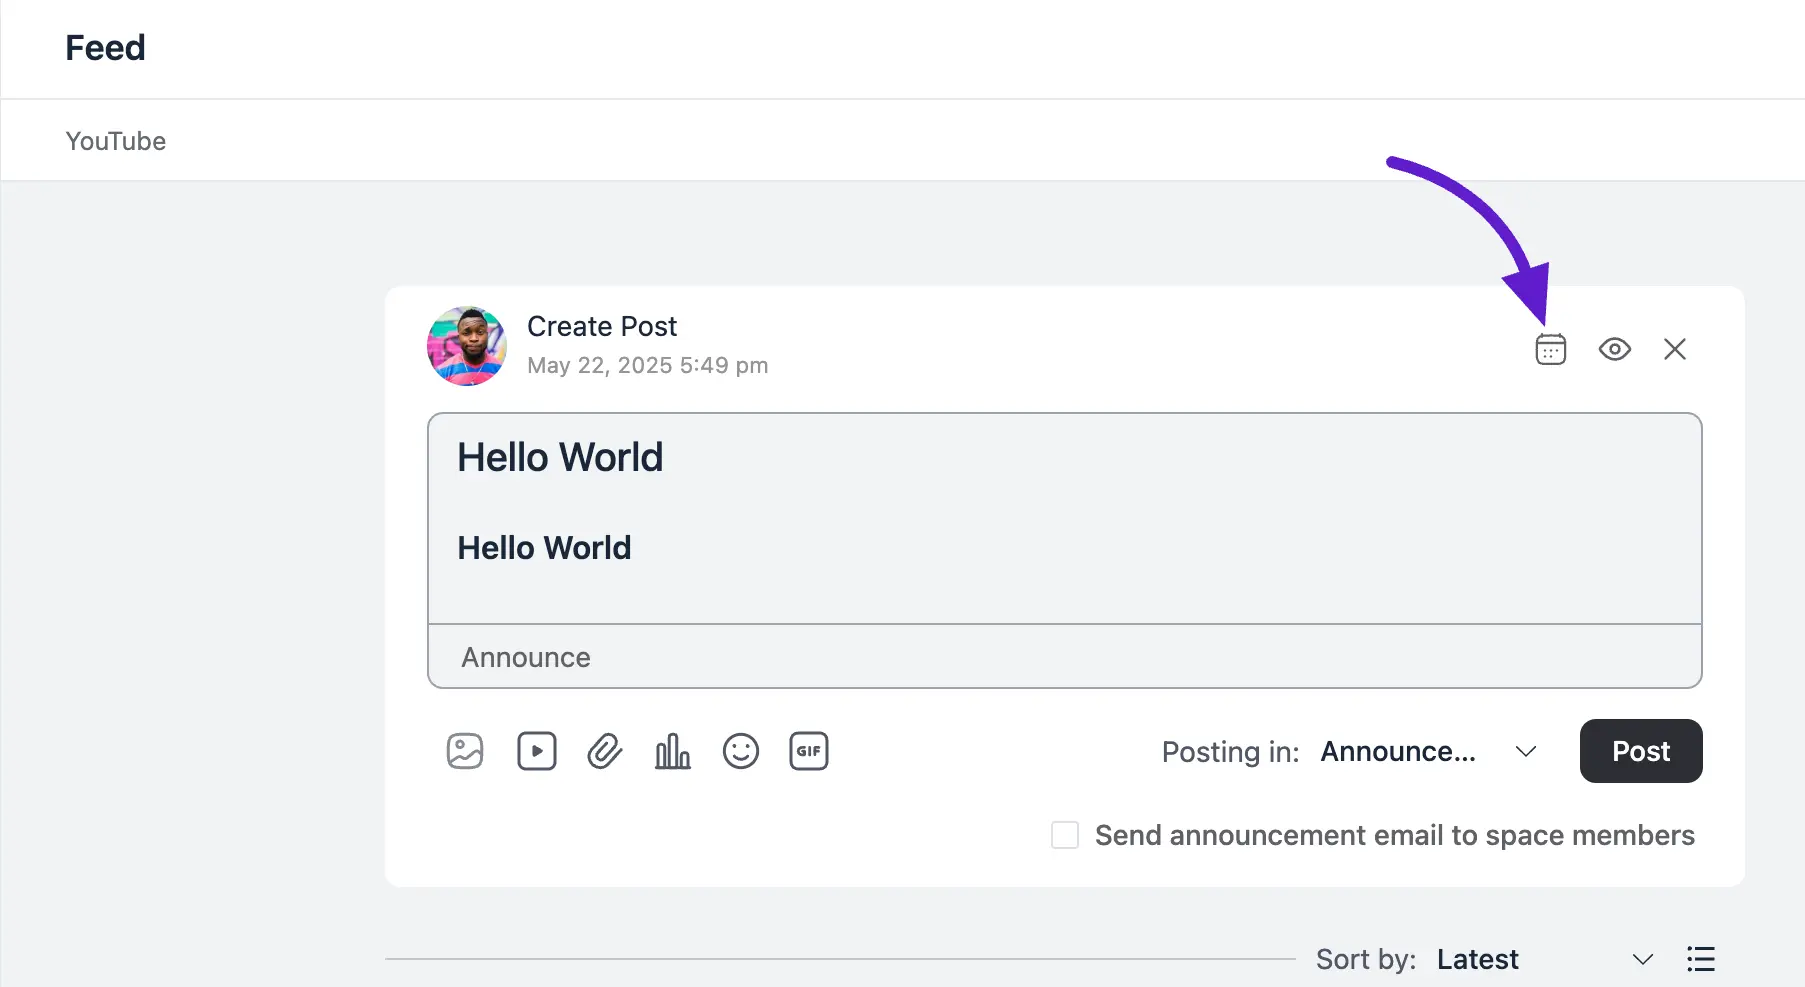
A popup will appear where you can set the date and time for your scheduled post. Choose your desired date and time from the respective fields, then click the Select Schedule button to confirm.
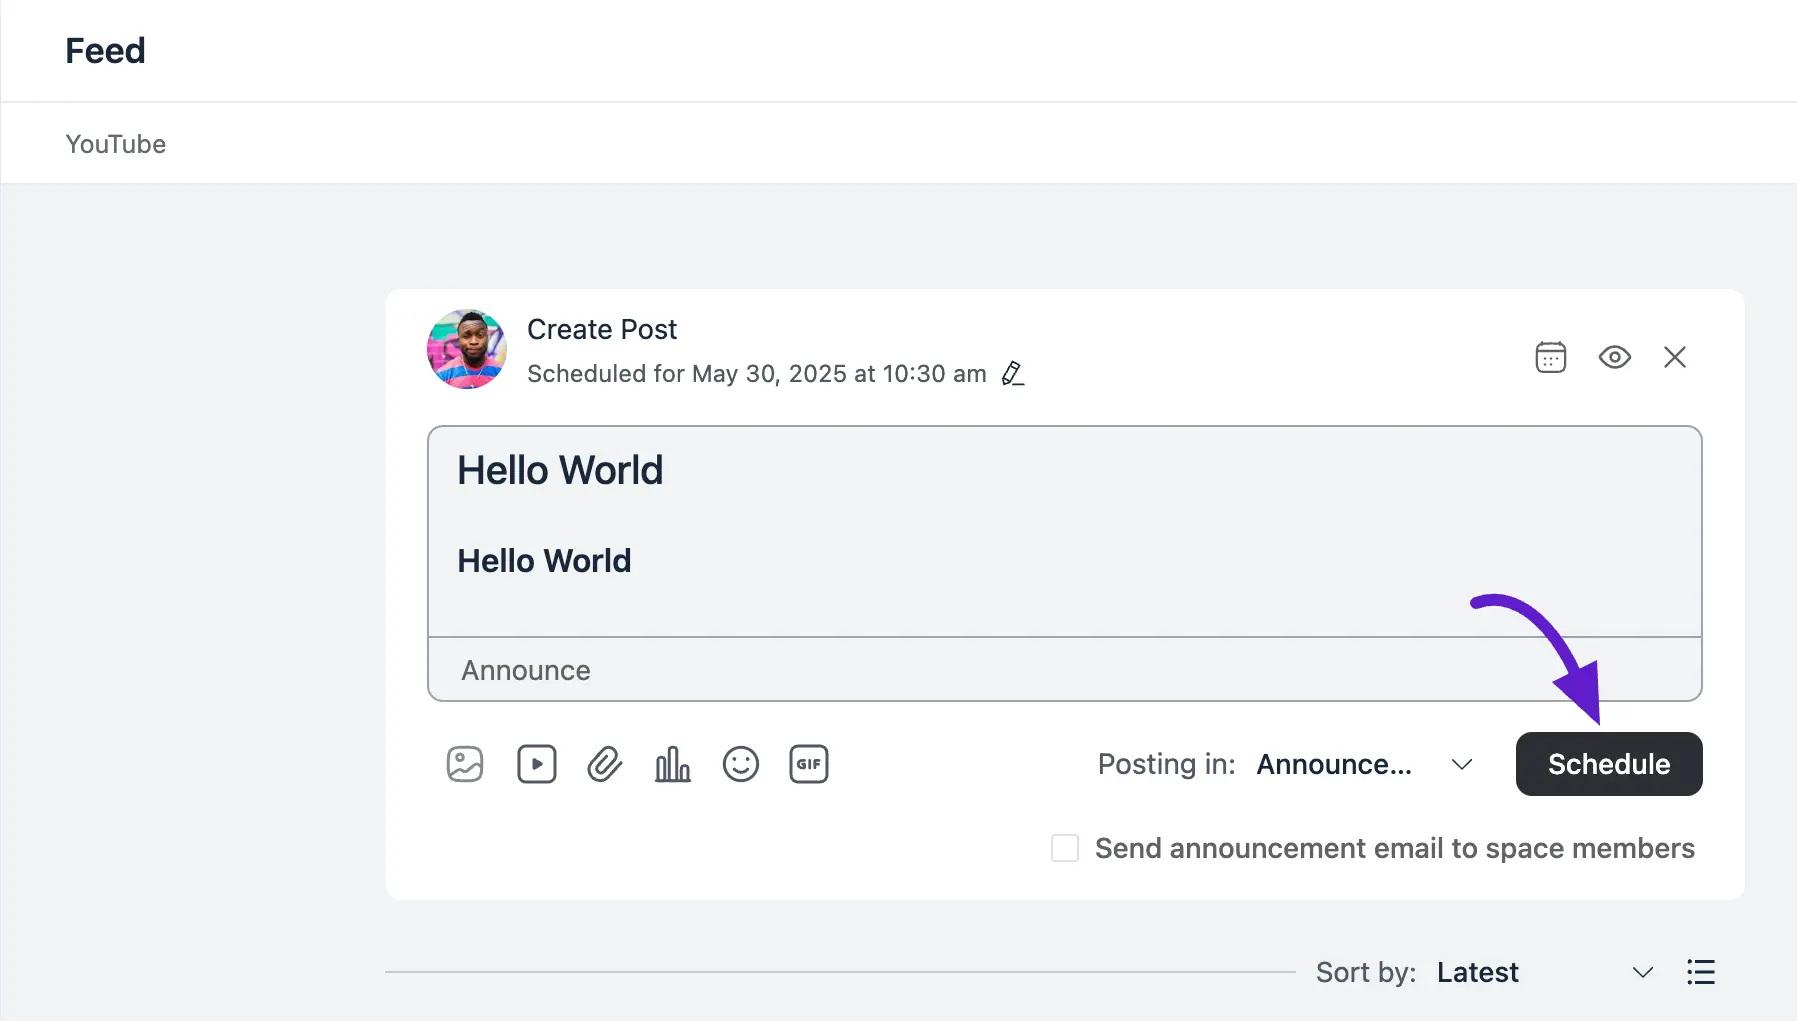
Now, click the Schedule button to add your post to the scheduled list.
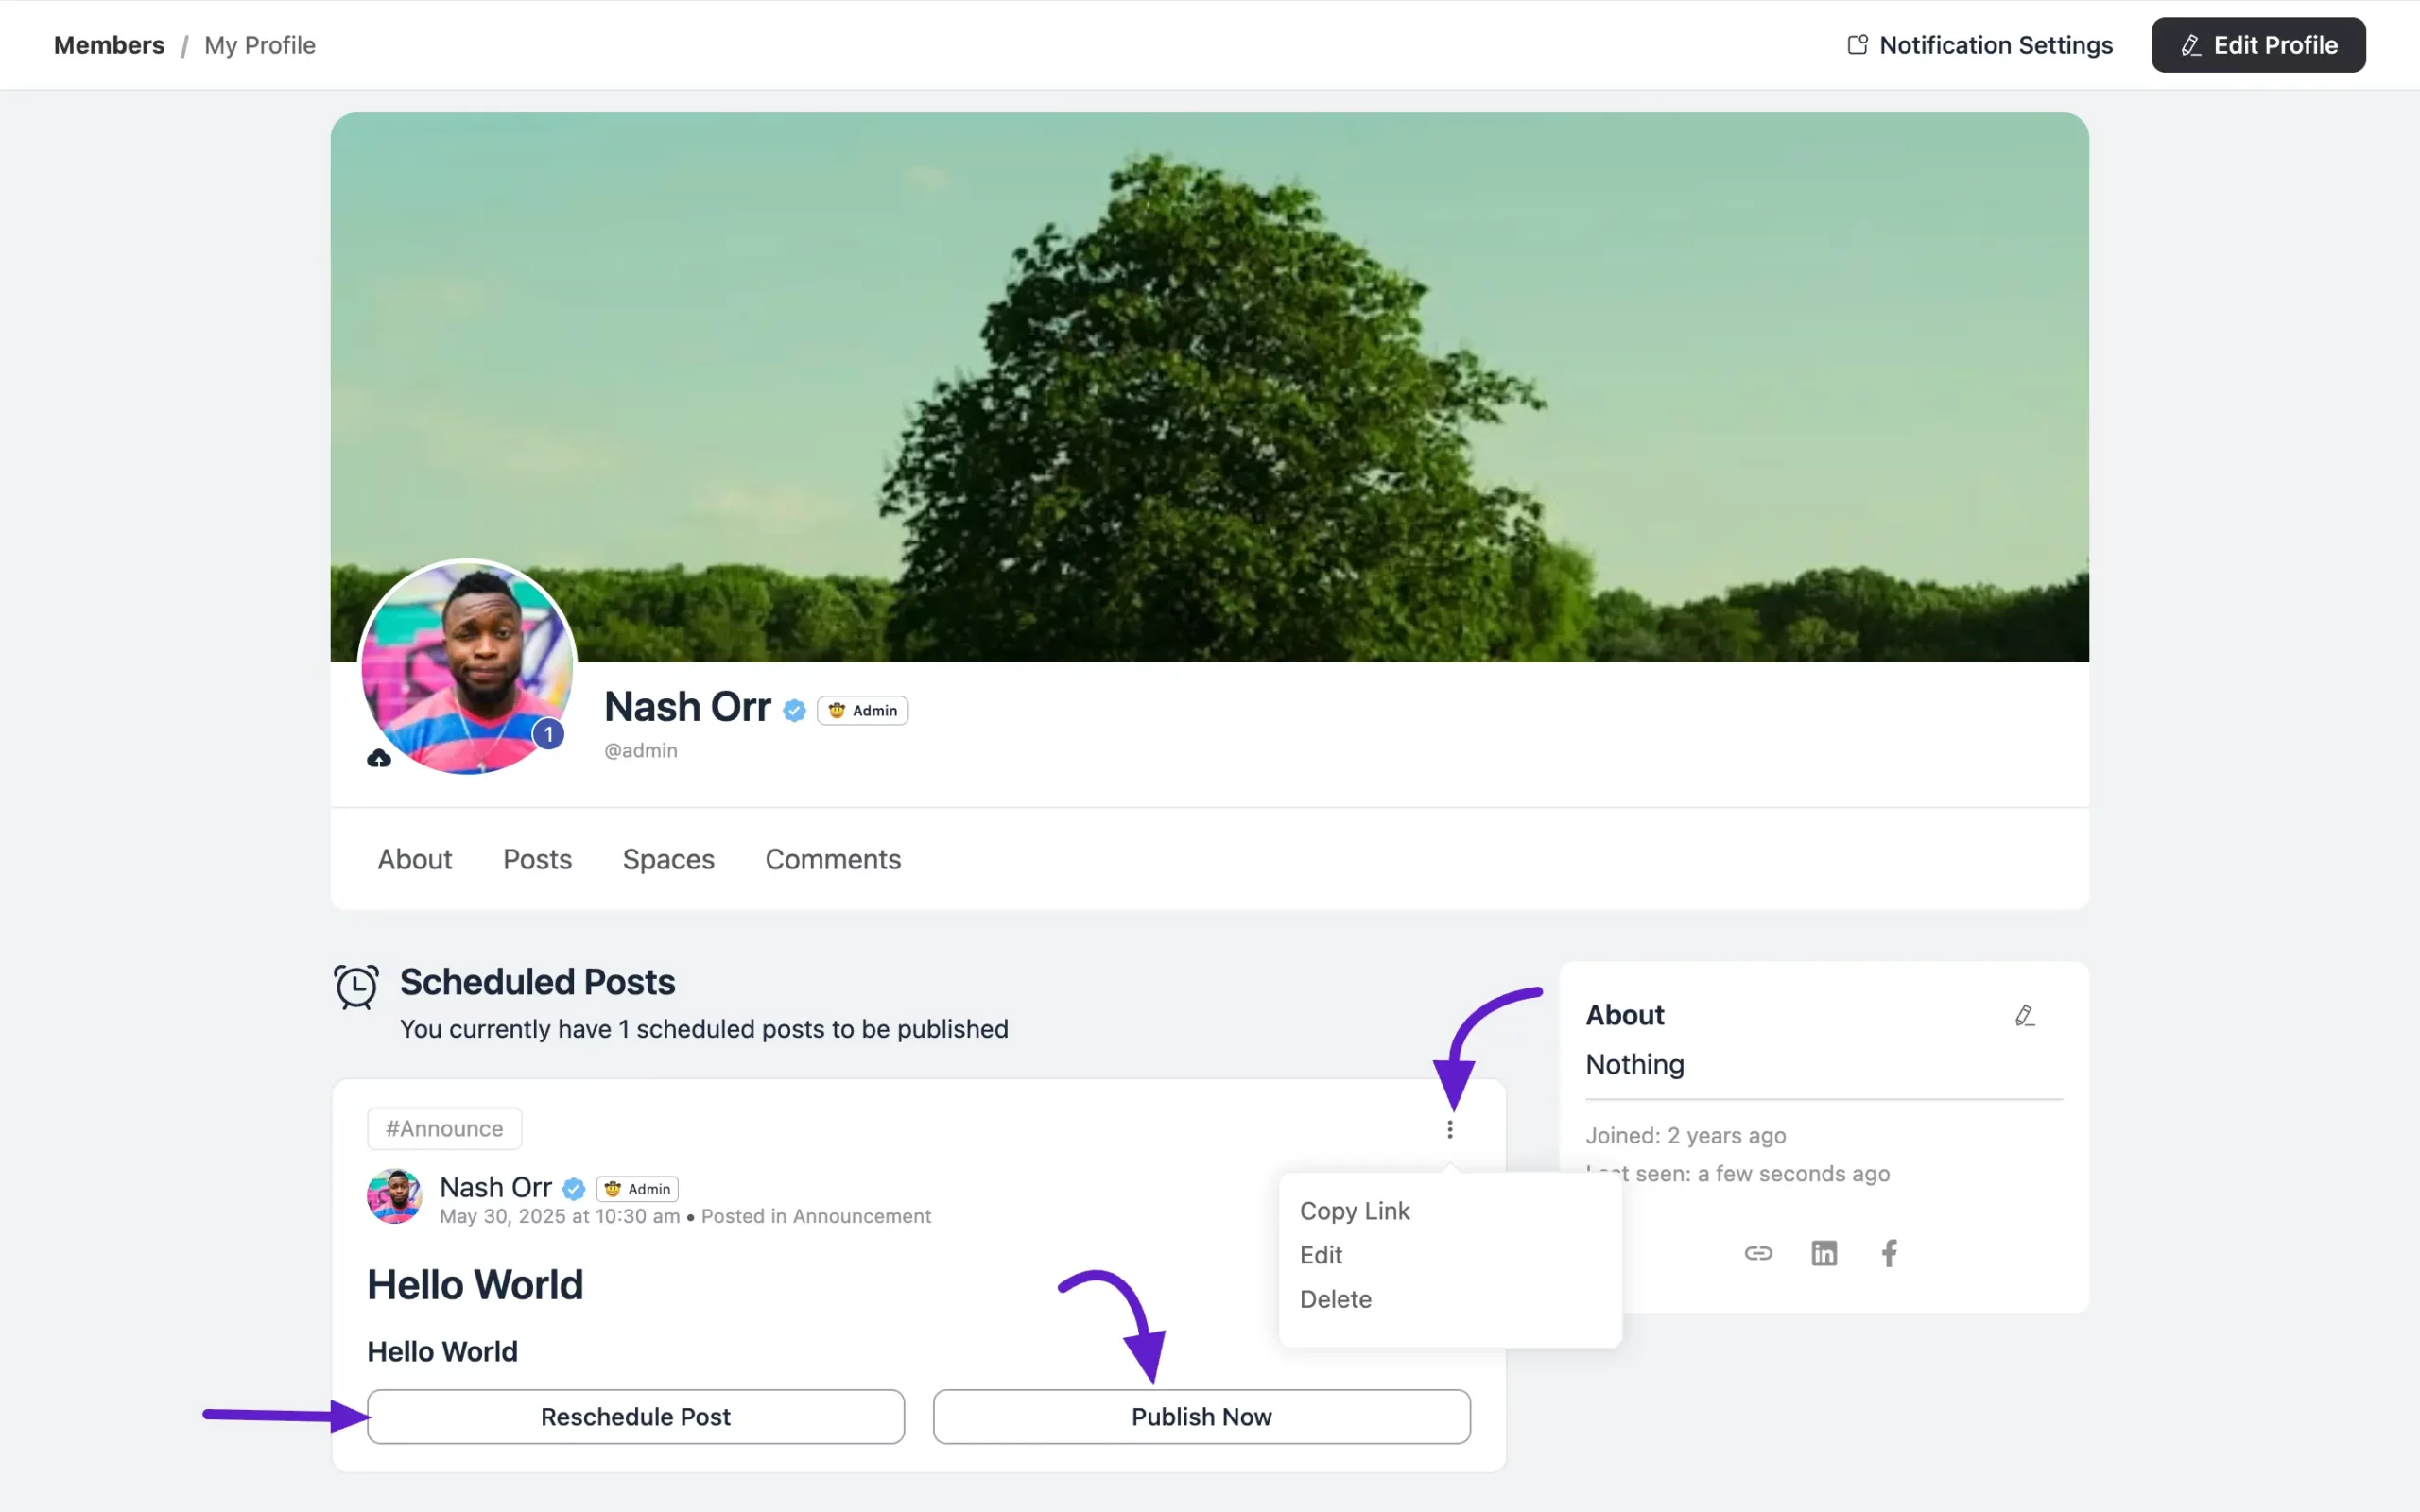
To view your scheduled post, head over to your Profile where you’ll find a pinned notification for your scheduled posts. Click the View Posts button to see them.

Here, you’ll find all your scheduled posts listed. You can publish any post instantly by clicking the Publish Now button. To change the scheduled time, simply click the Reschedule button.
If you’d like to edit or delete a post, click the three dot icon next to the post. This will give you options to Edit, Delete, or Copy Link.
If you have any further questions about this guide, please don’t hesitate to contact us.


