
By default, your FluentCommunity lives on its own page, usually at yoursite.com/portal. But what if you want your community to be the main event the very first thing visitors see when they arrive at your site?
This guide will show you how to make your community the true front door of your entire website. We’ll walk through two powerful goals, with the main focus on the first one:
- Making your community your actual homepage (so it loads at yoursite.com).
- Giving your community a nicer URL (like yoursite.com/community) as a simpler alternative.
Goal 1: Make Your Community the Actual Homepage #
Method A: Using Code Snippet Plugin
This method is the best choice for the vast majority of users. We will use a popular, free plugin called FluentSnippets to add the necessary code without ever needing to touch your sensitive core WordPress files.
Think of this plugin as a safe, managed sandbox for adding custom code. It’s fantastic because if you make a mistake, you can easily deactivate the snippet with a single click, which instantly fixes the problem. It’s safe, completely reversible.
Step 1: Create a New Snippet
- Select “FluentSnippet” from the left sidebar of WordPress and click on New Snippet button.
Step 2: Add and Configure the Homepage Code
This is where we tell WordPress what we want to do.
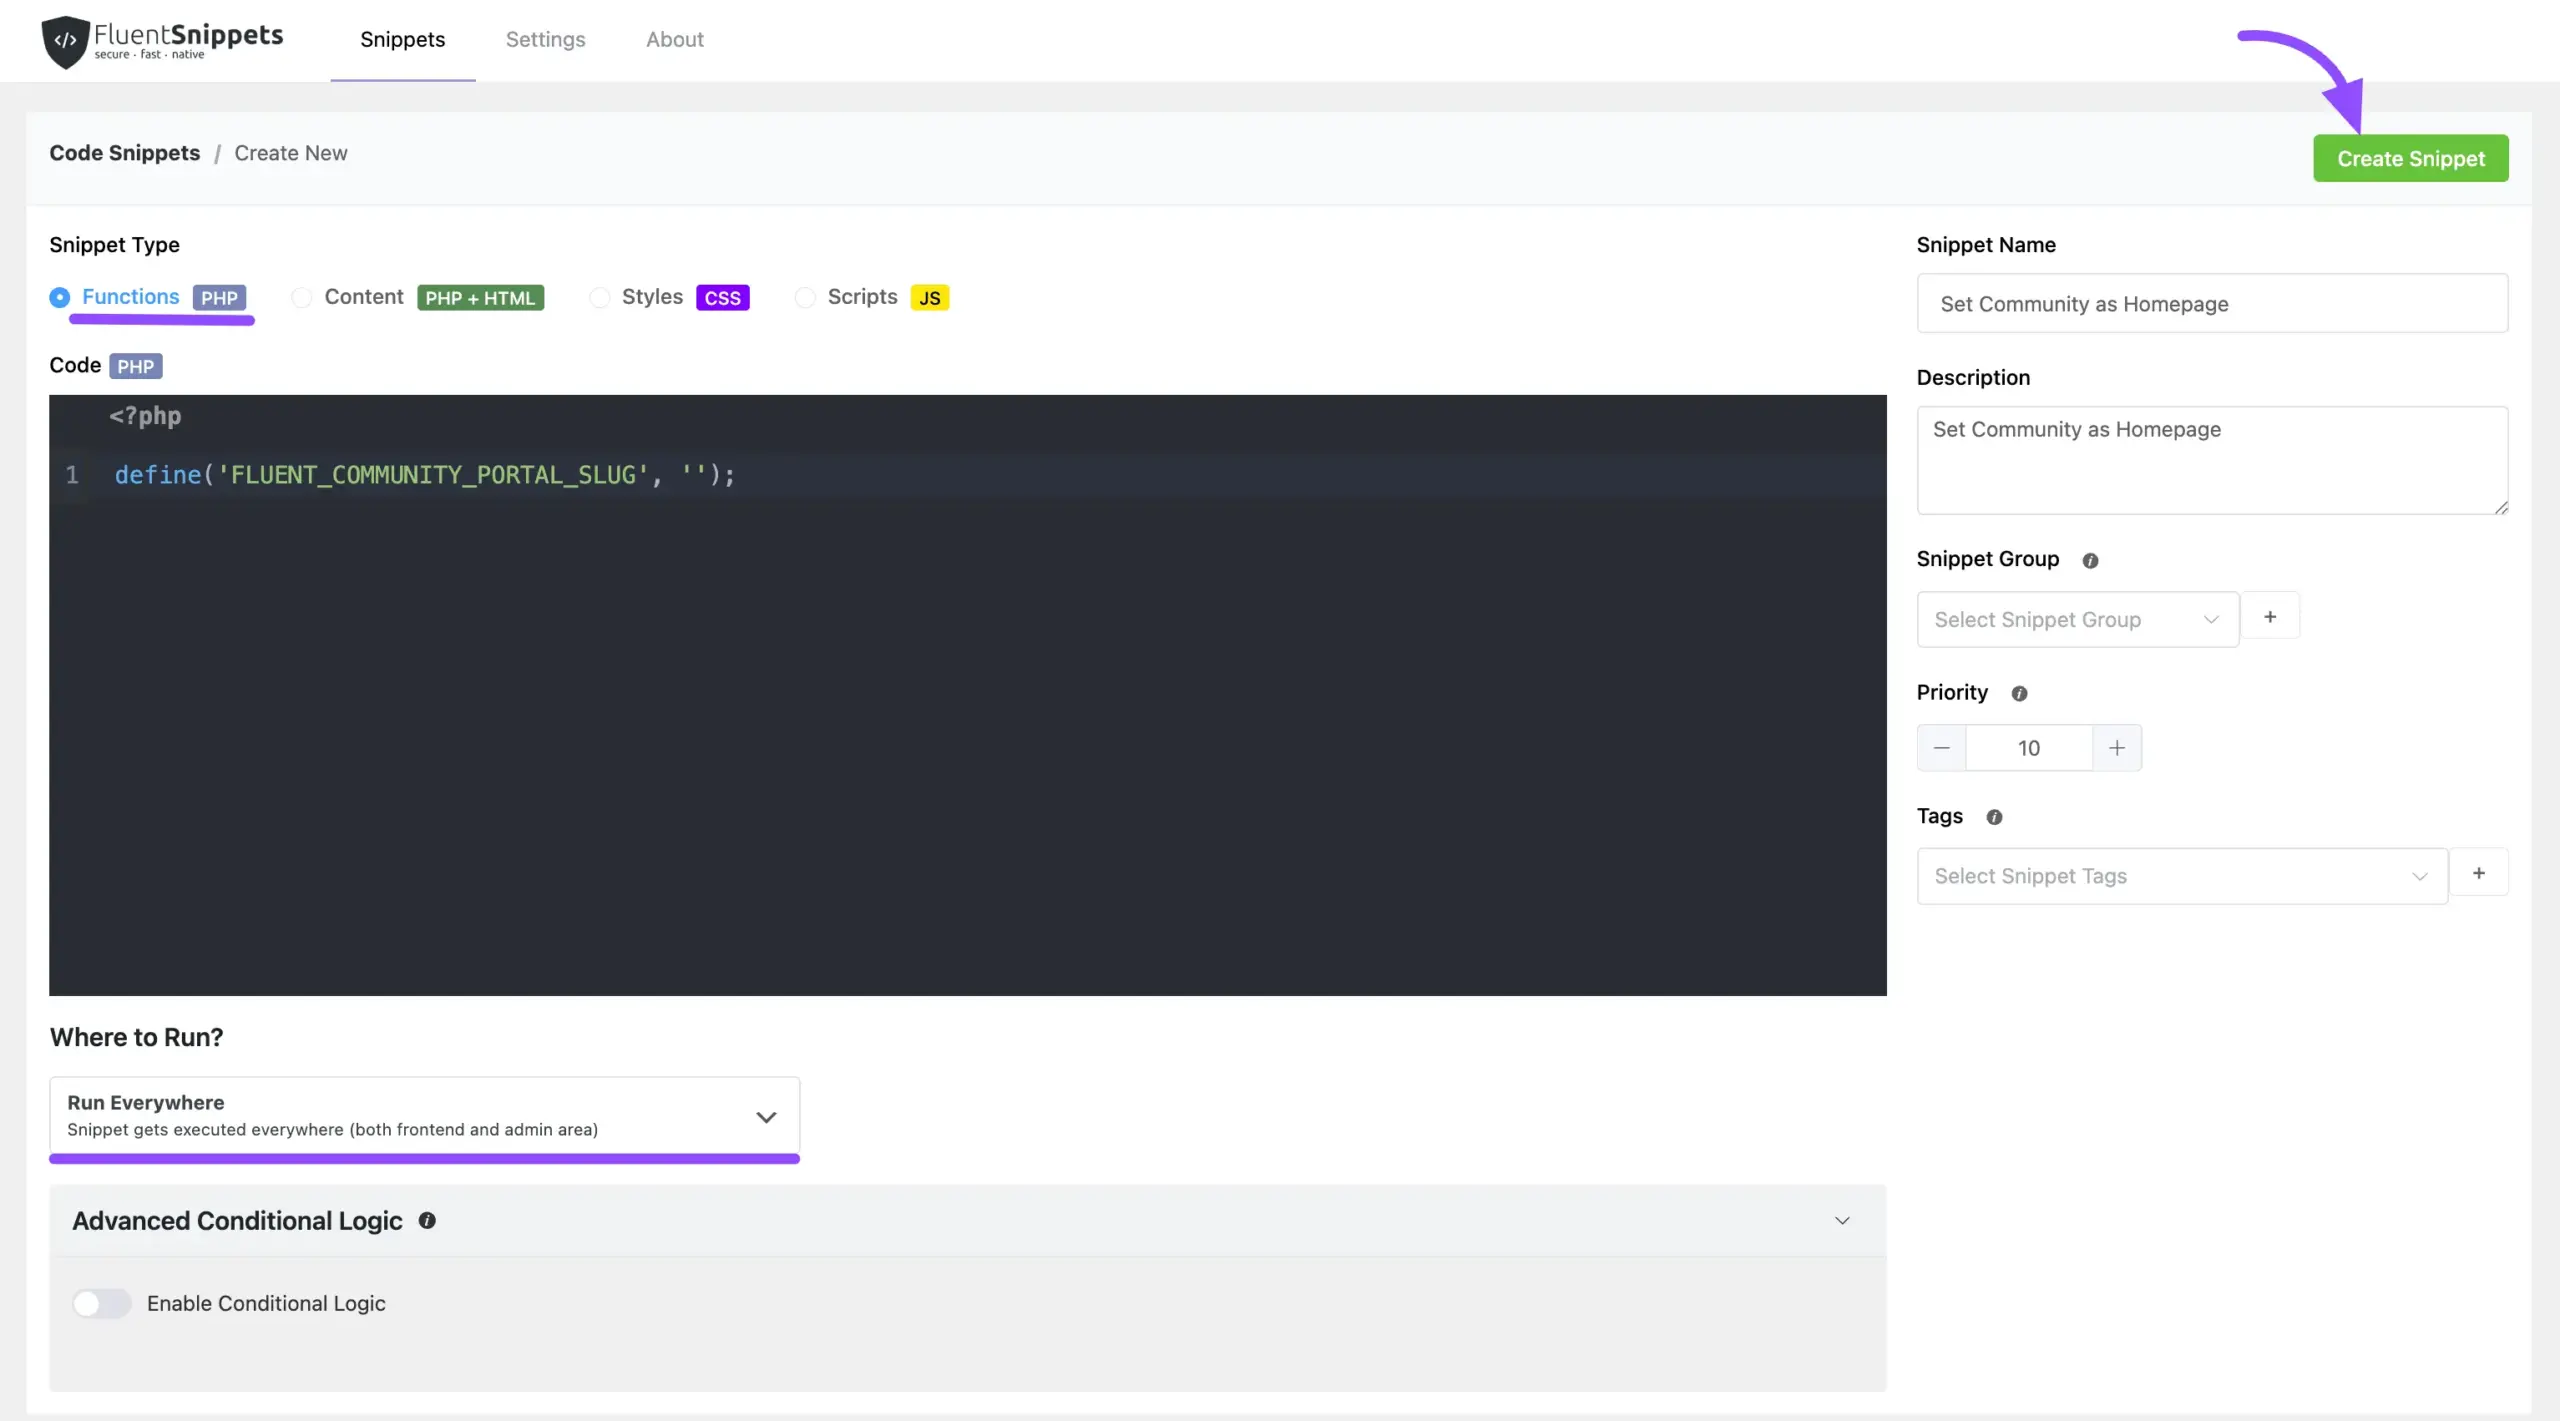
- Give it a clear title: Add a title for your snippet, like “Set Community as Homepage”.
- Confirm the Code Type: Make sure the “Snippet Type” is set to “PHP Snippet”.
Paste the code: In the large code box, carefully copy and paste the following single line of code:
define('FLUENT_COMMUNITY_PORTAL_SLUG', '');What this code does: This line is a simple instruction that tells FluentCommunity, “Don’t use any extra words like /portal in the URL; I want the community to be the main homepage.”
- Scroll down below the code box. Under the “Where to Run” section, ensure the method is set to “Run Everywhere”. This is the default and is what we need.
- Finally, click the “Create Snippet” then the “Activate” button.
Step 4: Refresh Your Permalinks
This last step is crucial. You’ve told WordPress to make a big change to your site’s structure, and now you need to tell WordPress to update its internal “map” of all your pages.
- Go back to your main WordPress Admin Dashboard.
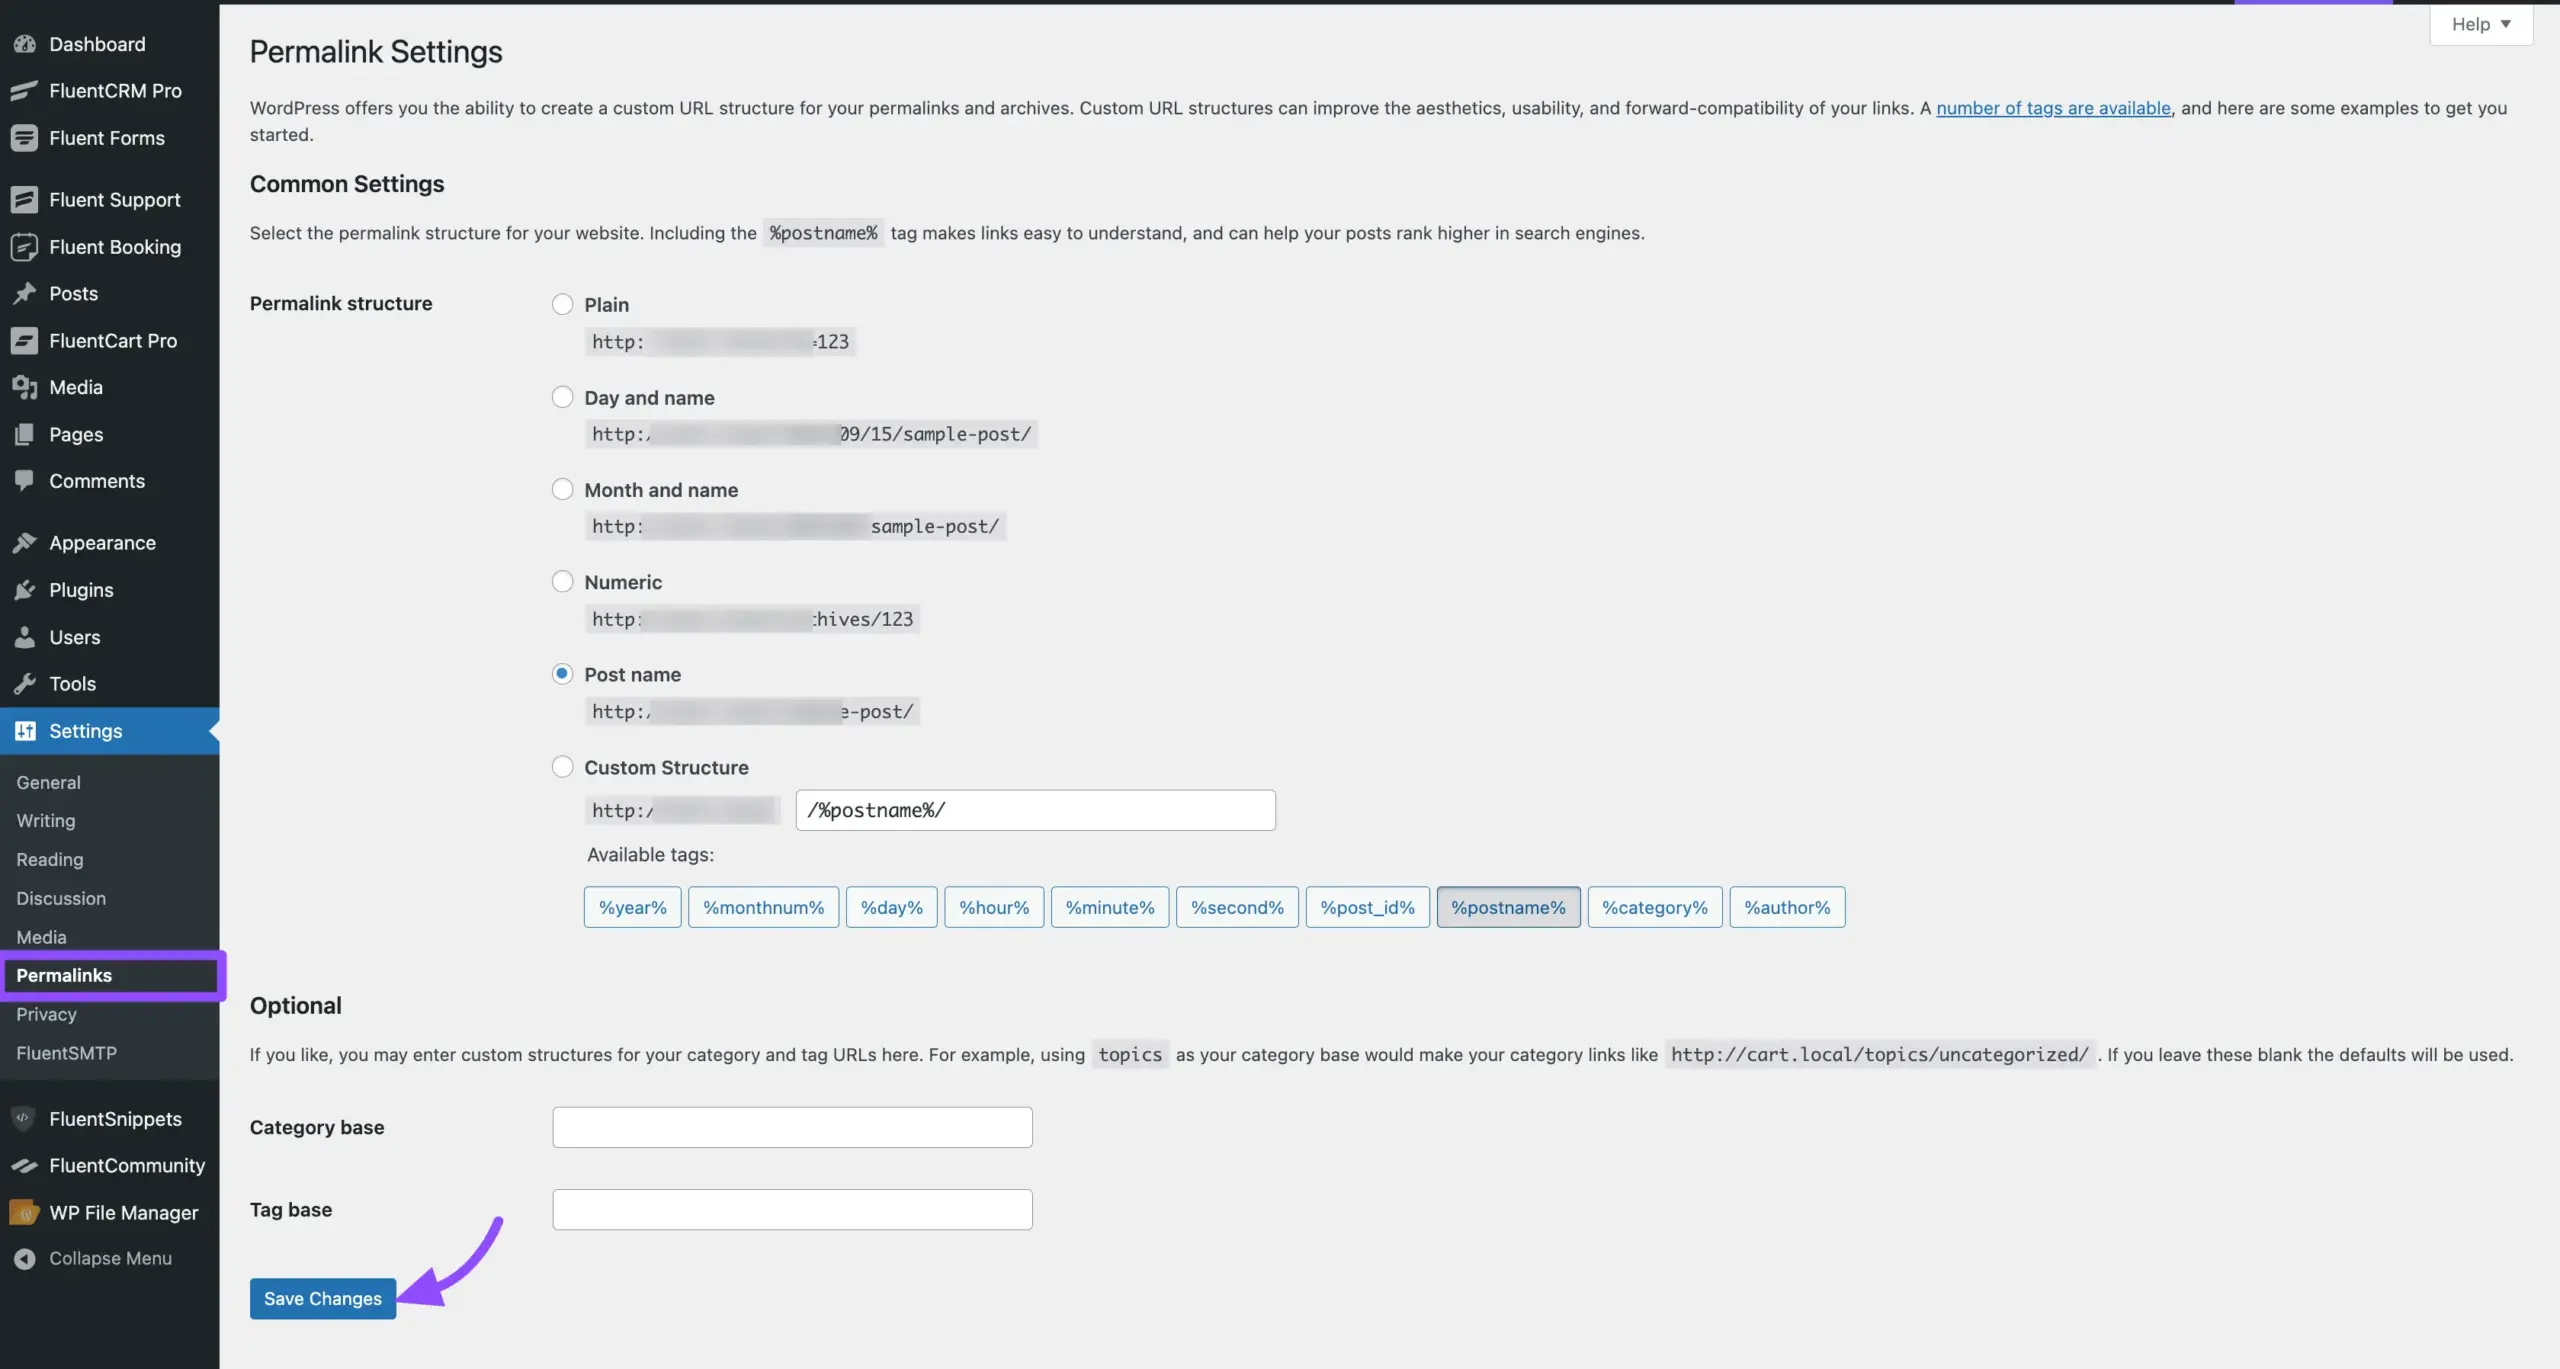
- Navigate to Settings → Permalinks.
- You don’t need to change any of the settings on this page. Just scroll to the bottom and click the Save Changes button.
Your website’s homepage is now your FluentCommunity portal. Open your website in a new browser tab to see it in action.
Method B: Changing wp-config.php file
This is for when you want your entire website’s main address (yoursite.com) to be the community itself.
Step-by-Step Guide to Editing wp-config.php #
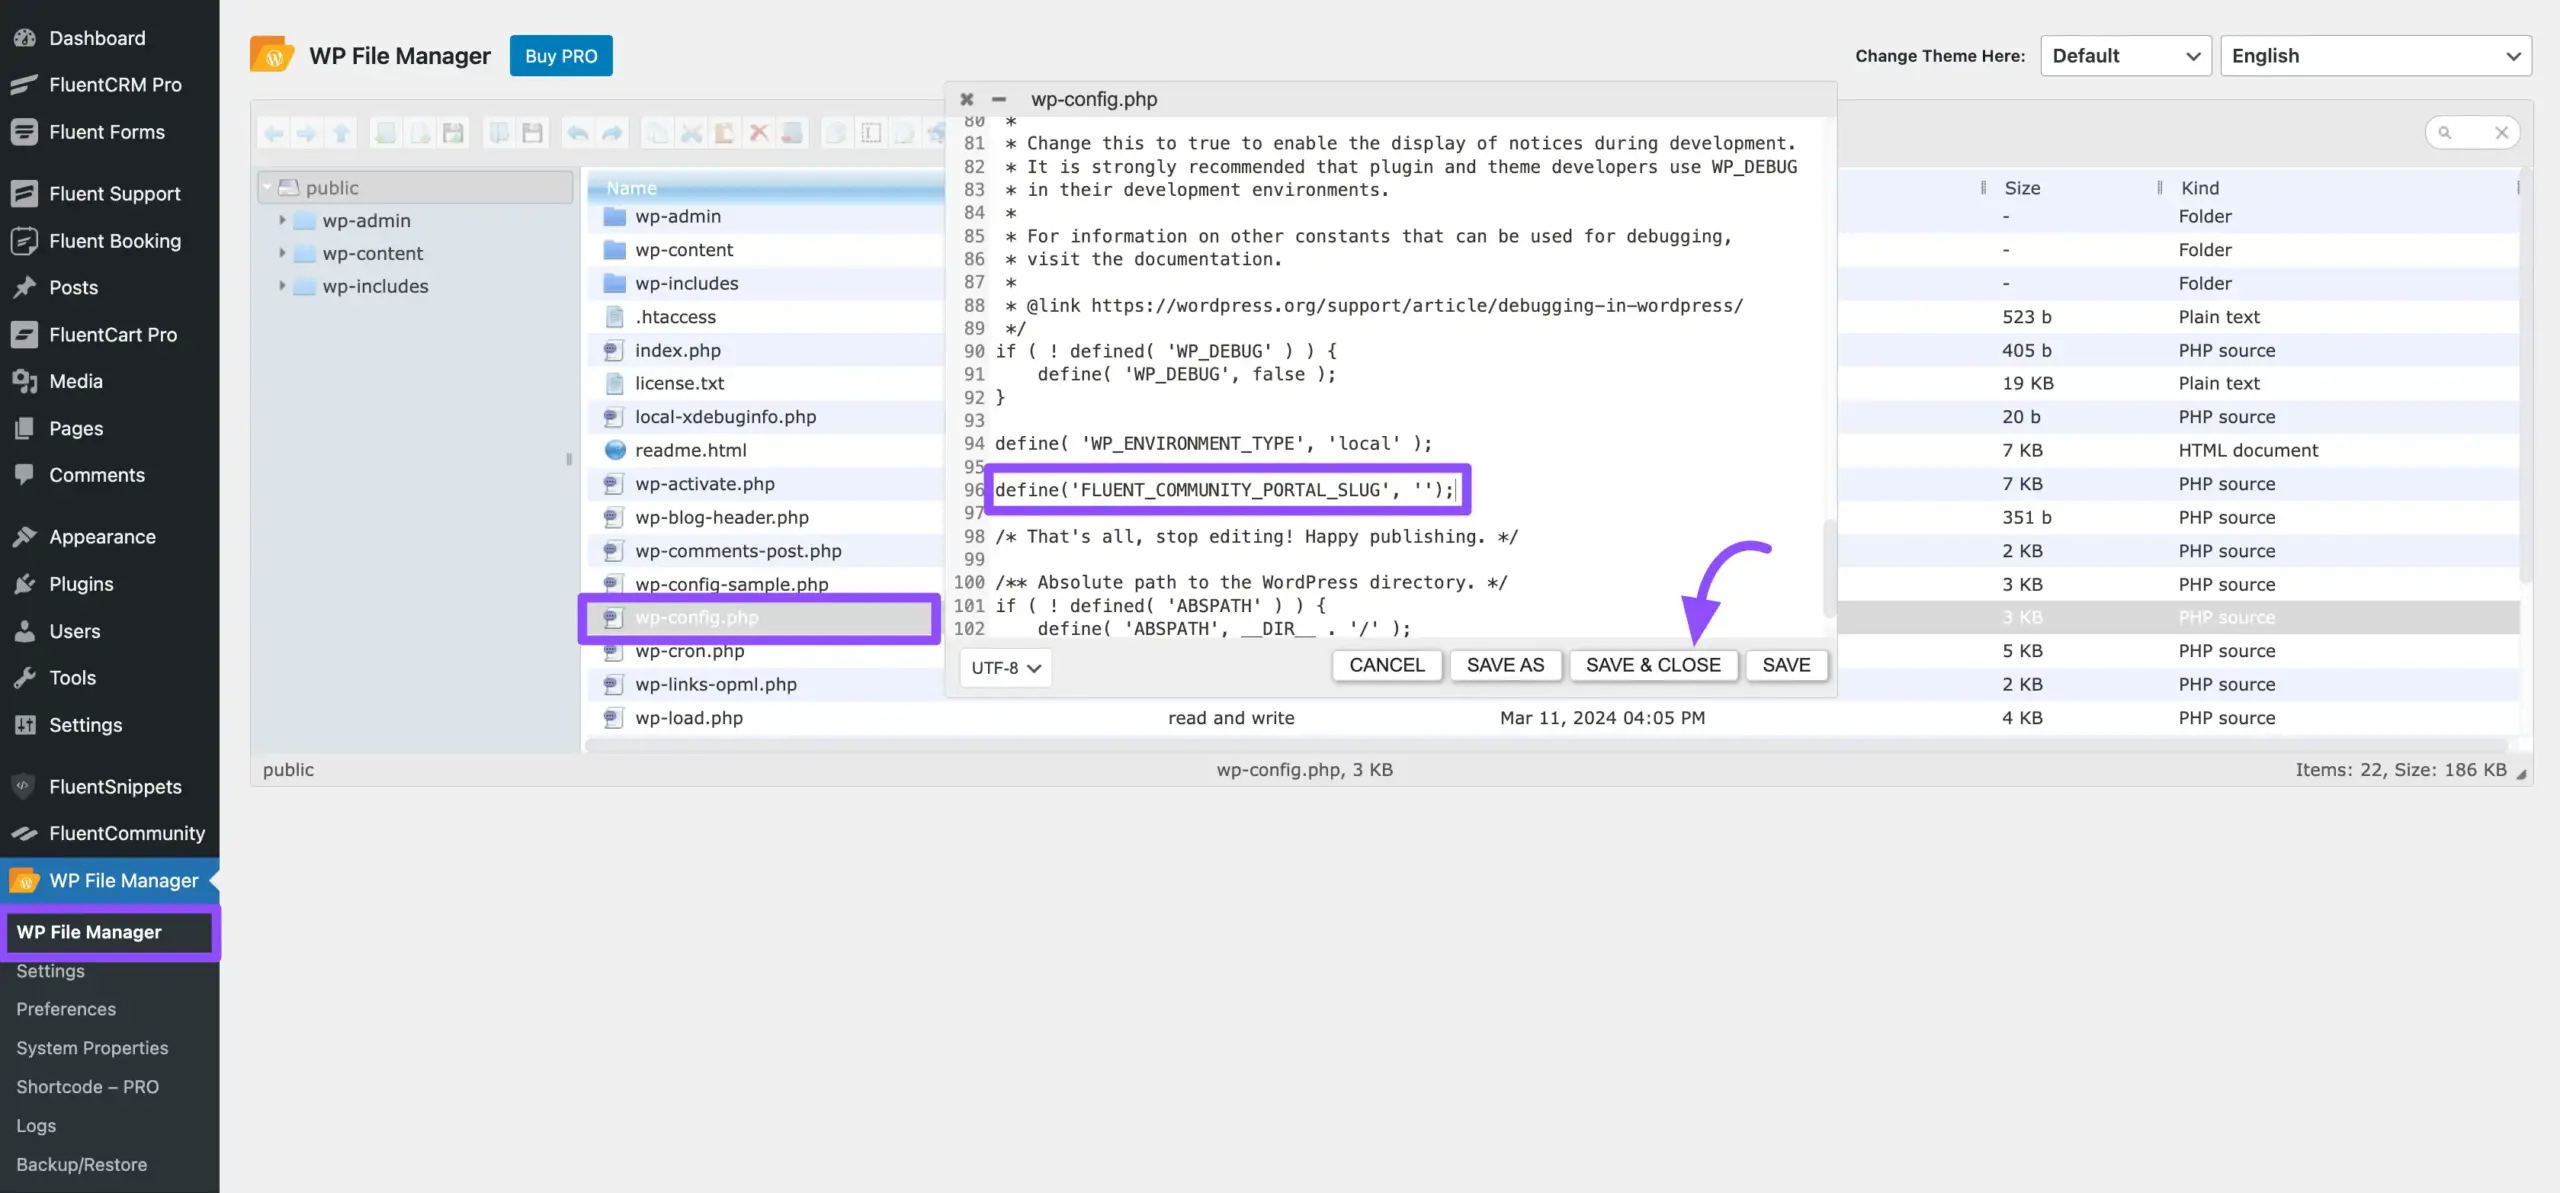
- Connect to Your Website’s Files: You will need to access your site’s file system. You can do this using the File Manager plugin in your website.
- Locate the wp-config.php file: This file is located in the main (root) folder of your WordPress installation.
- Open the File to Edit: Right-click on wp-config.php and choose “Edit.”
- Find the Correct Spot: Scroll down carefully until you see the following line of text: /* That’s all, stop editing! Happy publishing. */
Paste the Code: On a new line directly above paste the following code snippet:
PHP
define('FLUENT_COMMUNITY_PORTAL_SLUG', '');- By setting the slug to be empty (the ”), you are telling WordPress, “I want my community to be the main homepage, with no extra words in the URL.”
- Save and Close the File: Double-check your work, then click the “Save” button in your file editor.
- Refresh Your Permalinks (Crucial!): This final step makes your new homepage live.
- Go back to your WordPress Admin Dashboard.
- Navigate to Settings → Permalinks.
- Don’t change any settings here. Just scroll to the bottom and click the Save Changes button.
Congratulations! Go to your website’s main address in a new browser tab. Your community should now be your homepage!
Goal 2: Give Your Community a Nicer URL #
If making your community the entire homepage is more than you need, a great alternative is to simply give it a cleaner, more professional URL, like yoursite.com/members.
- From your WordPress dashboard, navigate to FluentCommunity.
- You will be taken to the Dashboard page with various settings. Look for the Change Community URL settings.
- Inside, you should see a field labeled Change Community URL.
- Simply give the slug words with no spaces (hyphens are okay). Examples: community, members, hub, my-group.
- And click the Change Portal URL button.
- Final Step: Go to Settings → Permalinks from your main WordPress menu and just click Save Changes. This refreshes your website’s internal map of links.

That’s it! Your community now has a beautiful, custom URL.
Quick Fixes for Common Issues #
- Problem: “Help! After editing wp-config.php, my site is just a blank white page!”
- Solution: Don’t panic! This almost always means there’s a tiny typo in the code. Re-open the wp-config.php file and check the code you added. Correcting the typo will bring your site back. If you can’t find it, restore your backup.
- Problem: “I get a ‘Page Not Found’ error after changing the URL.”
- Solution: You need to refresh your permalinks. Go to Settings → Permalinks in WordPress and click Save Changes. This fixes it 99% of the time.


