

FluentCommunity allows you to set whether your Spaces will be Public/Private/Secret for the members. This article covers the detailed process of setting the Privacy for Spaces.
Setup Privacy in Spaces #
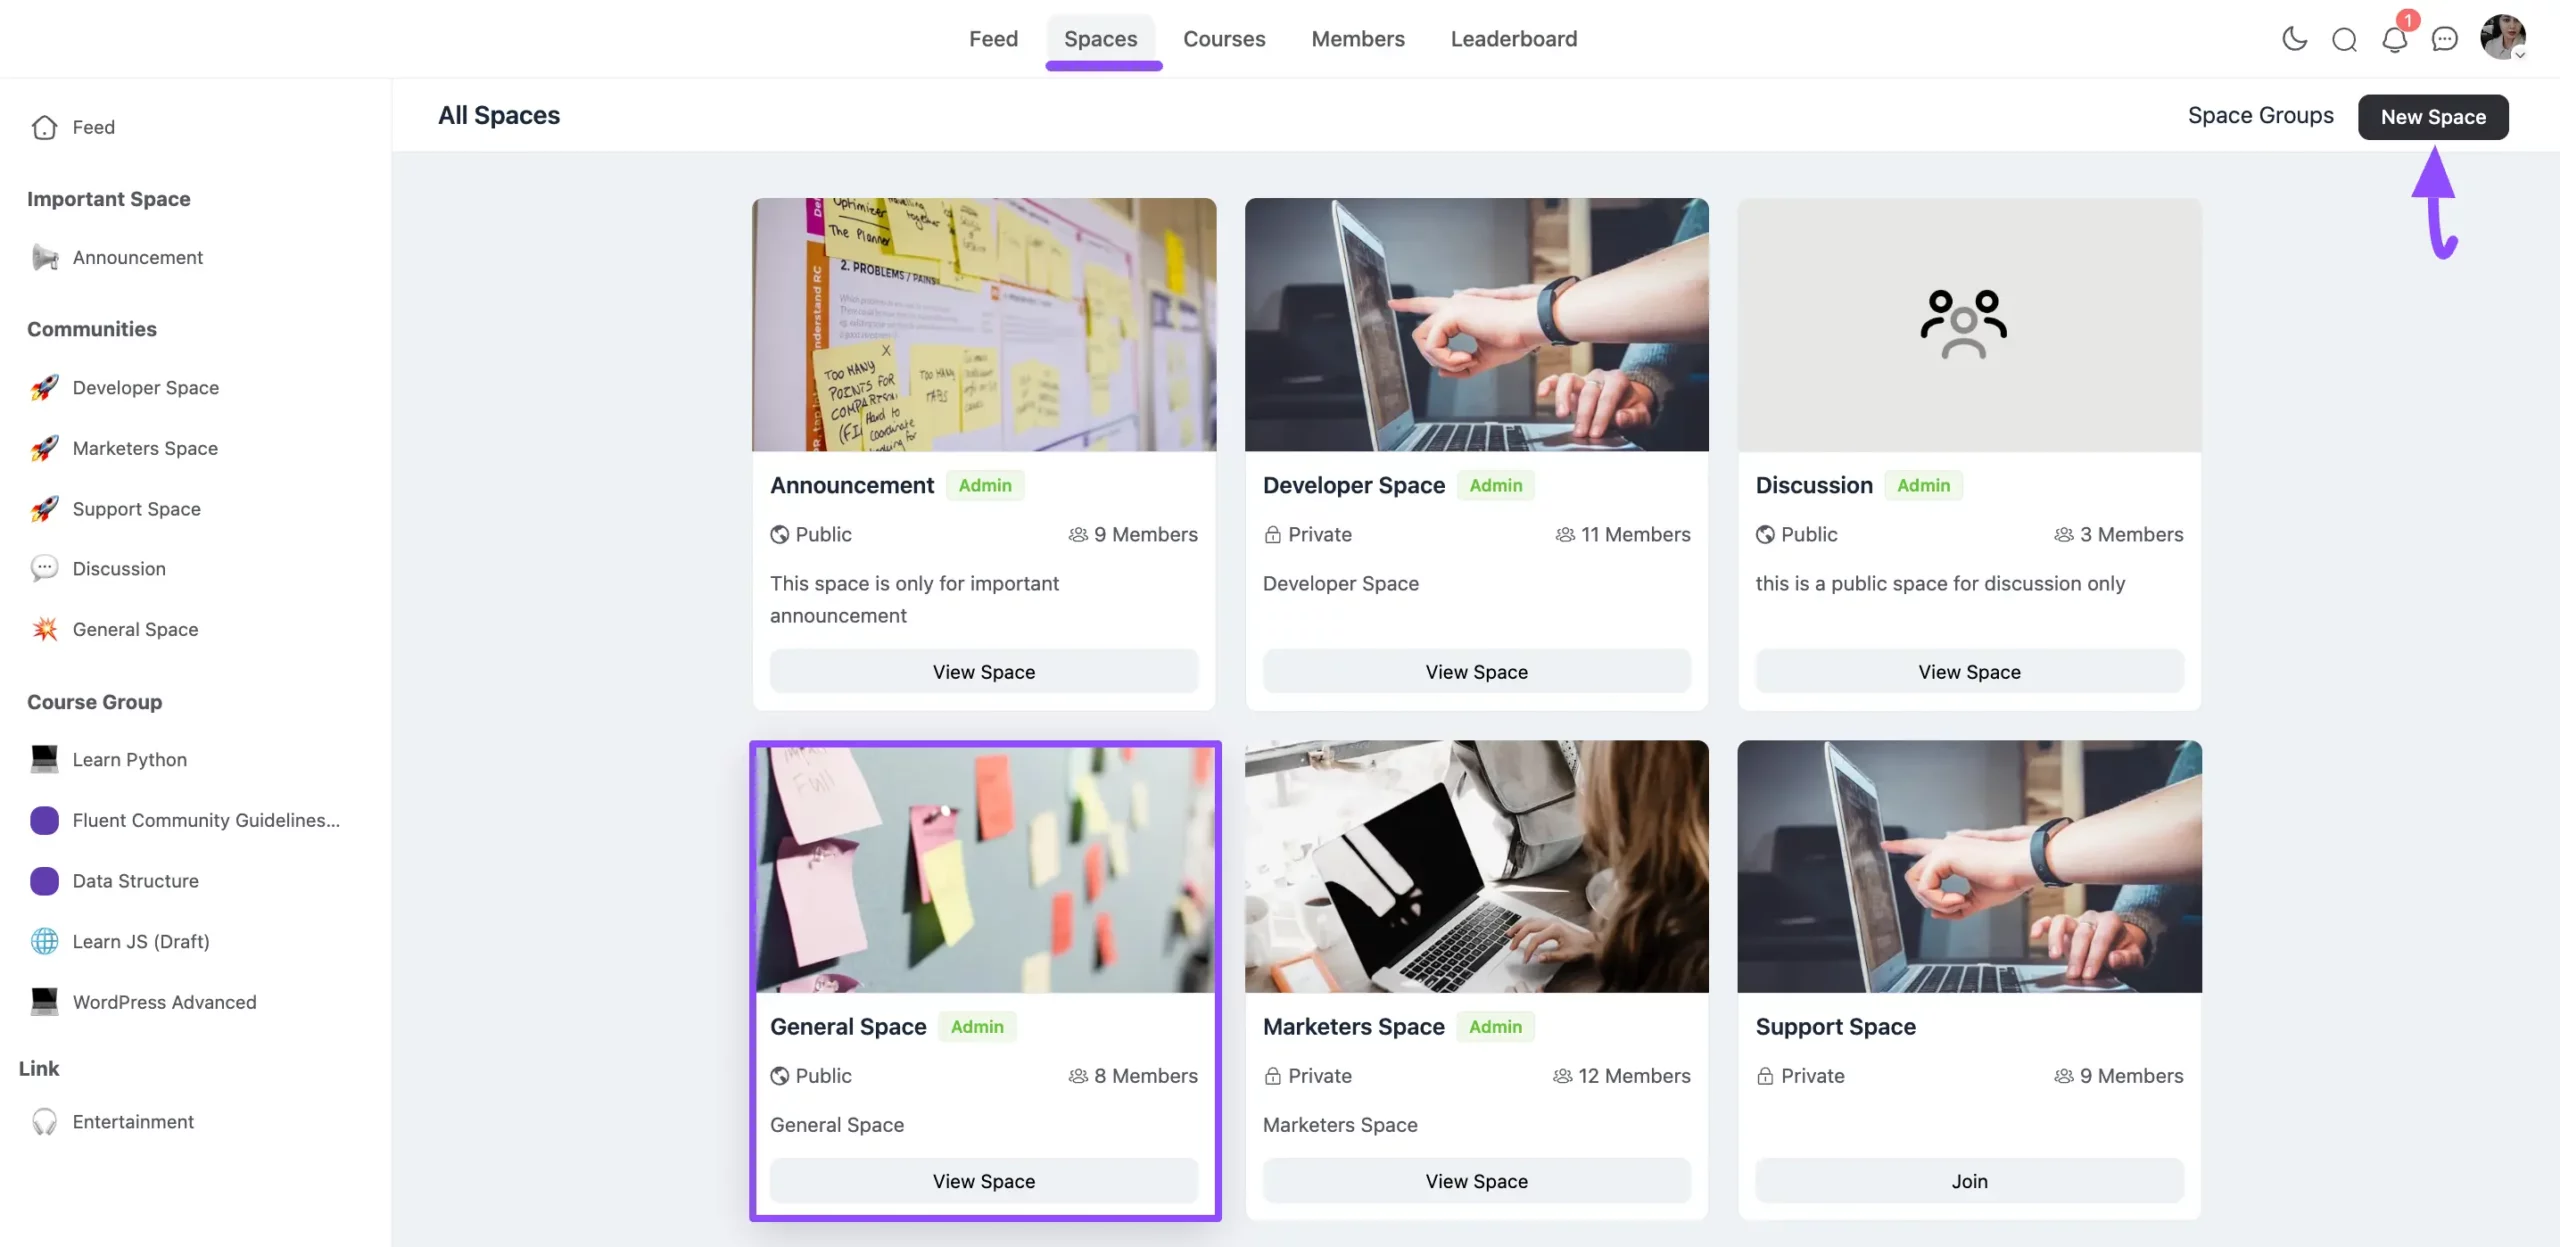
First, go to the Spaces section from the FluentCommunity navbar and open a Desired Space by clicking the tab where you want to set the privacy.
Or, you can create a new space by clicking the New Space button in the top right corner.
To learn the detailed process of creating a New Space, read this Documentation.
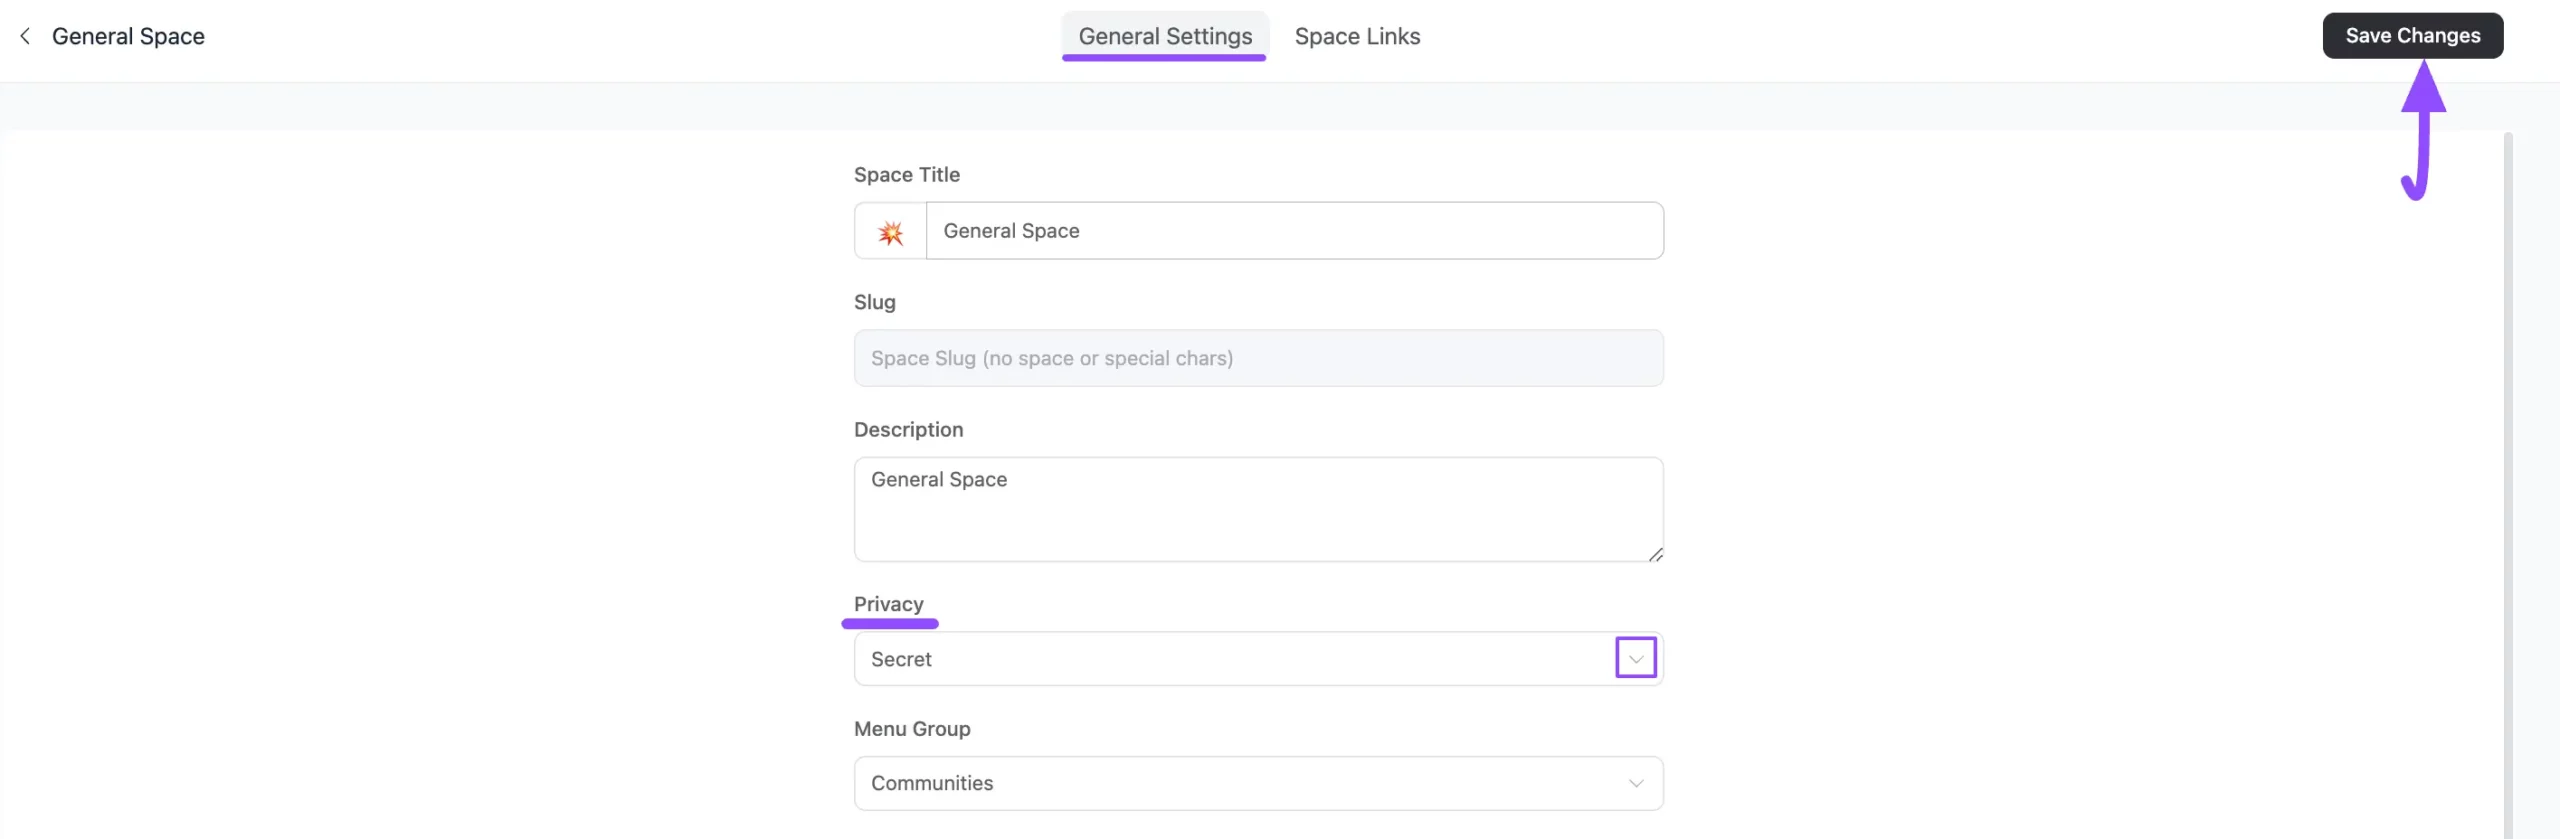
Go to the Space Settings option by clicking the three-dot button in the top right corner.
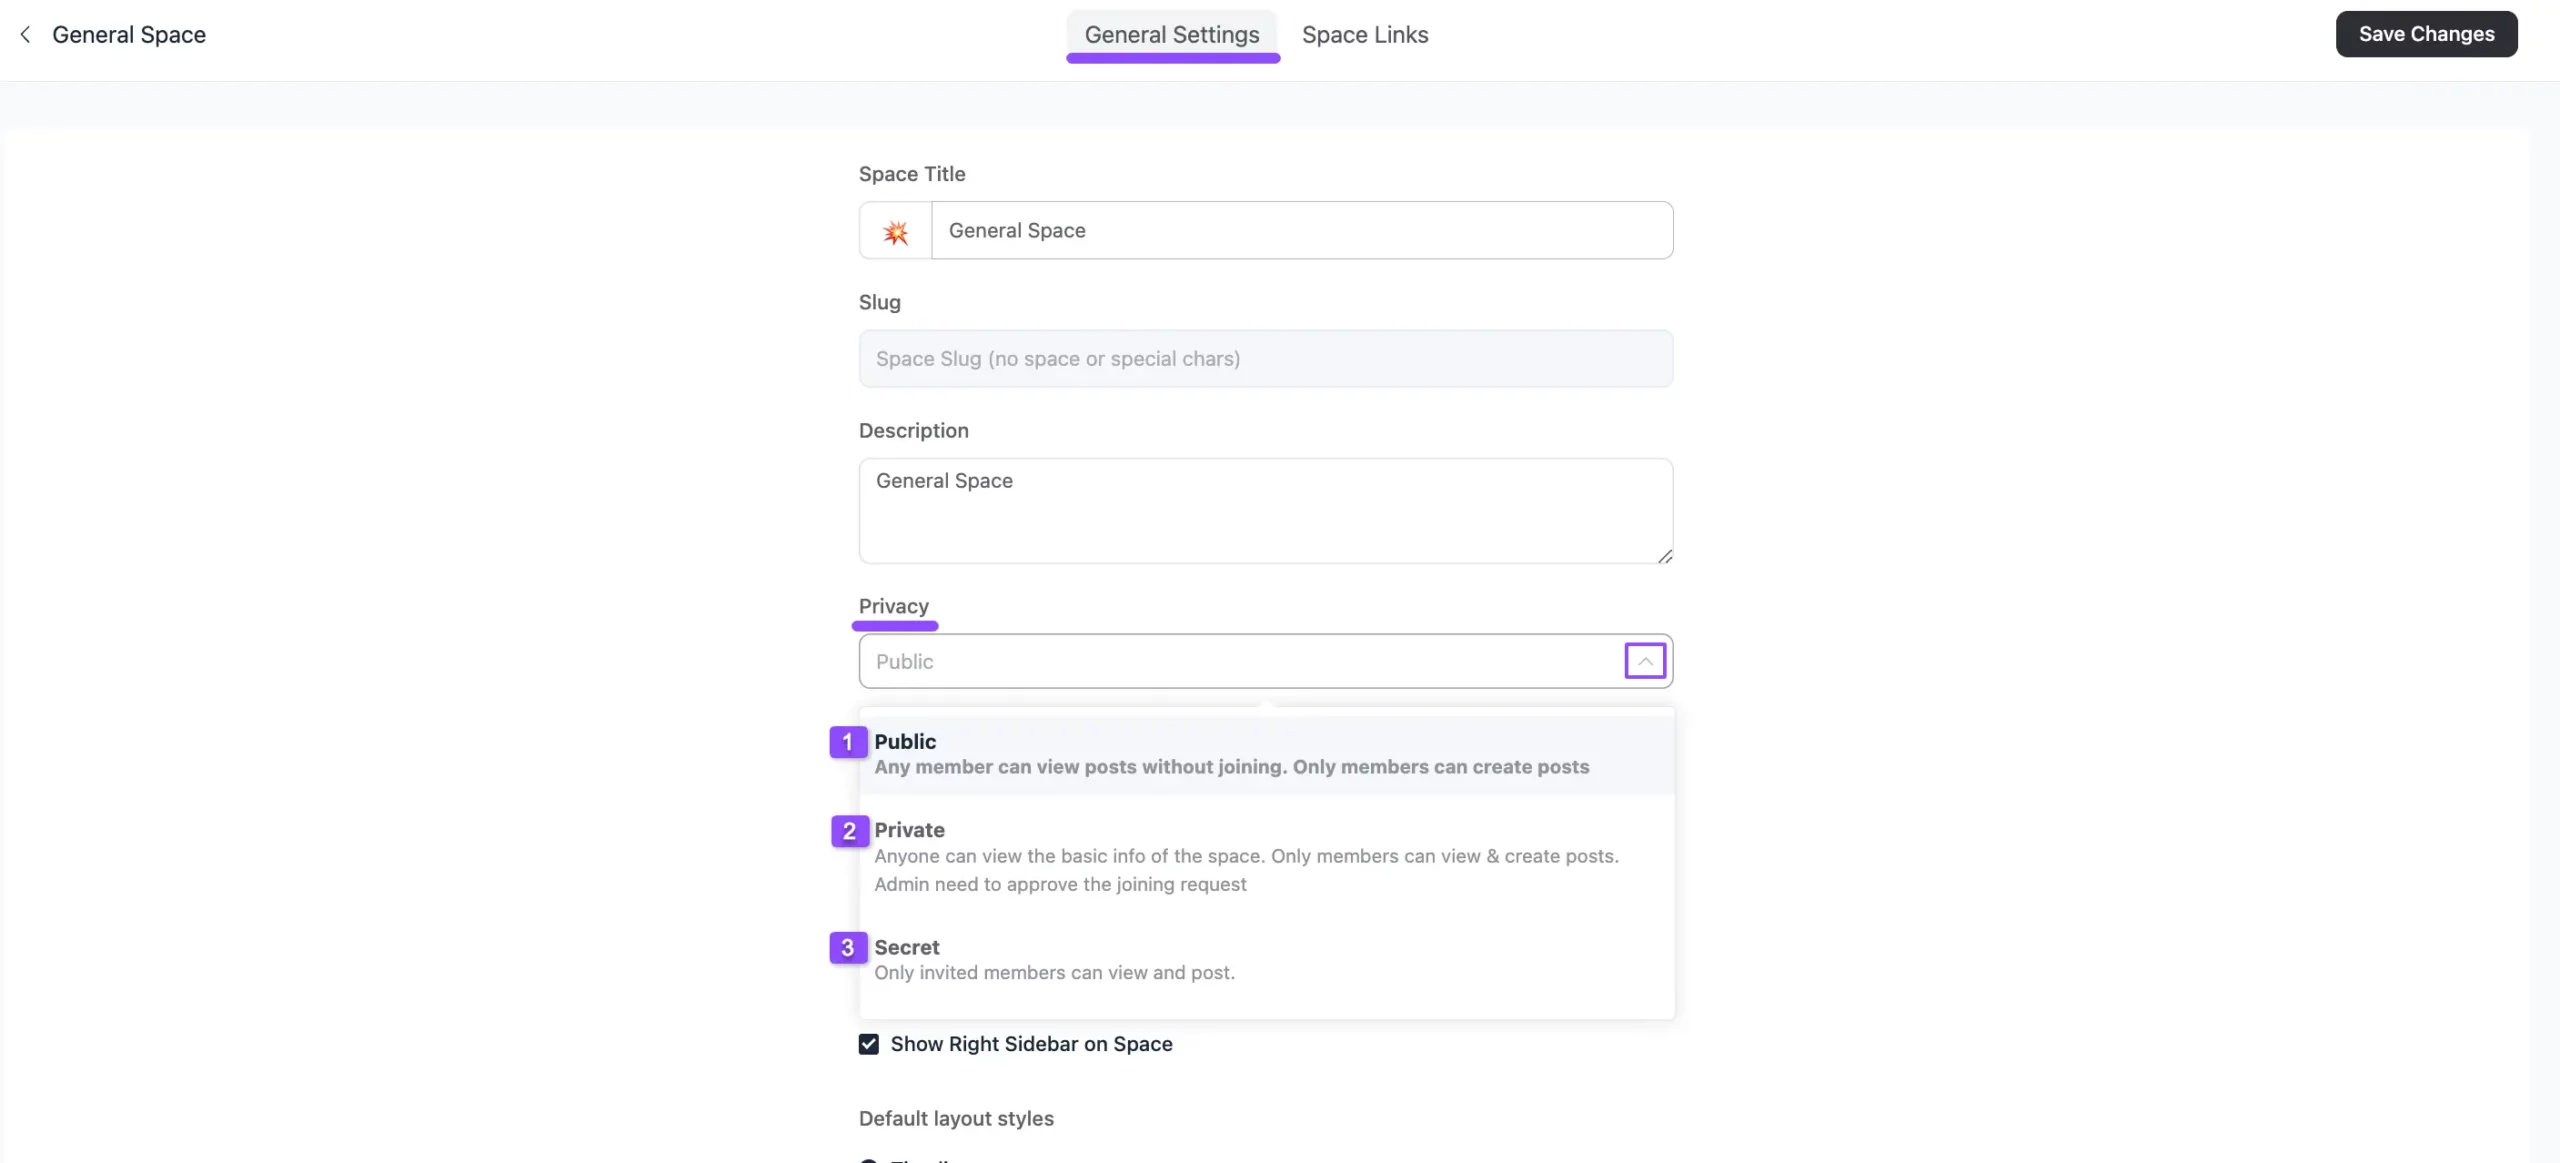
Now, click the Dropdown Arrow of the Privacy option under the General Settings.
From the dropdown list, you will get three options to set the Privacy. These are:
- Public
- Private
- Secret
A detailed explanation of the privacy options mentioned above is given below –
Public #
If you select this option, anyone can view the posts of space without joining, but only members can create posts.
Private #
Selecting this option allows anyone to view the basic info of the space, but only members approved and joined by Admin can create and see posts.
Lock Screen Type #
You can also select the type of how you want to display your lock screen to your users for Private Spaces.
For the lock screen, you will get three options. These are:
- Default Lock Screen: Select this option if you want to display the FluentCommunity’s Default Lock Screen for your Course.
- Redirect to a URL: This option is very useful for sales or marketing. Instead of showing a lock screen, you can automatically send any non-member who tries to visit this space to a different URL, like your main website, a landing page, or a sales page.
- Custom Lock Screen: You can also create a Customized Lock Screen by selecting this option. To get all the customization options, open the Lock Screen tab from the top menu.

Lock Screen Customization #
FluentCommunity allows you to fully customize the appearance of the Lock Screen for your Spaces. This ensures that even if a space is private or requires payment, the landing view is informative and branded.
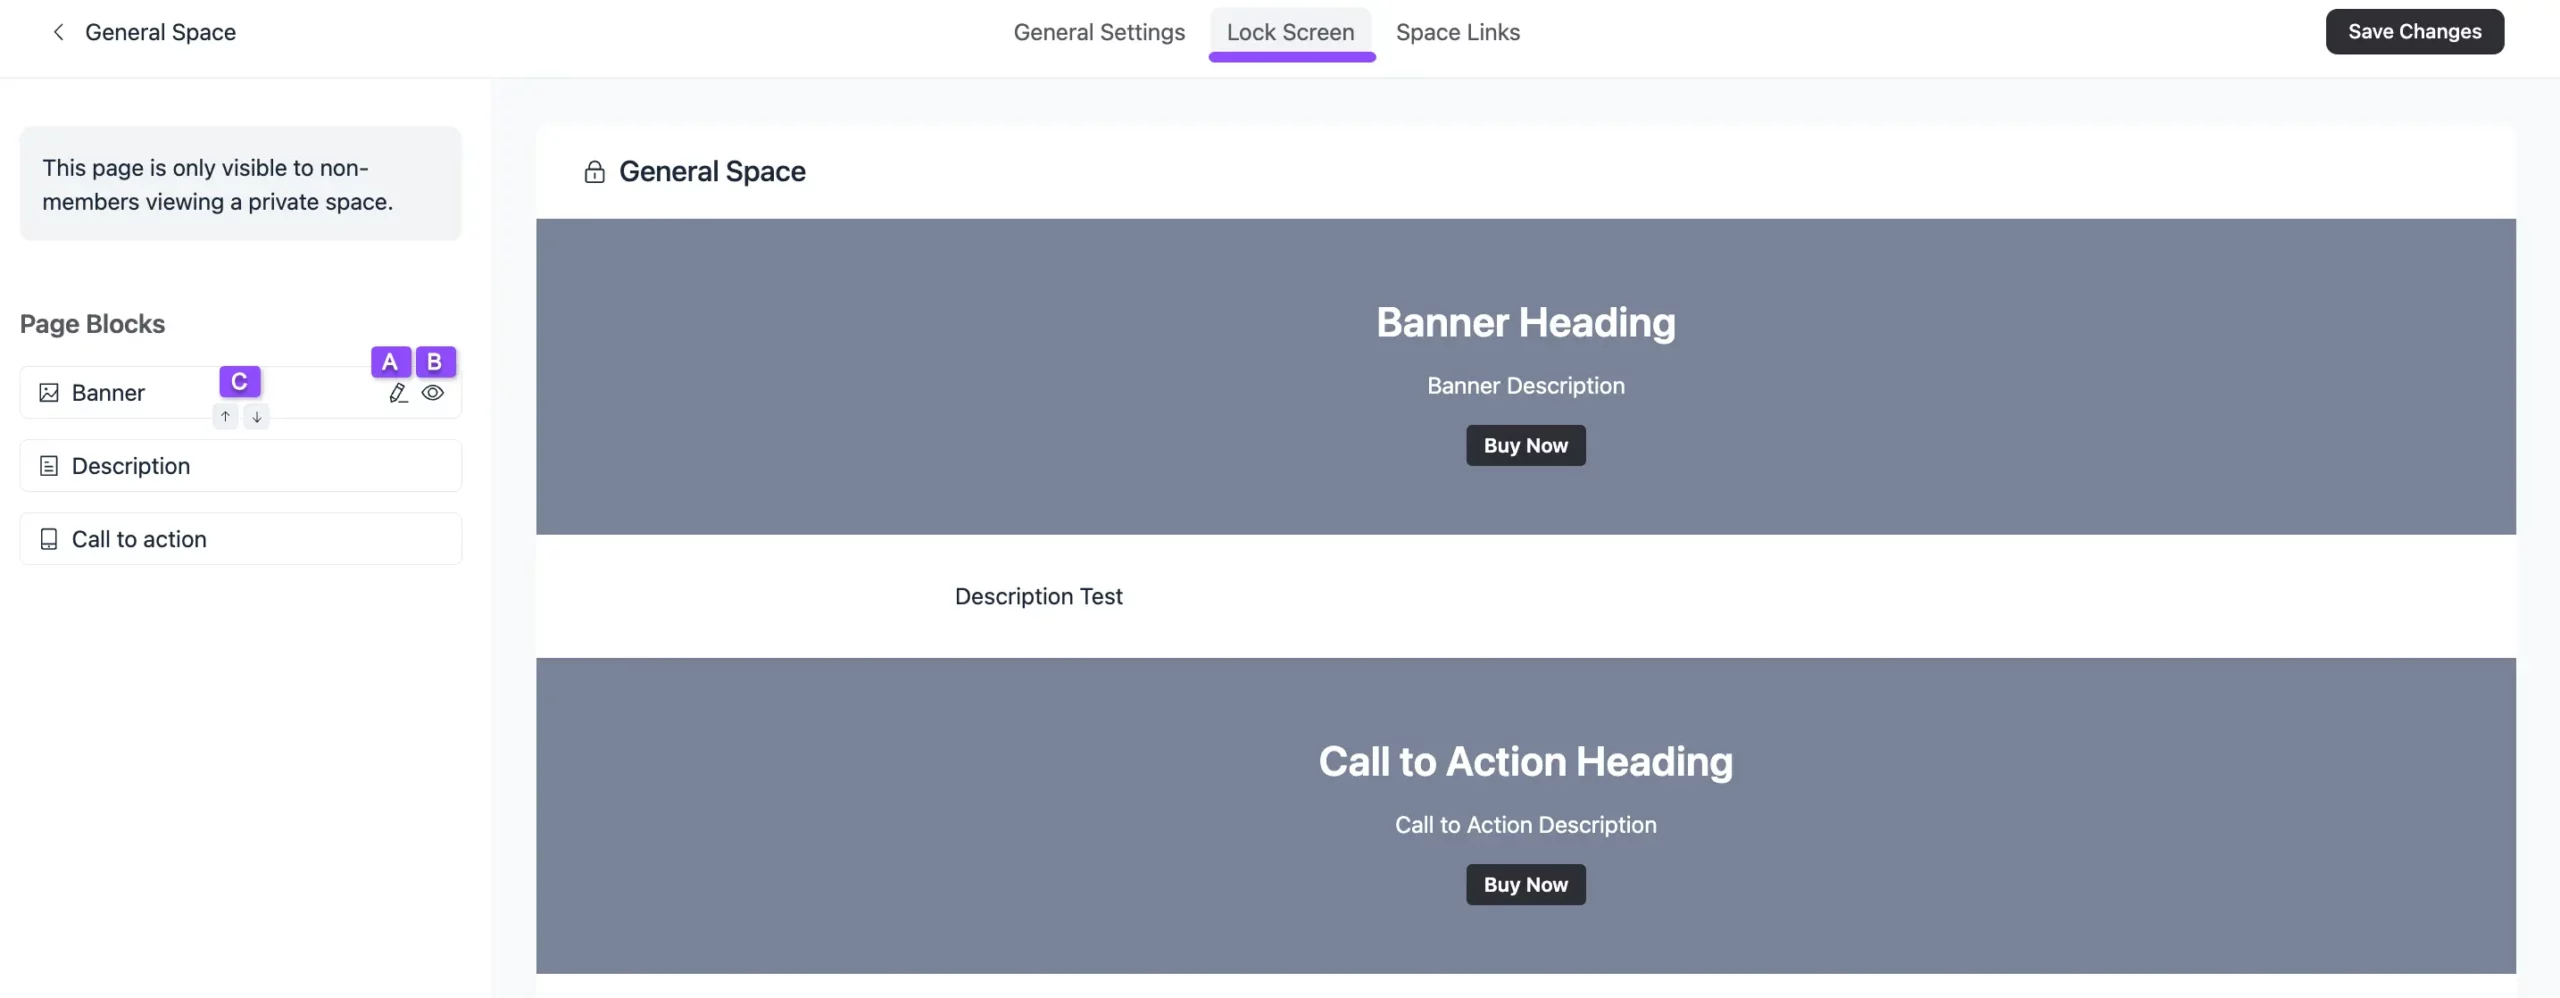
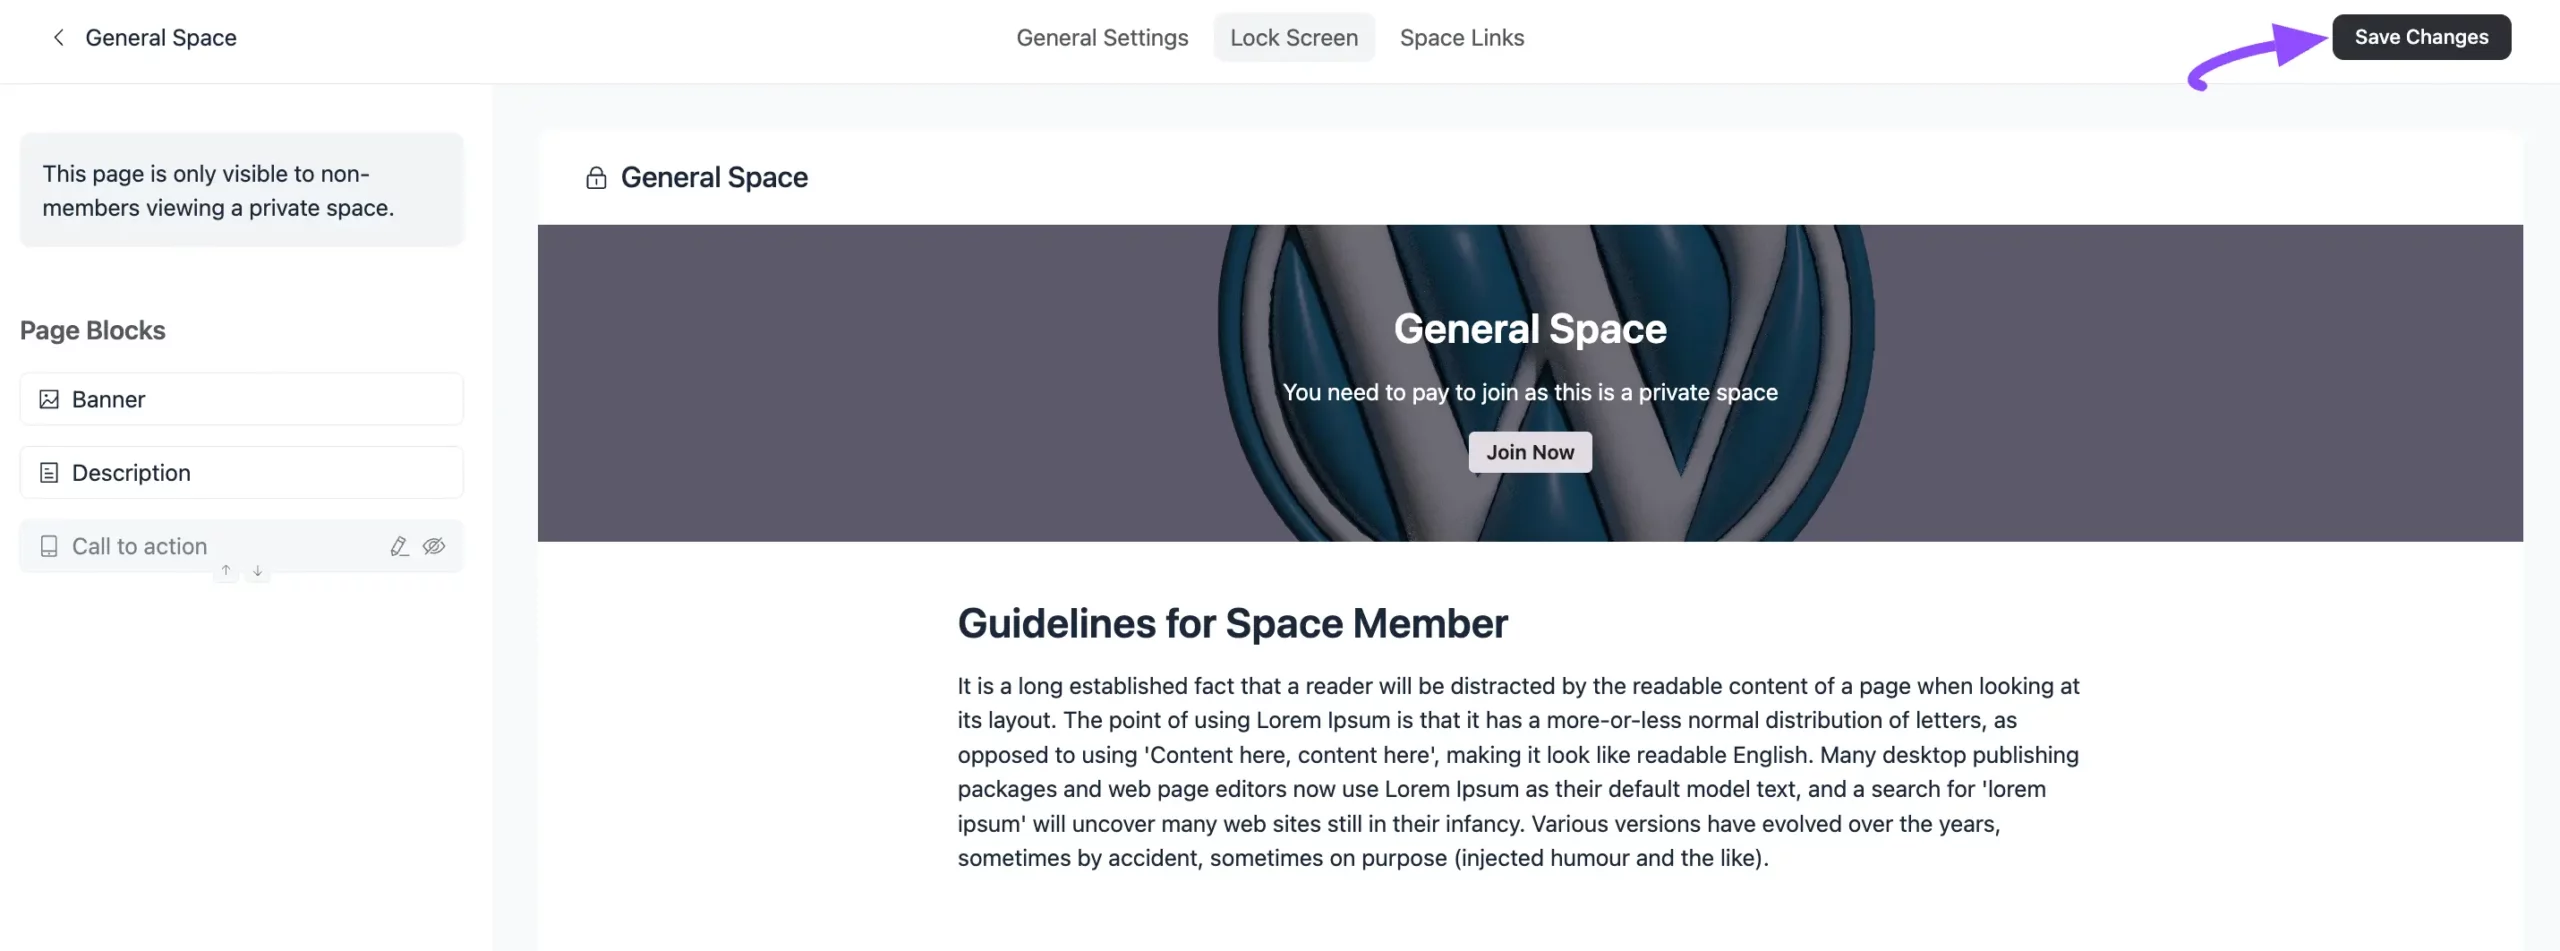
First, navigate to the desired Space and click on Space Settings. From the top navigation bar, select the Lock Screen tab.
Here, you can see all the customization options in the left sidebar under Page Blocks to customize the Banner, Description, and Call to action. These are:
- Edit: Click the Pencil Icon of the desired block you want to edit.
- Disable: Click this Eye Icon of the desired block you don’t want to show on your lock screen.
- Move: Click the Up-Down Arrows of the desired block you want to move up and down.
Banner #
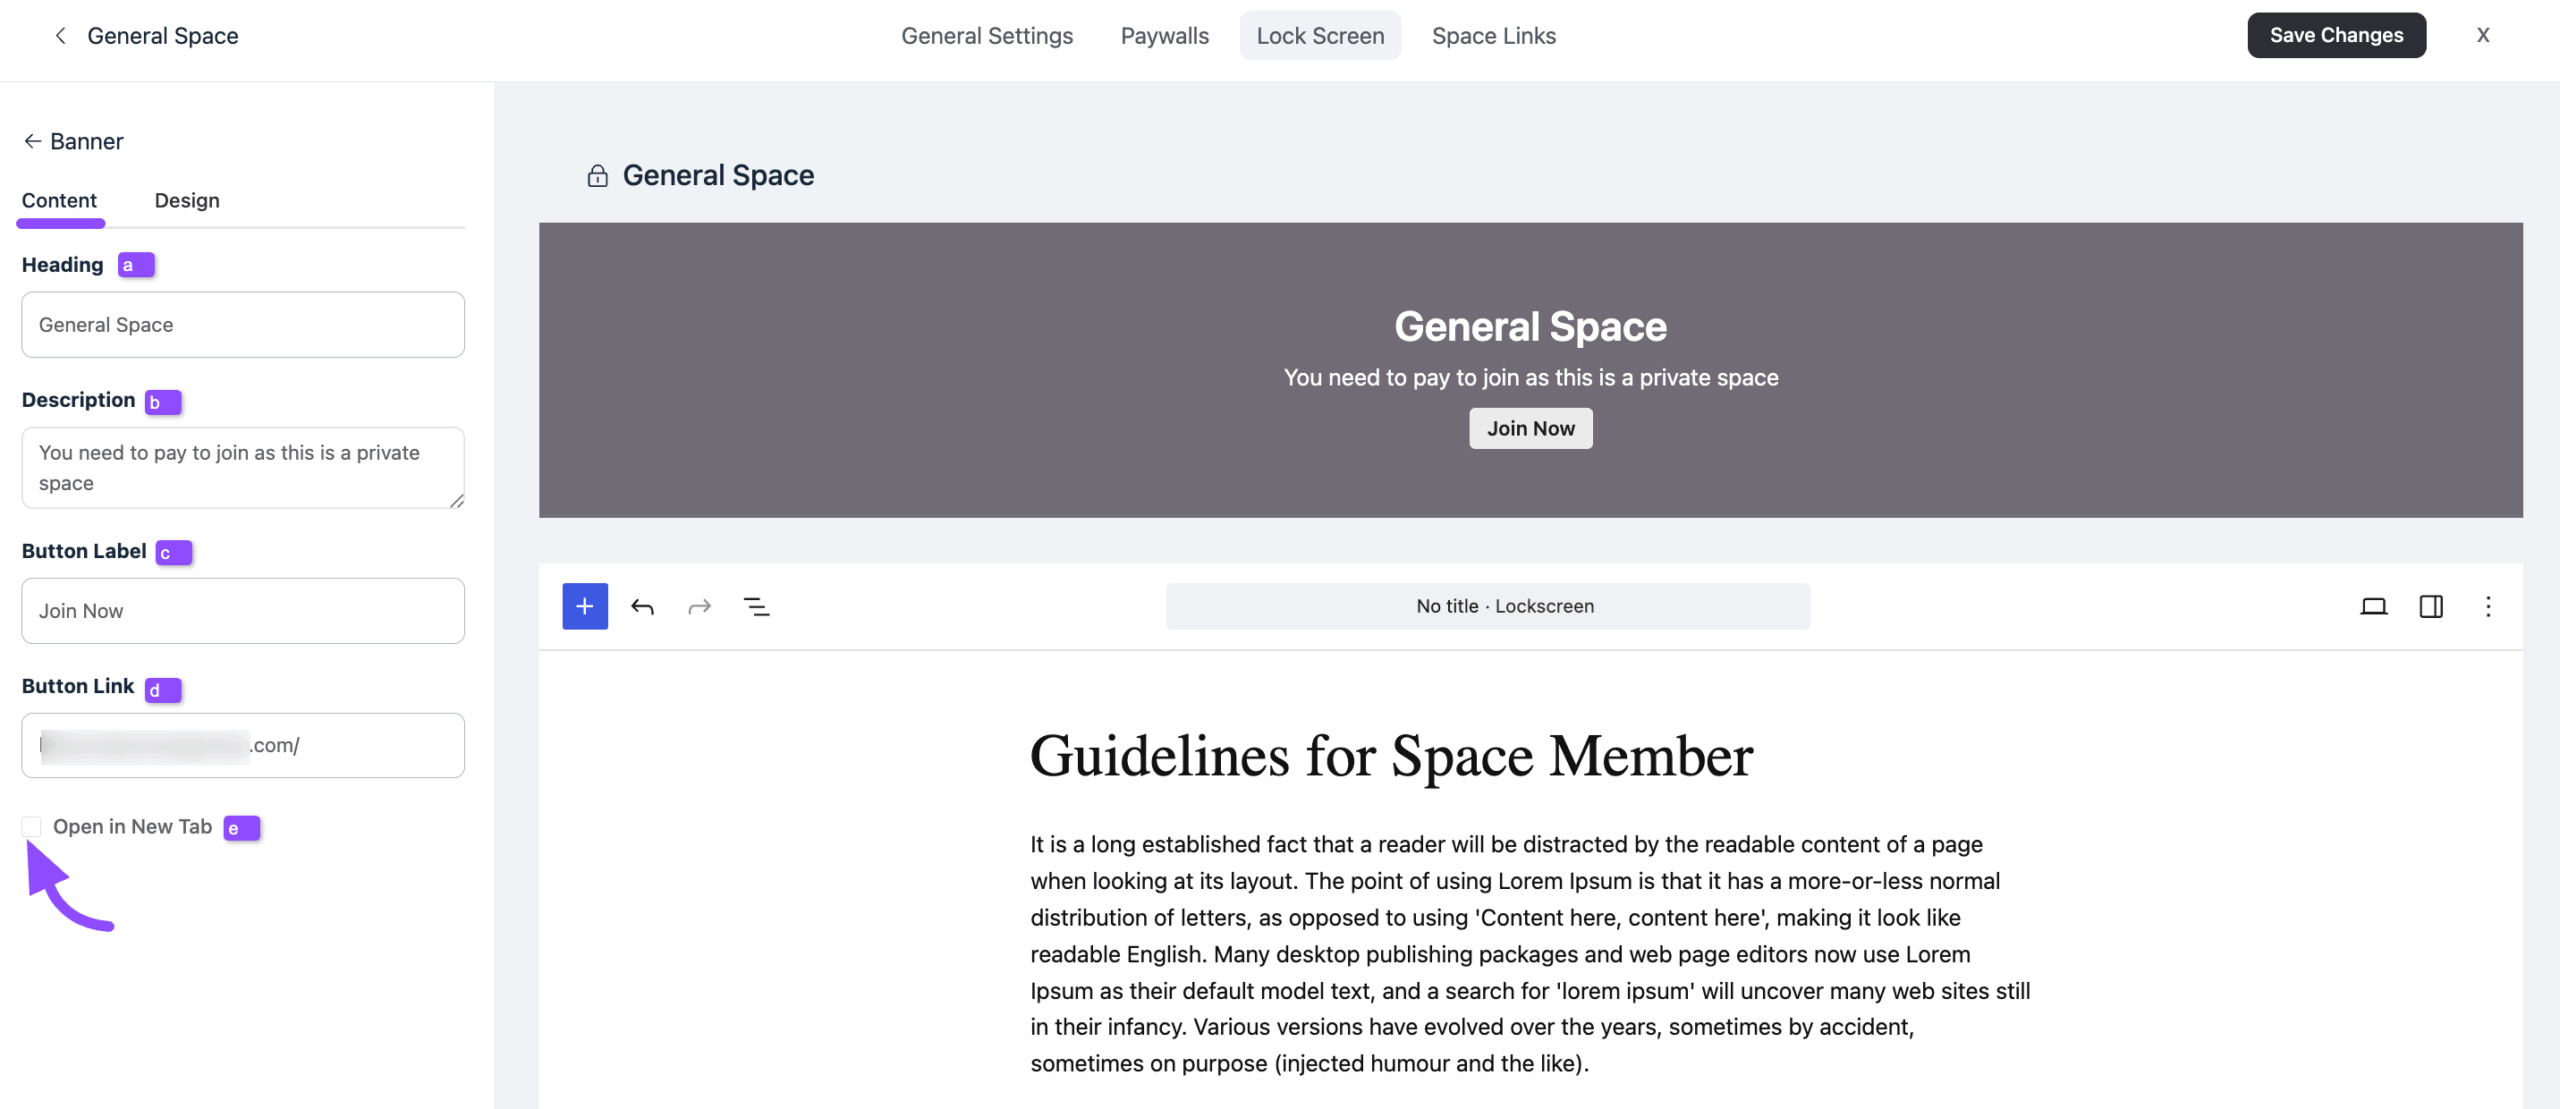
Clicking on the Banner edit option in the sidebar allows you to configure the main header area of the lock screen. This section includes two tabs: Content and Design.
Content #
Under the Content tab, you can configure the following fields:
a) Heading: Enter the main title for your lock screen (e.g., “General Space”).
b) Description: Add a short subtitle or message explaining why the space is locked or what users need to do to join (e.g., “You need to pay to join as this is a private space”).
c) Button Label: Customize the text that appears on the Call-to-Action button (e.g., “Join Now”).
d) Button Link: Insert the destination URL where the button will redirect the user.
e) Open in New Tab: Check this box if you want the button link to open in a new browser tab.
Design #
To customize the layout of the Lock Screen, open the Design tab. The customization options of Design are briefly explained below:
a) Background Image: With this option, you can add images in the background of your banner by clicking the Upload Image button.
b) Overlay Color: With this option, you can add an overlay color to the Background Image.
c) Heading Color: With this option, you can change the text color of the Heading.
d) Text Color: With this option, you can change the text color of the Description right below the Heading.
e) Button Label: With this option, you can change the text color of the Button.
f) Button Background: With this option, you can change the background color of the Button.

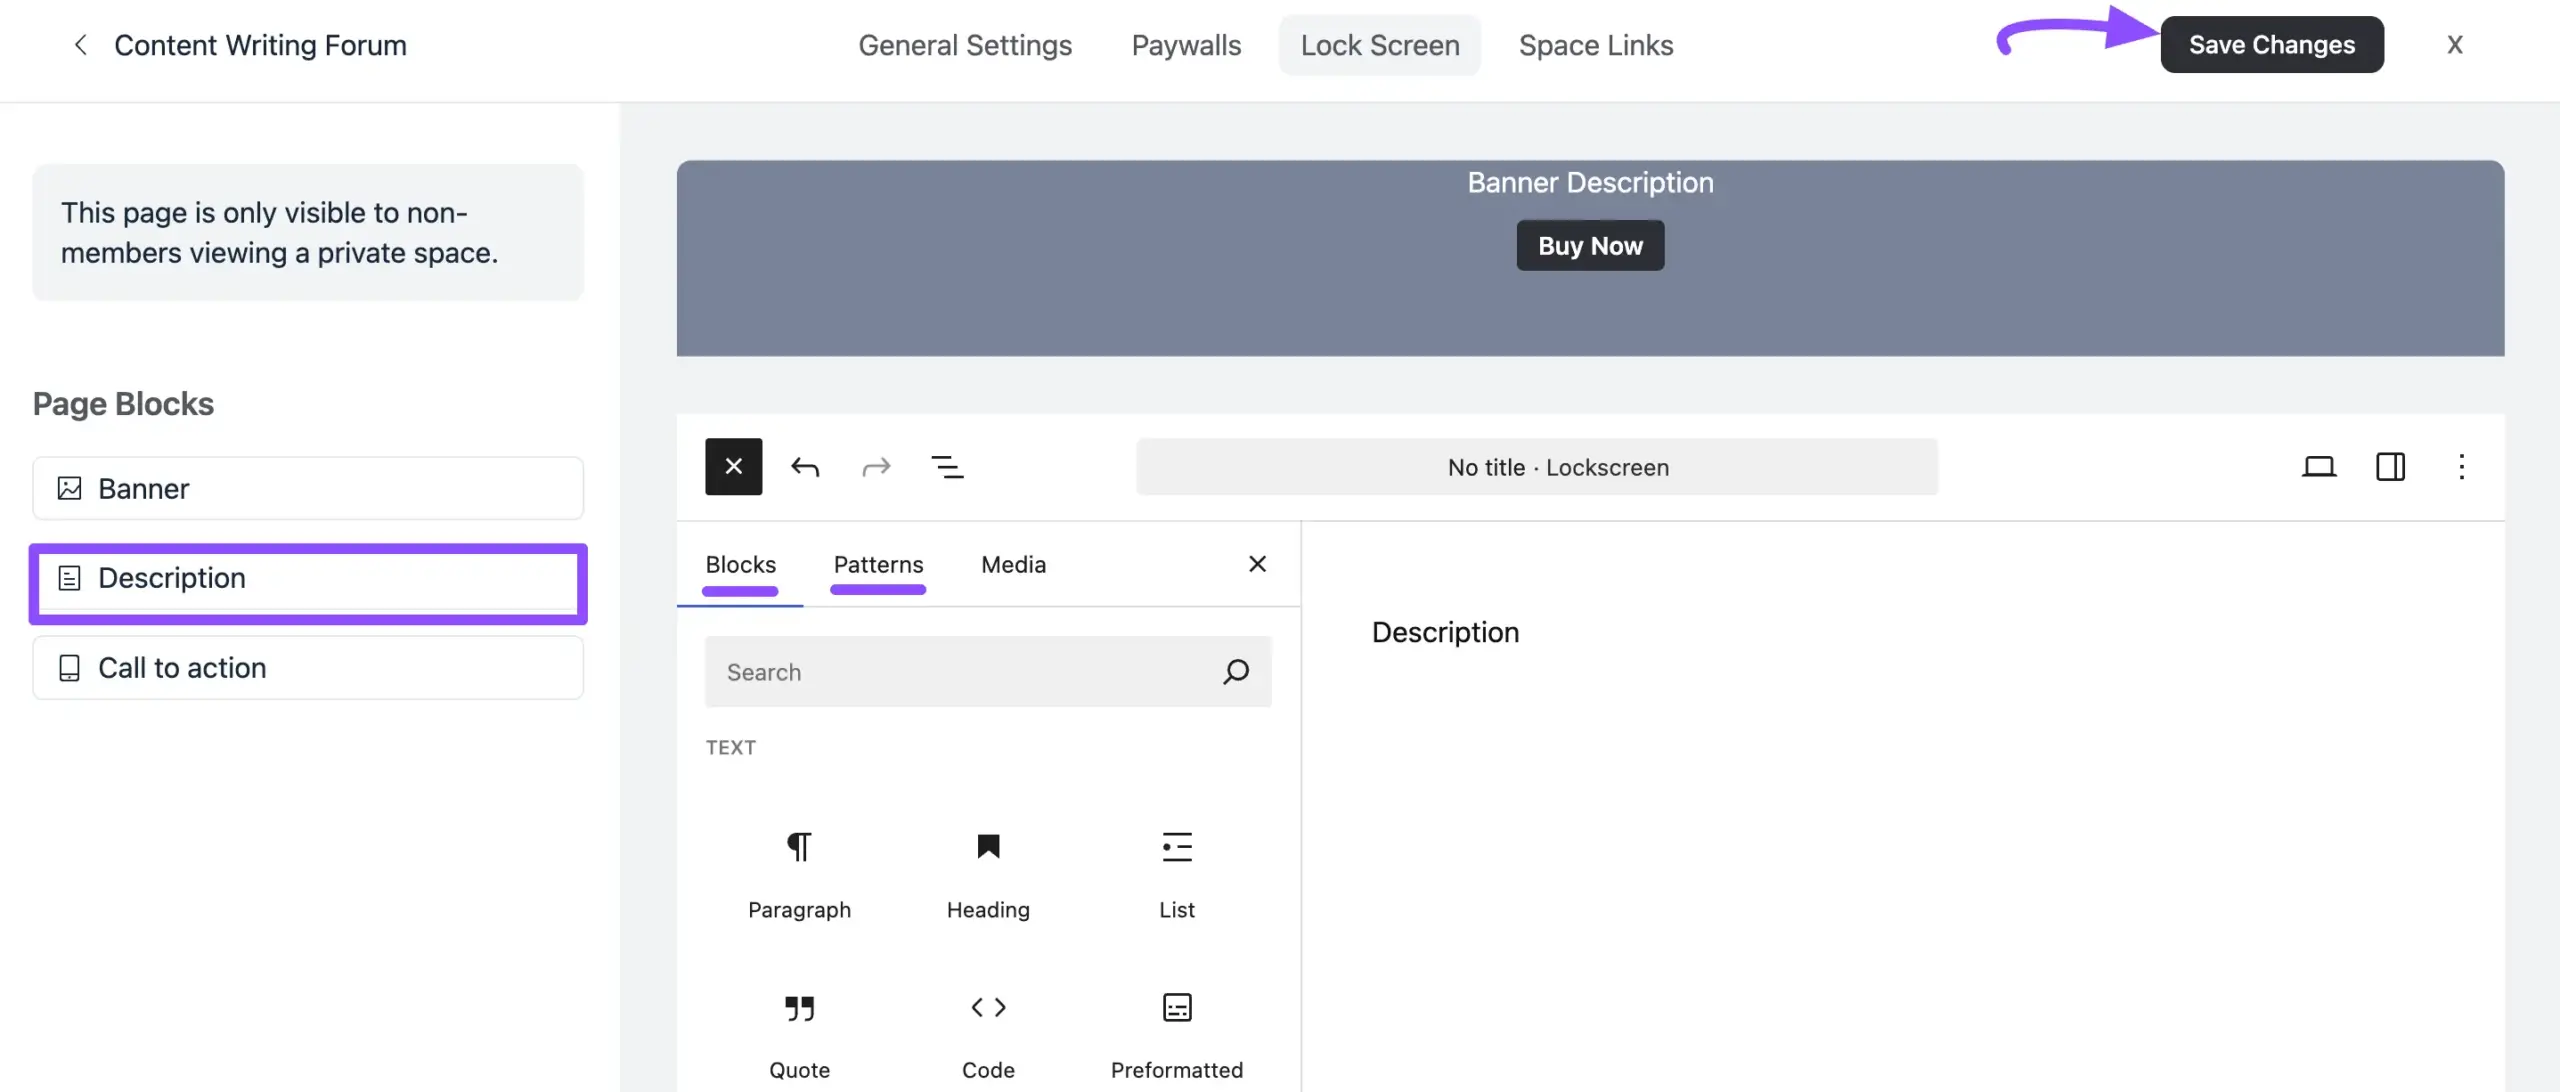
Description #
The Description section allows you to add detailed content below the banner using the block editor. This section uses the WordPress Block Editor (Gutenberg), so you have full control over how you want to present your content.
If you don’t want to design everything manually, you can use the Patterns tab at the top. Click Patterns to see ready-made layouts such as About, Featured, Services, or Call to Action. Choose any pattern and it will instantly appear on your lock screen. Then, you can edit the text and images based on your needs.
Call to Action #
The Call to Action section allows you to add a secondary prompt for your users, typically ensuring they have another opportunity to join or subscribe after reading the description.
Clicking on the Call to Action edit option in the sidebar will reveal settings identical to the Banner section, split into Content and Design tabs.
Once you complete the customization, click the Save Changes & Close button to save all your changes.
Secret #
If you select this option, the space will be locked for everyone. Only invited members can view and create posts in the space.
After selecting your desired Privacy option for the Space, don’t forget to click the Save Changes button to save all your changes.
If you have any further questions, concerns, or suggestions, please do not hesitate to contact our @support team.


