Pusher is a powerful, cloud-based service that handles real-time data delivery. By integrating Pusher with your community, you empower your chat system to deliver messages instantly. Your members will enjoy a seamless, “live” conversation experience without ever needing to refresh their page.
This guide will walk you through the process of setting up a Pusher account, creating your channel app, and securely connecting it to FluentCommunity.
Step 1: Creating a Channel App in Pusher #
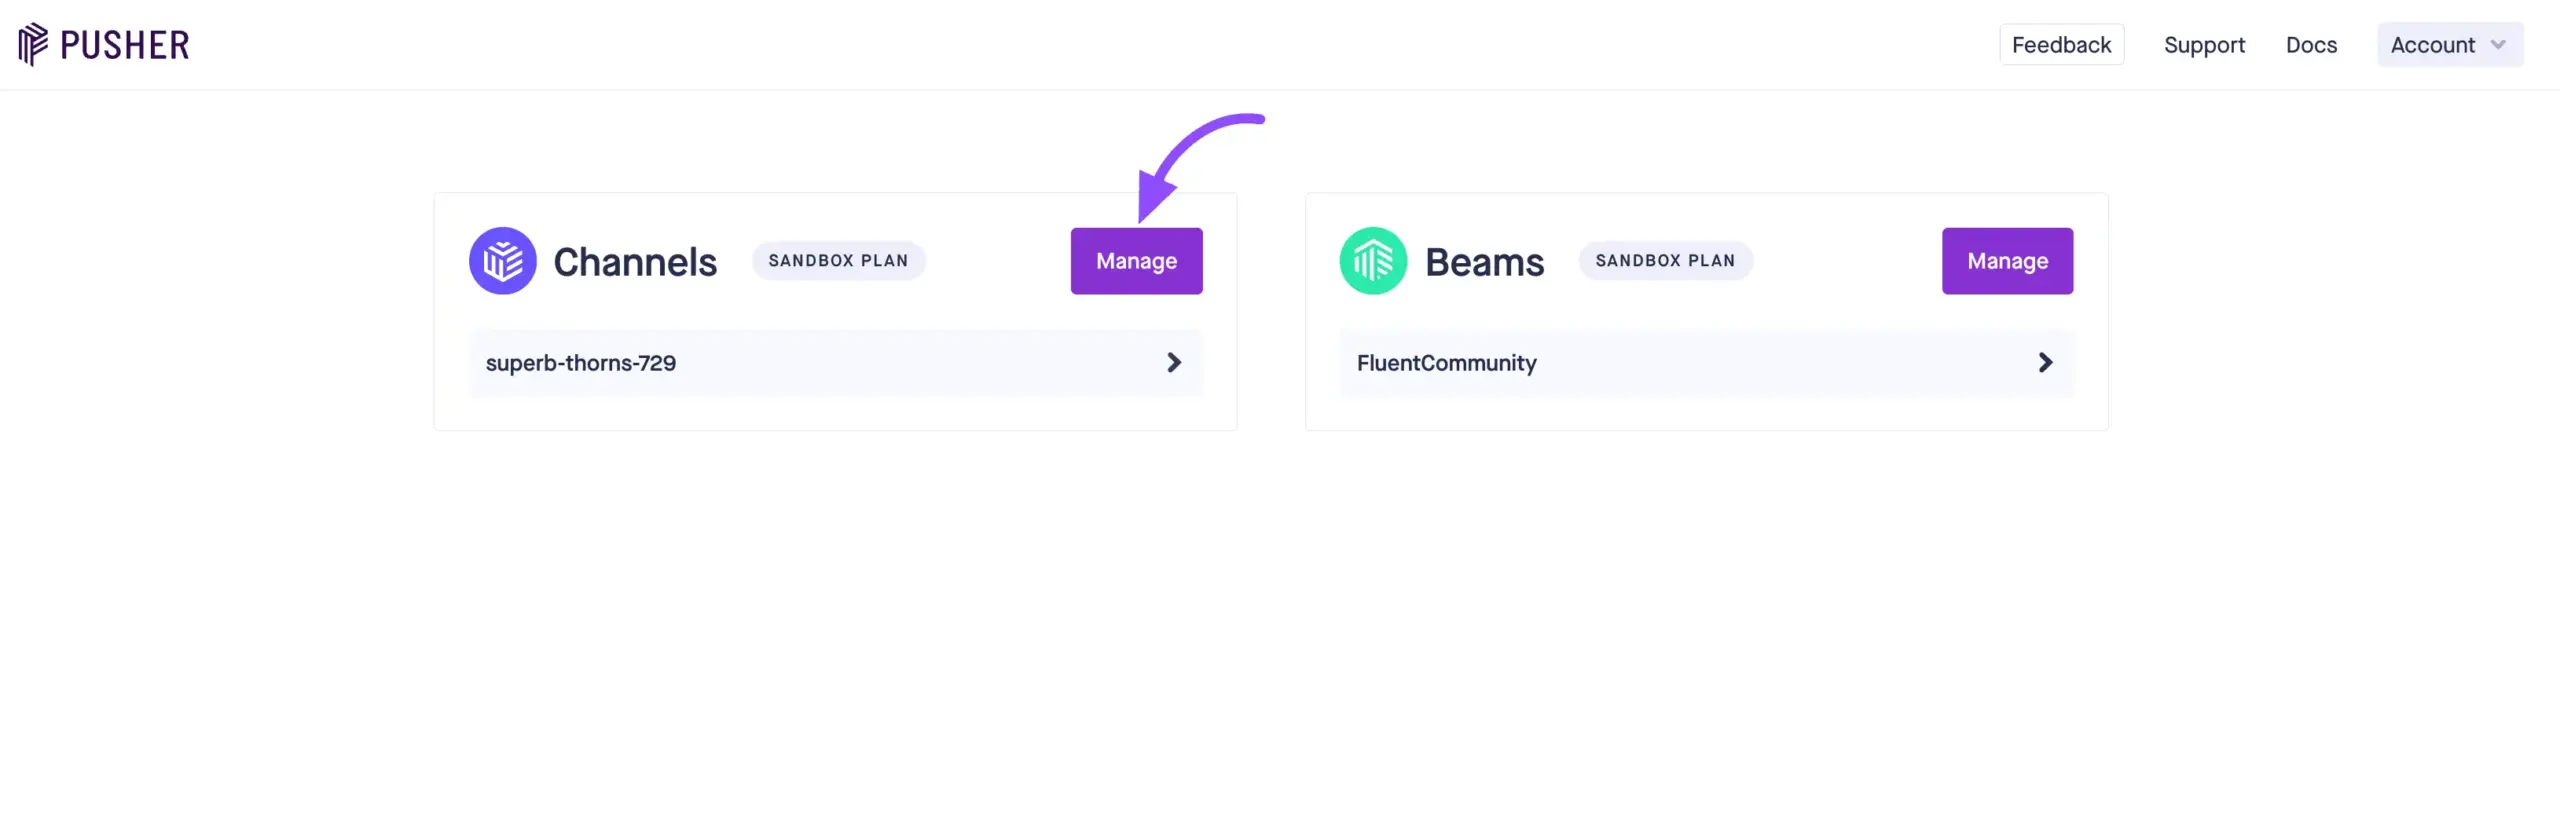
To get the necessary connection keys, you first need to go to the “Channels” app within your Pusher dashboard.
- Log In to Pusher: Access your Pusher account dashboard.
- Navigate to Channels: From your main dashboard, select the Channels product from the dashboard and click on the Manage .
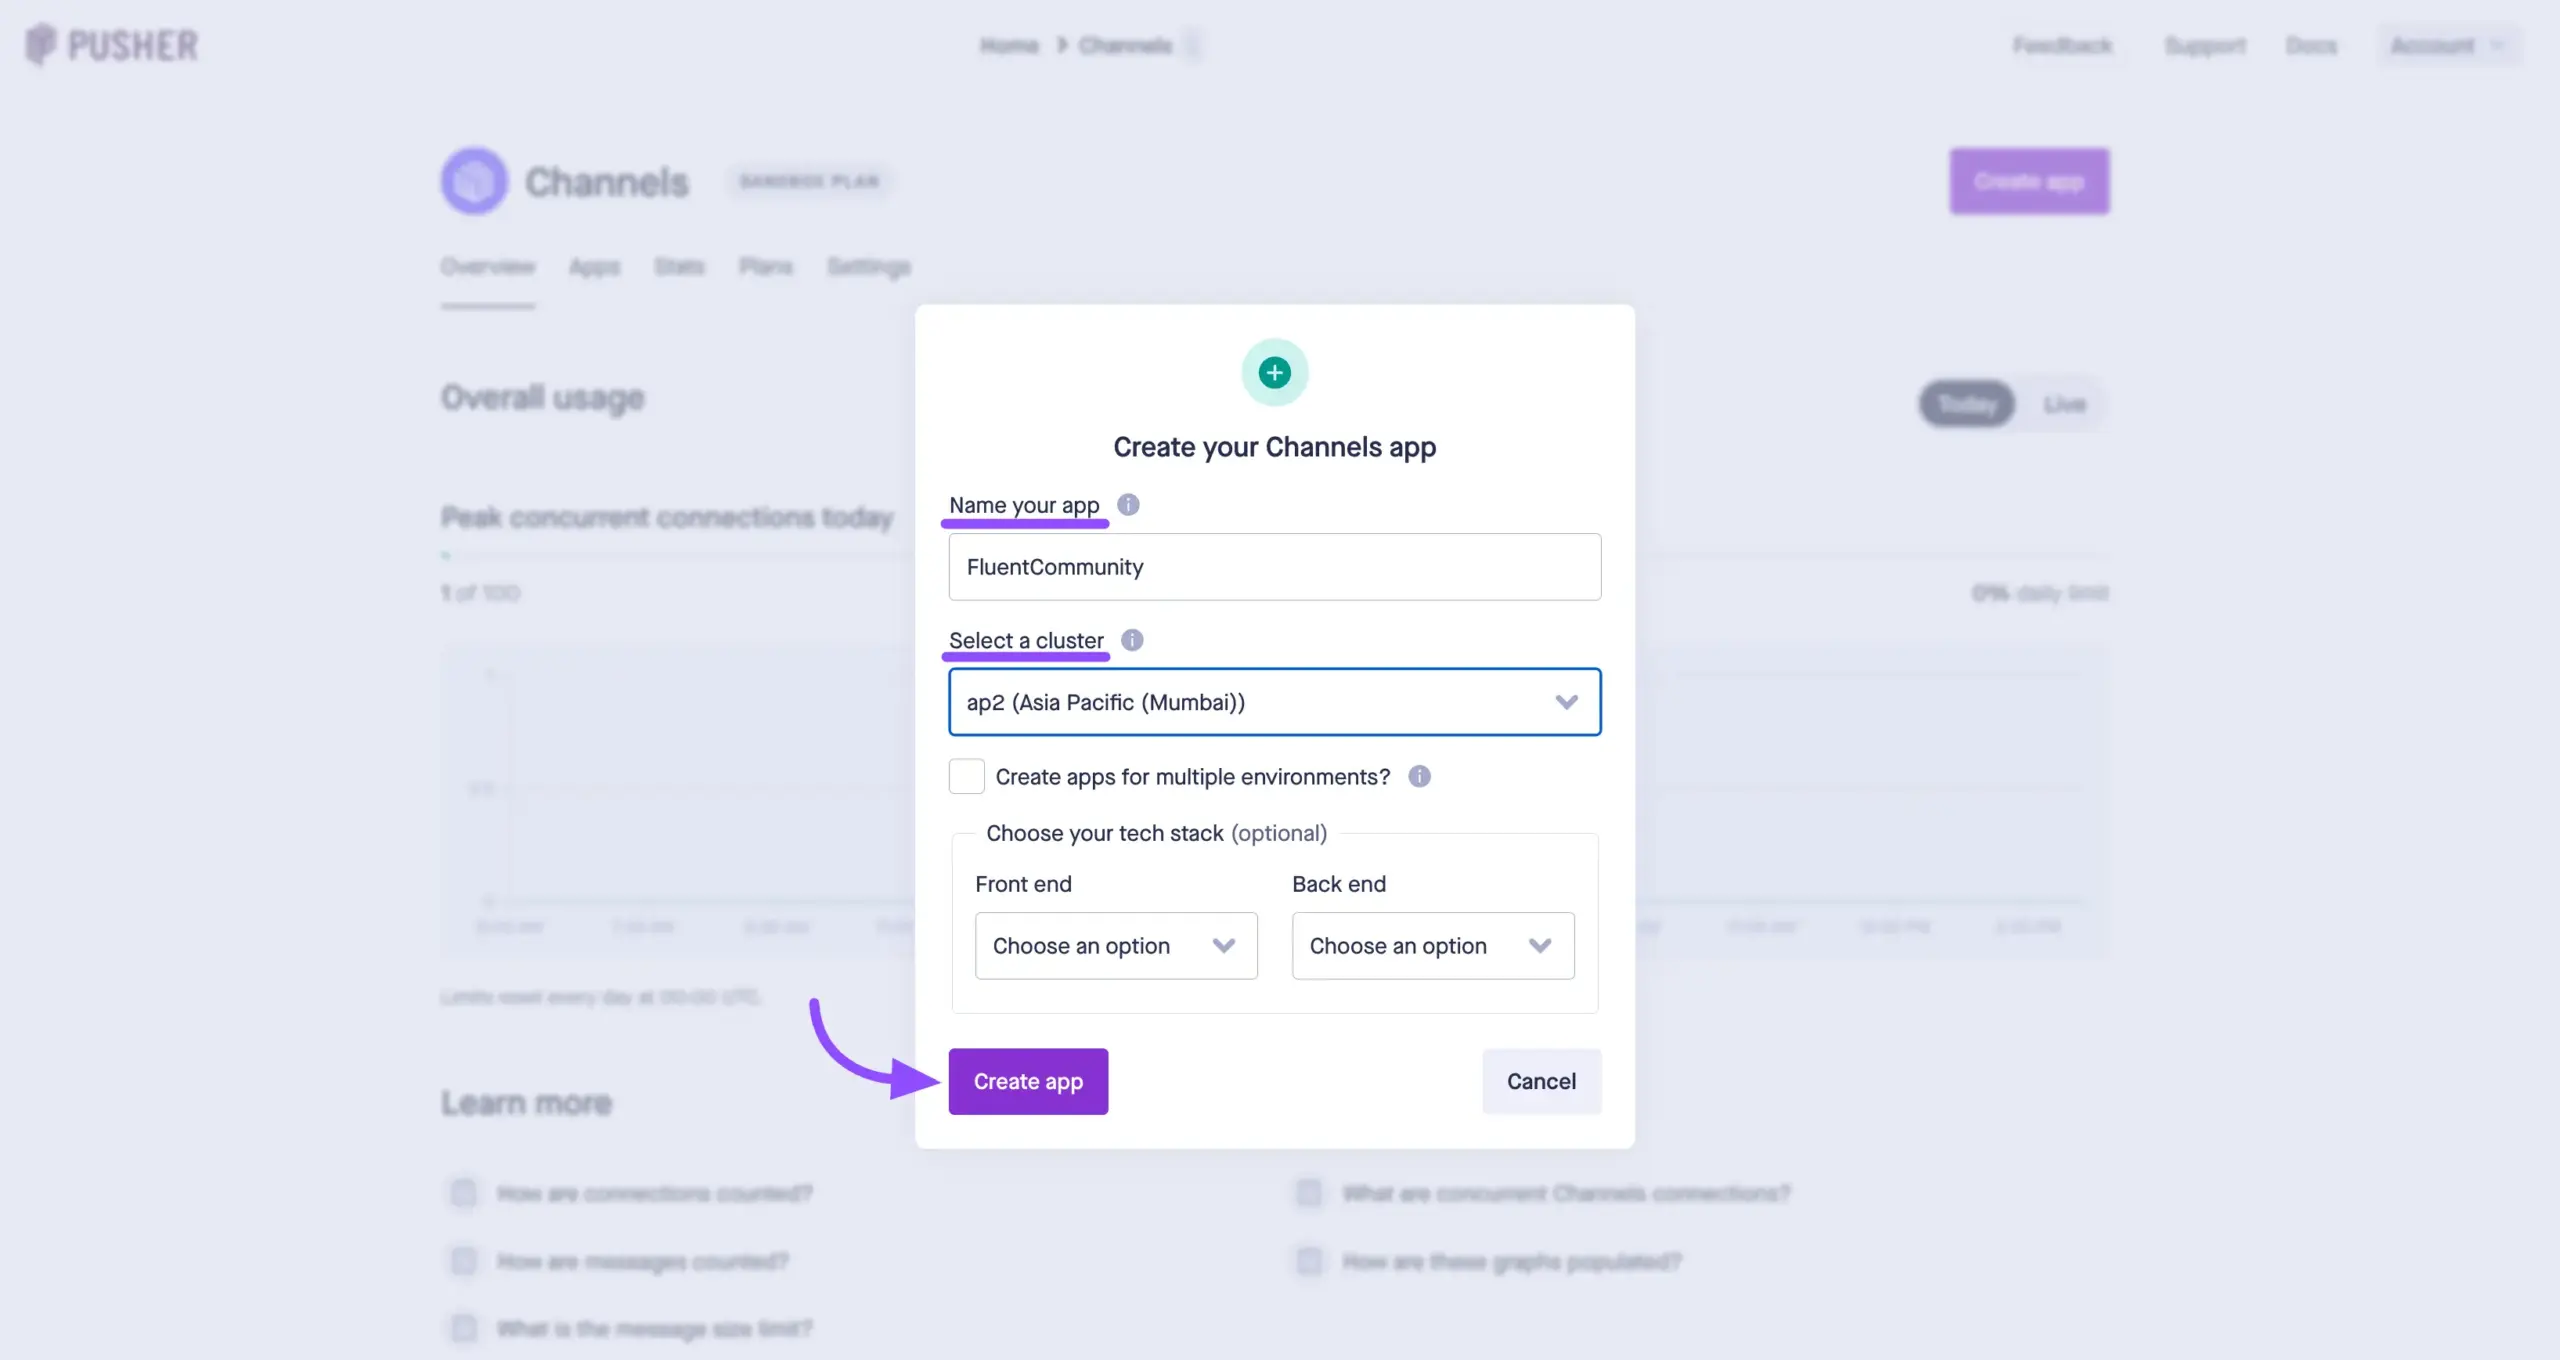
- Create a New App: Click on the Create app button
- Configure Your App:
- Name your app: Give it a recognizable name, such as “FluentCommunity Chat”.
- Select a Cluster: Choose the cluster (server location) closest to where your website is hosted for the fastest response times.
- Finalize: Click the Create app button to generate your new connection.
Step 2: Collecting Your Credentials #
Once your app is successfully created, Pusher will generate a set of unique security keys. You will need these to authorize the connection from your WordPress site.
- In your newly created Pusher app dashboard, click on the App Keys tab from the left-hand menu.
- You will see a list of credentials. Copy and safely store the following four items:
- app_id
- key
- secret
- cluster
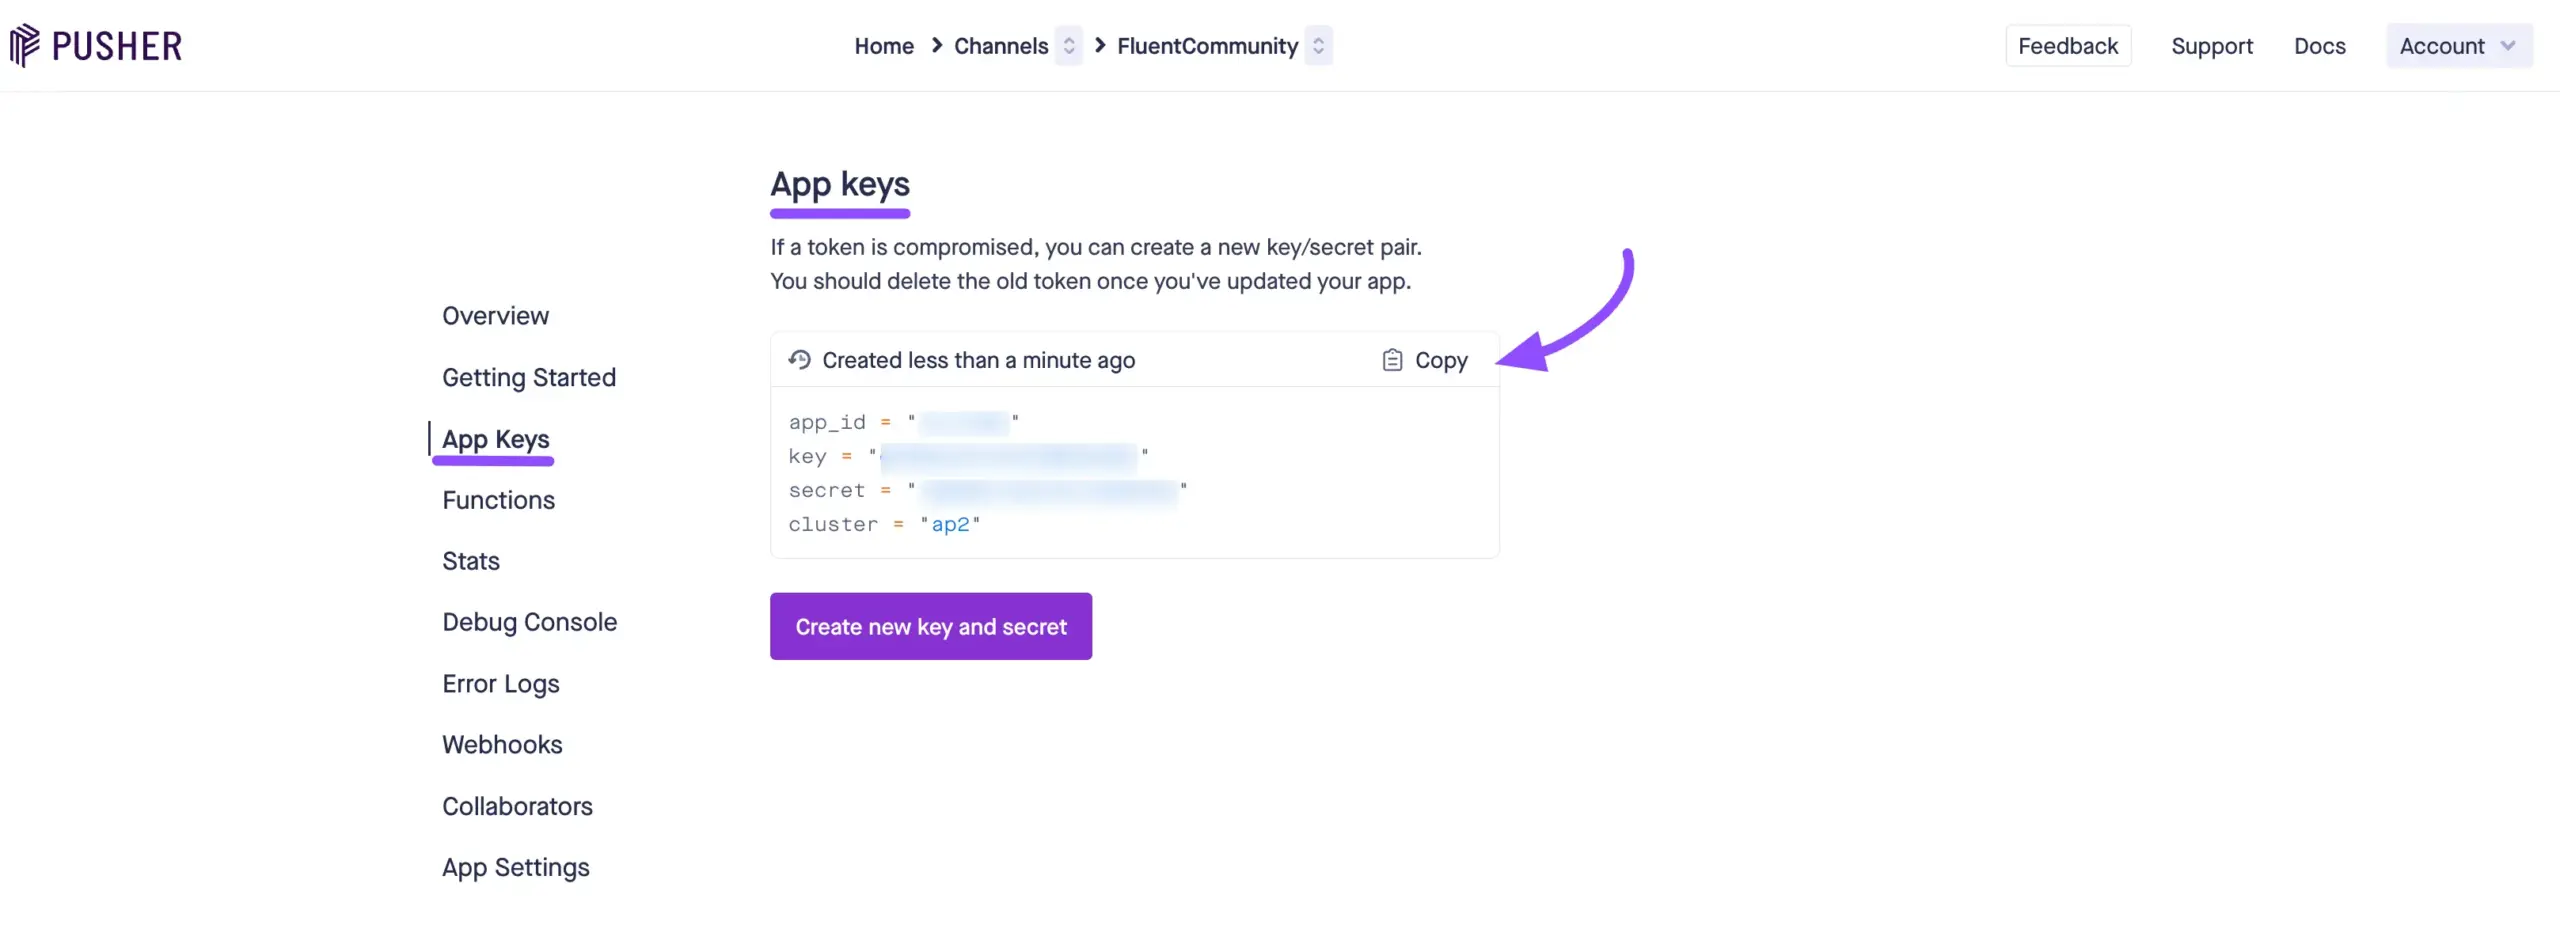
Note: Keep these keys strictly confidential. They are the secure “passwords” that allow your website to push data through your Pusher account.
Step 3: Connecting Pusher to FluentCommunity #
Now that you have your Pusher credentials, it is time to plug them into your community settings to bring your chat to life.
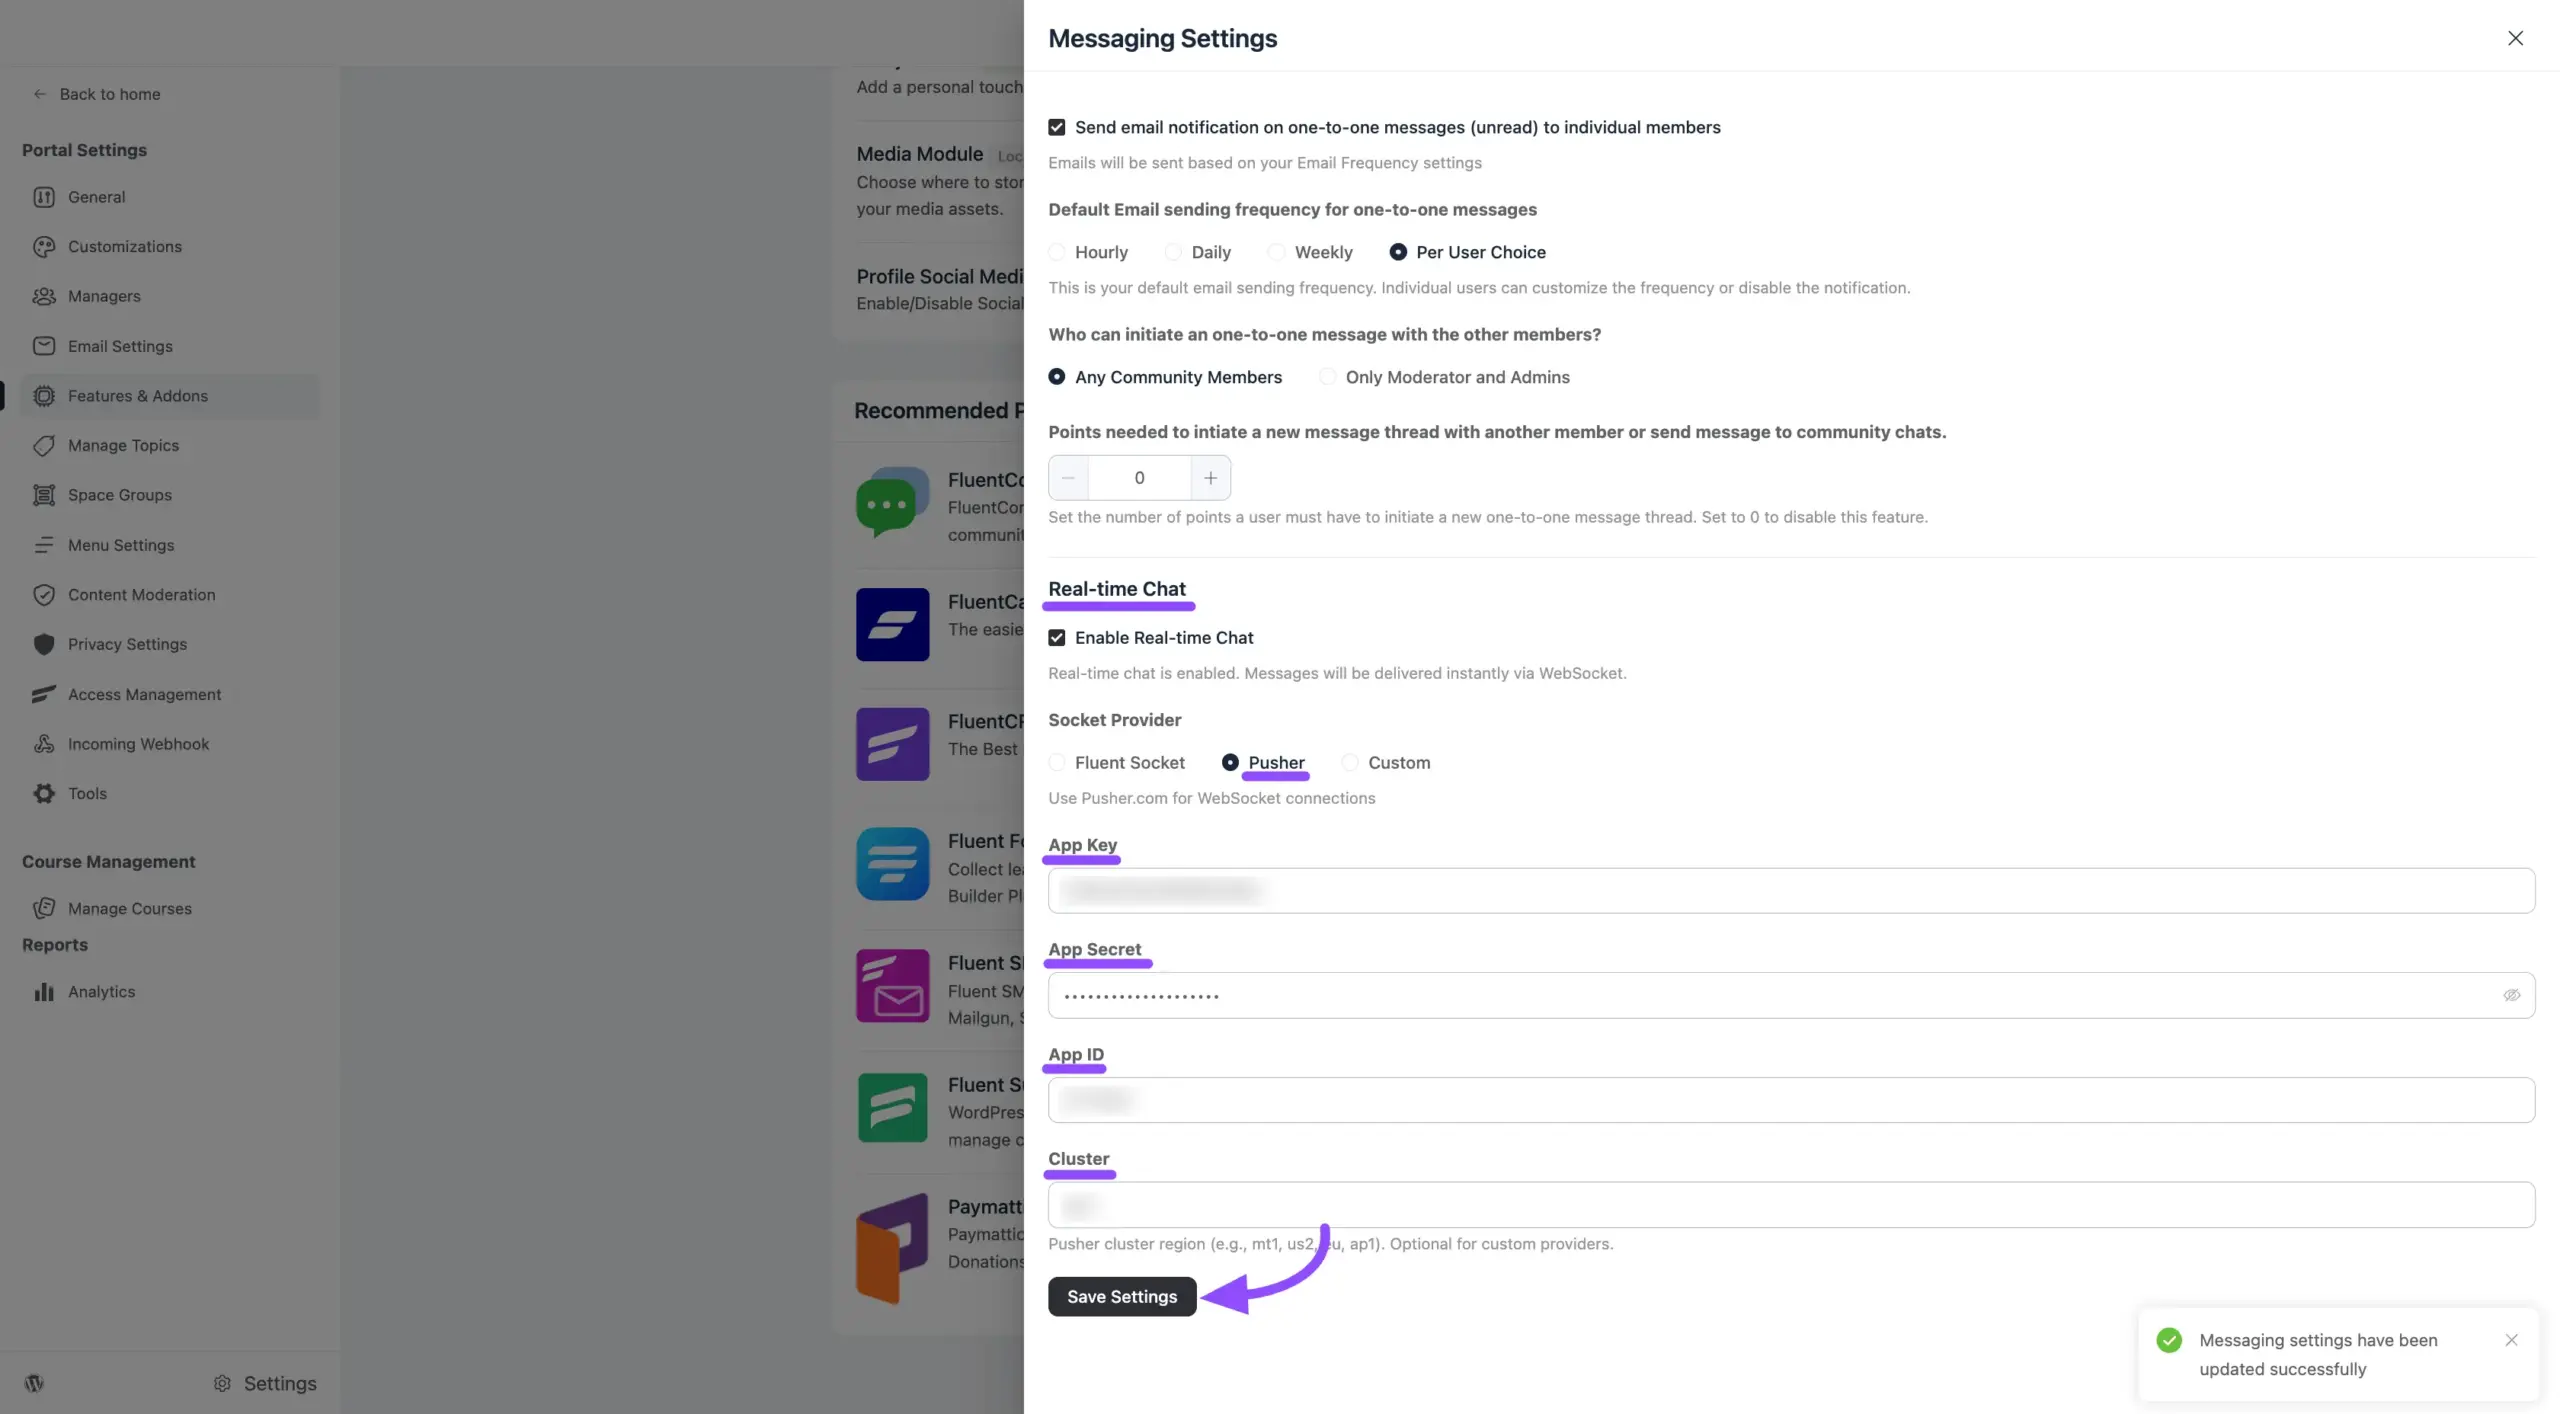
- Access Settings: Go to your WordPress Dashboard and navigate to FluentCommunity > Settings.
- Open Messaging Settings: Click on Features & Addons in the left sidebar, locate the FluentCommunity Chat module, and click the Messaging Settings button.
- Enable Real-Time Chat: Find the Enable Real-Time Messaging toggle and switch it to On.
- Configure the Pusher Driver:
- From the driver dropdown menu, select Pusher.
- Paste your App ID, App Key, App Secret, and Cluster into their matching fields.
- Save Your Settings: Click the Save Settings button at the bottom of the screen.