FluentCommunity allows you to organize your spaces into groups, making it easier to manage and structure your communities.
Create a Space Group #
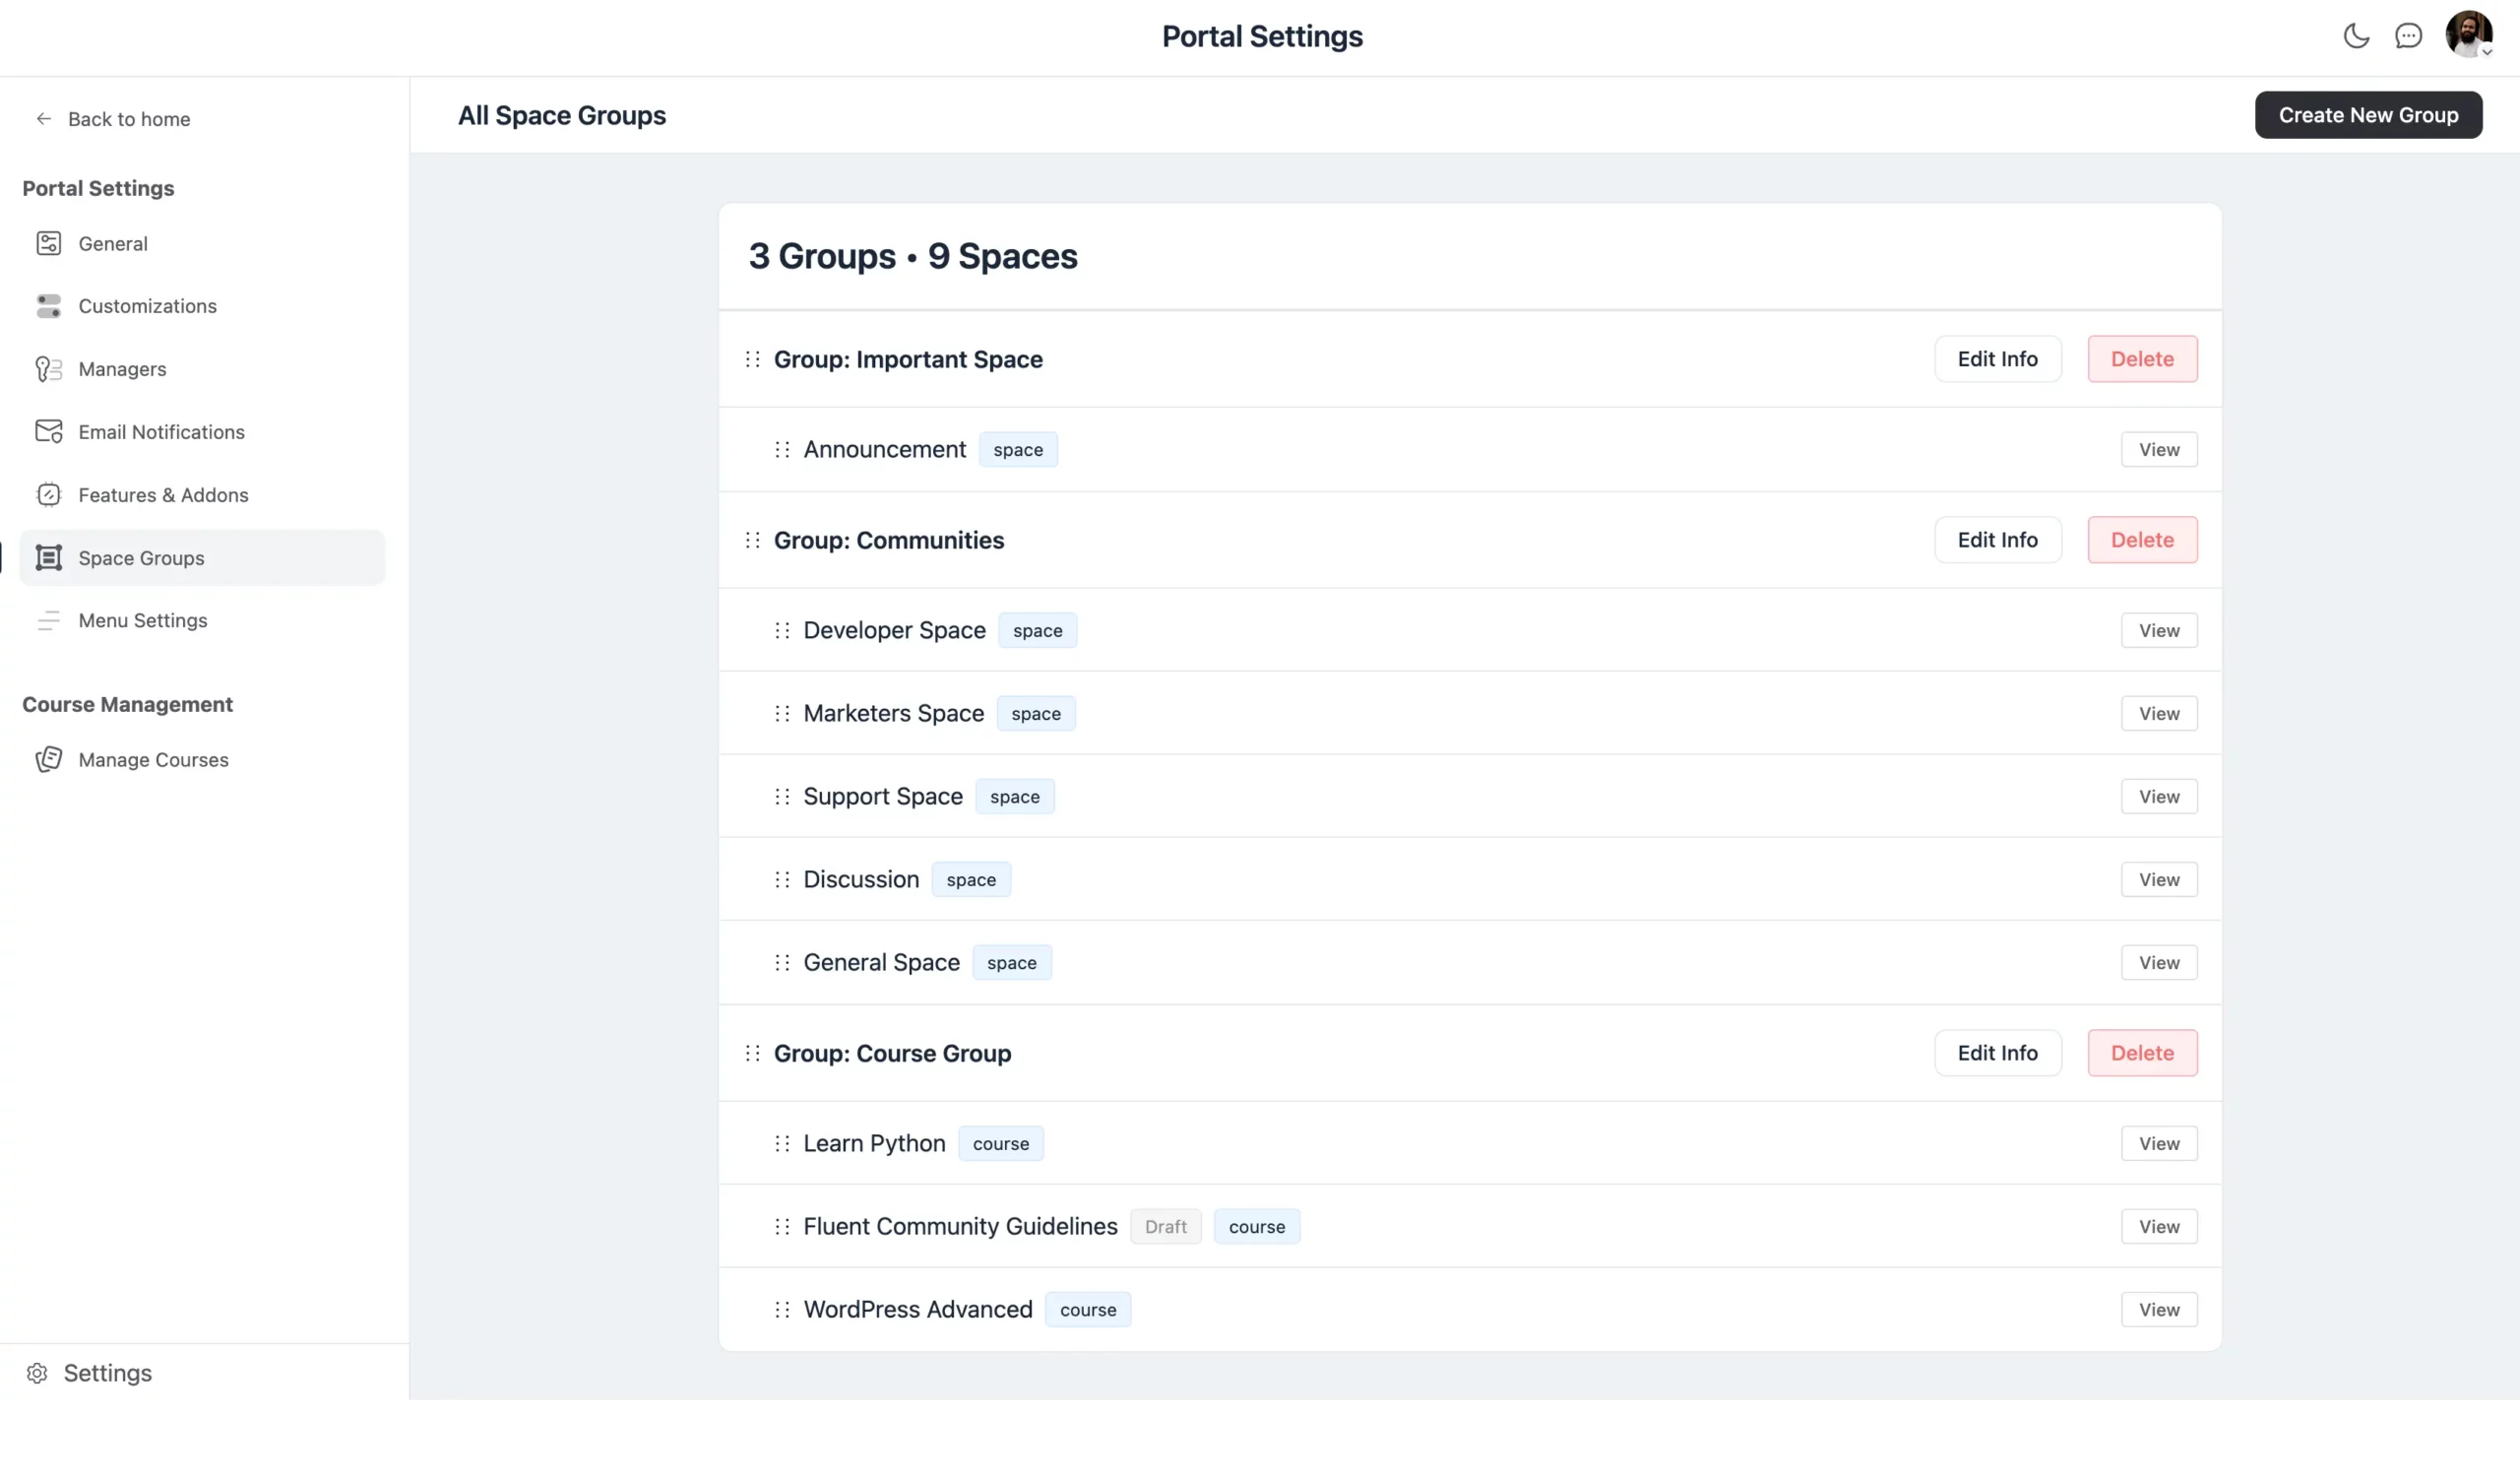
Go to your FluentCommunity. Then, go to Settings and select Space Group from the left sidebar.

Create a New Group #
To create a new group, click the Create New Group button. A pop-up will appear asking for the following details:
Group Title: The name of the group.
Slug: A URL-friendly version of the group title.
Description: A brief description of the group’s purpose.
Set Group Visibility
You can choose the visibility of the group from Appearance by selecting the Show Spaces Even if the User is not a Member of any Space checkbox.
Once you’ve filled in the details and set the visibility, click the Create button to create the group.

Managing Space Groups #
Reorganize Communities: You can easily reorganize the spaces or communities within a group by dragging and dropping them into the desired order.
Edit/Delete Group: To change the details of a group, click the Edit Info button next to the group. This will allow you to update the title, slug, description, or visibility settings.
If you want to delete the group simply click on the Delete button next to the Group name.
That’s how you can efficiently create and manage your Space Groups to keep your community organized.
If you have any further questions about this guide, please don’t hesitate to contact us.


