
FluentCommunity provides you with easy-to-manage Portal Access Settings, allowing you to control how members access your community. One of the key settings here is the Portal Access URL, which gives users a direct link to your community’s front-end portal.
Configure Portal Access Settings #
In your WordPress dashboard, navigate to the top menu and select FluentCommunity. Then, click on the General Settings tab. Within the General Settings, find the Portal Access Settings section.
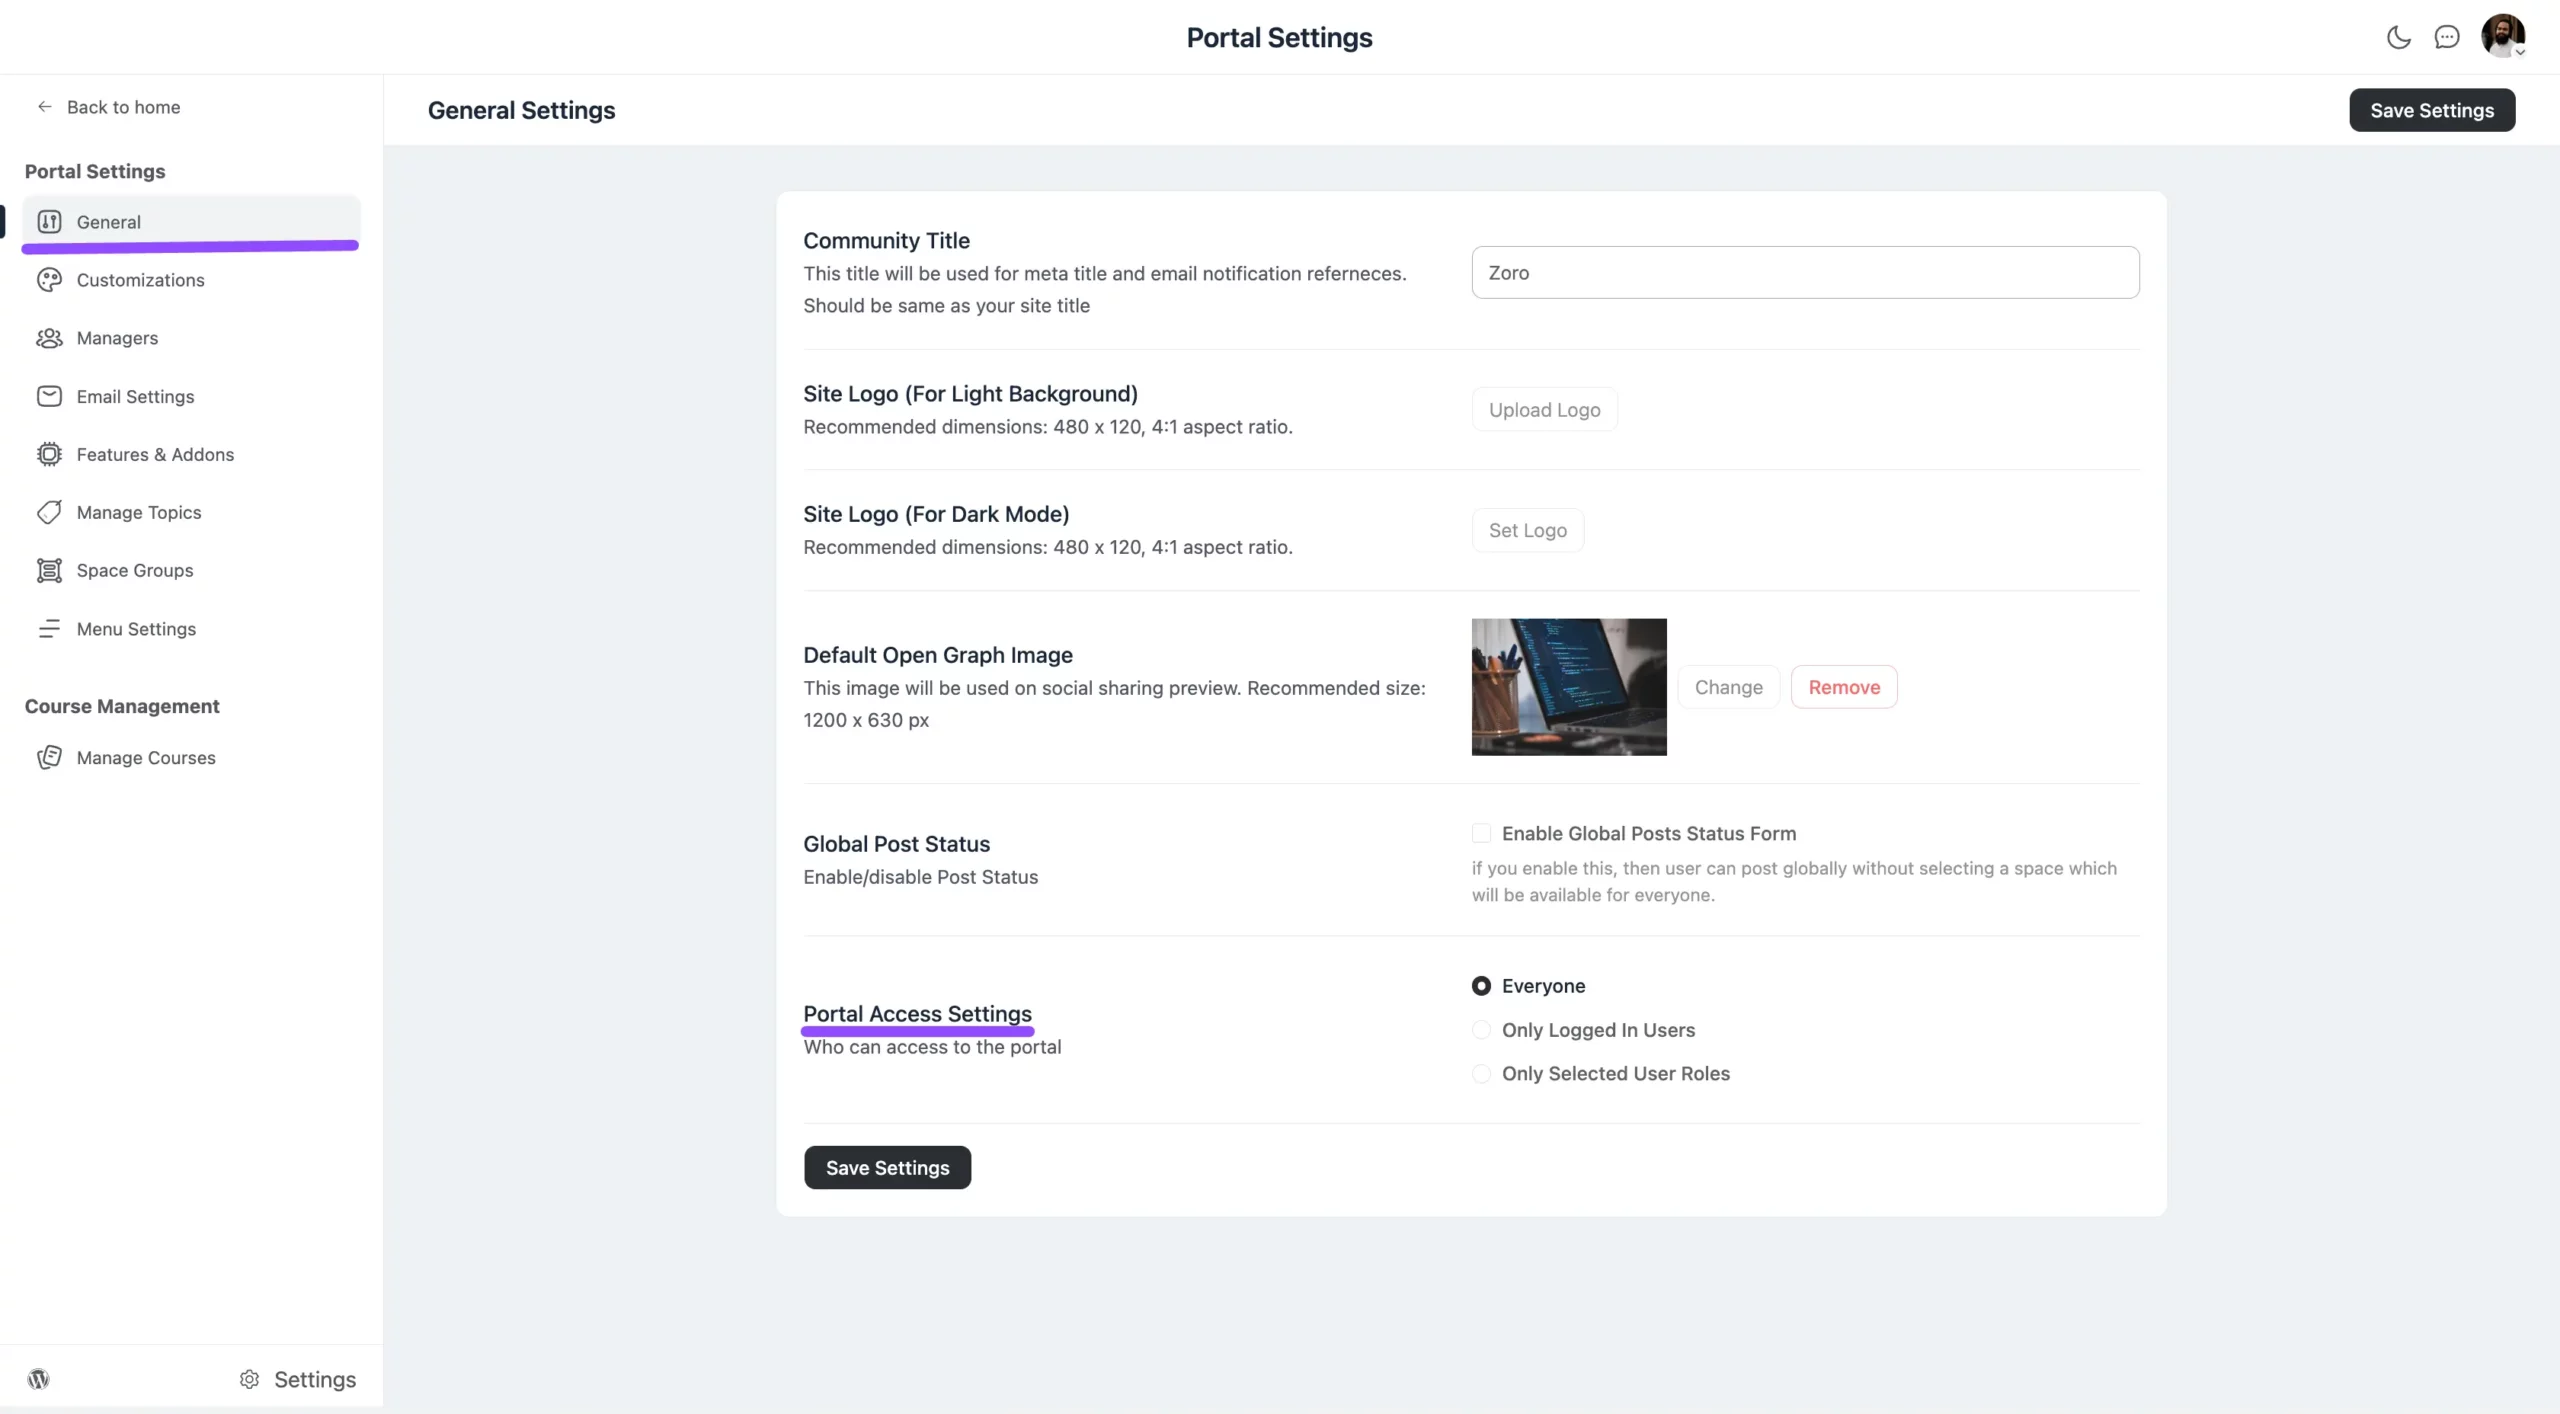
Everyone #
By selecting this option, everyone can access the portal and view the public spaces feed. However, they will not be able to take any actions or make interactions on the portal.
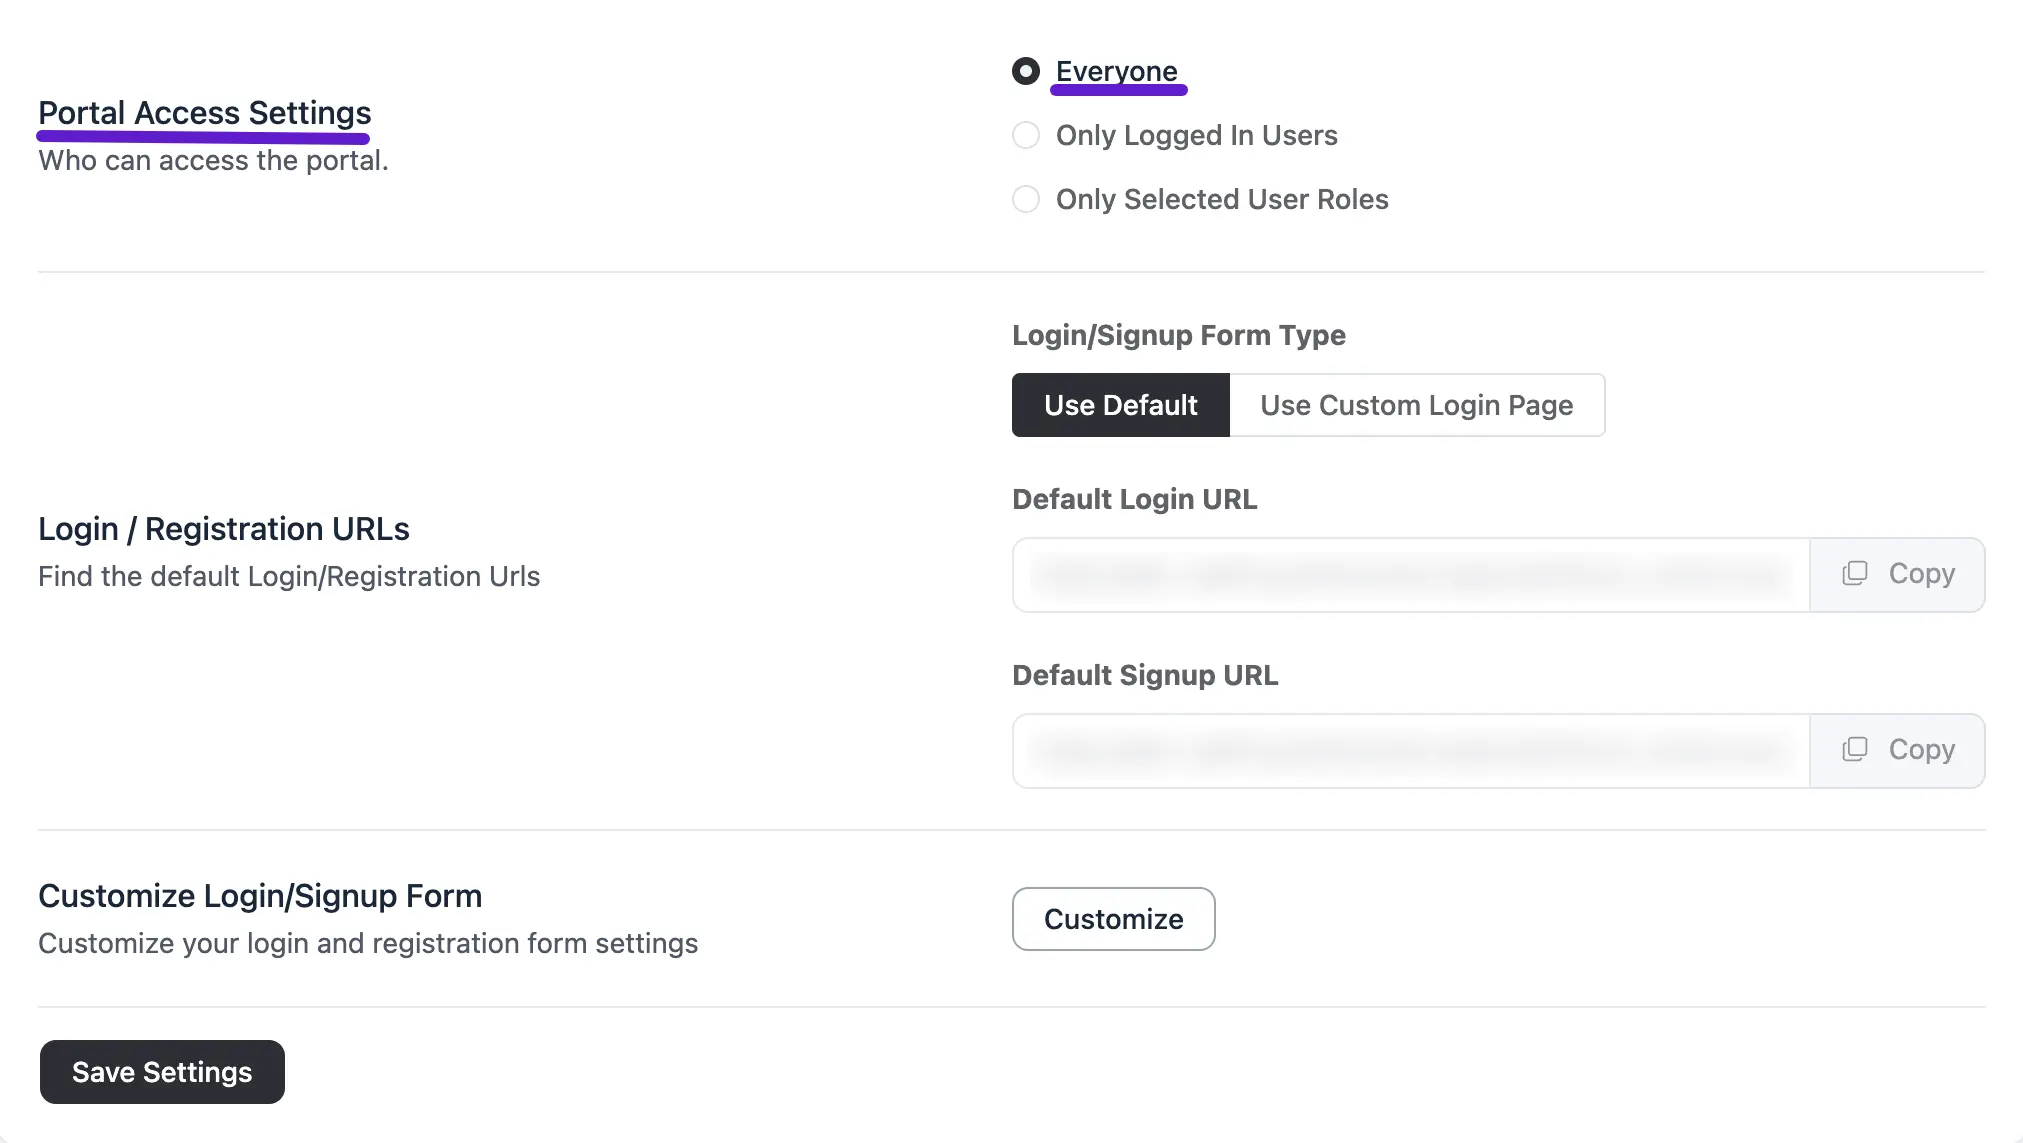
Login / Registration URLs #
This process works the same for other options as well.
Use Default
- Default Login URL: This is the standard login URL for the FluentCommunity portal.
- Default Signup URL: This is the default signup URL for the FluentCommunity portal.
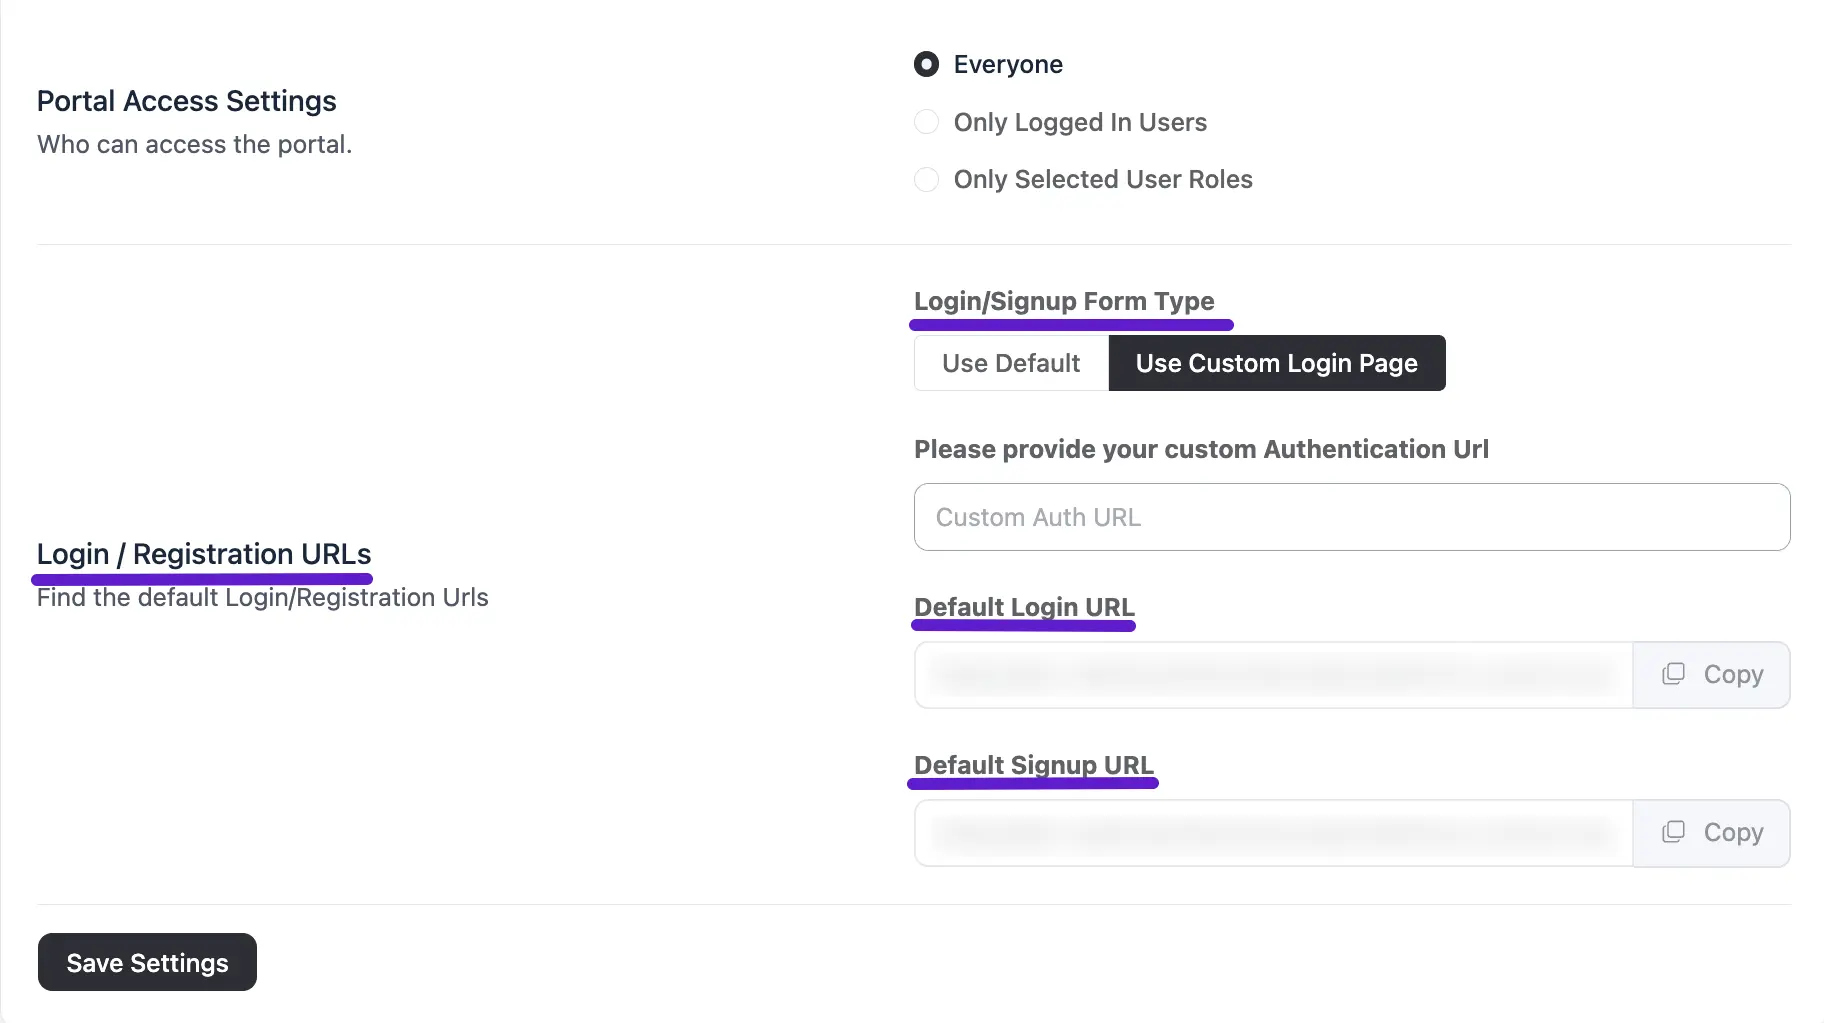
Use Custom Login Page
- Please Provide your Custom Authentication URL: Enter a custom login or registration URL to override the default WordPress authentication system. This allows you to direct users to a specific login or registration page.
- Default Login URL: These URLs remain unchanged and cannot be modified.
- Default Signup URL: The signup URL will also remain the default.
If you select “Use Custom Login Page,” then you will not get the option to set Customize Login/Signup Form on the FluentCommunity settings page.
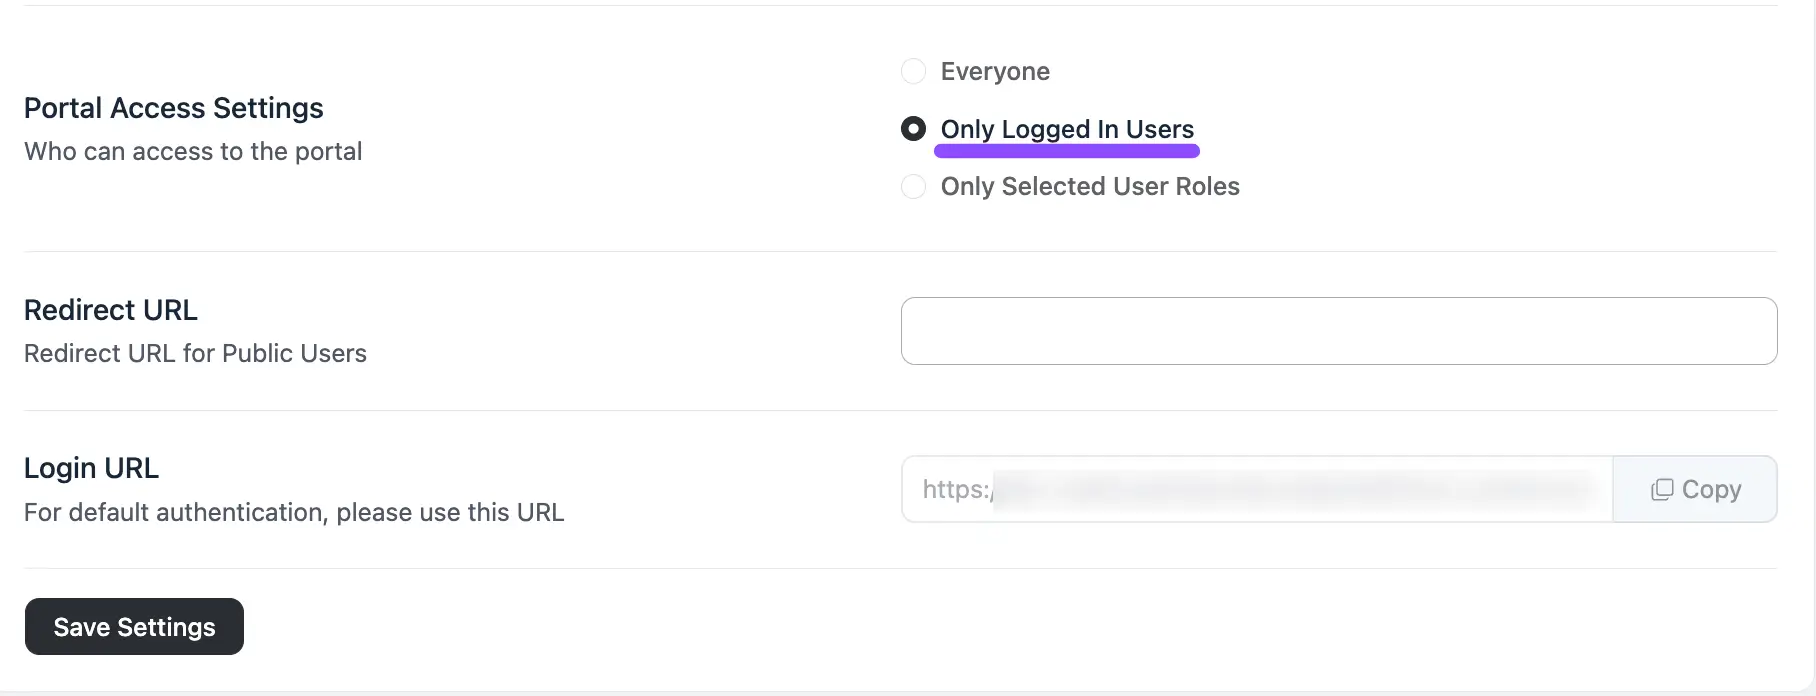
Only Logged In Users #
This option limits access to registered members only. Users need to log in to view and interact with the community content. In Portal Access Settings under the Only Logged In Users option.
Redirect URL: This URL specifies where non logged in users will be redirected when trying to access community content. It helps guide them to a different page, such as a landing page or signup page, encouraging them to log in or sign up.
Only Selected User Roles #
Restricts access to specific user roles (e.g., Admins, Members, or other custom roles). Only users assigned these roles can access the community, allowing for targeted engagement.
In the Only Selected User Roles setting for Portal Access, these options control access for specific user roles:
User Roles: This option allows you to select specific roles (like Admin, Member, etc.) that can access the community content. Only users with these roles will be able to view the portal. Select the roles from the dropdown field.
Not Matched User Roles: A message is displayed to users who don’t have the specified roles. It informs them why they don’t have access or prompts them to take action, like logging in or upgrading their role. Type the notice into the Text field if you want to show them a notice.
Redirect URL: This URL redirects non logged in users when they try to access community content. It sends them to a page like a landing or signup page, encouraging them to log in or sign up.
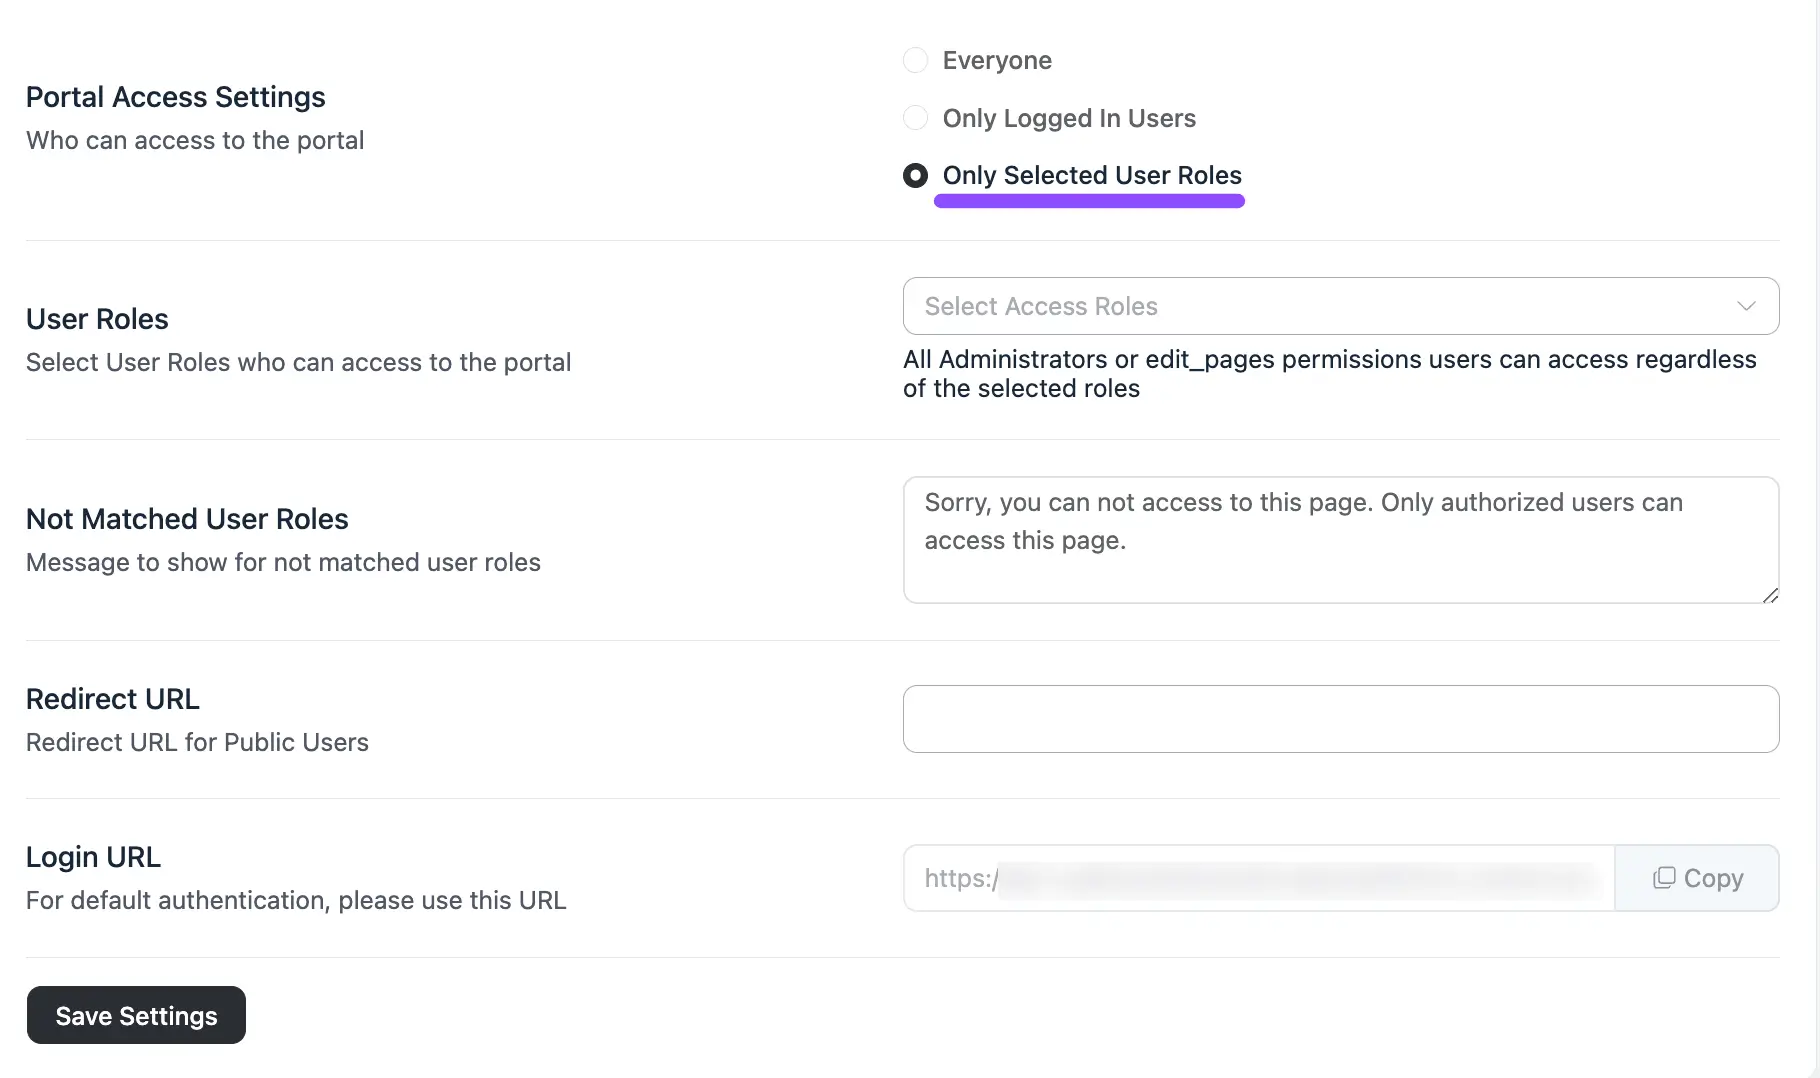
Always remember to click the Save Settings button after making changes to your Portal Access Settings to ensure they are applied.
If you have any further questions about this guide, please don’t hesitate to contact us.


