

The FluentCommunity Chat is a real-time chat feature, designed to help members connect and interact easily. Follow this guide to enable and use the chat feature.
Activating the Community Chat #
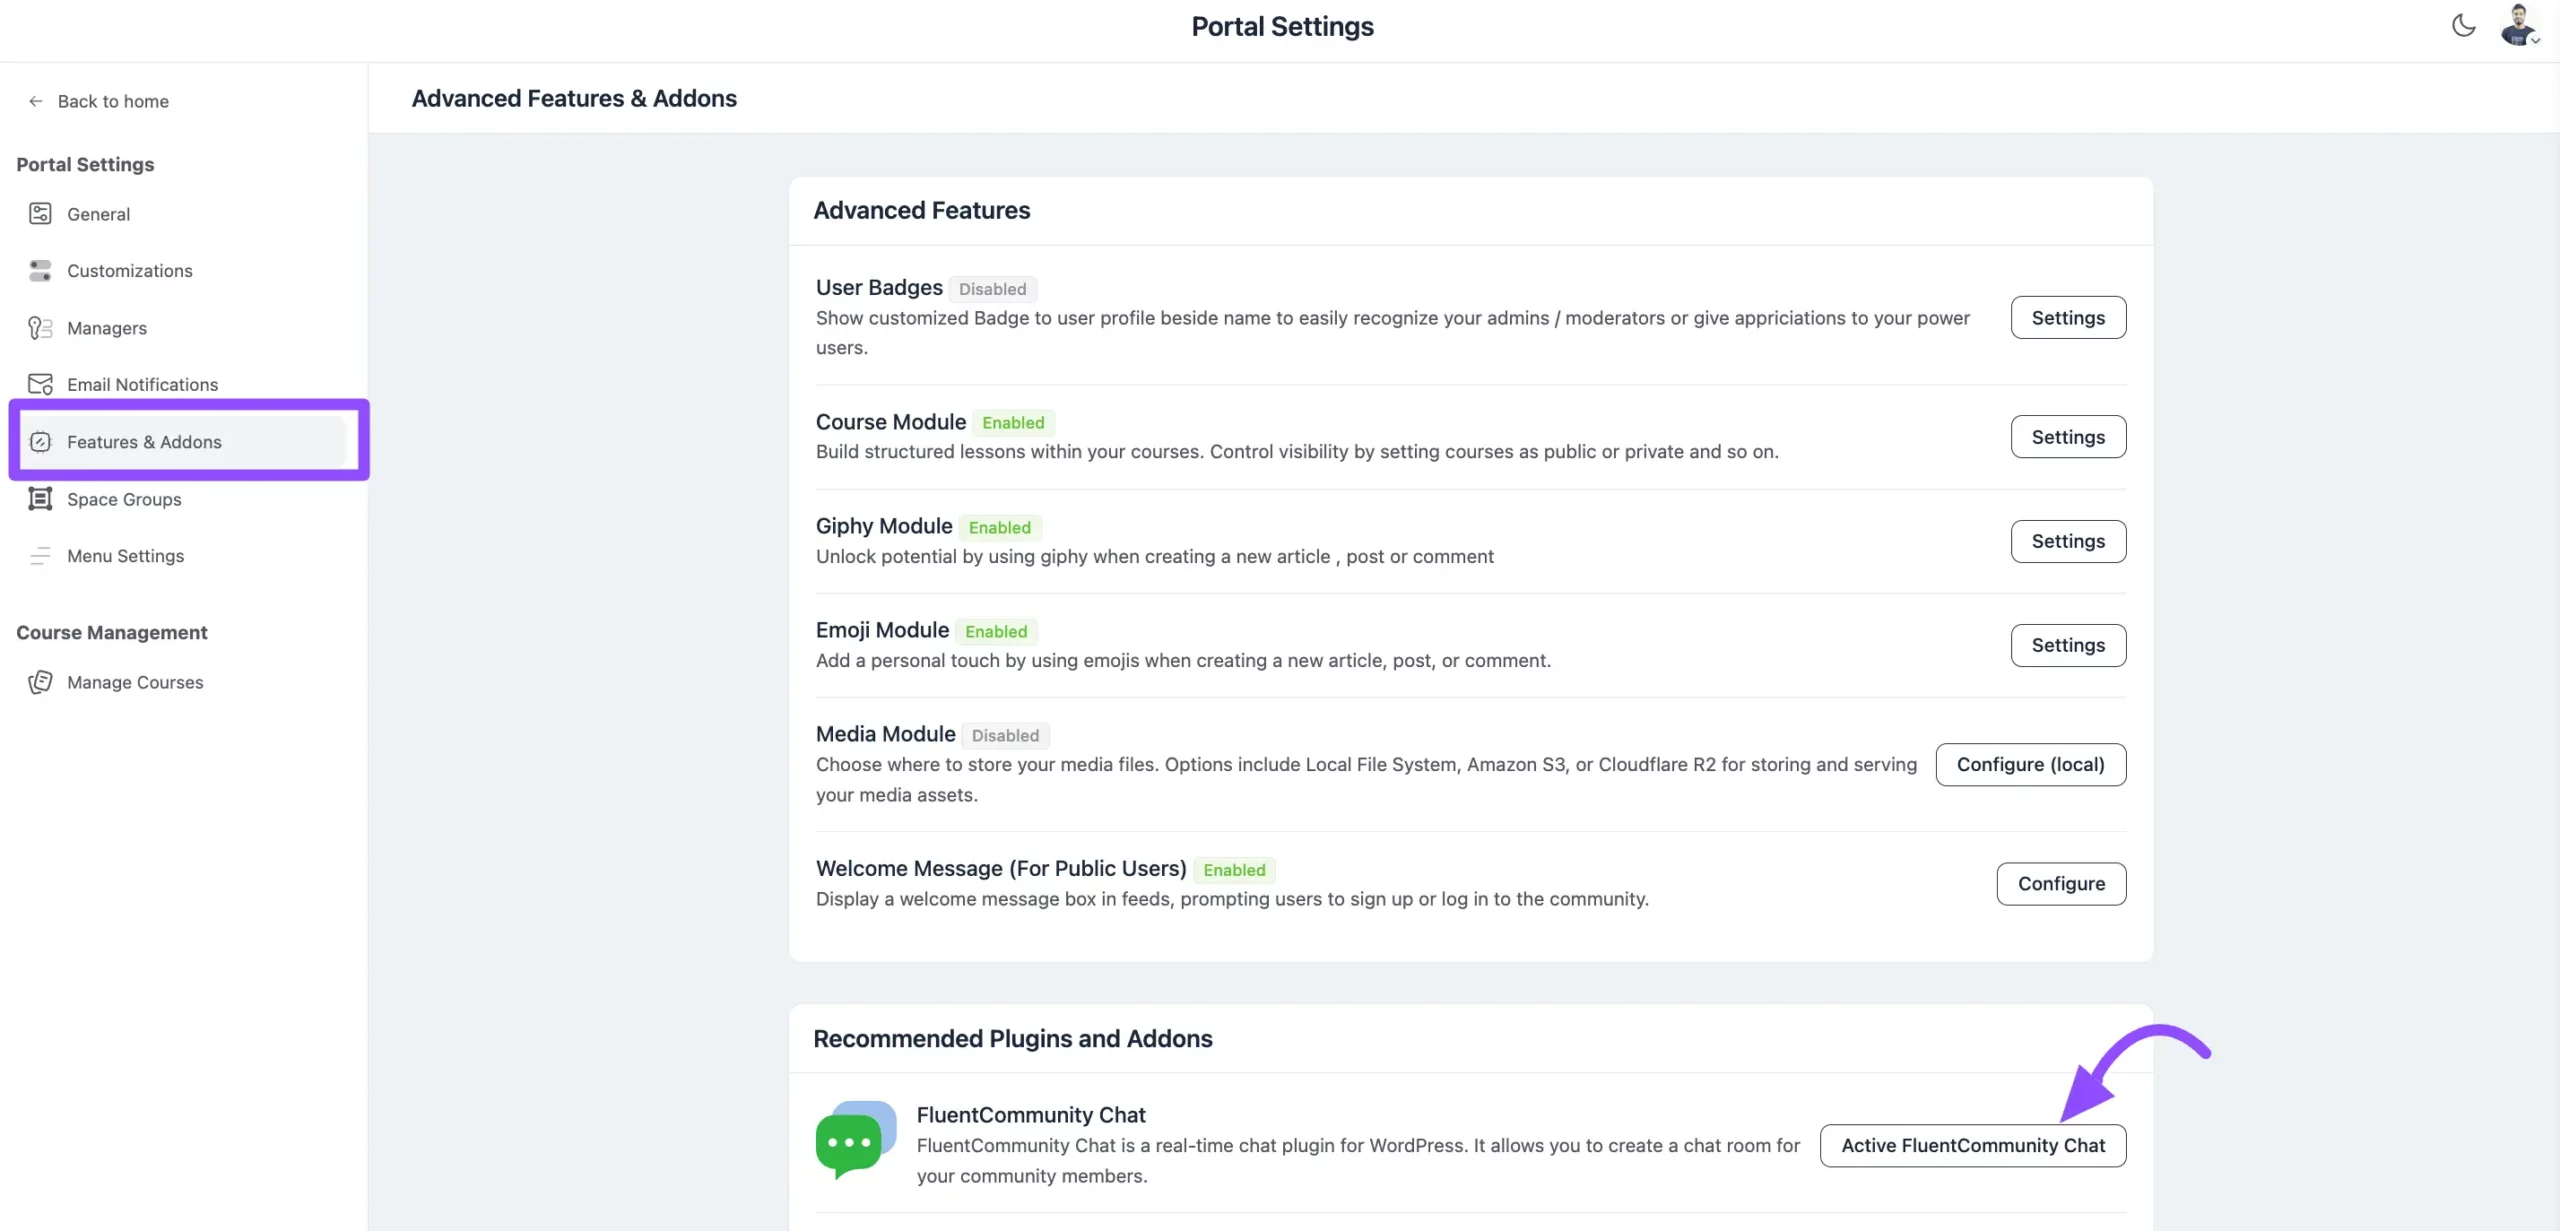
Go to the Settings of your FluentCommunity and select Features & Addons from the left sidebar. Find FluentCommunity Chat and click the Active FluentCommunity Chat button to enable the chat.
Start a Chat Session #
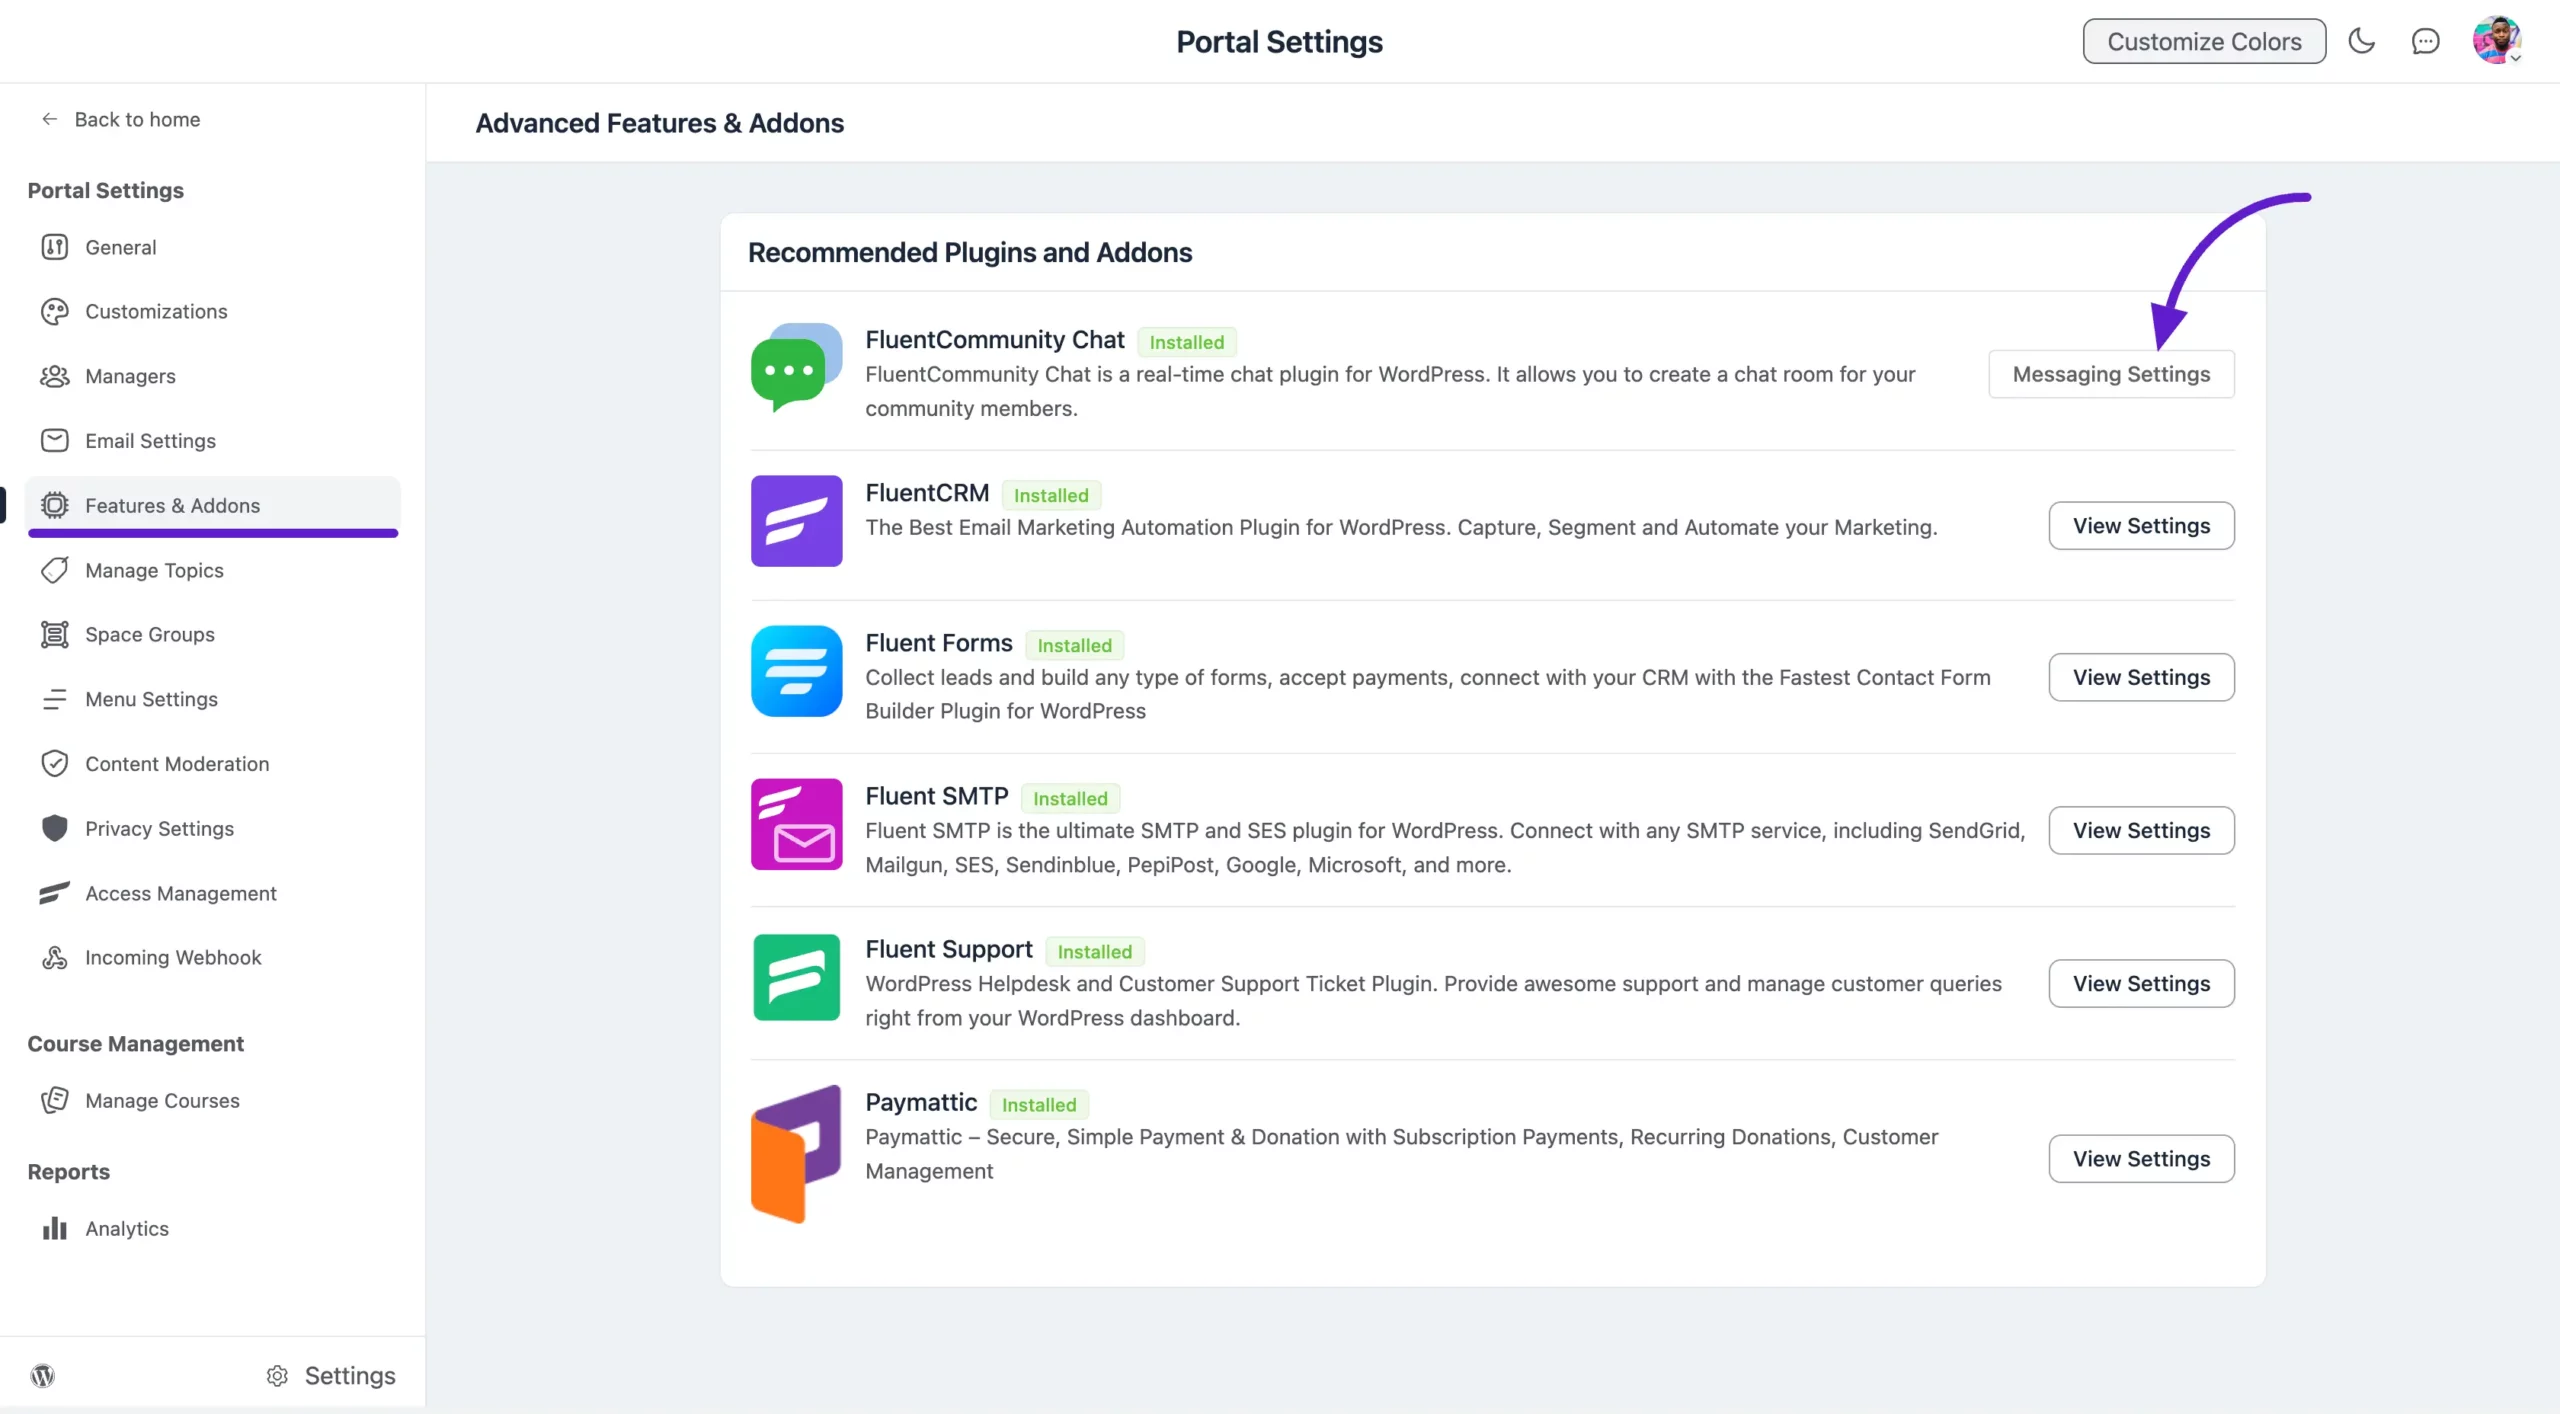
After enabling the chat, click on Messaging Settings to customize your message preferences with community members.
Message Settings
In this section, you can customize your messaging and notification preferences:
- Send email notification on one-to-one (unread) messages to individual members: Enable this option to receive an email notification whenever you have an unread one-to-one message.
- Default email sending frequency for one-to-one messages: Choose how often members receive these notifications (Hourly, Daily, Weekly, or Per User Choice).
- Who can initiate a one-to-one message: Select who can start a conversation: Any community members or Only Moderator and Admins.
- Points needed to initiate a new message thread: Set a specific point requirement for members to start new conversations to help prevent spam.
Real-time Chat Configuration #
To enable instant message delivery, you can activate Real-time Chat and choose one of the available socket providers. For detailed setup instructions, please refer to the Real-time Chat documentation.
Once configured, click Save Settings to apply your real-time chat preferences.

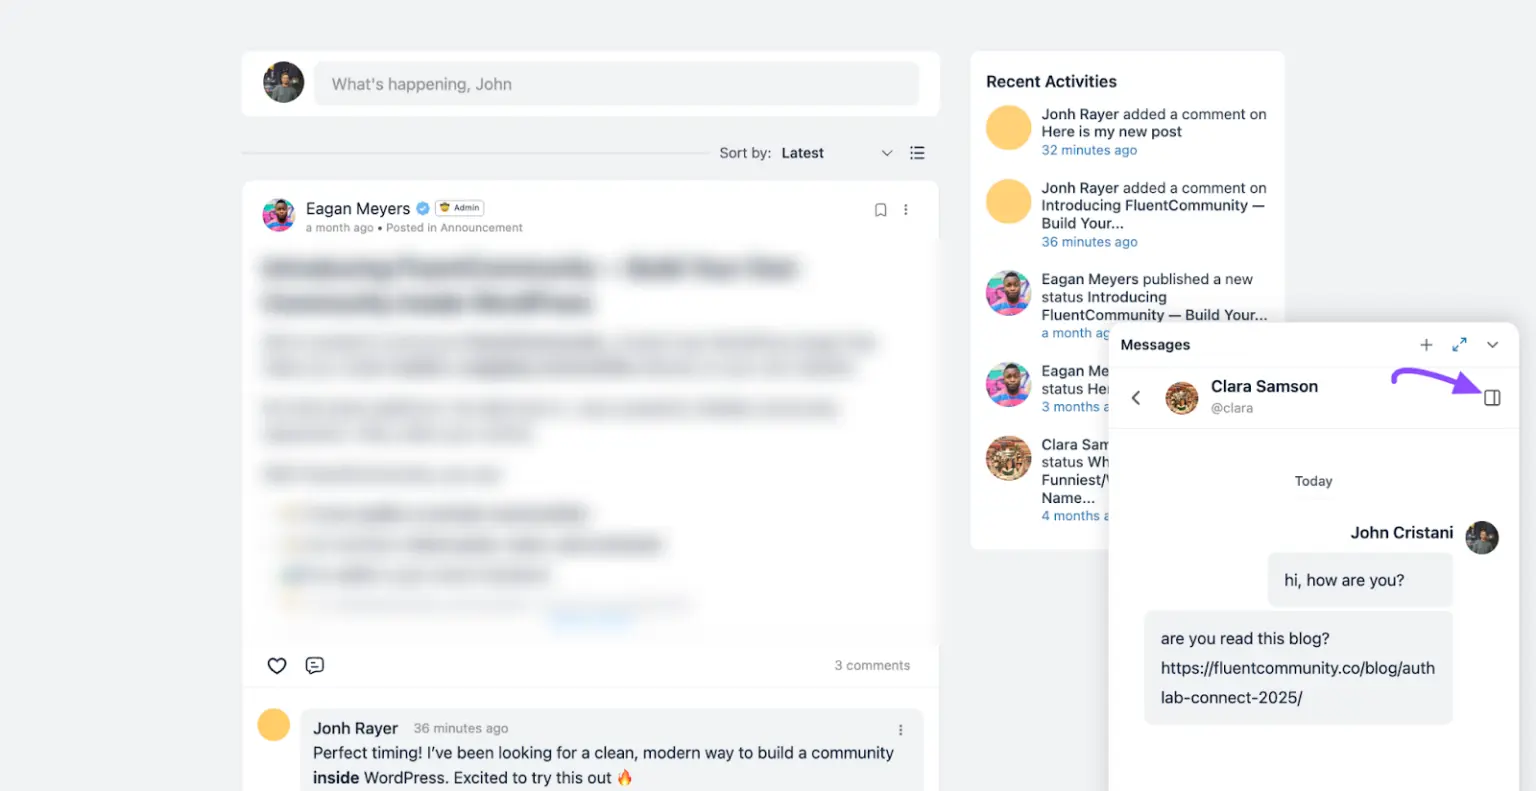
Navigating the Chat Interface #
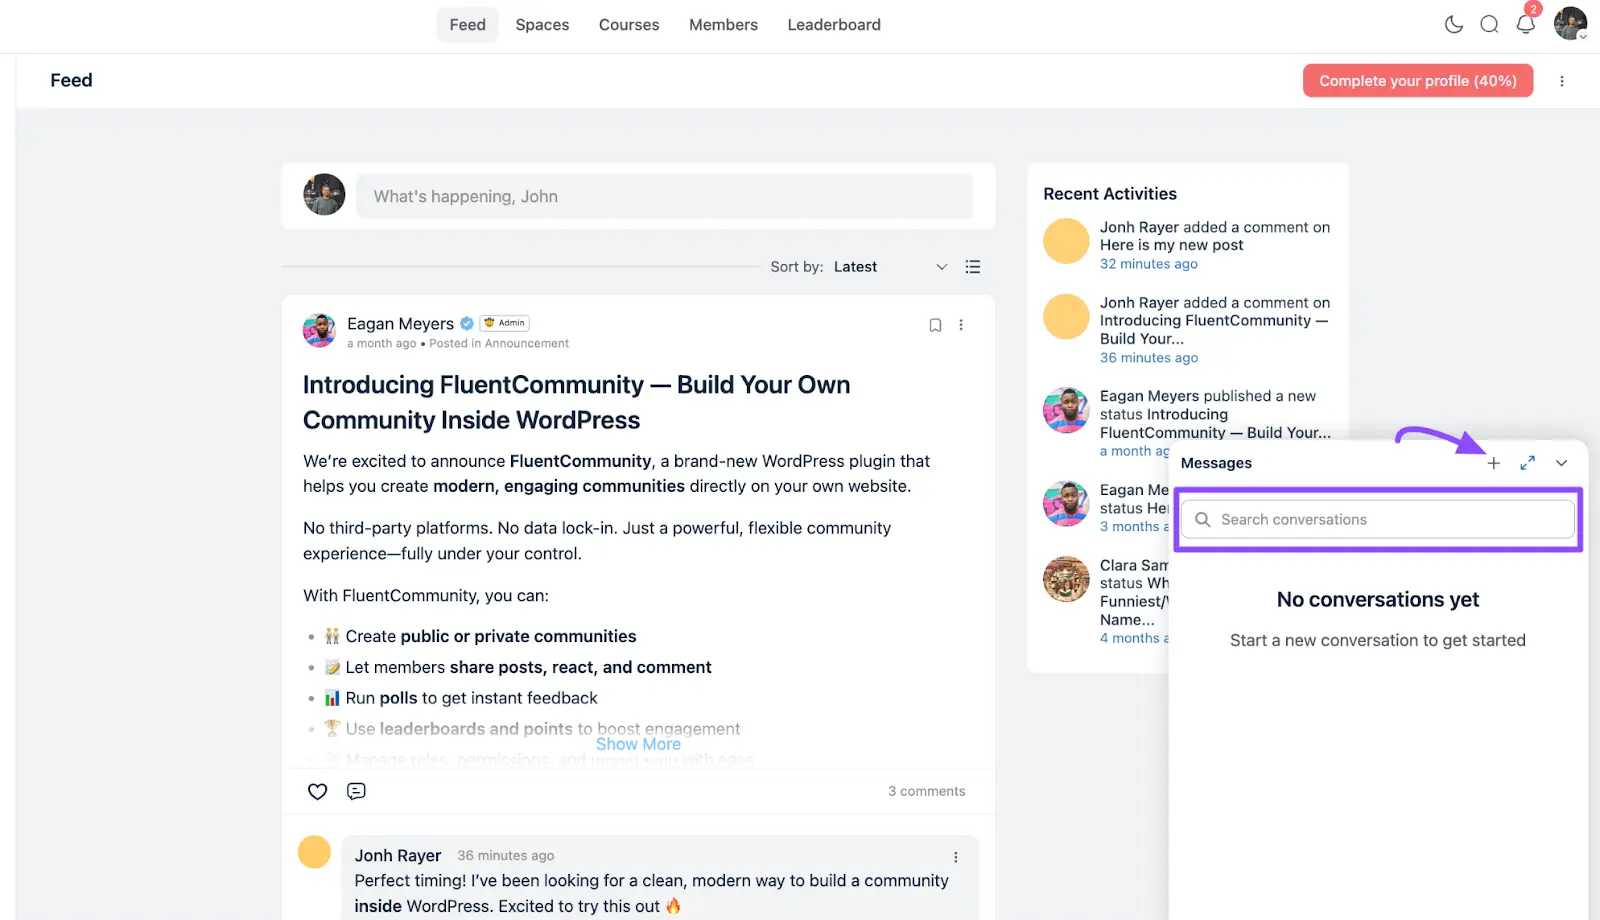
To access the chat feature in FluentCommunity, click on the Messages (speech bubble) icon in the bottom-right corner.
- Message List: Clicking this icon opens the messaging panel, where you can see all your recent conversations.
- Search Conversations: Use the search bar at the top of the message list to quickly find existing chats by typing a member’s name.
Starts a Conversation #
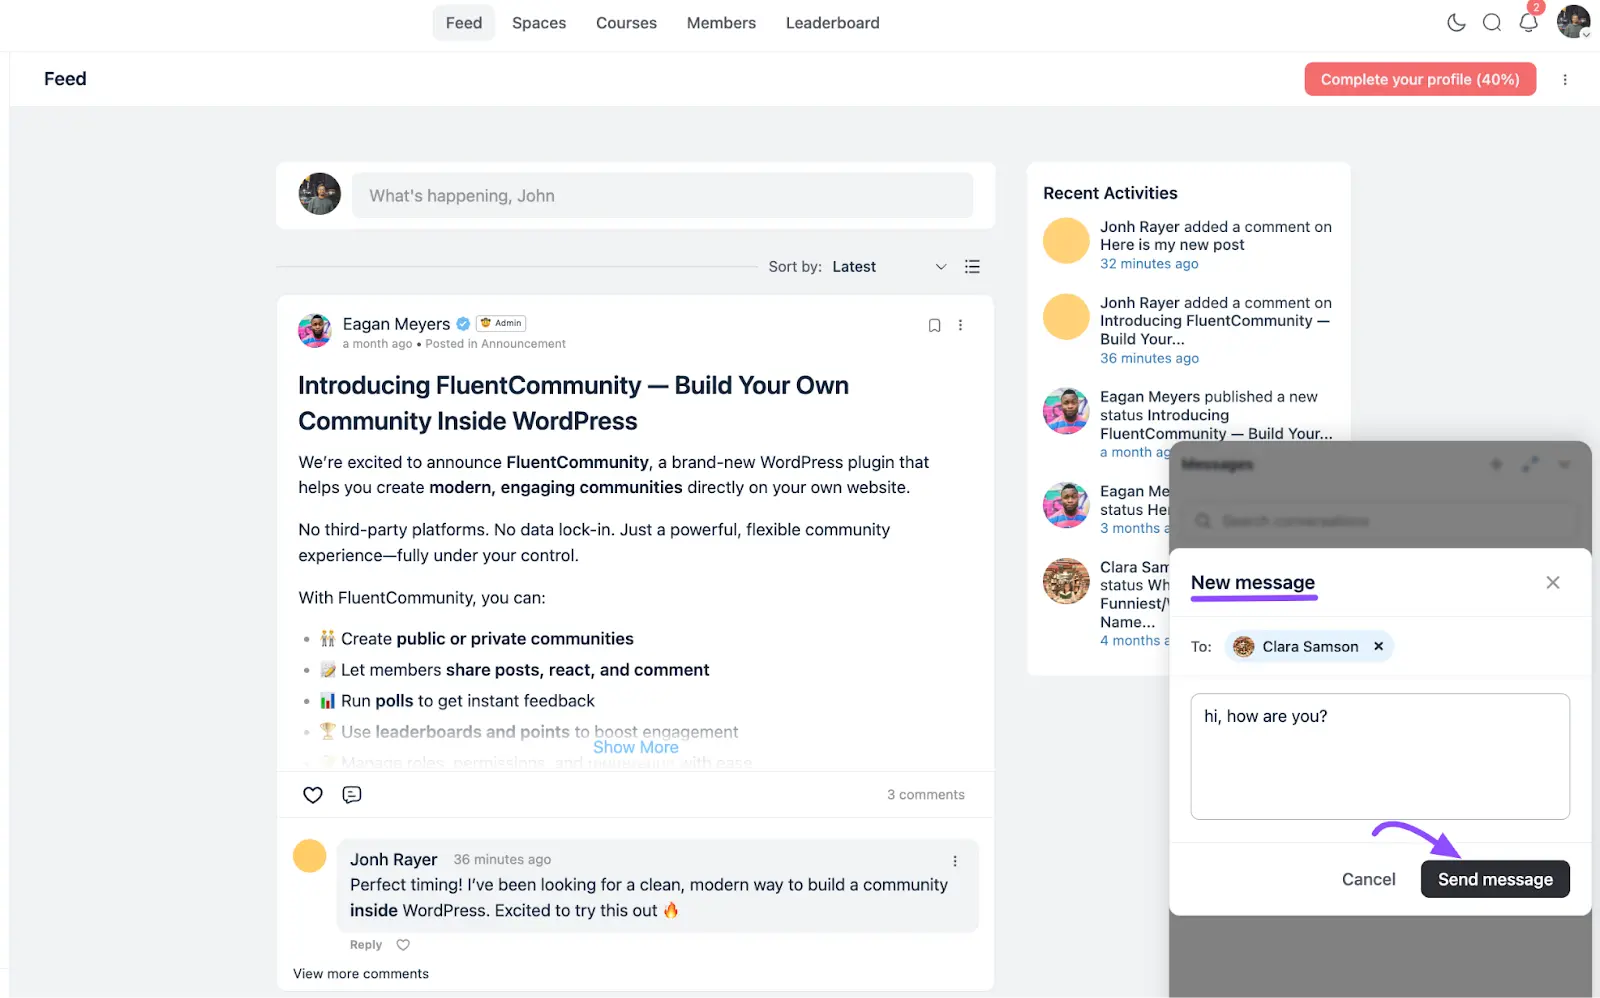
To reach out to a member, click the “+” (plus icon) or use the search bar within the messaging panel to initiate a New message.
- Type the name or username of the member in the “To:” field.
- Select the desired user from the dropdown list to open the chat window.
Sending Messages and Media #
In the Type a message… box at the bottom of the chat, you can:
- Upload Media: Attach images or videos directly within the chat to share content with other members.
- Send icon: Once your message is ready, click the Send icon to publish it.
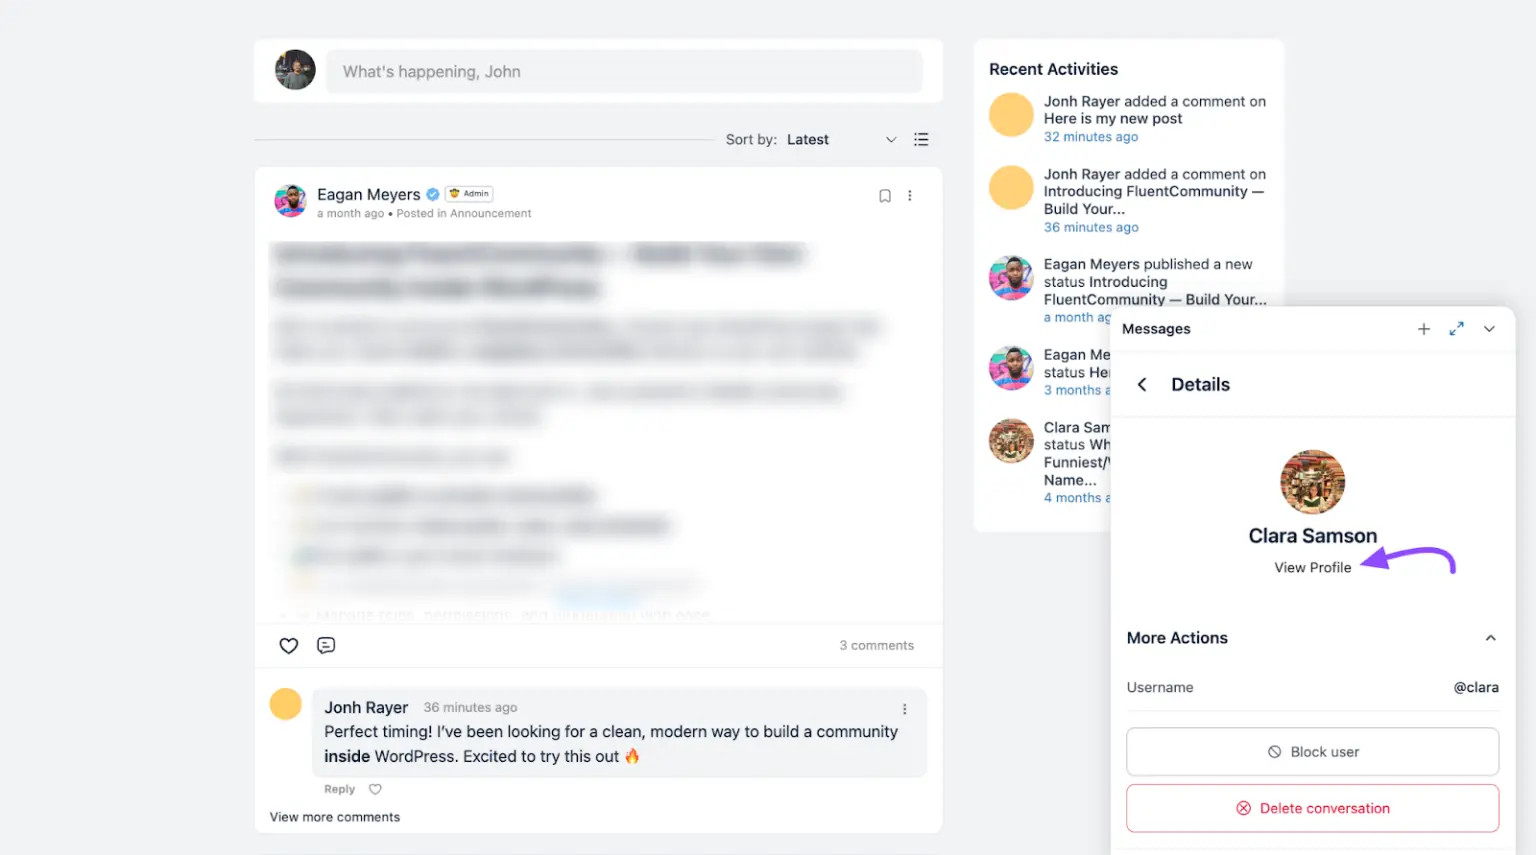
Viewing User Profile Details & Actions #
Within a conversation, click the Details (i) icon or the member’s name in the header to open the Details panel. This area allows you to:
- View Profile: Click this link to visit the member’s full community profile page.
- Username: View the specific @username of the person you are chatting with.
- Block User: Select this option under More Actions to prevent a specific member from sending you further messages.
- Delete Conversation: Choose this to permanently remove the chat history with this user from your list.
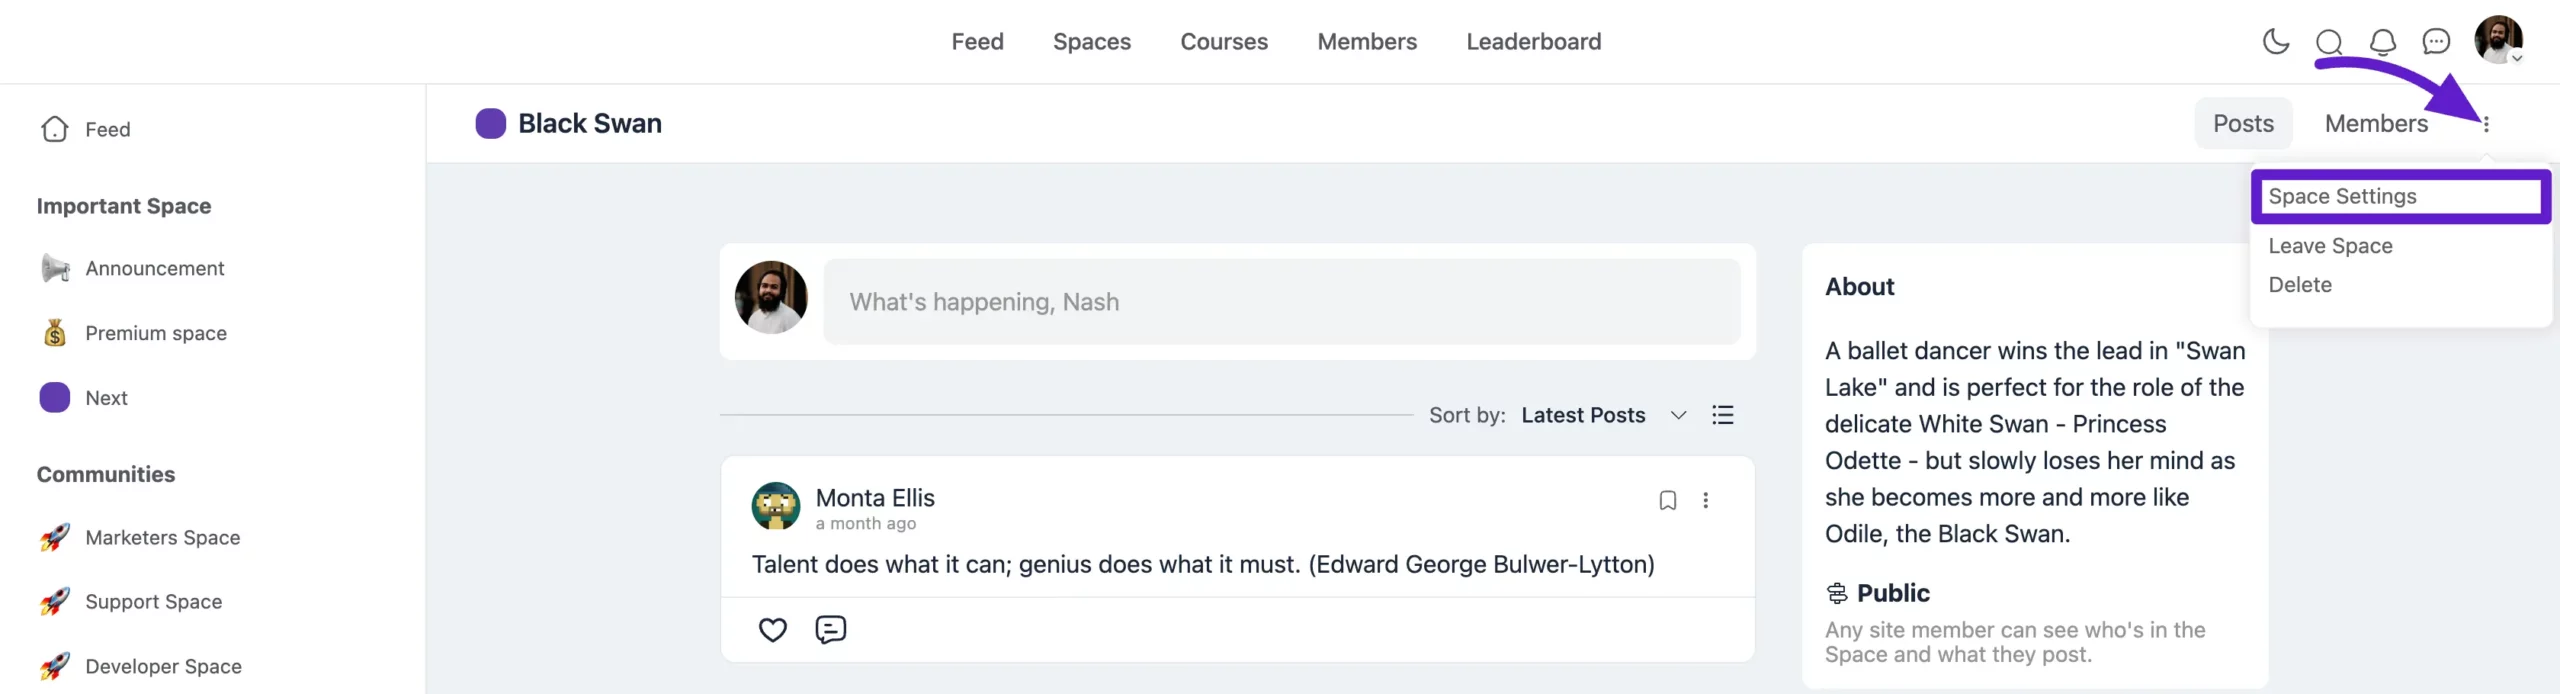
Group Chat #
You can create a group chat for your Space members, allowing them to have conversations together. To enable this option, go to the specific Space for which you want to set up the group chat. Click on the three-dot menu and select Space Settings.
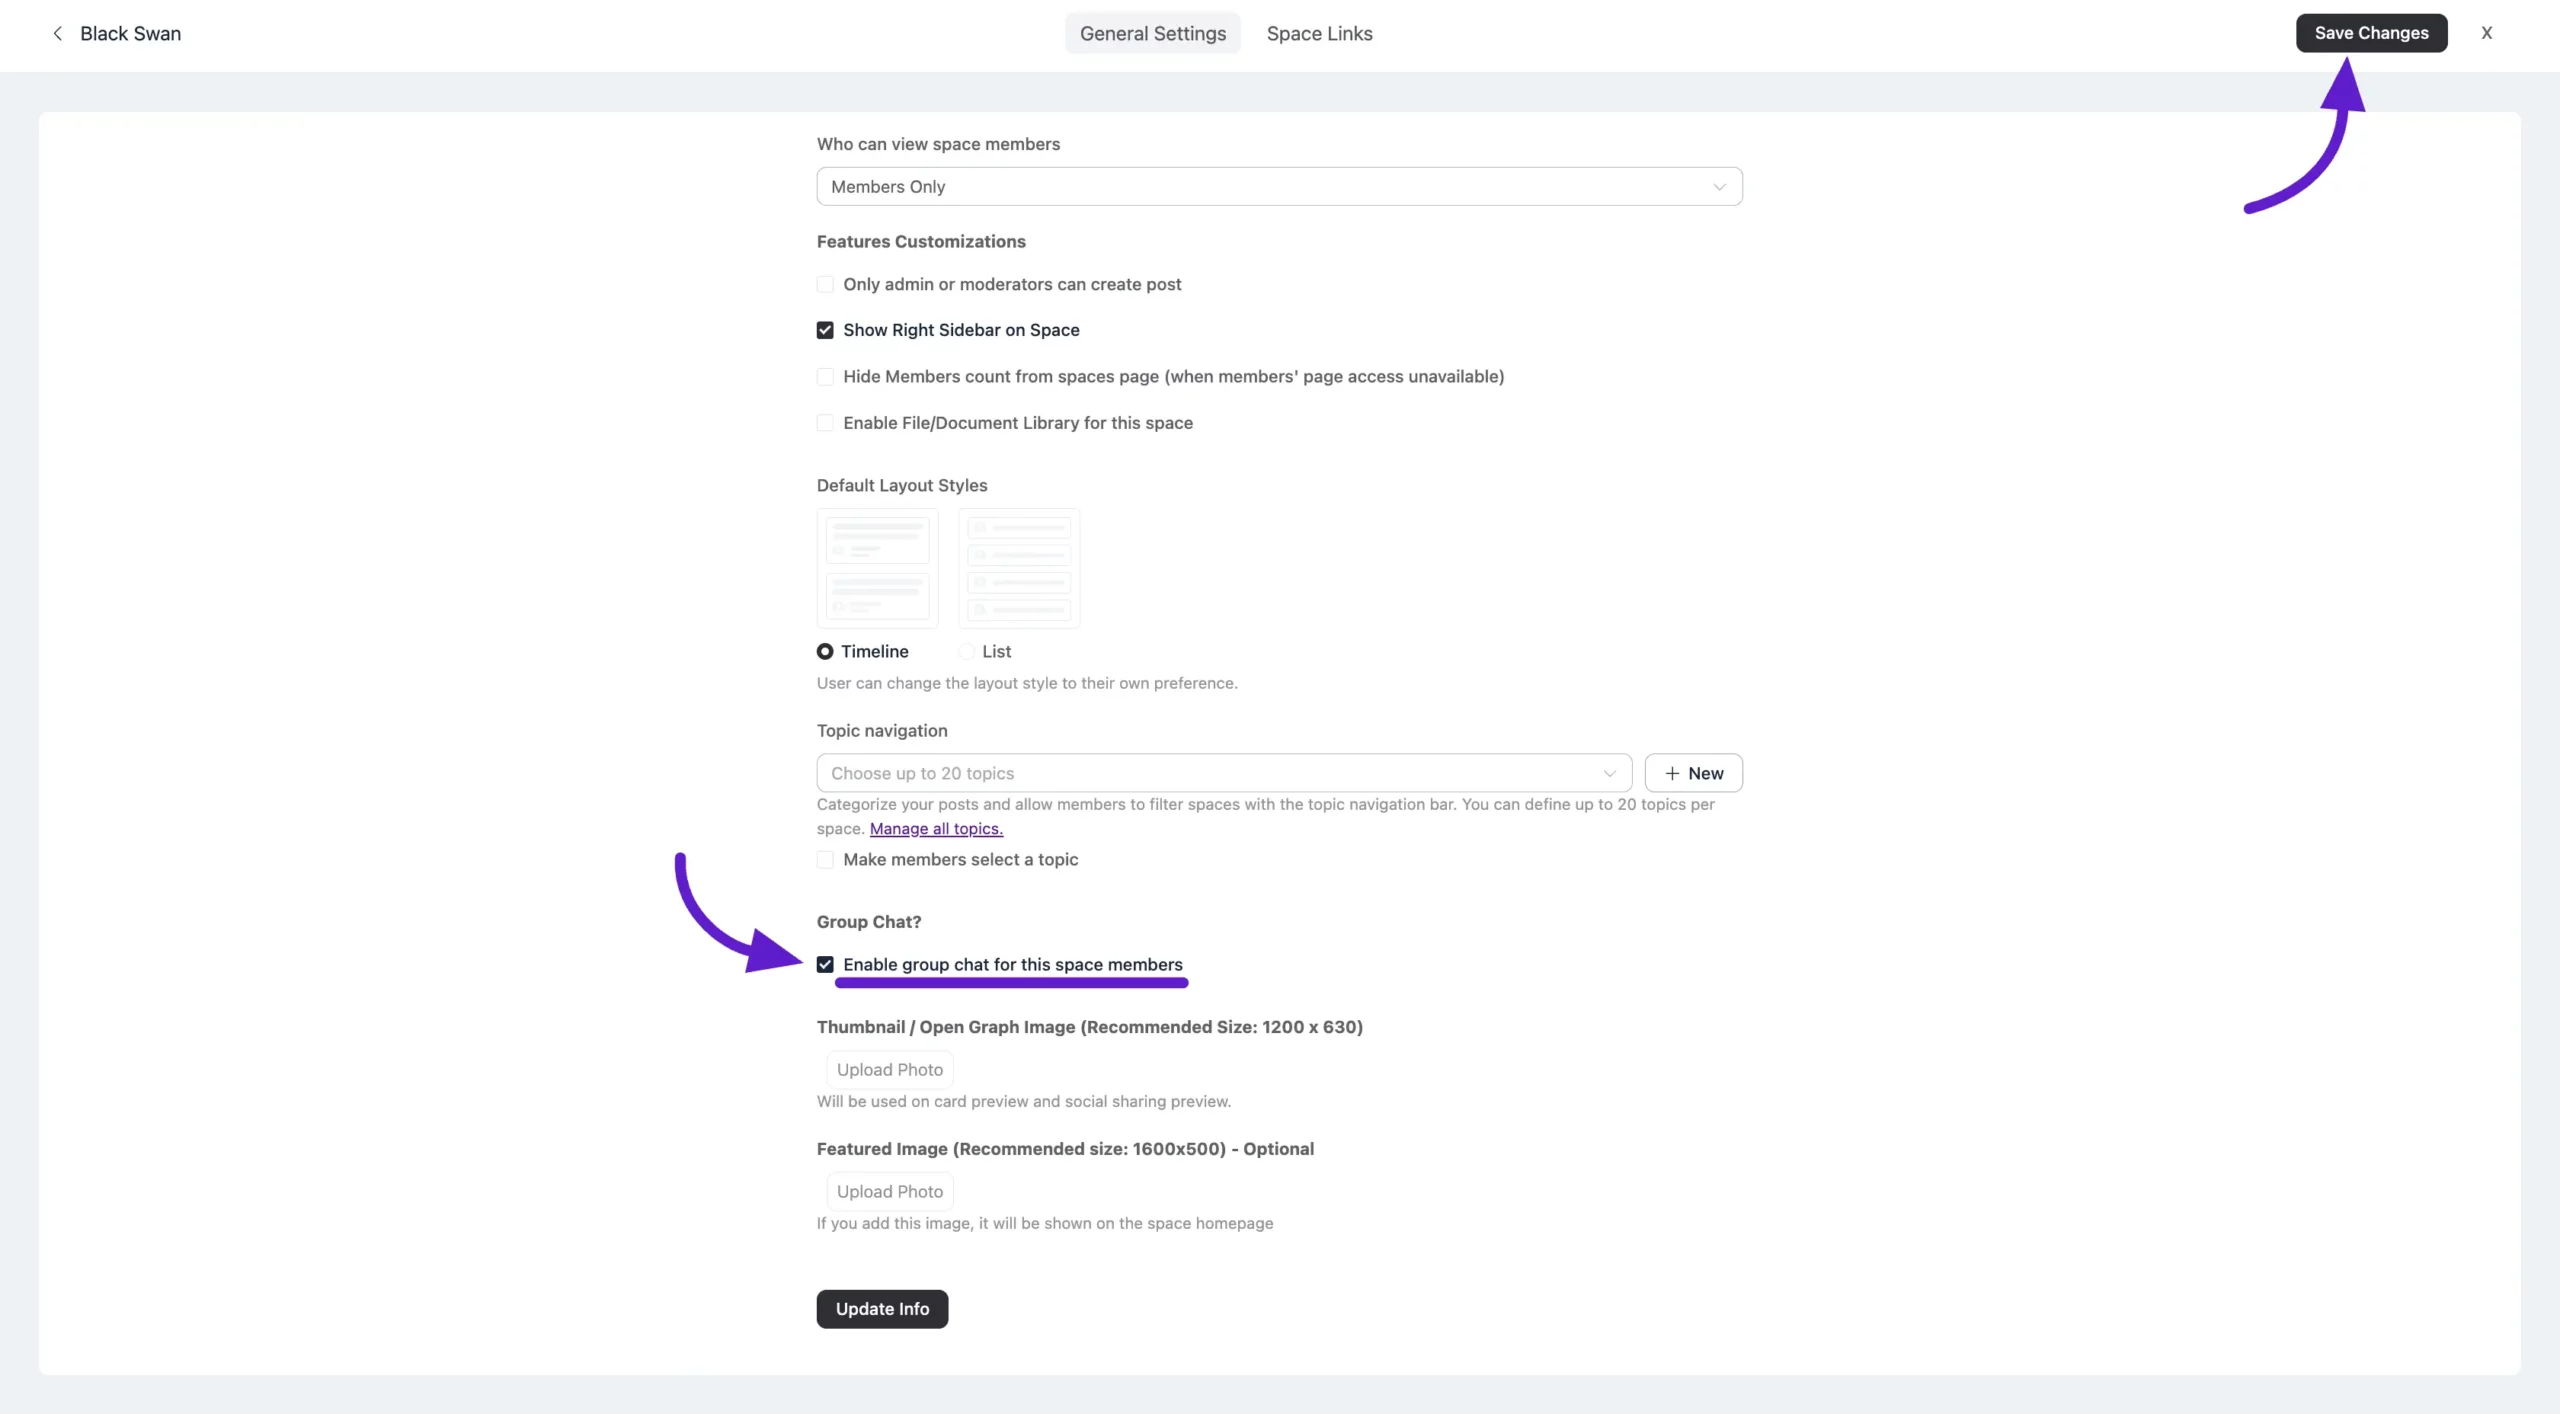
Here, you’ll find the Group Chat option. To enable it, check the Enable Group Chat for this Space Members box. This will activate group chat for the members of that Space.
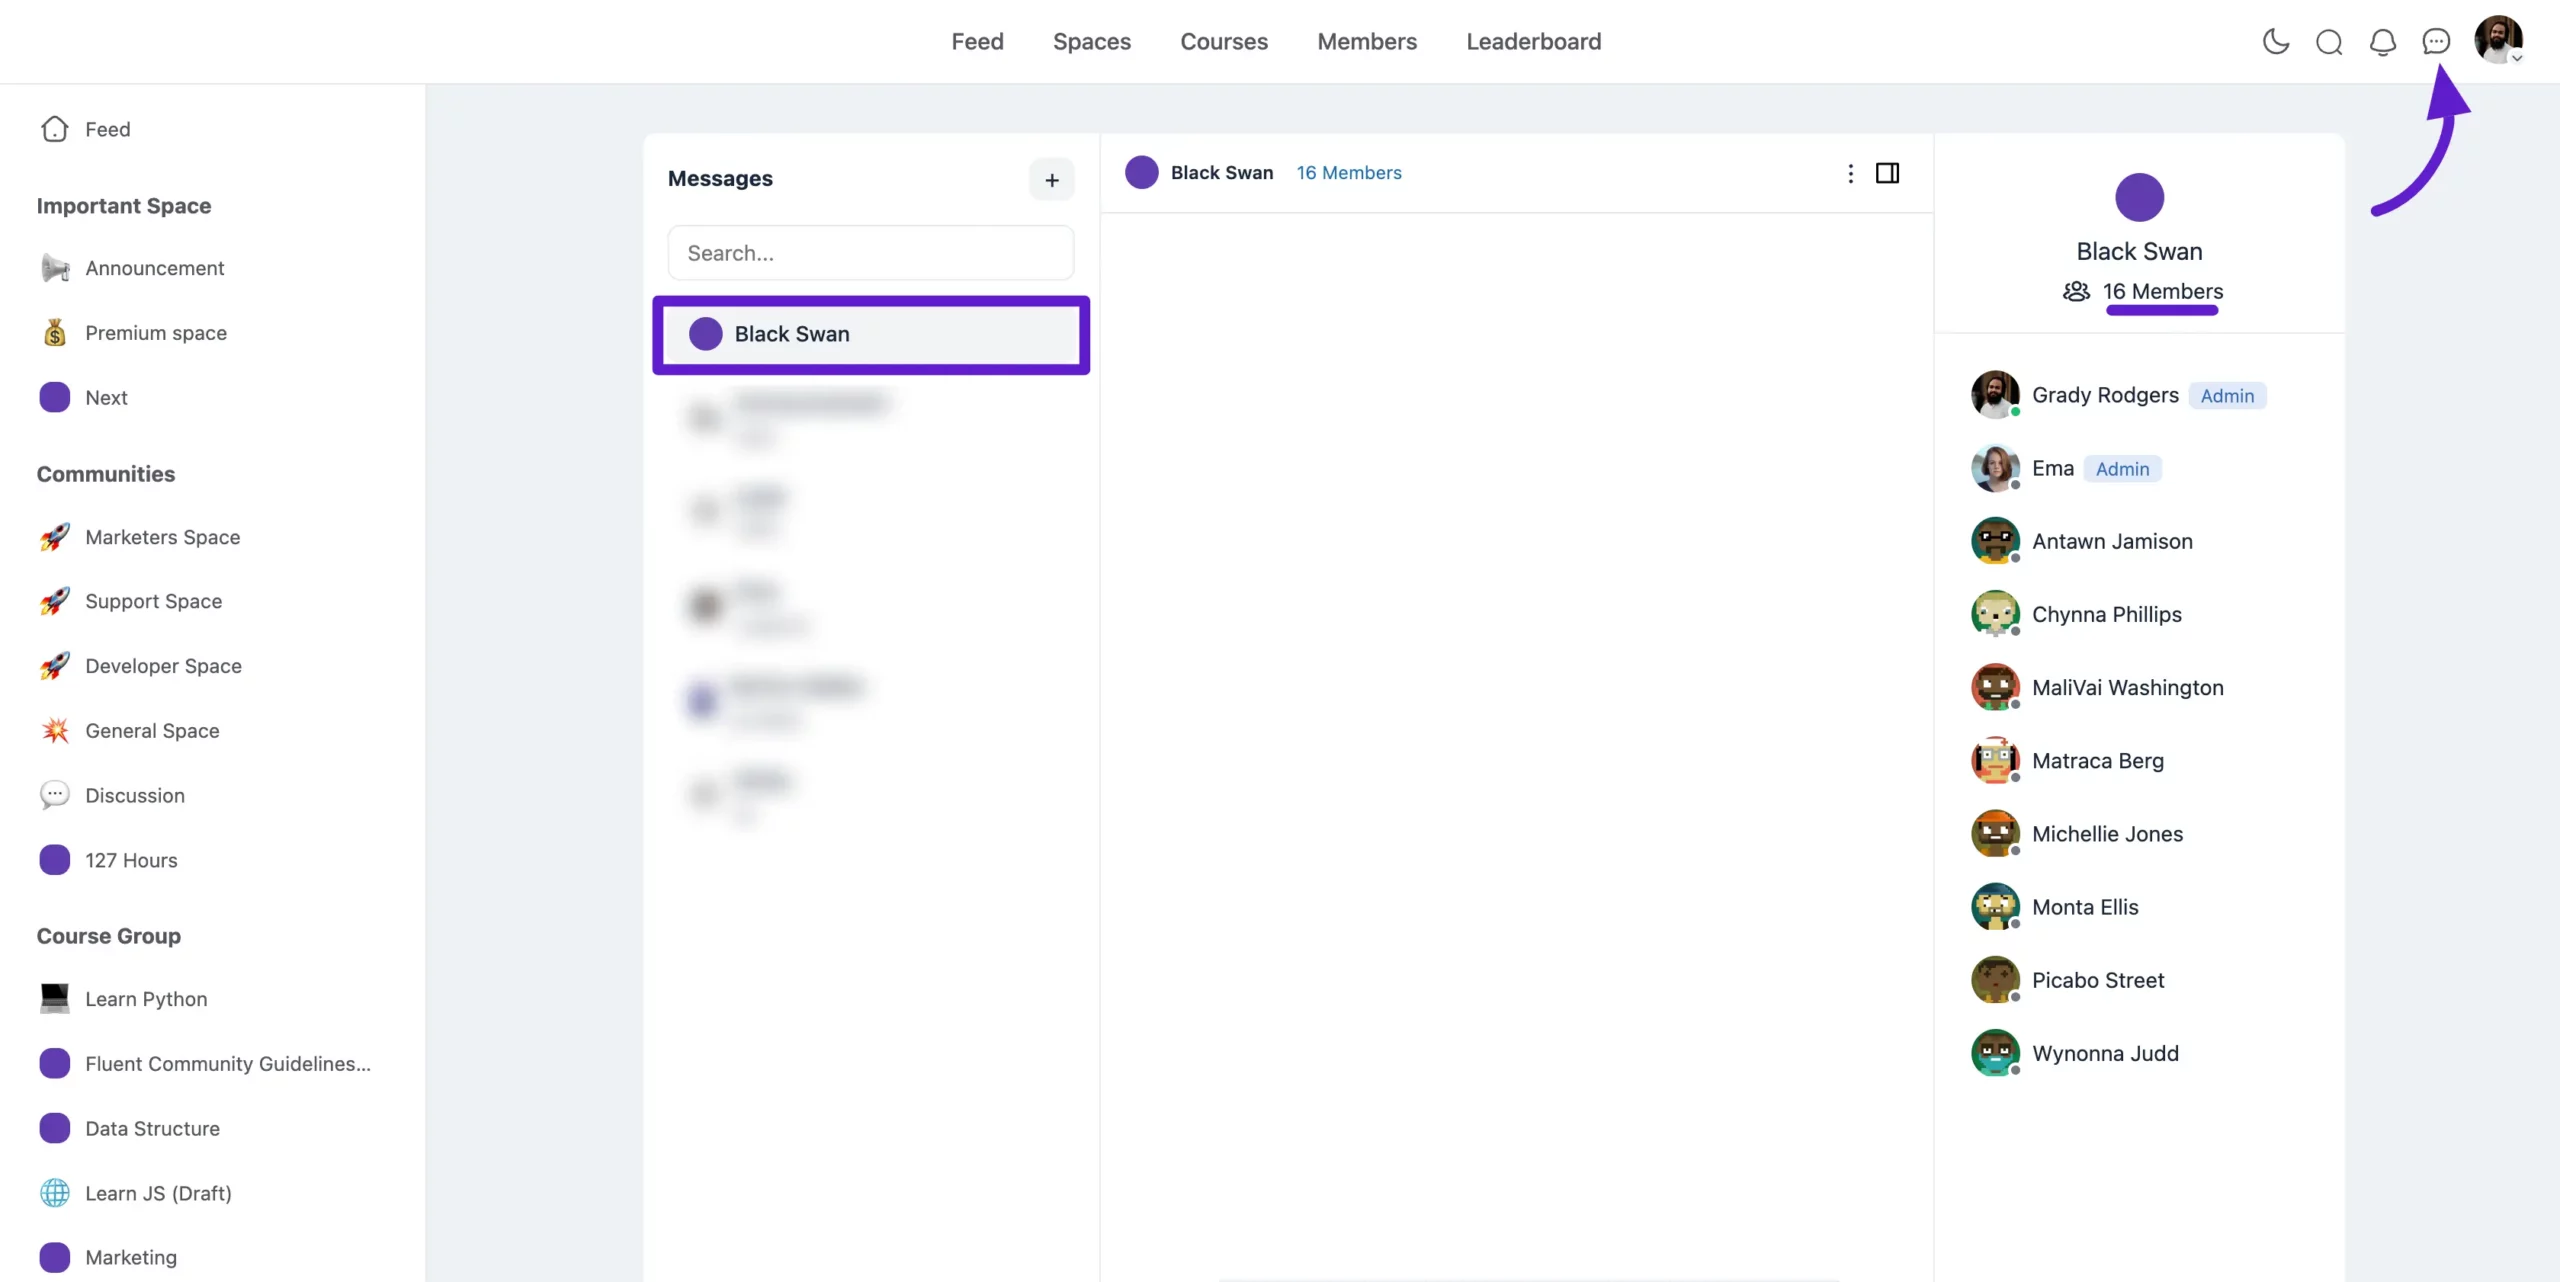
Now, click on the Chat icon from the navbar to open the chat. You’ll find a group chat box with the same name as the Space. Inside this chat, all Space members will be included, allowing seamless group conversations.
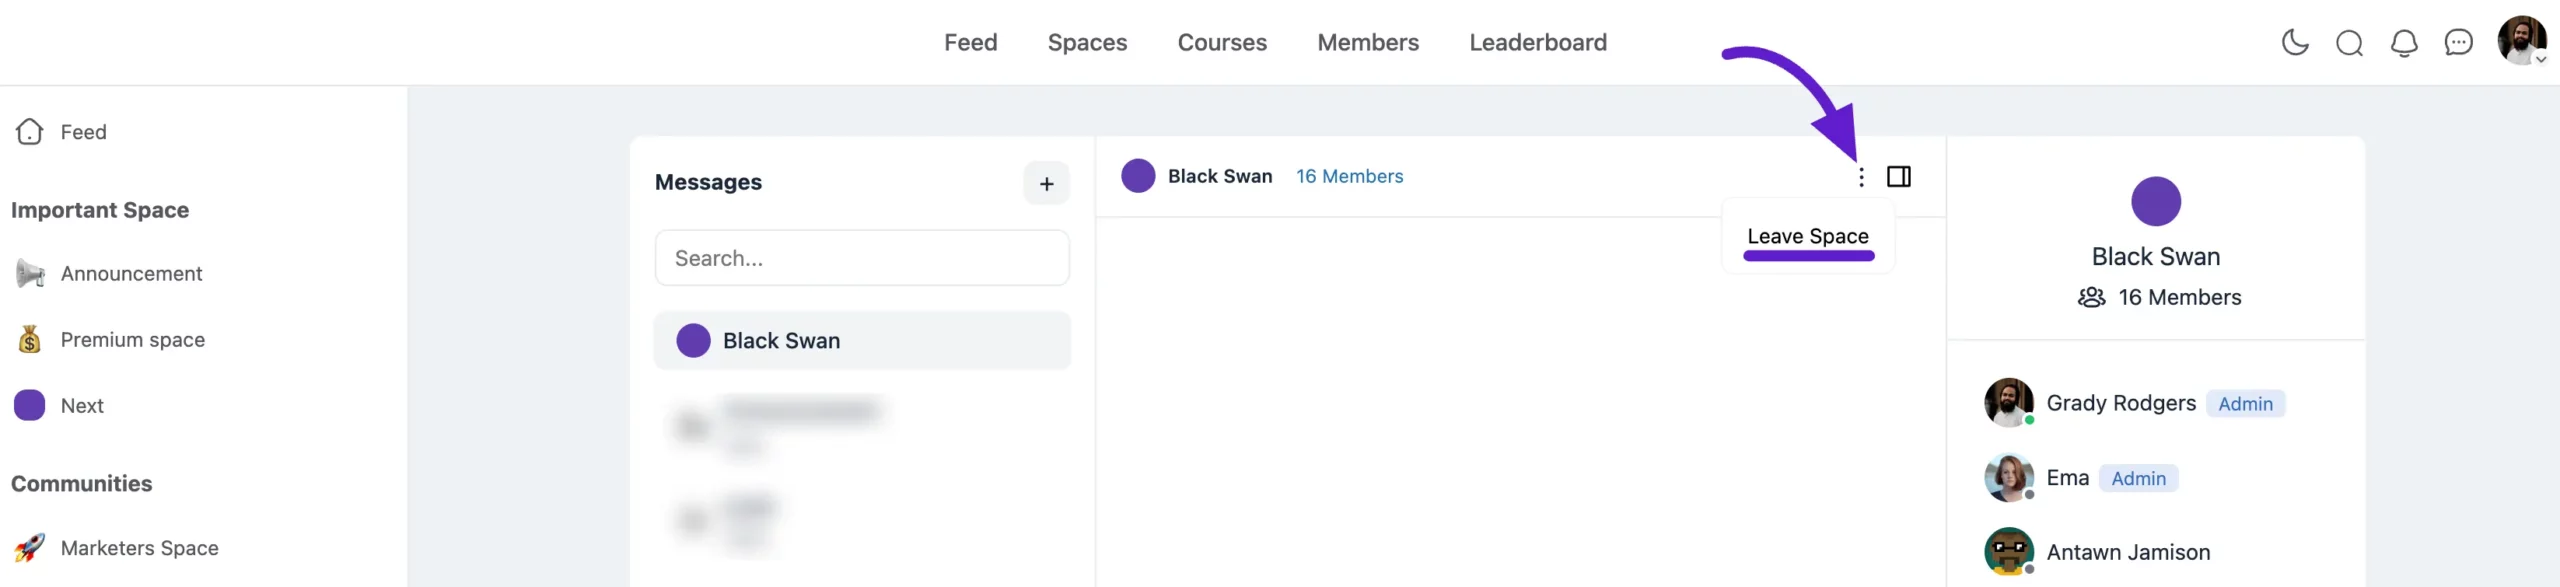
If you want to leave the group chat, simply click on the three-dot button and select Leave Space. This will remove you from the chat group, but you will still remain a member of the Space.
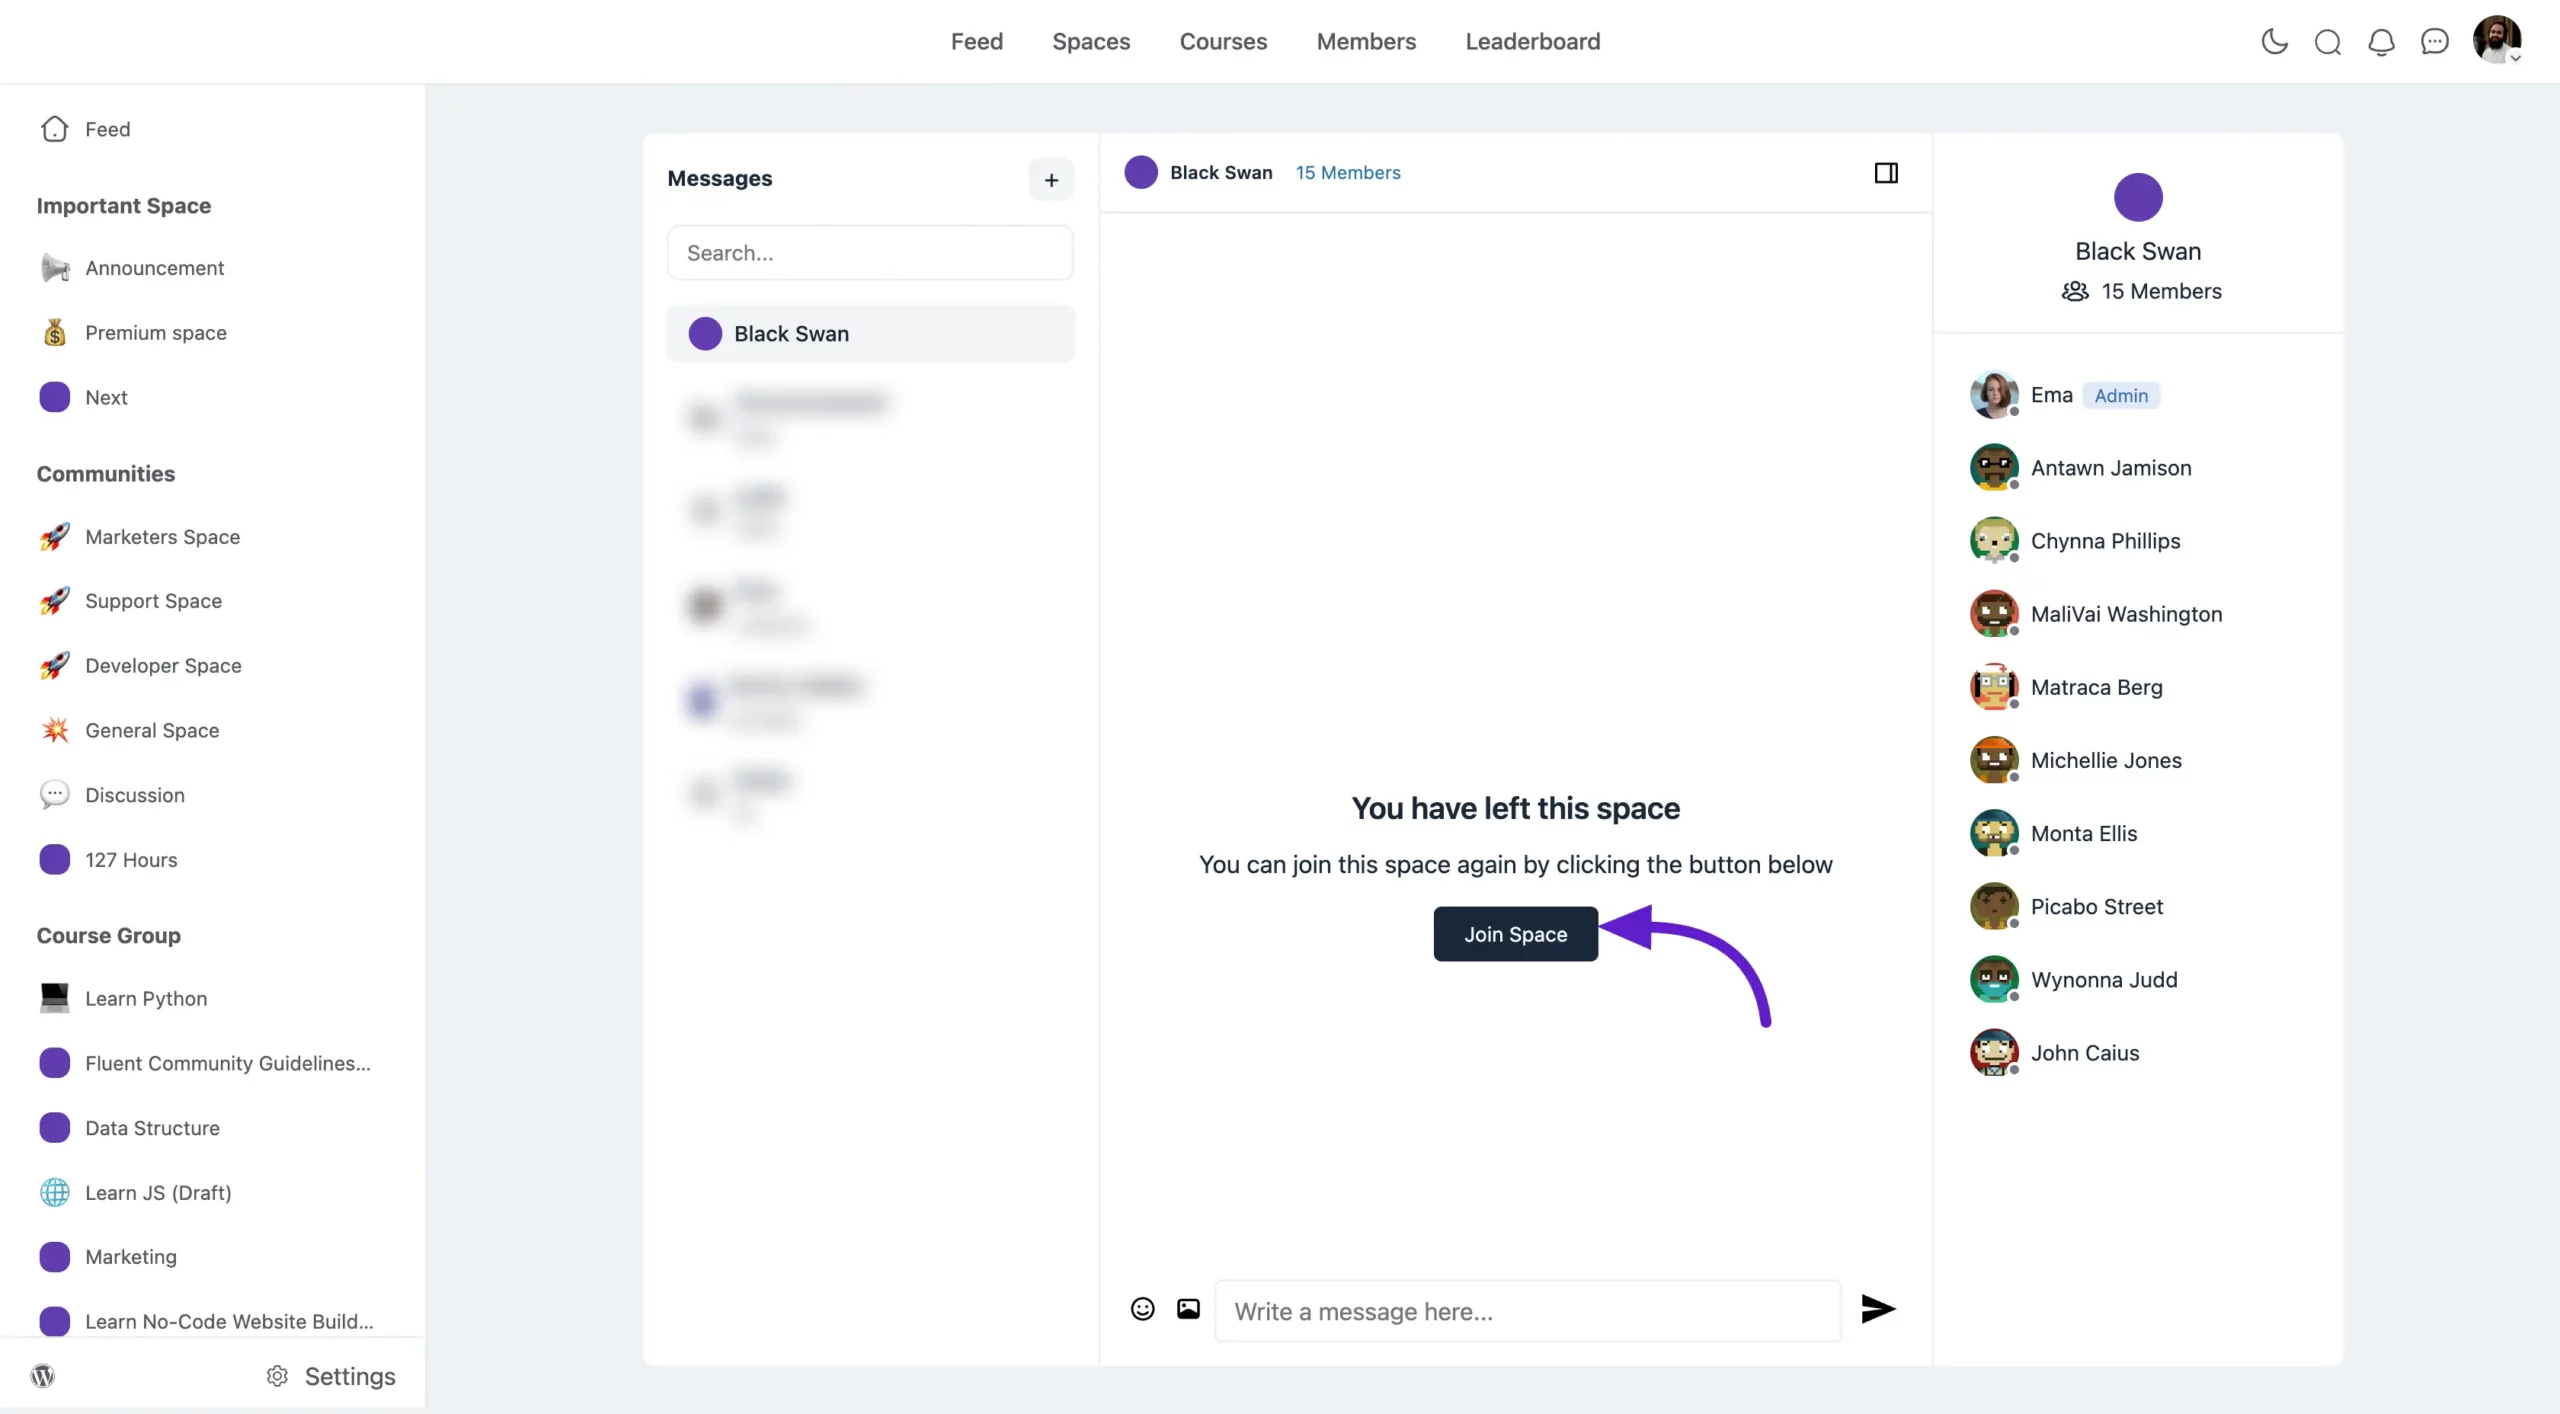
To rejoin the chat group, simply click on the Join Space button in the chat group box. You’ll be added back to the group chat instantly.
The Fluent Community Chat feature makes it easy for members to stay connected, share media, and view profile details, creating a vibrant community space for real-time communication.
If you have any further questions about this guide, please don’t hesitate to contact us.


