With FluentCommunity, creating and managing courses within your community is simple and flexible. Whether you’re sharing free resources or offering premium content, this guide will help you set up your course and organize your modules step by step.
Enable Course Module #
To enable the Course Module, follow these steps:
Go to your FluentCommunity and open the Settings section. Click on the Features and Addon tab on the left sidebar. Here you will see the Course Module and click the Settings button along with it.
In the popup that appears, check the Enable Course Module checkbox and click Save to apply the settings.
Now you’re ready to create and manage courses!
Create a Course #
To create a new course, do the following, In the left sidebar of Settings, click on Manage Course, or you can enter the Courses from the navbar of FluentCommunity.
Click the New Course button to create a new course.

General #
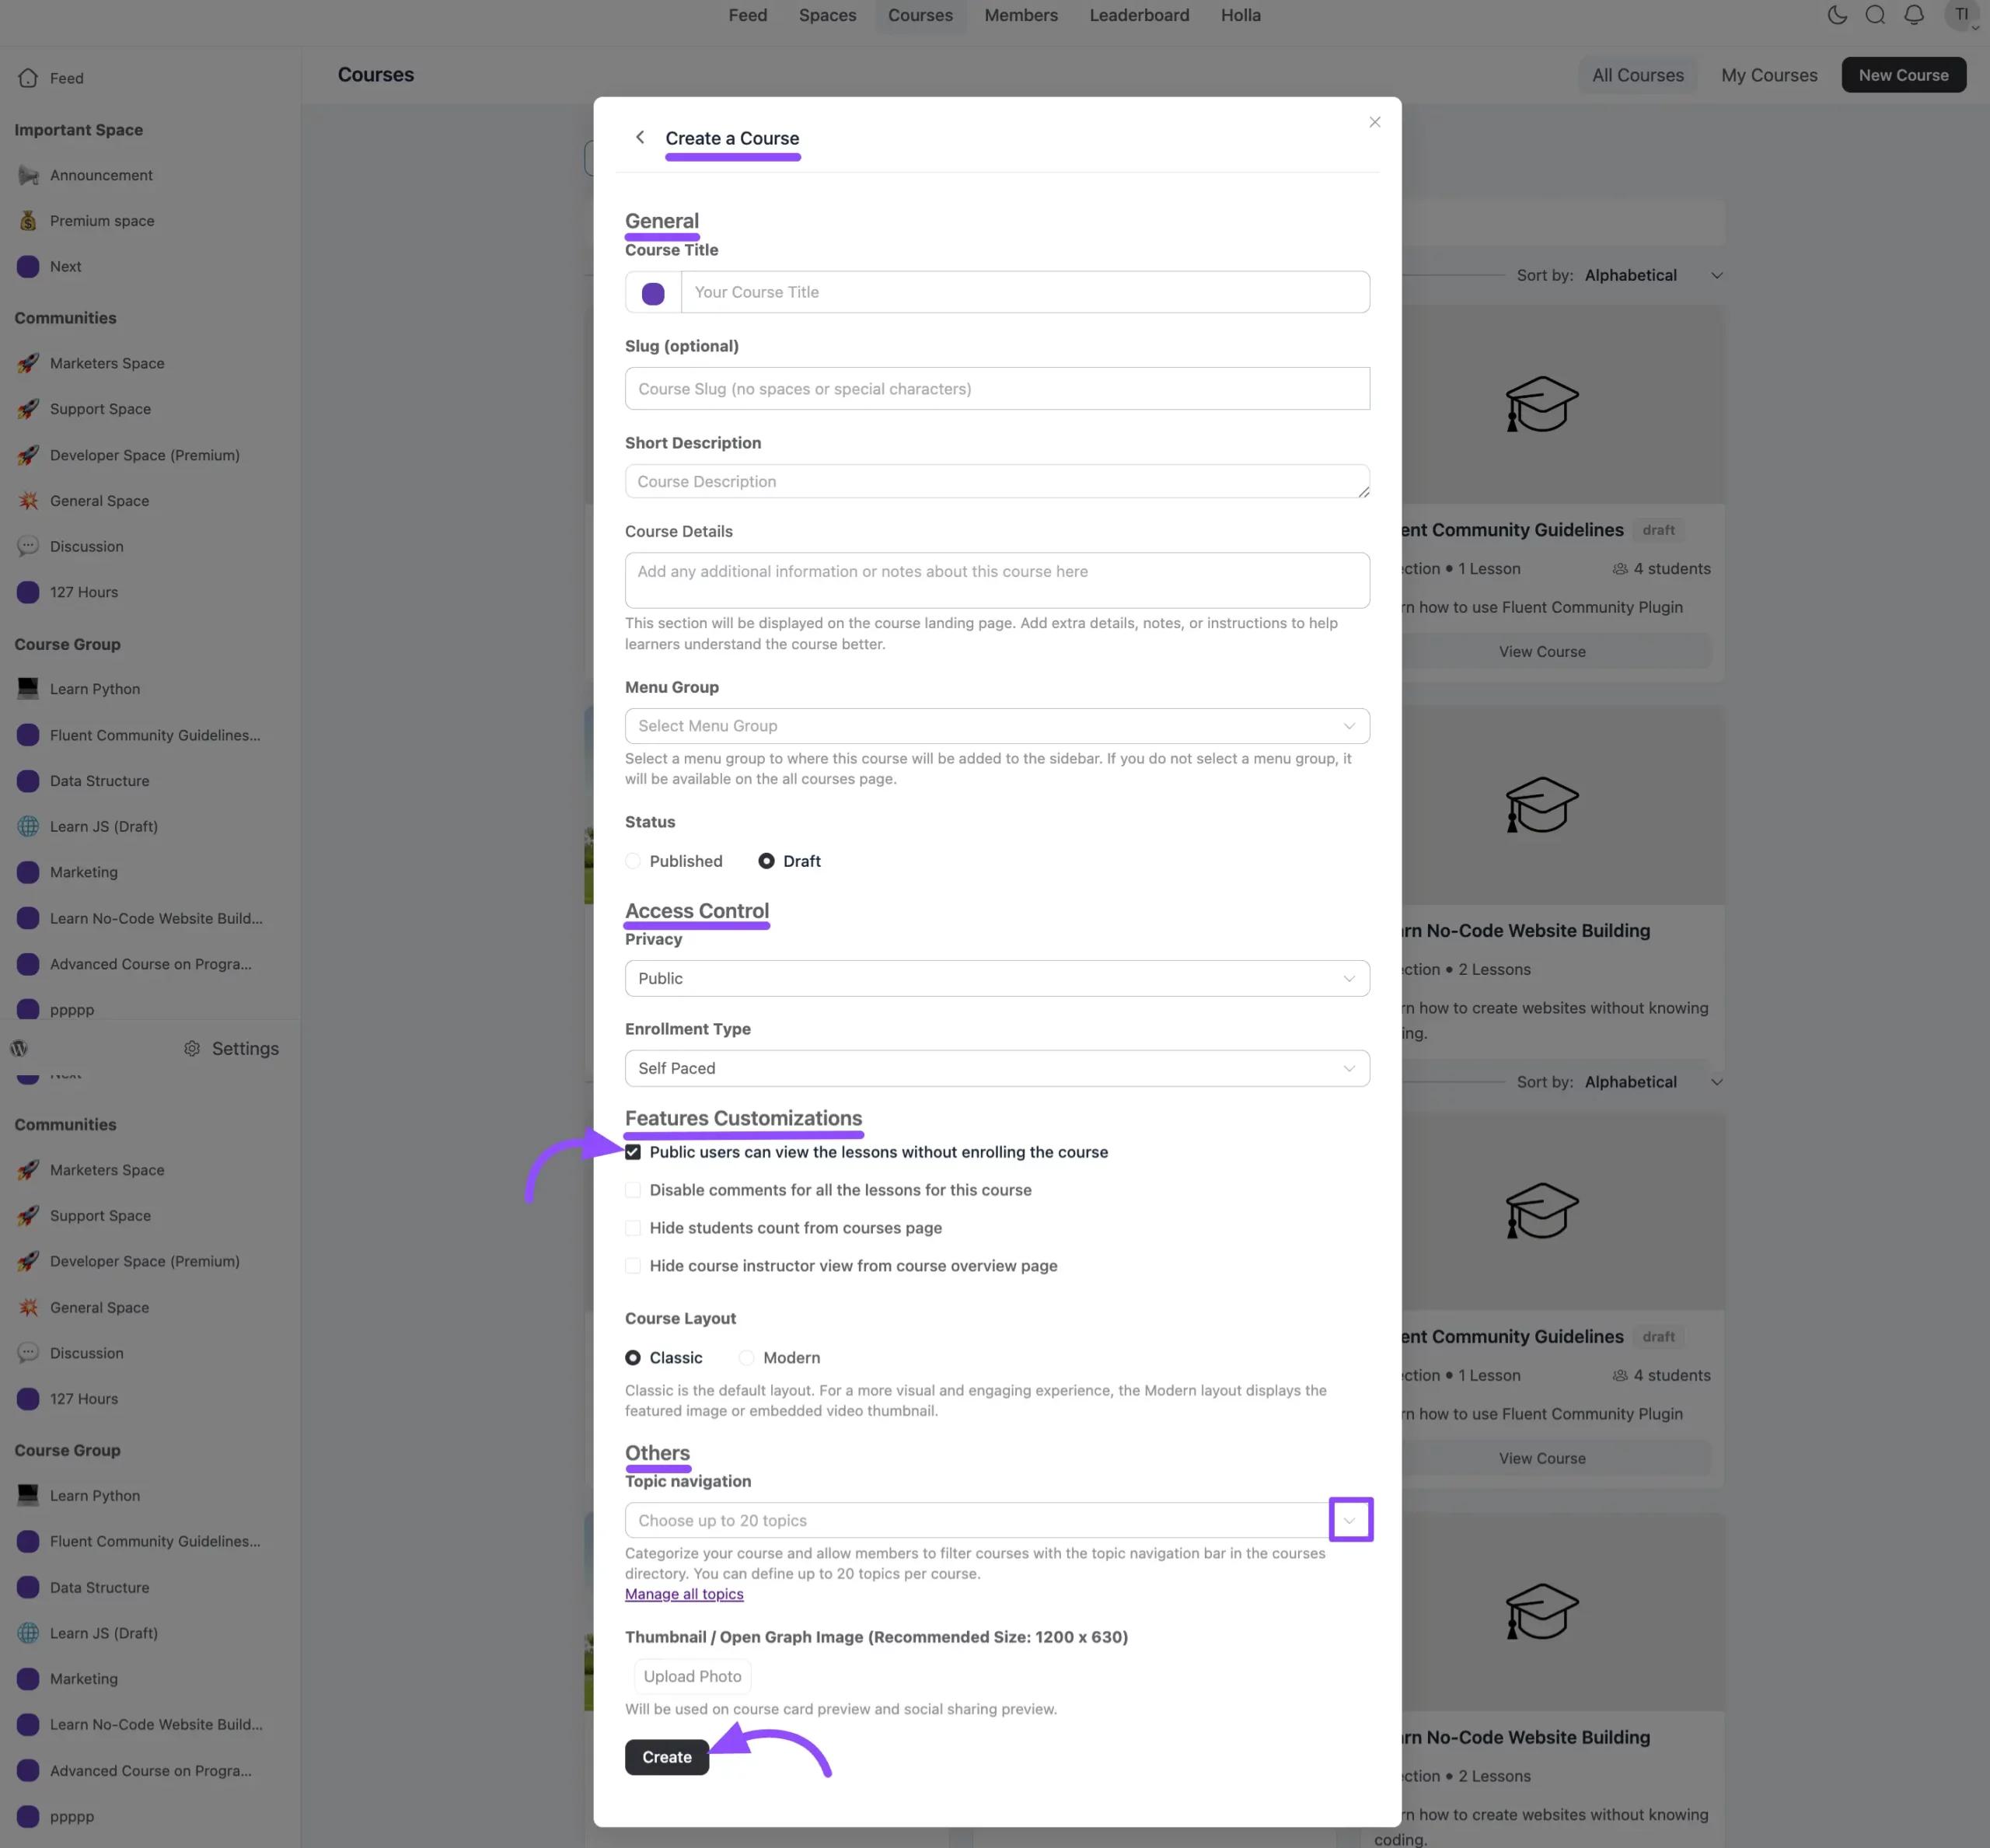
A popup will appear to fill out the course details. Here give the necessary details for your Course.
- Course Title: The name of the course that students will see.
- Slug: Give a slug for your course if you want.
- Short Description: Here you can give a brief overview of the course.
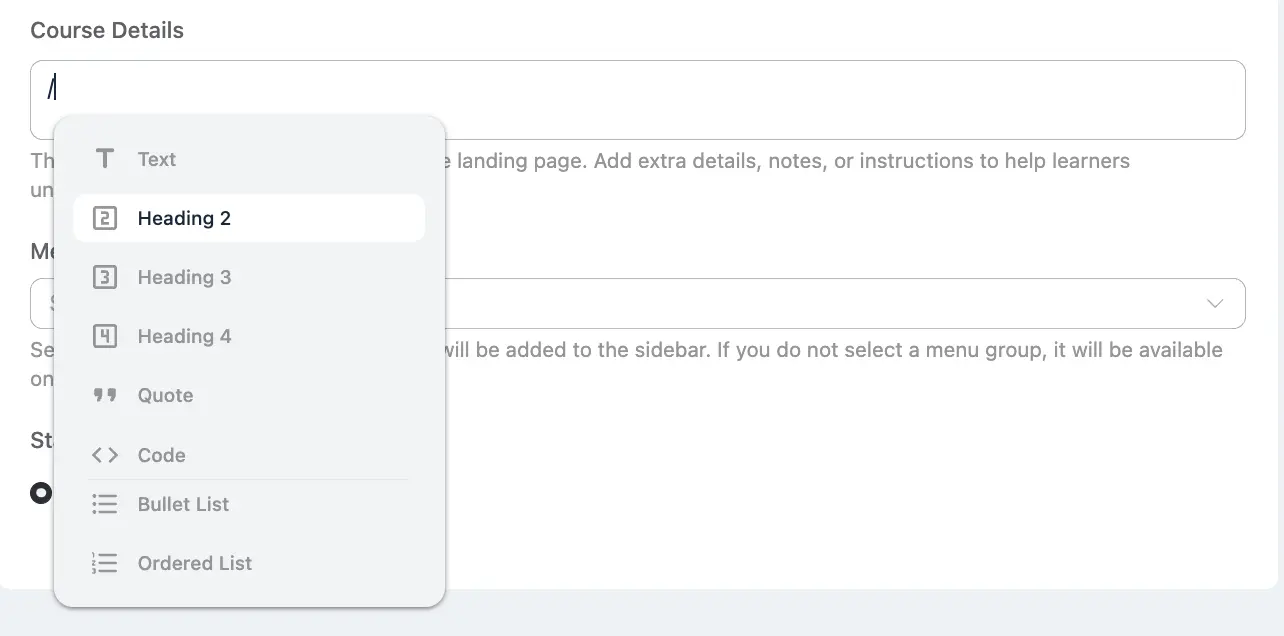
- Course Details: Use this section to add extra information or important notes about your course. Anything you write here will appear on the course landing page, helping learners understand what the course is about. You can include special instructions, helpful tips, or any other information that enhances the learning experience.
This powerful tool provides various formatting options to make your content clear and engaging for learners. Here are the common formatting choices available:
- Text
- Heading 2
- Heading 3
- Heading 4
- Quote
- Code
- Bullet List
- Ordered List
- Menu Group: Pick which group will host the course.
- Status: Choose whether the course will be Published or will be saved as a Draft.
Access Control #
- Privacy: Choose whether the course is public (open to everyone) or private. To know more about Privacy, you can read this documentation.
- Enrollment Type: In enrollment type options, you can manage and track your students progress easily. Choose one option below:
- Self-Paced: Students can access all the course content right away.
- Structured: Content is released slowly (dripped) based on when students enroll.
- Scheduled: The course starts on a set date, and new lessons are released on a fixed schedule.
Feature Customization #
You’ll find a few handy customization options for the course:
- Public users can view the lessons without enrolling the course: Enable this to let anyone view the course content without enrolling. Note: This only applies to Public courses. It won’t work for Private or Secret courses.
- Disable comments for all lessons for this course: Turn this on to disable comments across all lessons by default. You won’t be able to enable comments individually from the lesson settings. If you want to allow commenting, you’ll need to enable it from the course edit settings.
- Hide students count from courses page: This option hides the number of enrolled students from being displayed on the course page.
- Hide Course Instructor’s View from Course Overview Page: Enable this option to hide the instructor section from the course overview page. When turned on, students won’t see the instructor’s name, photo, or profile information on the course page.
- Course Layout: You can choose between two course layouts: Classic or Modern. By default, the Classic layout is selected. If you want your course to look more visual and engaging, choose the Modern layout option. The Modern layout features an image or embedded video thumbnail at the top of your course for a more interactive look.
Others #
Topic Navigation: Select your preferred topics to help course members easily filter and find content in the course directory. You can add up to 20 topics for each course. This makes it easier for learners to browse and explore relevant courses by topic.
Thumbnail / Open Graph Image: Upload an image that will be used as the course thumbnail and Open Graph image. This helps represent your course visually on the course page and when shared on social media platforms.
Once you’ve added these details, click Create to finish setting up your course.
Lesson Creation #
Now you’ll land on the course creation page, where you can start adding sections and lessons to structure your course content.
Adding Sections and Lessons
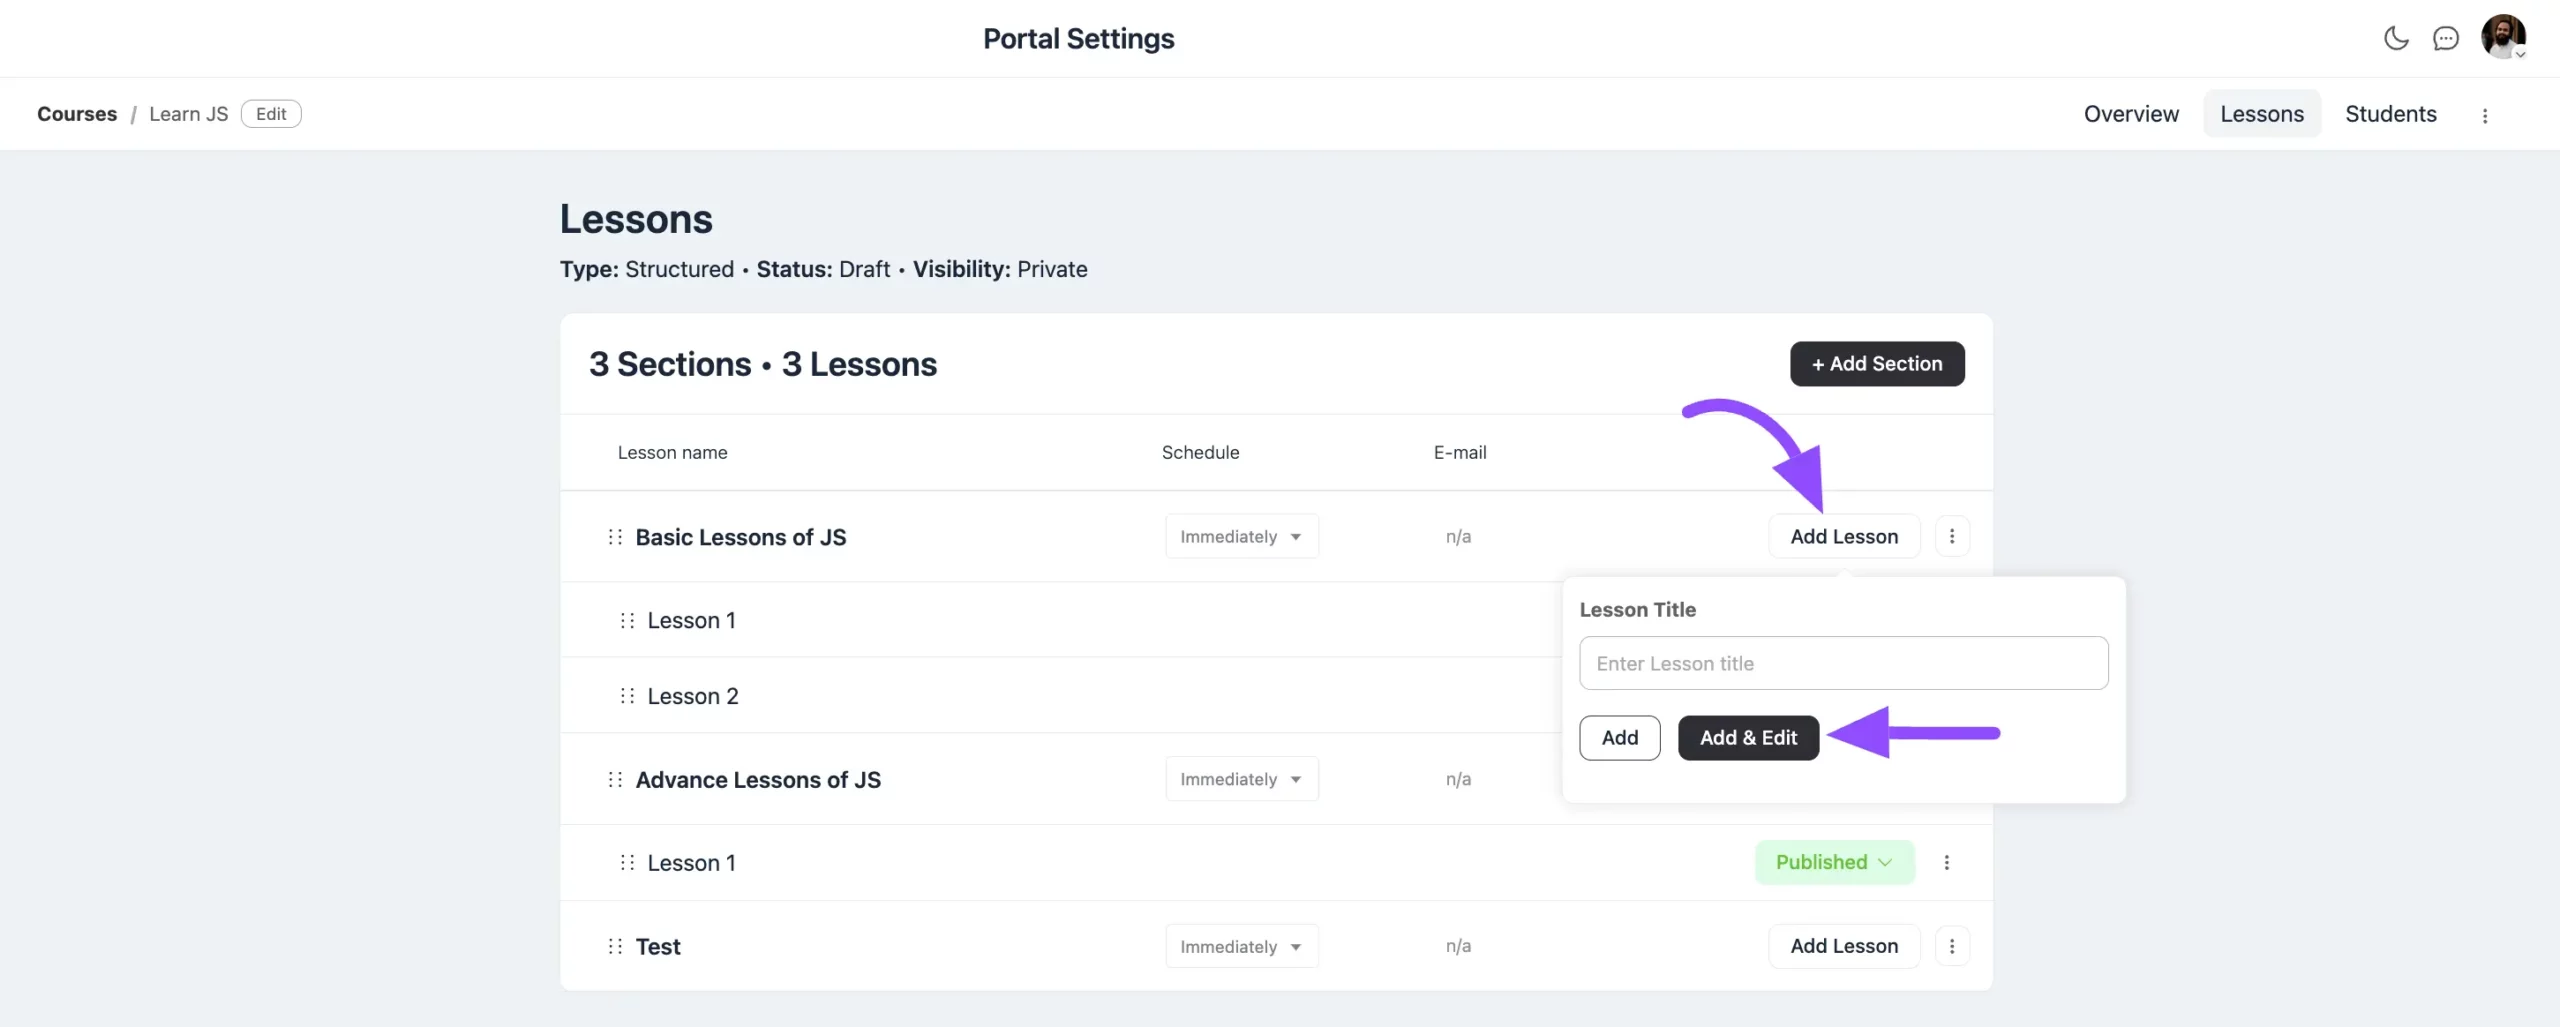
Click the Add Section button and enter a Topic Title, then press Save.

To add a lesson, click Add Lesson and enter the Lesson Title. You can choose to Add or Add & Edit:
- Add: Won’t take you to the next editing options.
- Add & Edit: Allows for future edits.
Edit Lesson Slug (optional): FluentCommunity enables you to edit the lesson slug directly from your course lesson easily. For this, click the three-dot menu button found on the right-hand side of the lesson row. From the dropdown options, select Edit Slug.
A pop-up box will appear displaying the current slug. Enter your desired URL-friendly text in the input field. Click the Save button to apply your changes immediately.

Embedding Media and Writing Content
You can customize your course lessons using WordPress’s Gutenberg Editor. Design your content freely with Gutenberg blocks to create engaging lessons. On the right sidebar, you’ll also find helpful Shortcodes to make your lessons even more dynamic and tailored to your students.
Feature Settings
Here are the Feature Settings to enhance your lesson:
Enable Video Embed: Turn this on if you want to include video content in your lesson.
Enable Comments: Check this box to allow students to comment on the lesson.
Free Preview Lesson: If you check this checkbox, public users can view this lesson without enrolling in the course.
Oembed: Want to embed a video using just a link? Select the Oembed option, paste the video URL into the field, and click the Embed button. Your video will appear directly in the lesson.
Custom HTML Code: If you prefer using custom code then select Custom HTML Code and paste your video embed code in the provided field.
Video Length: Add the duration of your video here. It will be displayed in the lesson to give students an idea of the video length.
Documents & Files: Want to attach any files or documents to your lesson? Upload them here. Learn more about using Documents & Files.
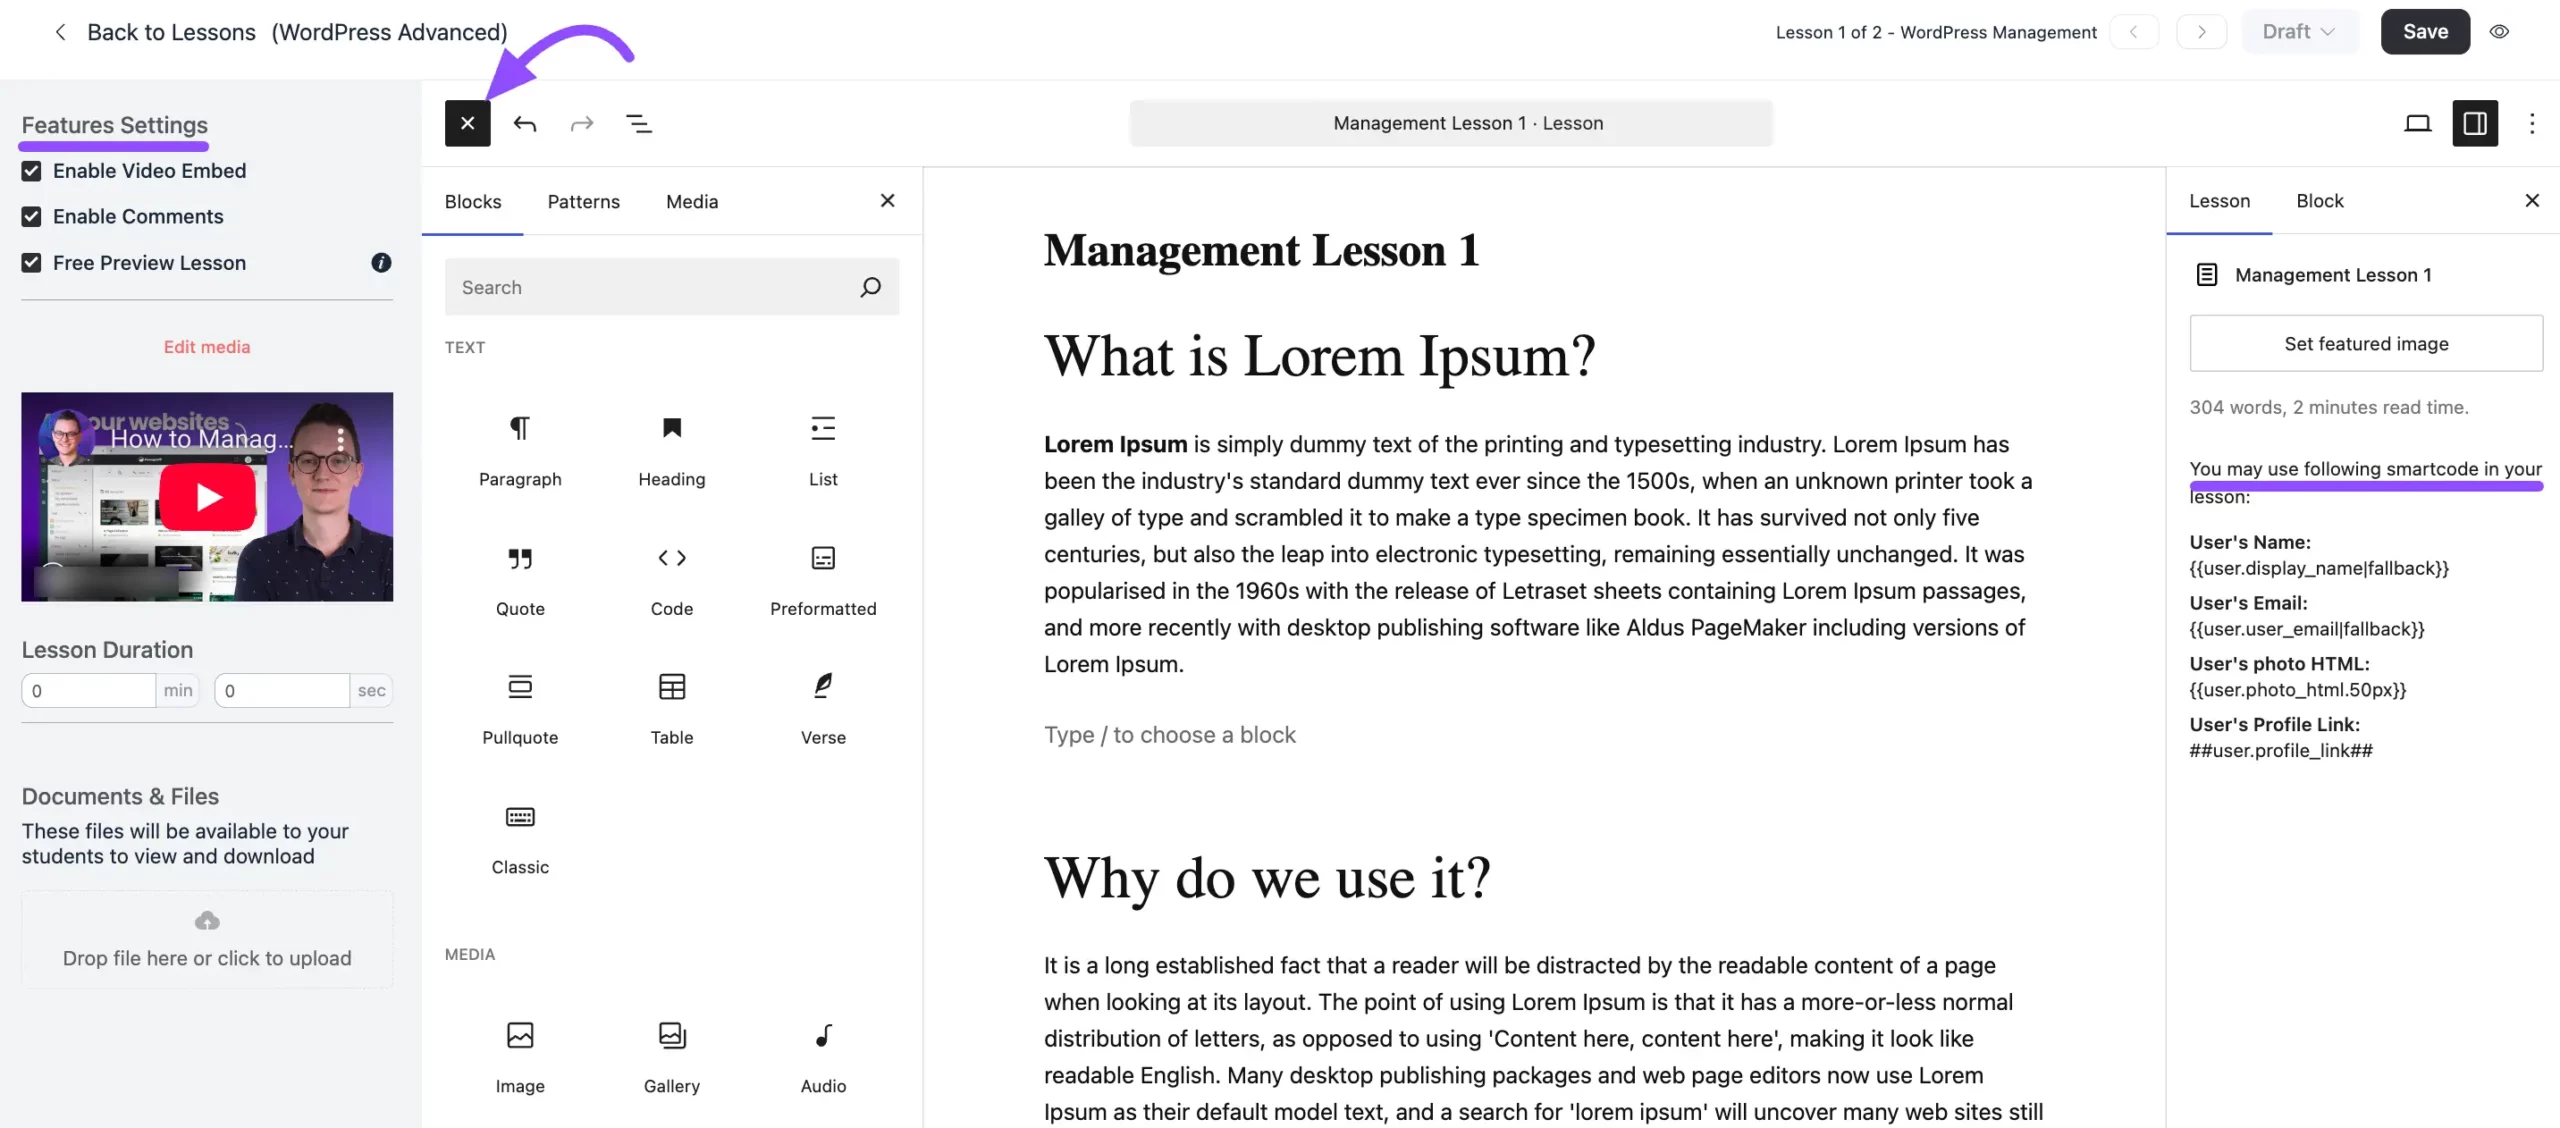
Once you’re done, click on this button from the navbar then Publish the Course and click on the Save button.
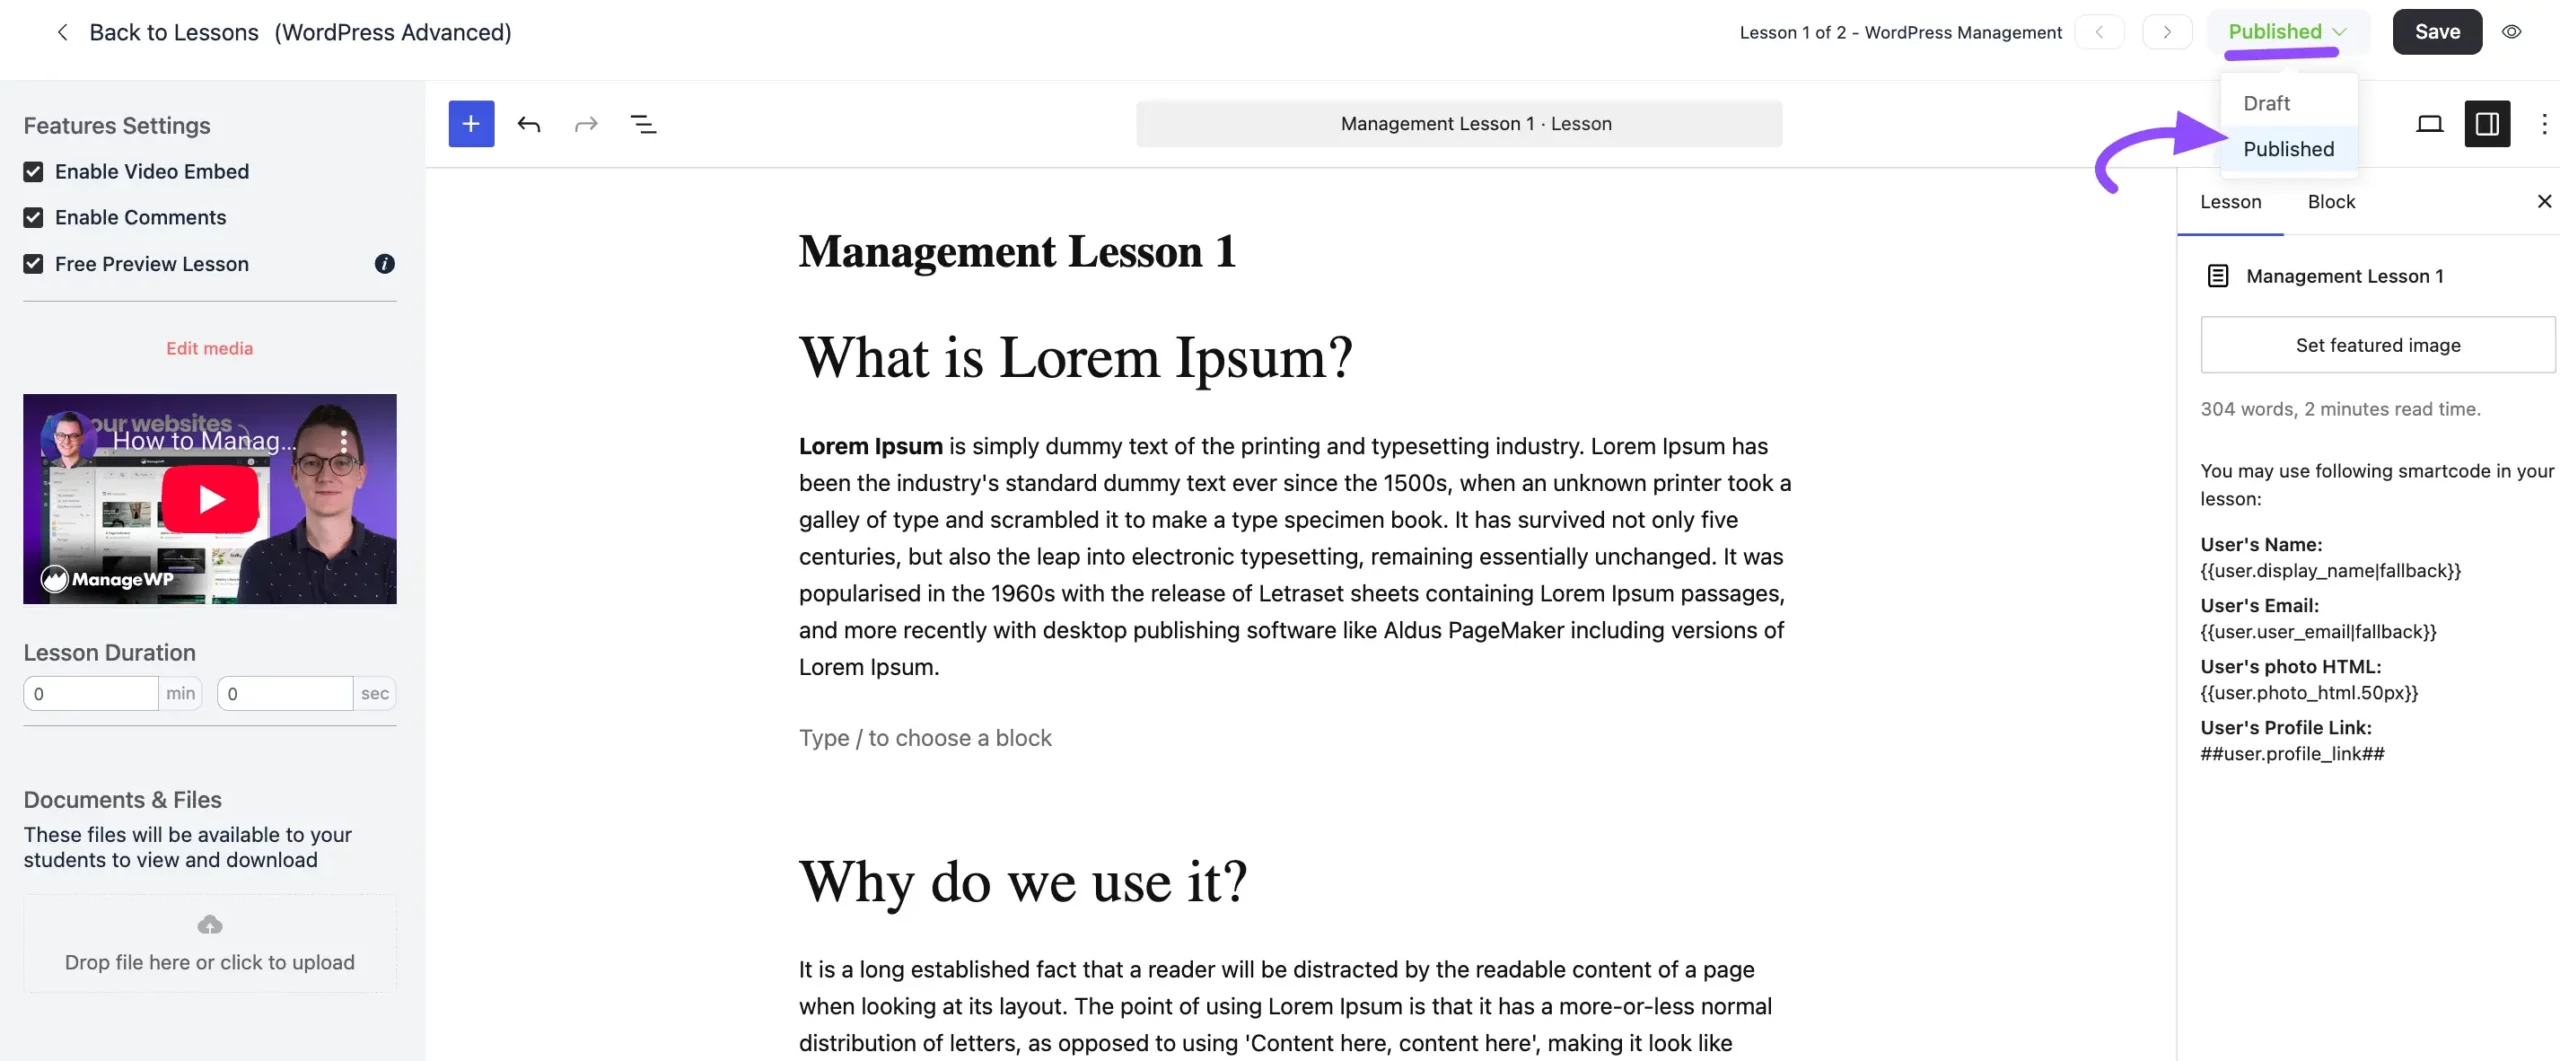
Editing Course Content #
Edit Sections
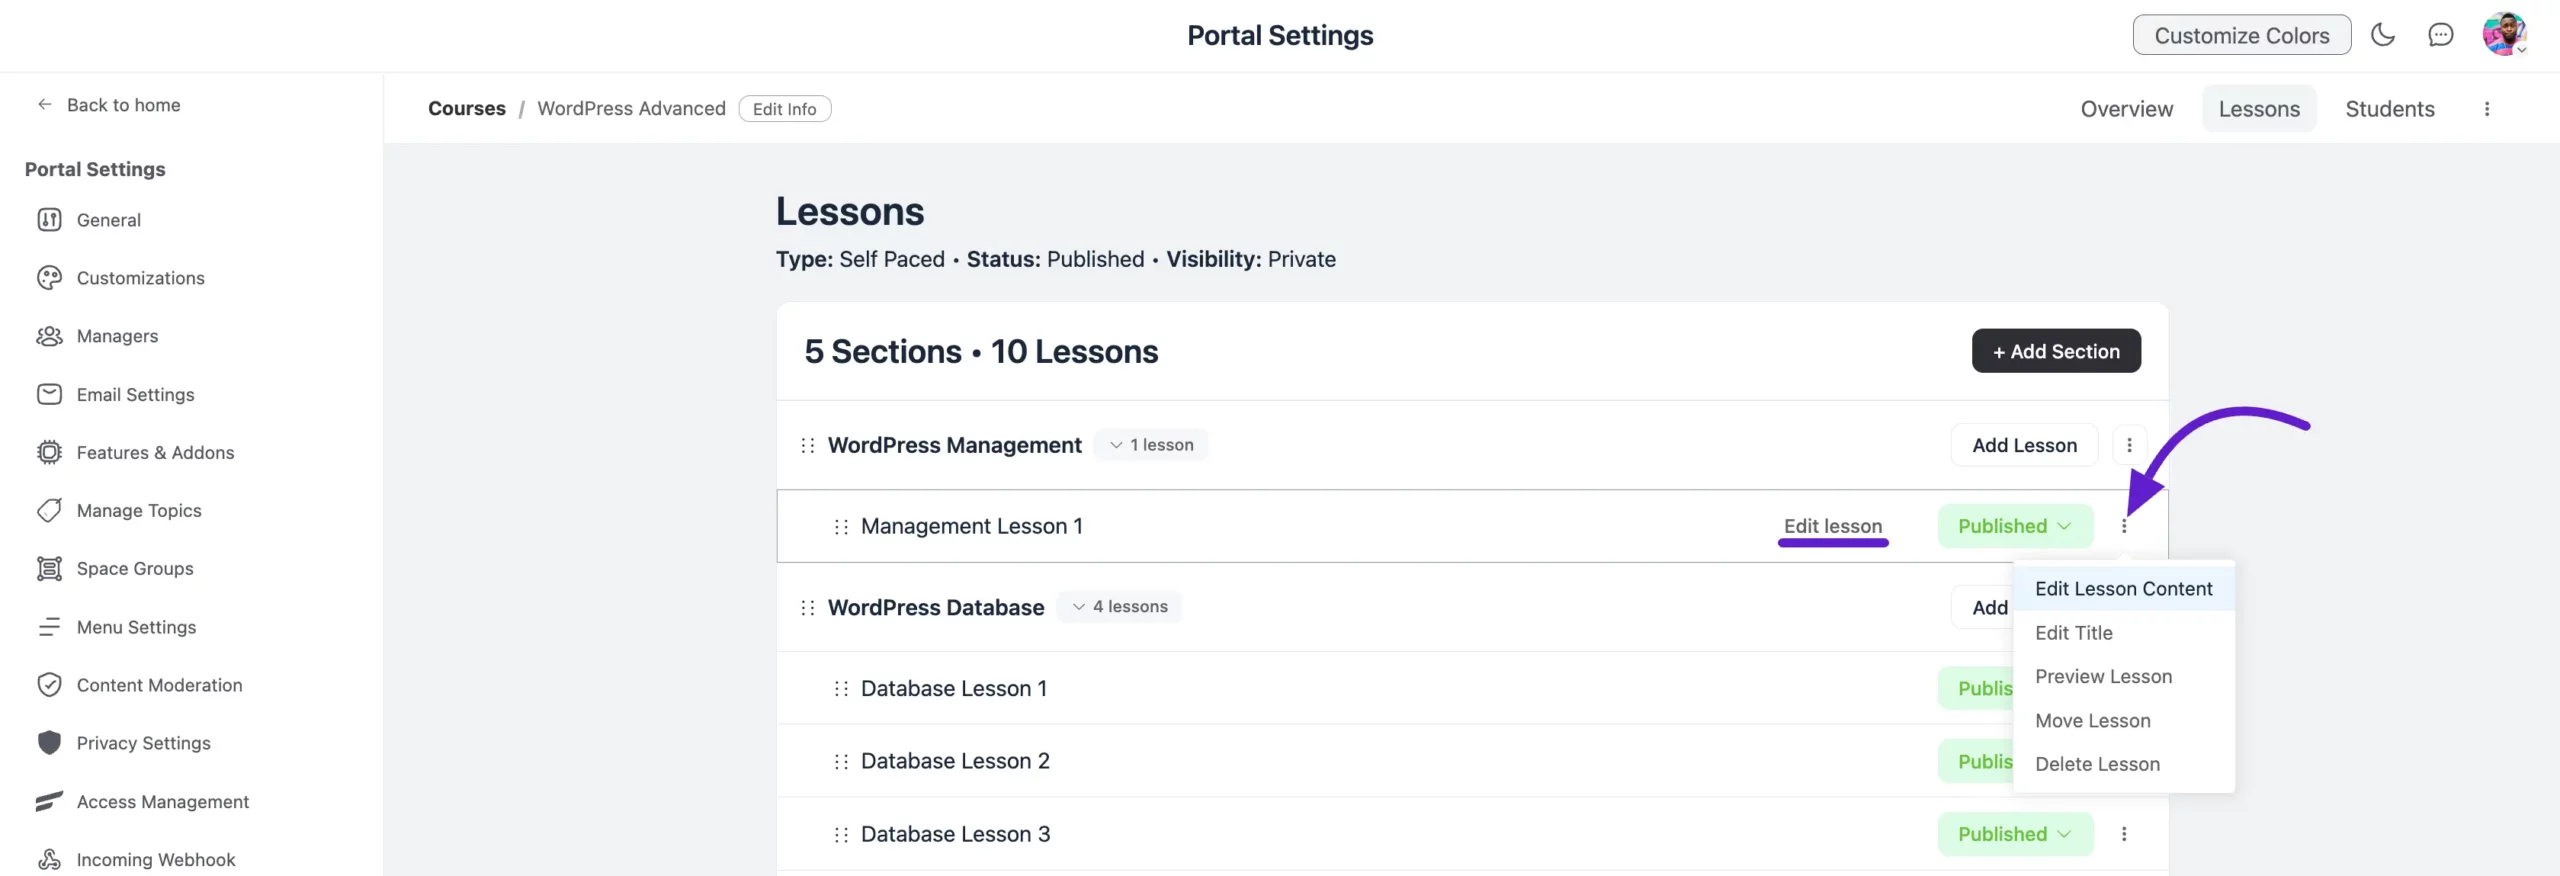
You can Edit Title or Delete sections by clicking the three-dot button in the right corner of each section.

Edit Lessons
To modify a lesson, click the three dot icon next to the lesson under each section. From there, you can perform the following actions:
Edit Lesson Content: Open the lesson editor to update the content using Gutenberg blocks.
Edit Title: Rename the lesson title directly.
Preview Lesson: See how your lesson will appear to users before publishing.
Move Lesson: Reorder the lesson by moving it to another section within the course. Simply choose the section you want to move from the dropdown field and your lesson will be moved on that section.
Delete Lesson: Permanently remove the lesson from your course.
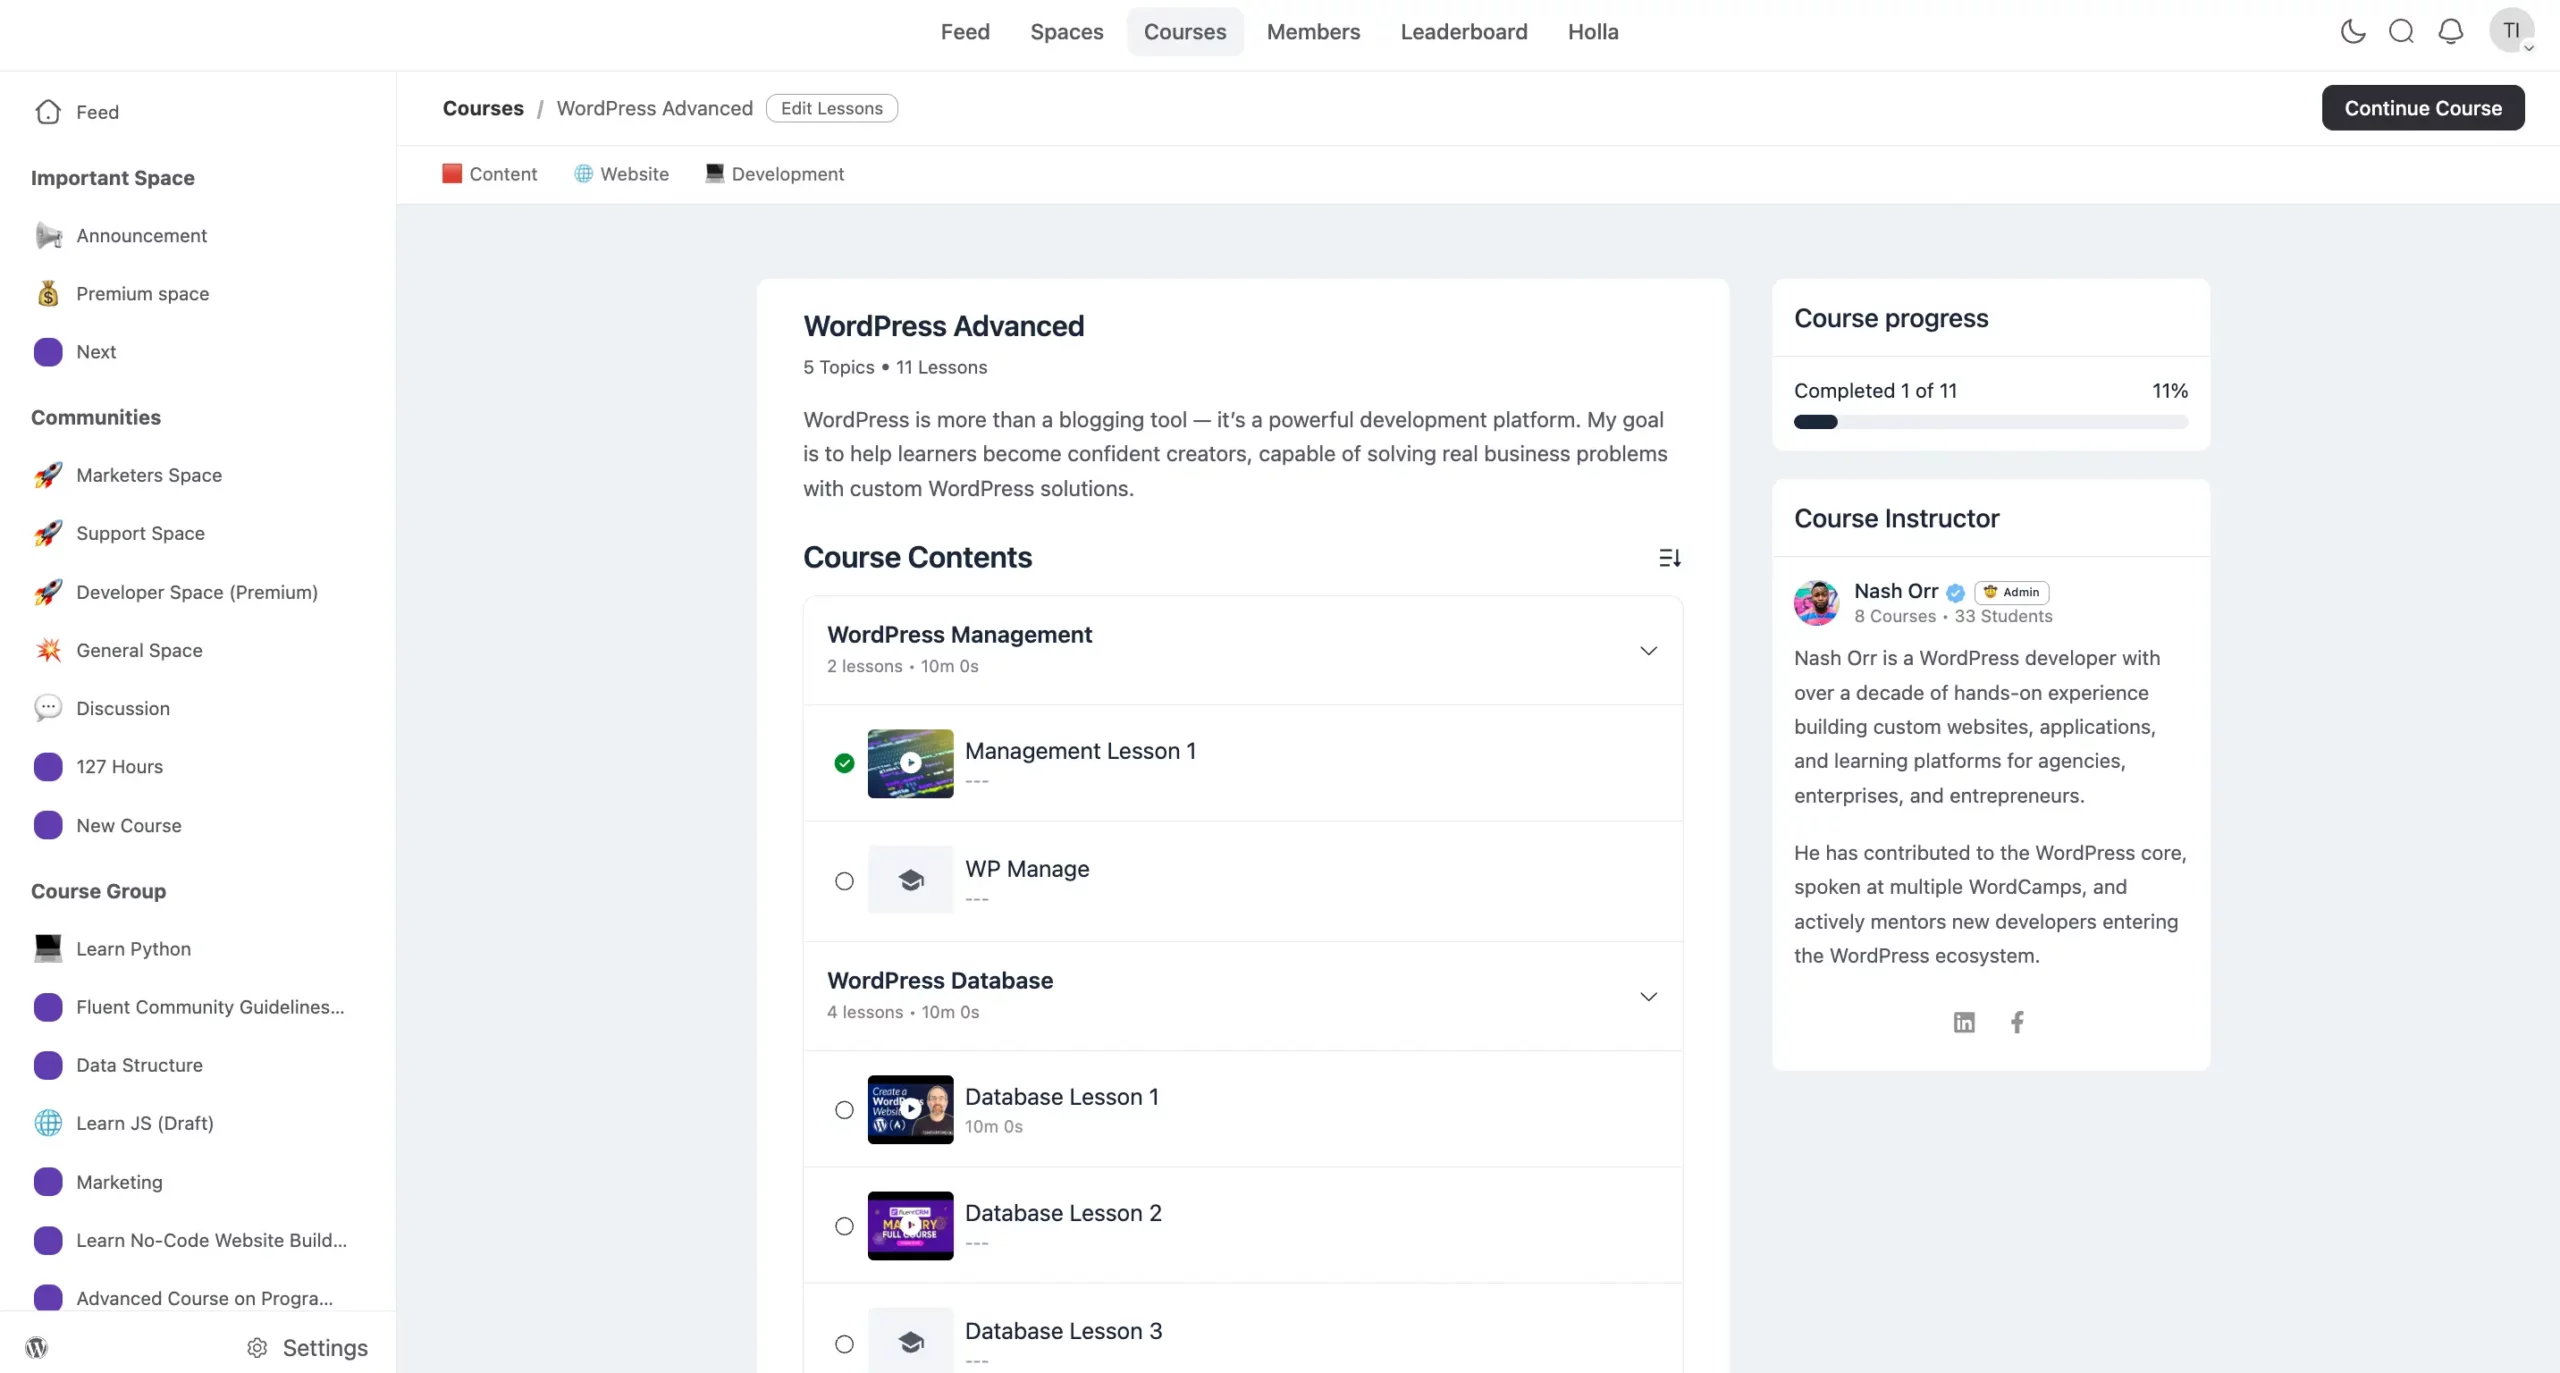
Preview the Modern Course Layout #
Once a student enrolls in the course, they’ll see the modern course overview layout. This layout features a clean design with visual elements like the featured image or embedded video at the top, making the course more engaging and easier to navigate, as shown in the screenshot below.
So, with the FluentCommunity’s Course Management function, you can design, implement, and monitor learning opportunities that are specific to the needs of your community.
If you have any further questions about this guide, please don’t hesitate to contact us.


