FluentCommunity allows you to set whether your Courses will be Public/Private/Secret for the Students. This article covers the detailed process of setting the Privacy for Courses.
Setup Privacy in Courses #
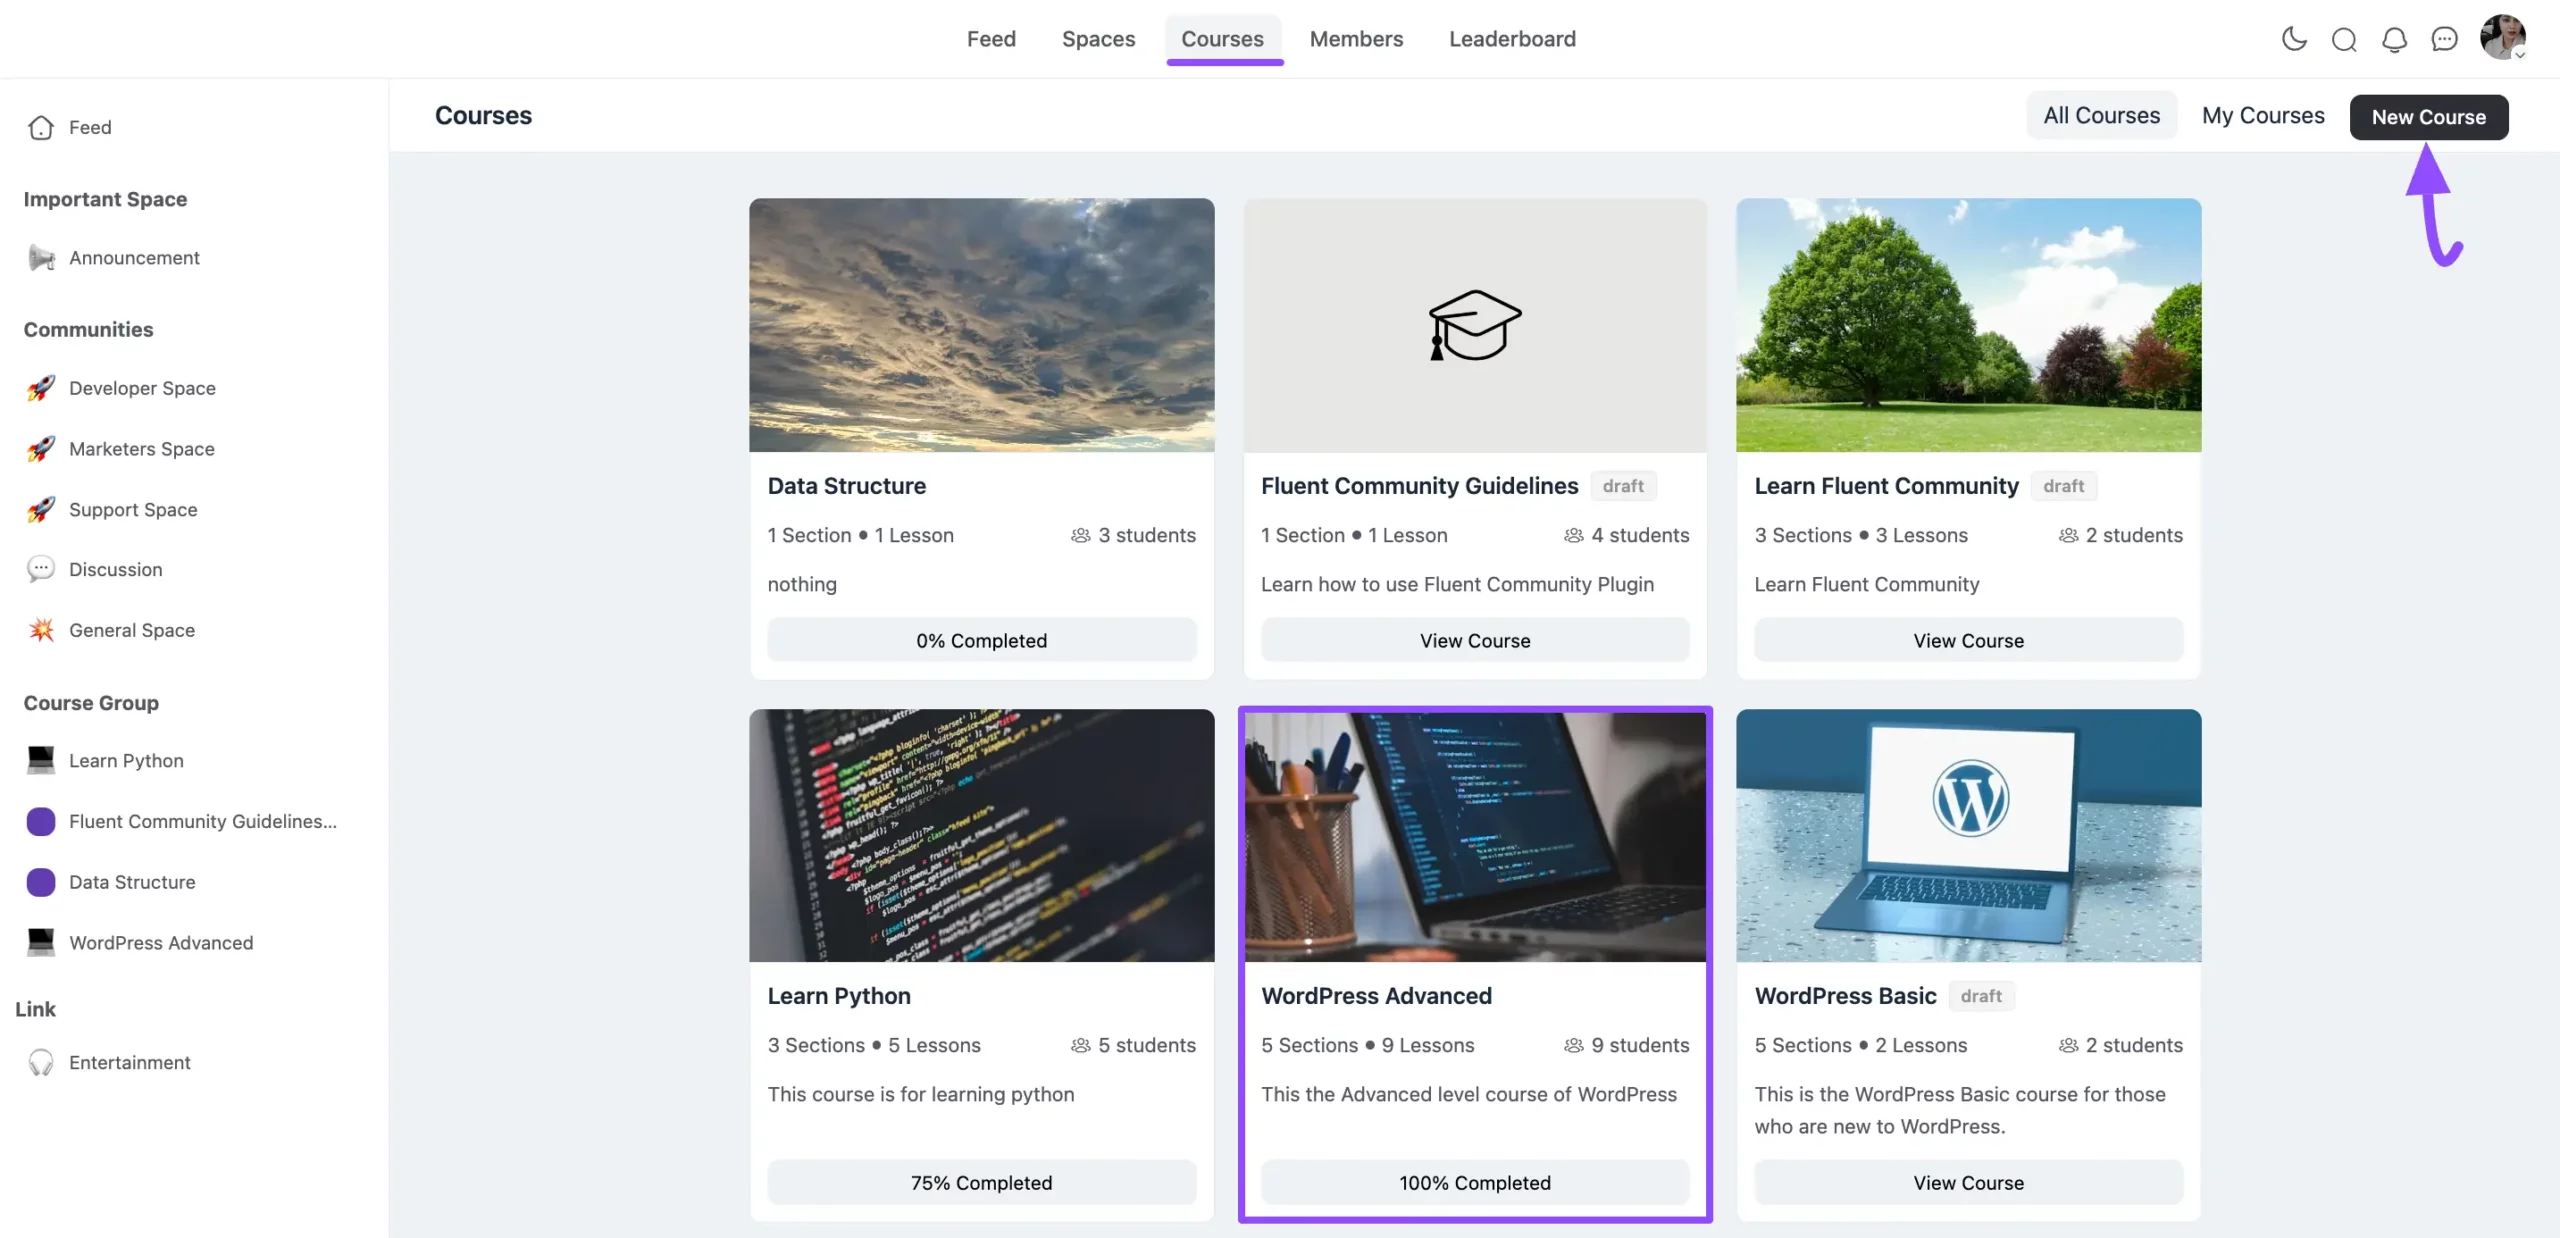
First, go to the Courses section from the FluentCommunity navbar and open a Desired Course by clicking the tab where you want to set the privacy.
Or, you can create a new course by clicking the New Course button in the top right corner.
To learn the detailed process of creating a New Course, read this Documentation.
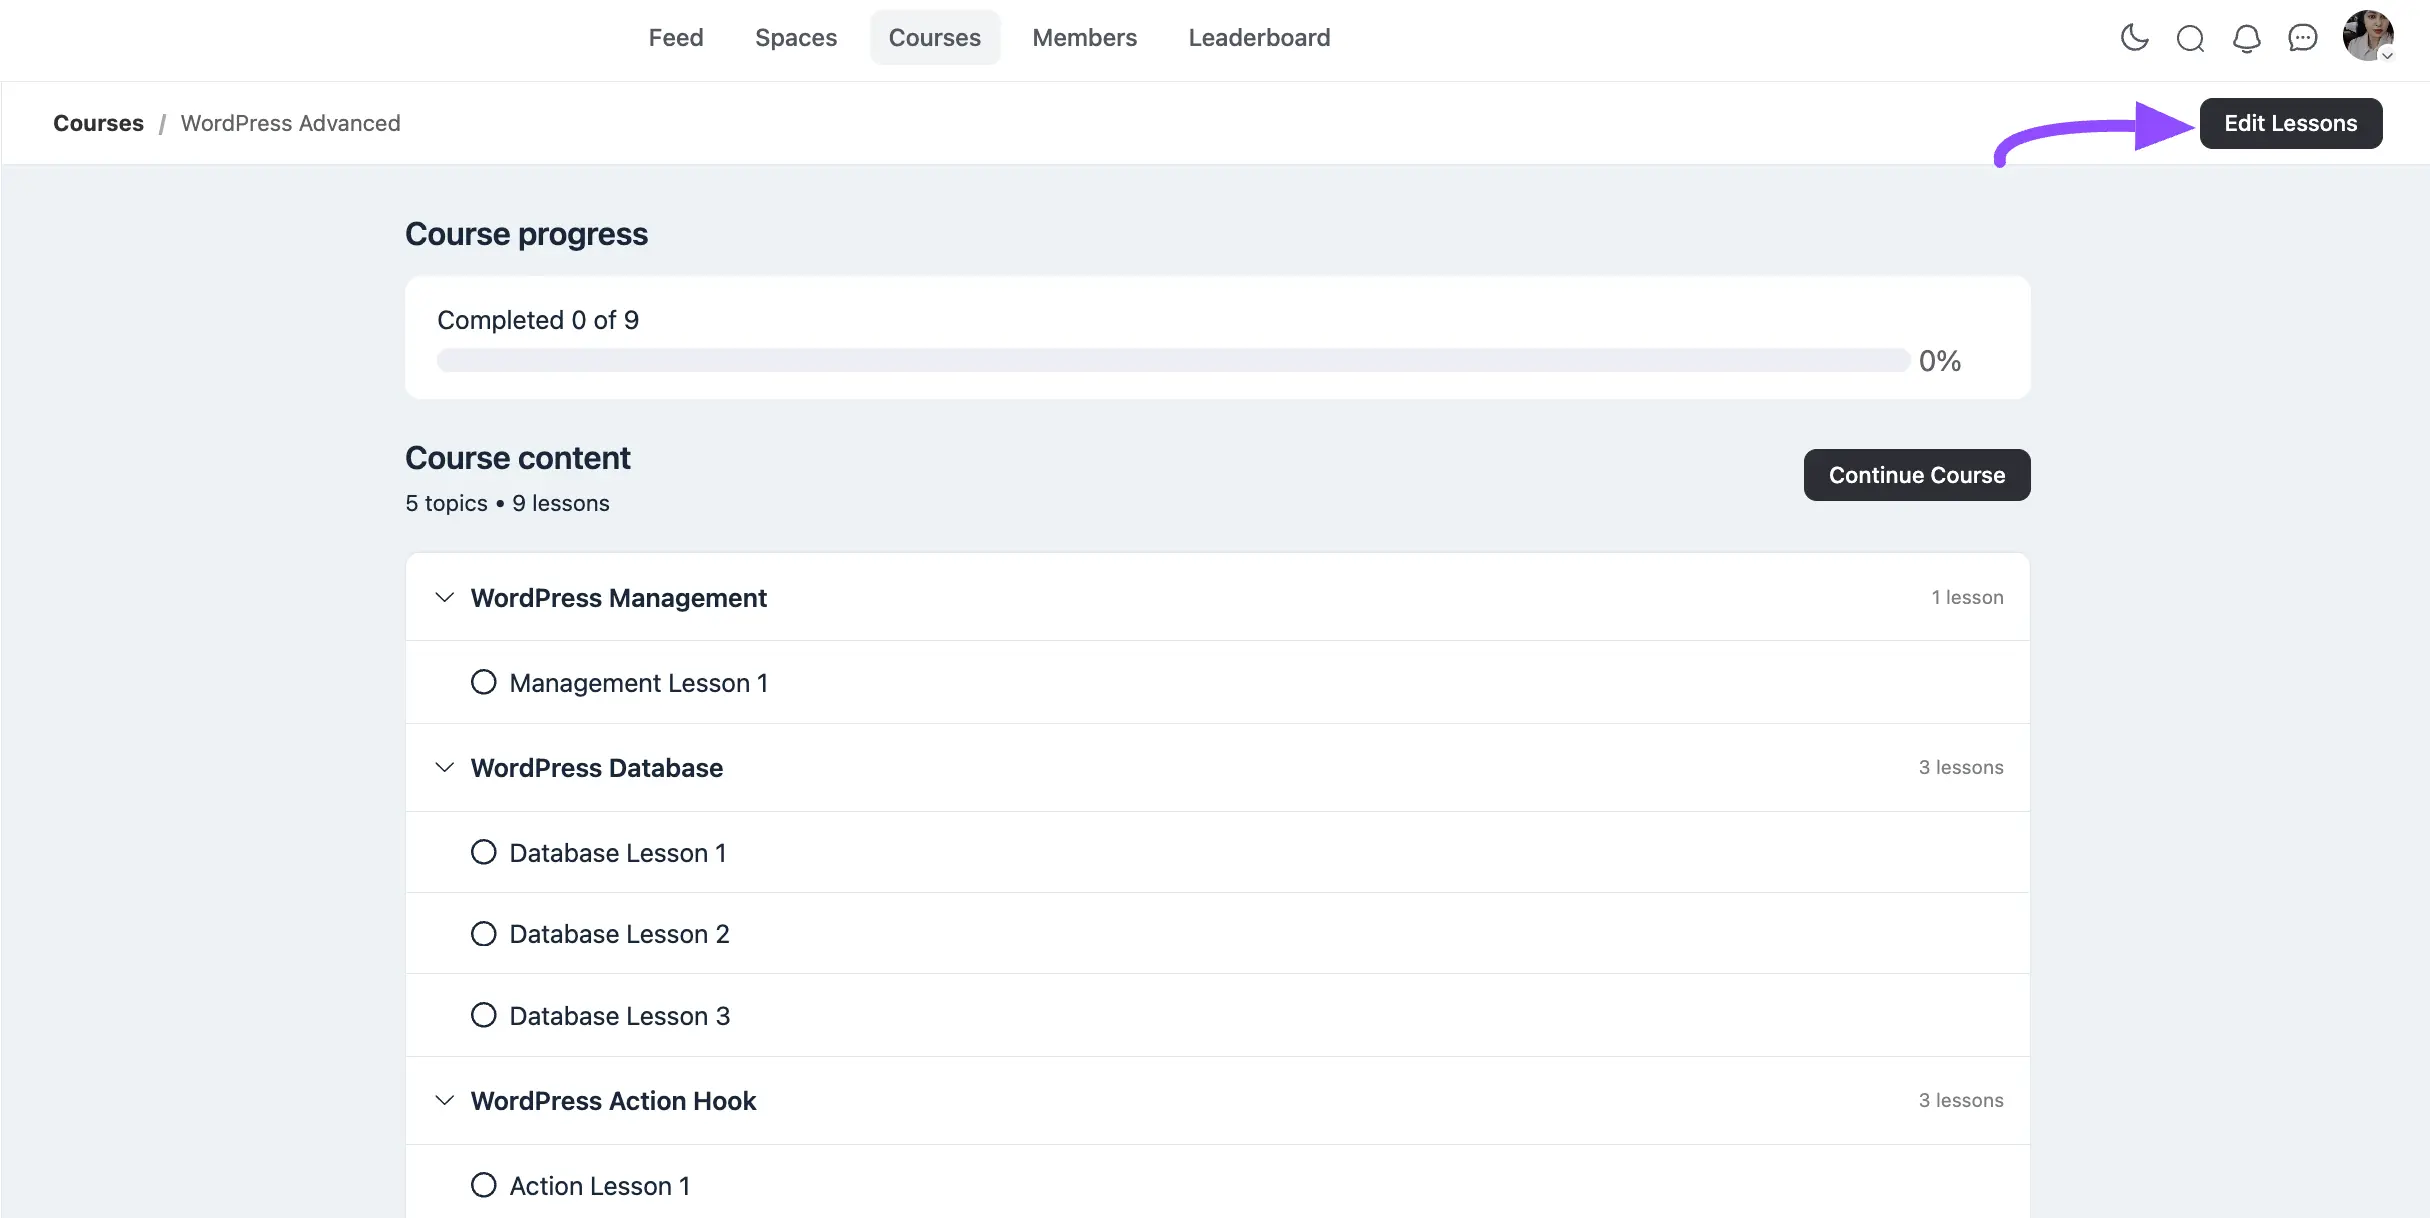
Click the Edit Lesson button in the top right corner.
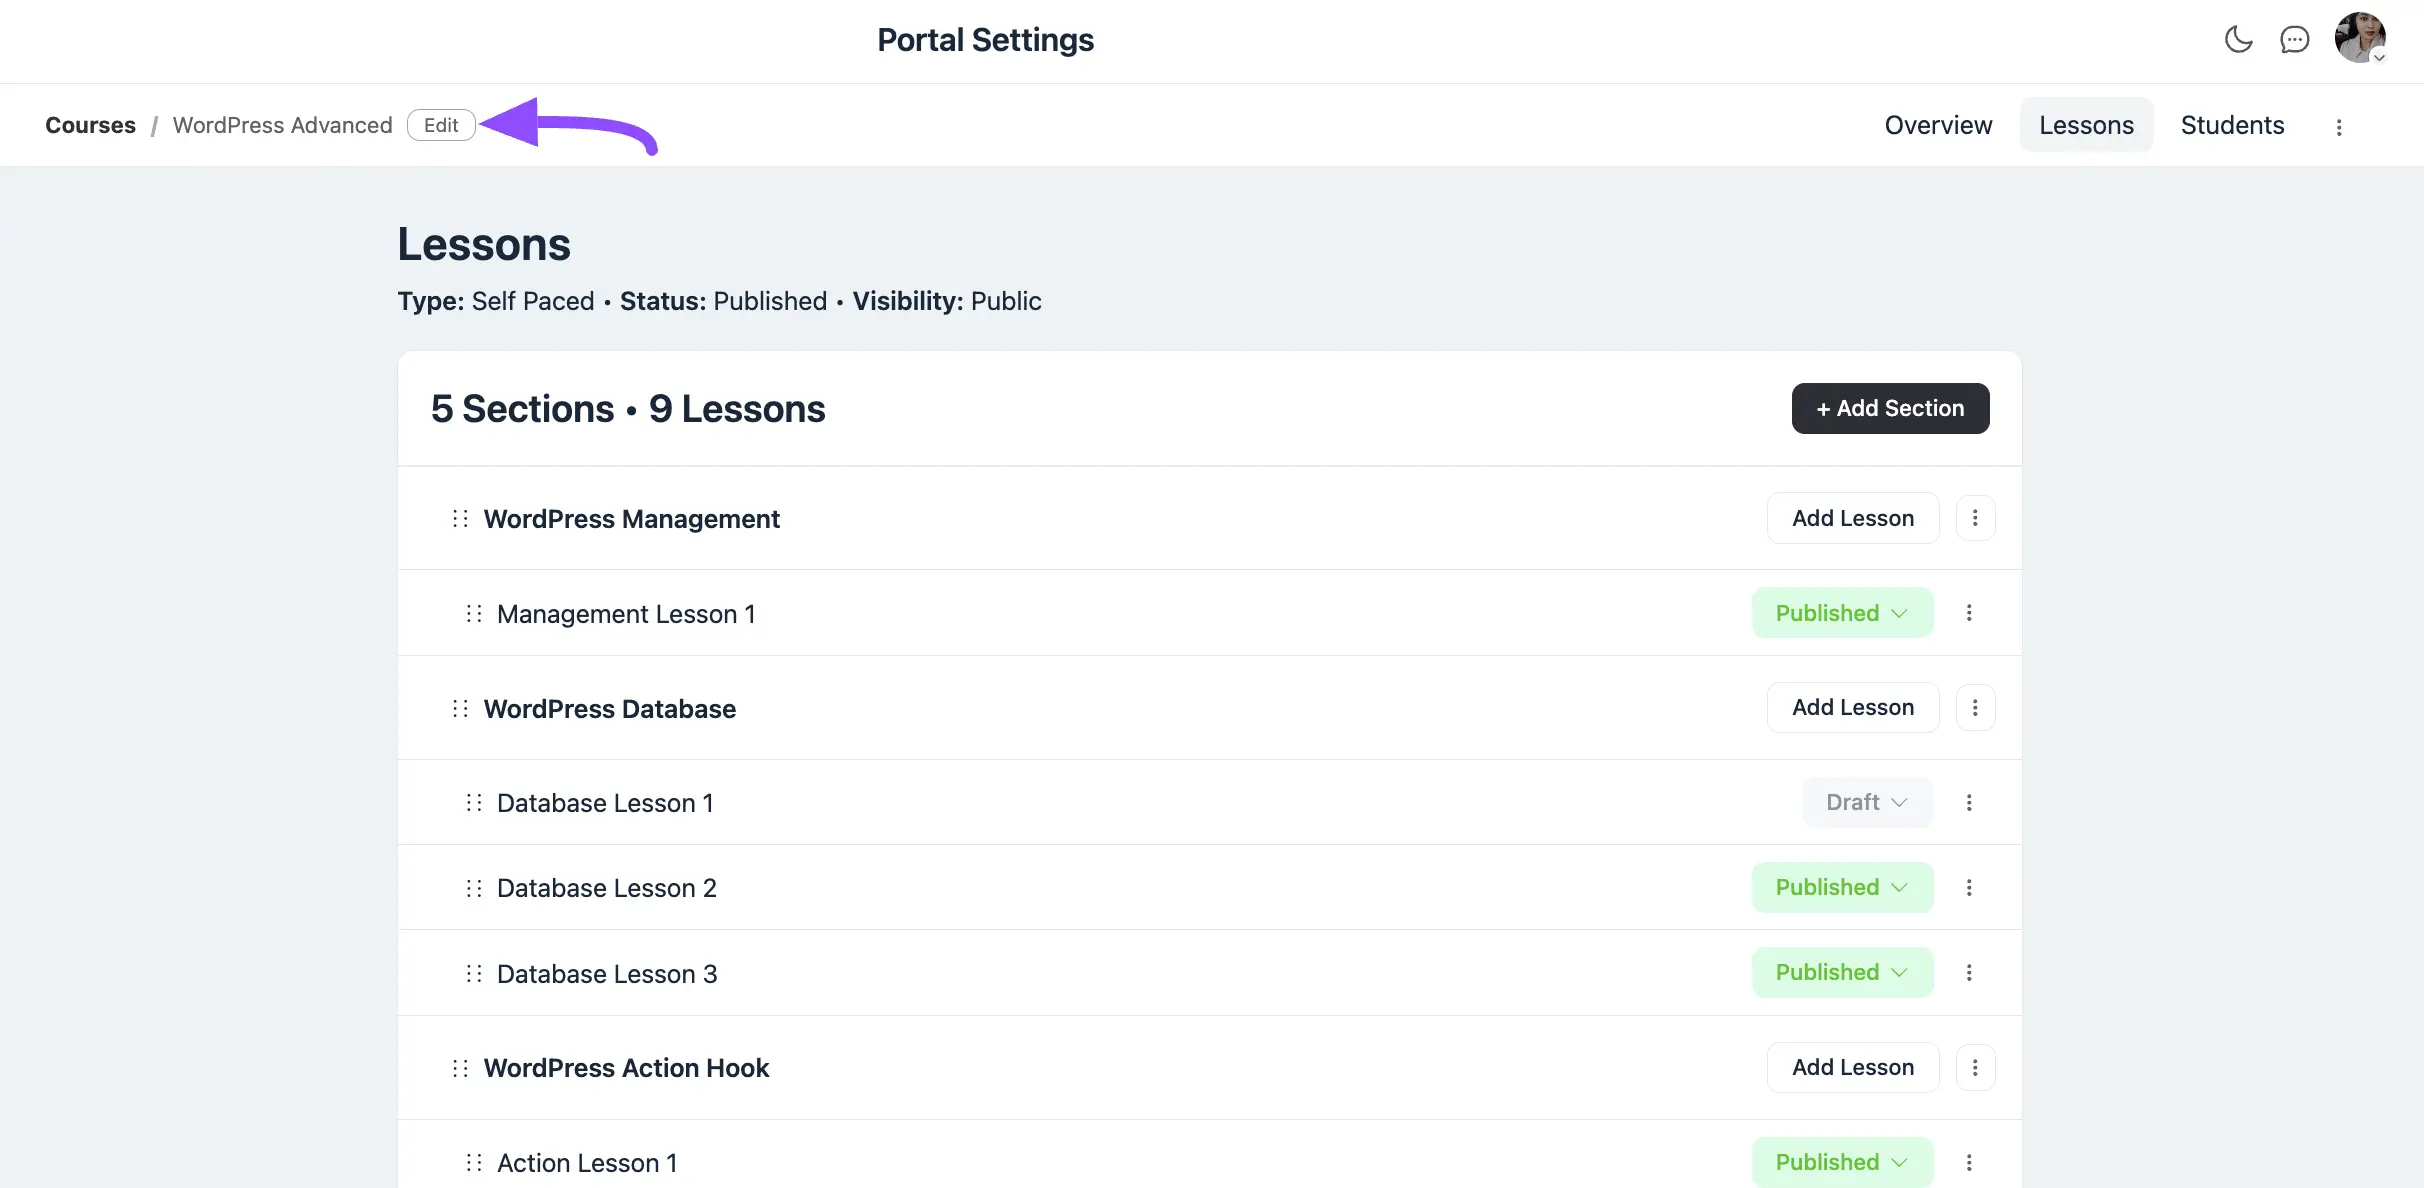
Again, click on the Edit button in the top left corner.
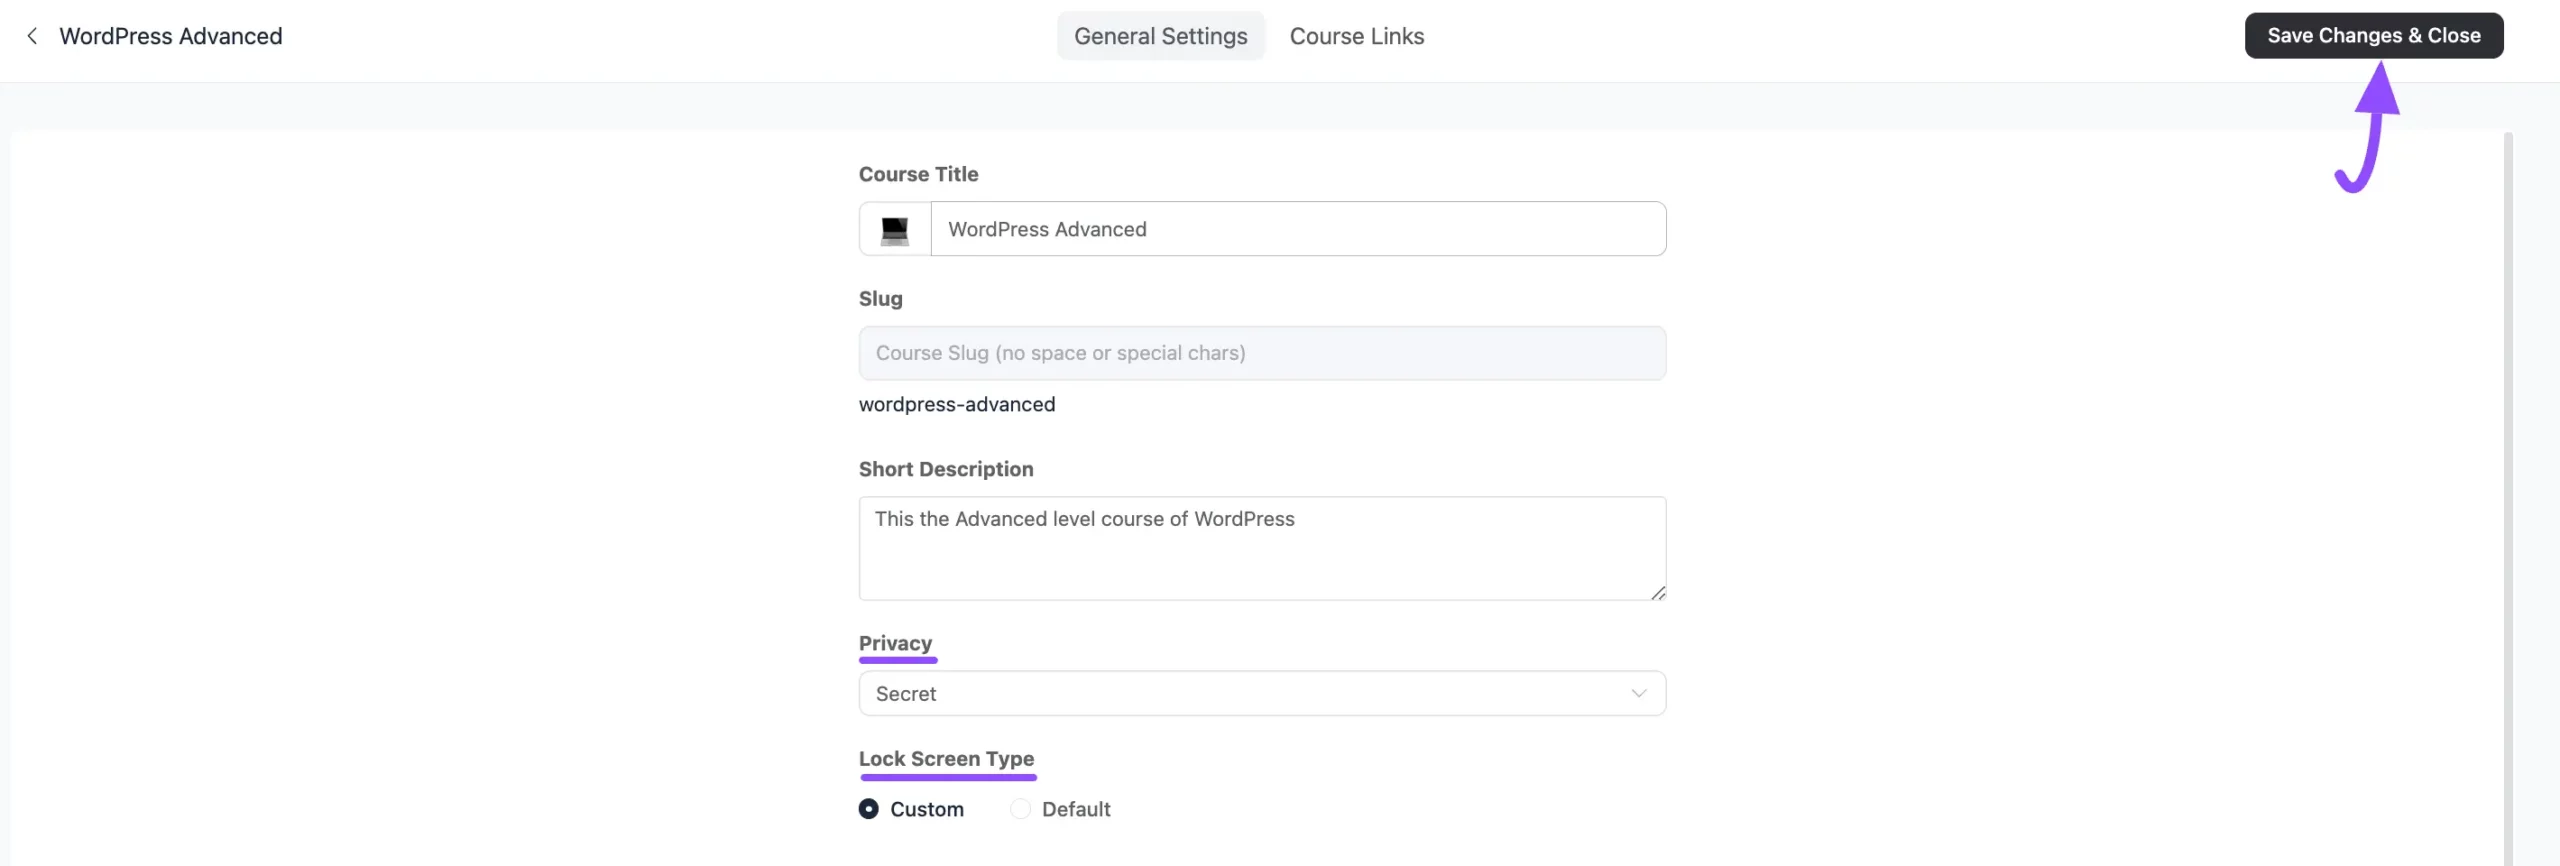
Now, click the Dropdown Arrow of the Privacy option under the General Settings.
From the dropdown list, you will get three options to set the Privacy. These are:
- Public
- Private
- Secret
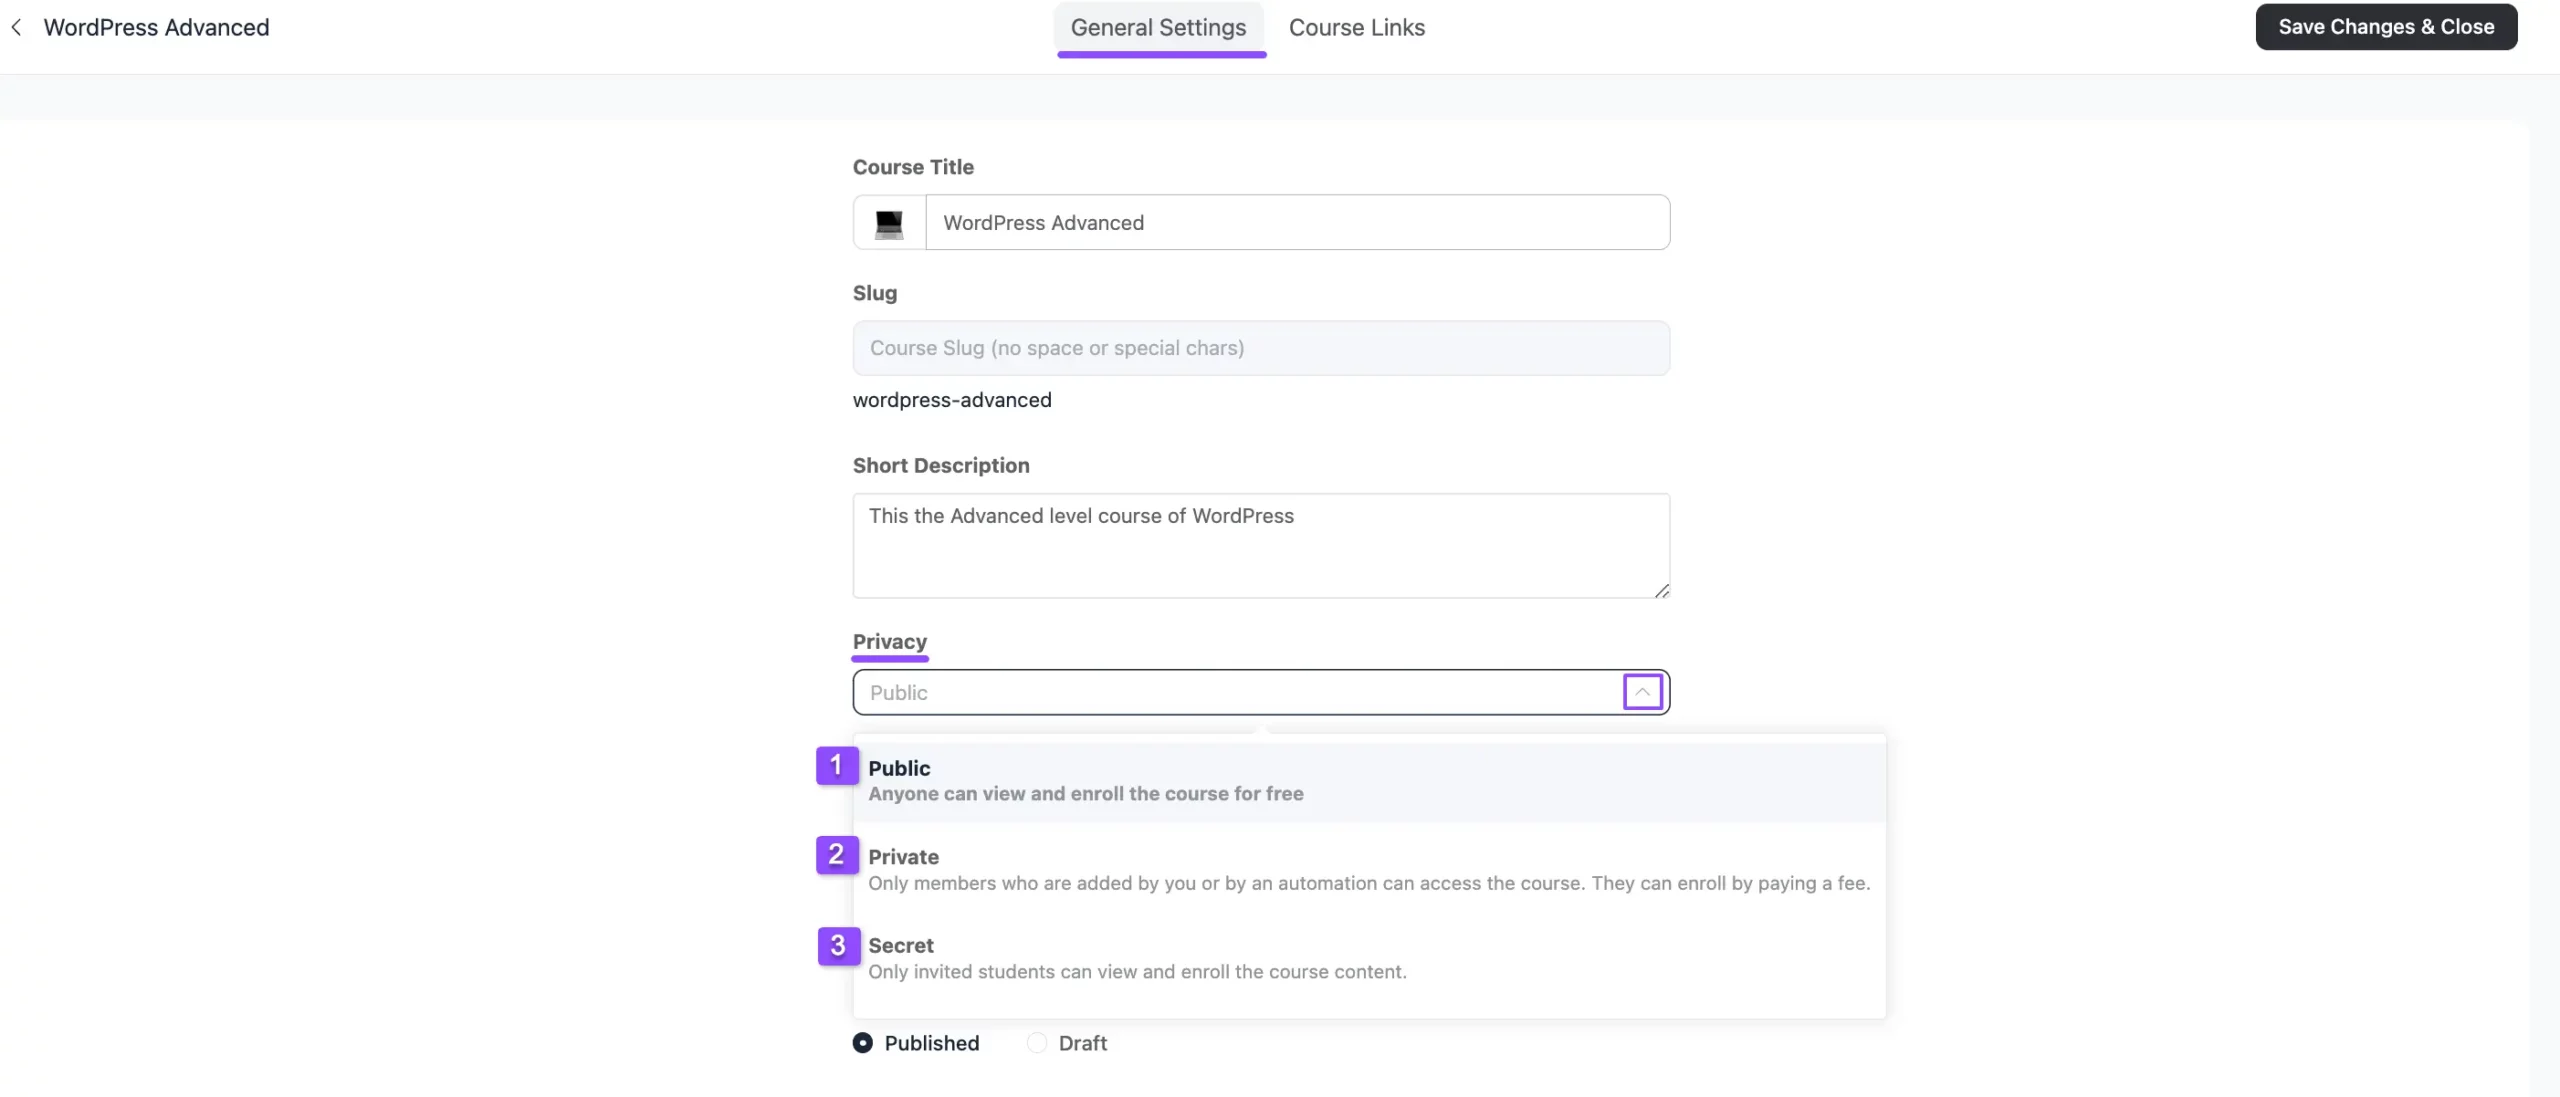
A detailed explanation of the privacy options mentioned above is given below –
Public #
If you select this option, anyone can view and enroll in the course for free.
Private #
If you select this option, the course will be locked for everyone. Only members who are added by you or by automation can access the course. Also, users can enroll by paying a fee.
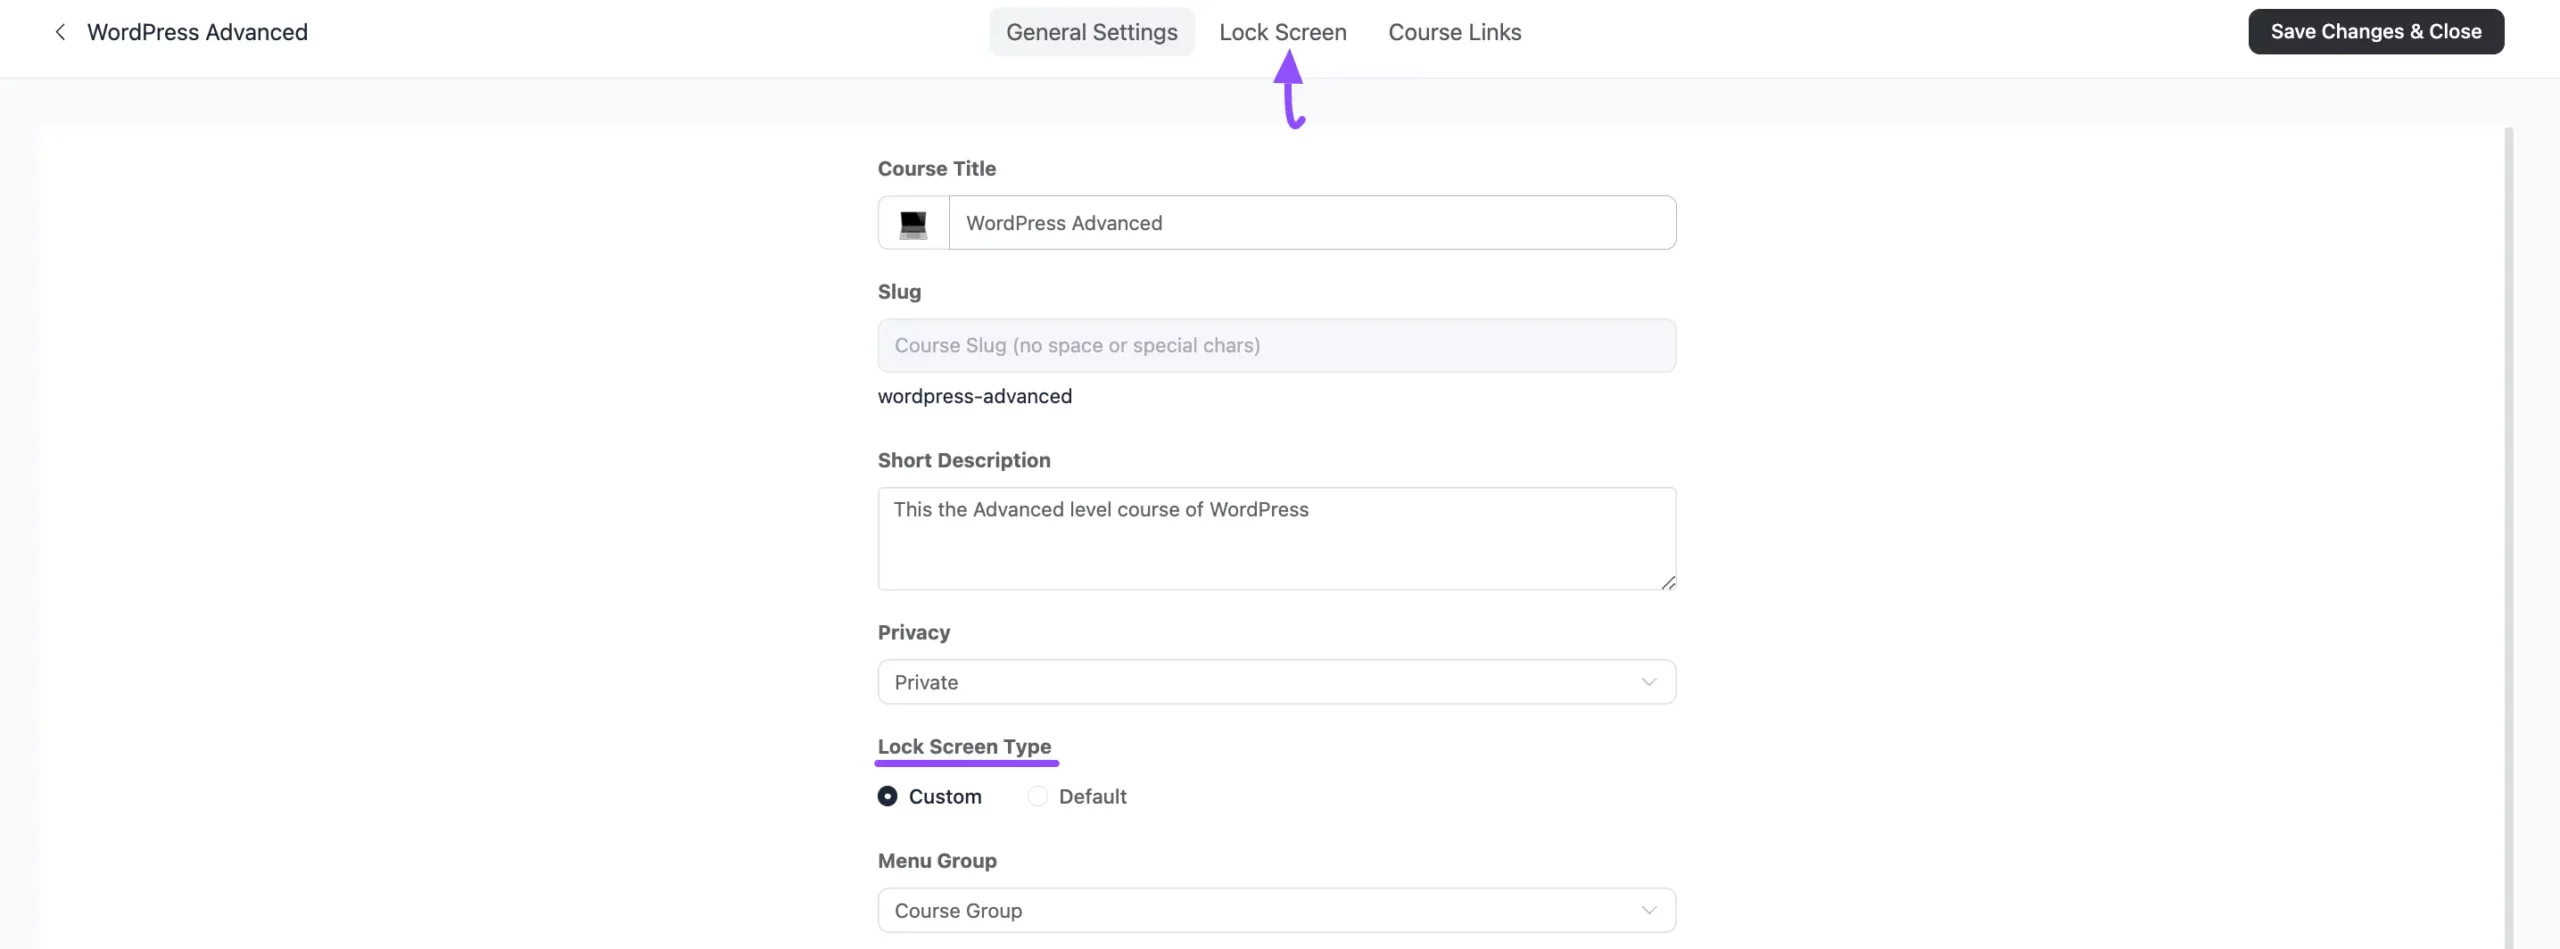
For the lock screen, you will get two options. These are:
- Default: Select this option if you want to display the FluentCommunity’s Default Lock Screen for your Course.
- Custom: You can also create a Customized Lock Screen by selecting this option. To get all the customization options, open the Lock Screen tab from the top menu.
Lock Screen Customization #
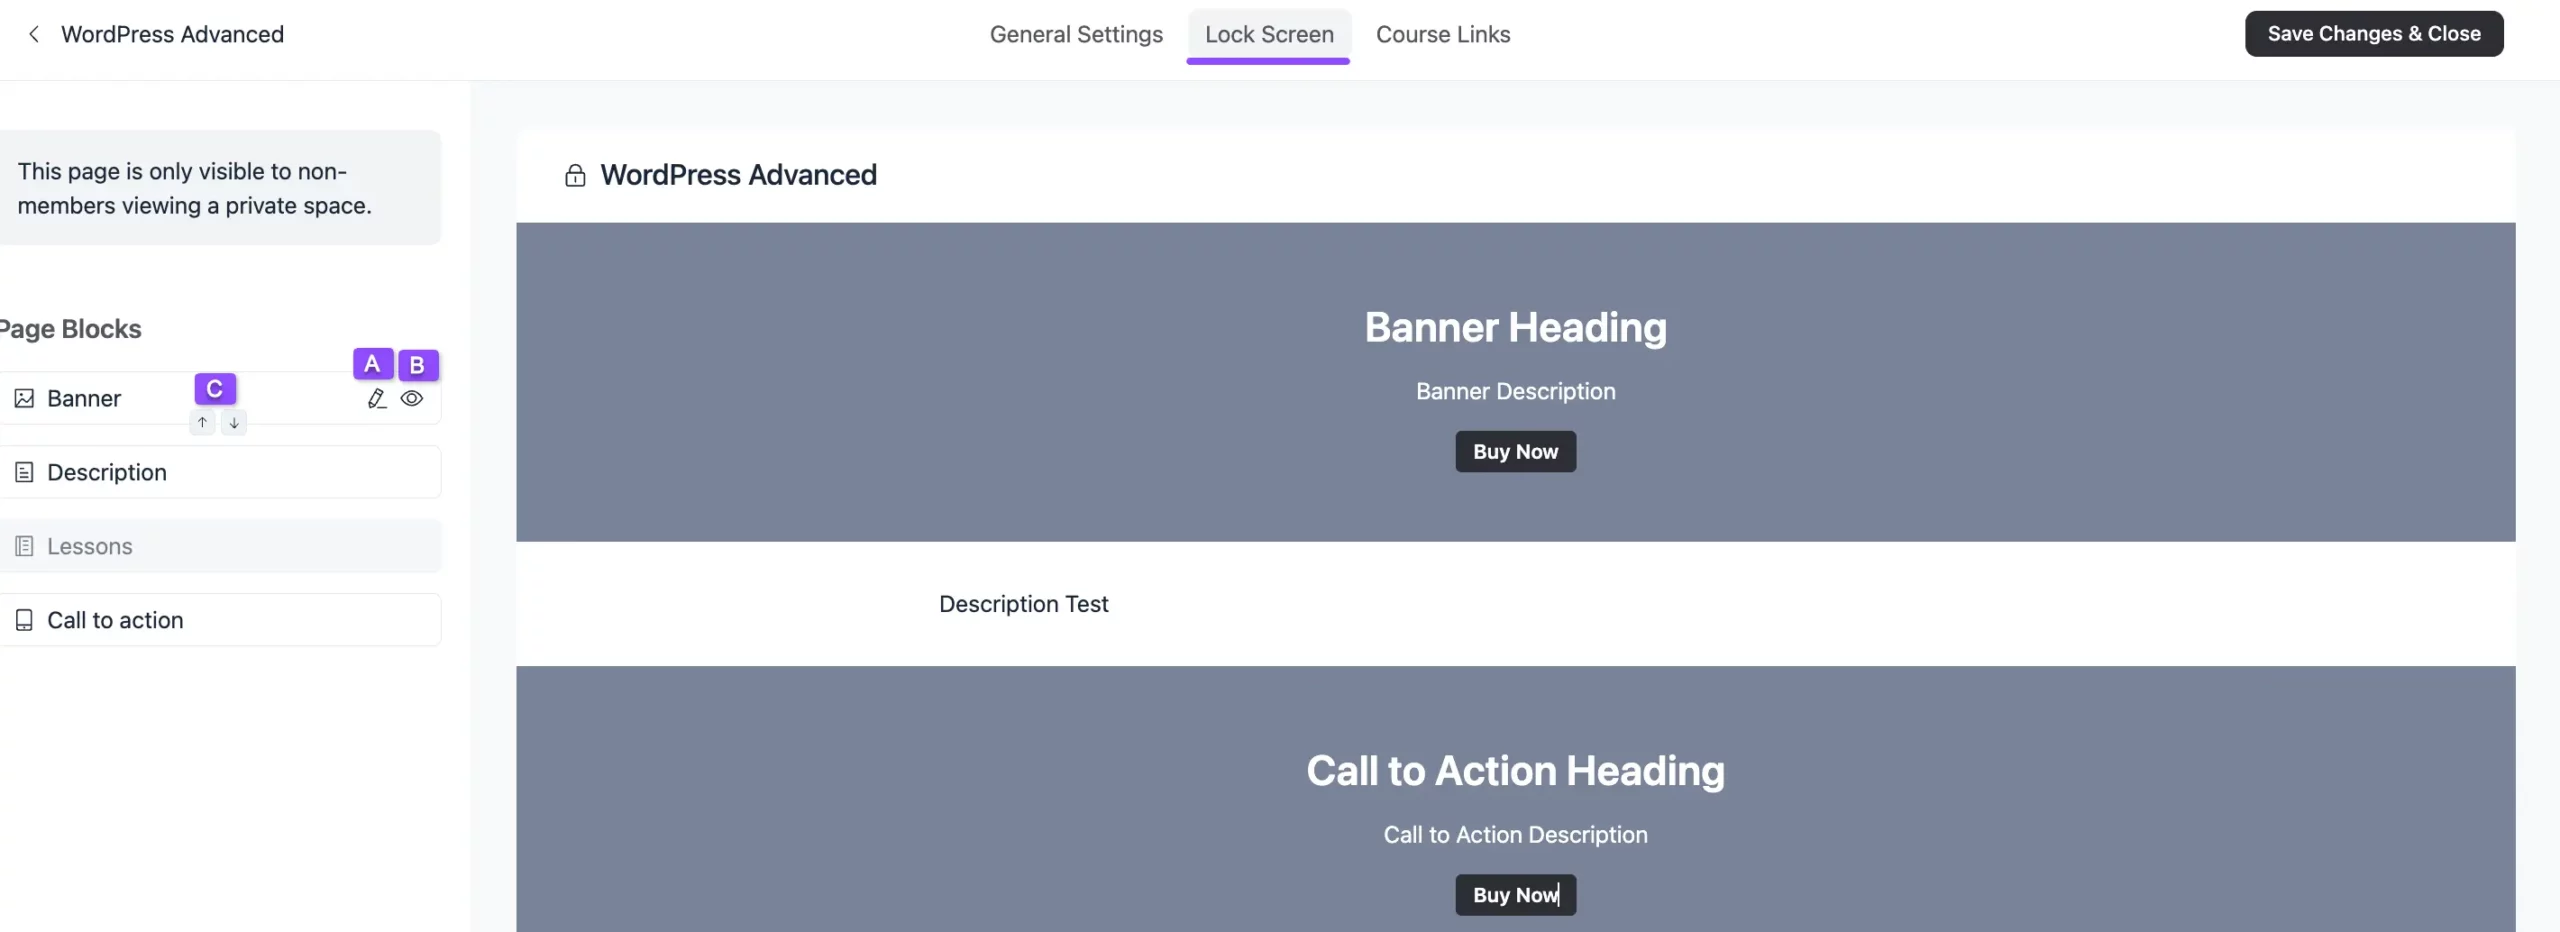
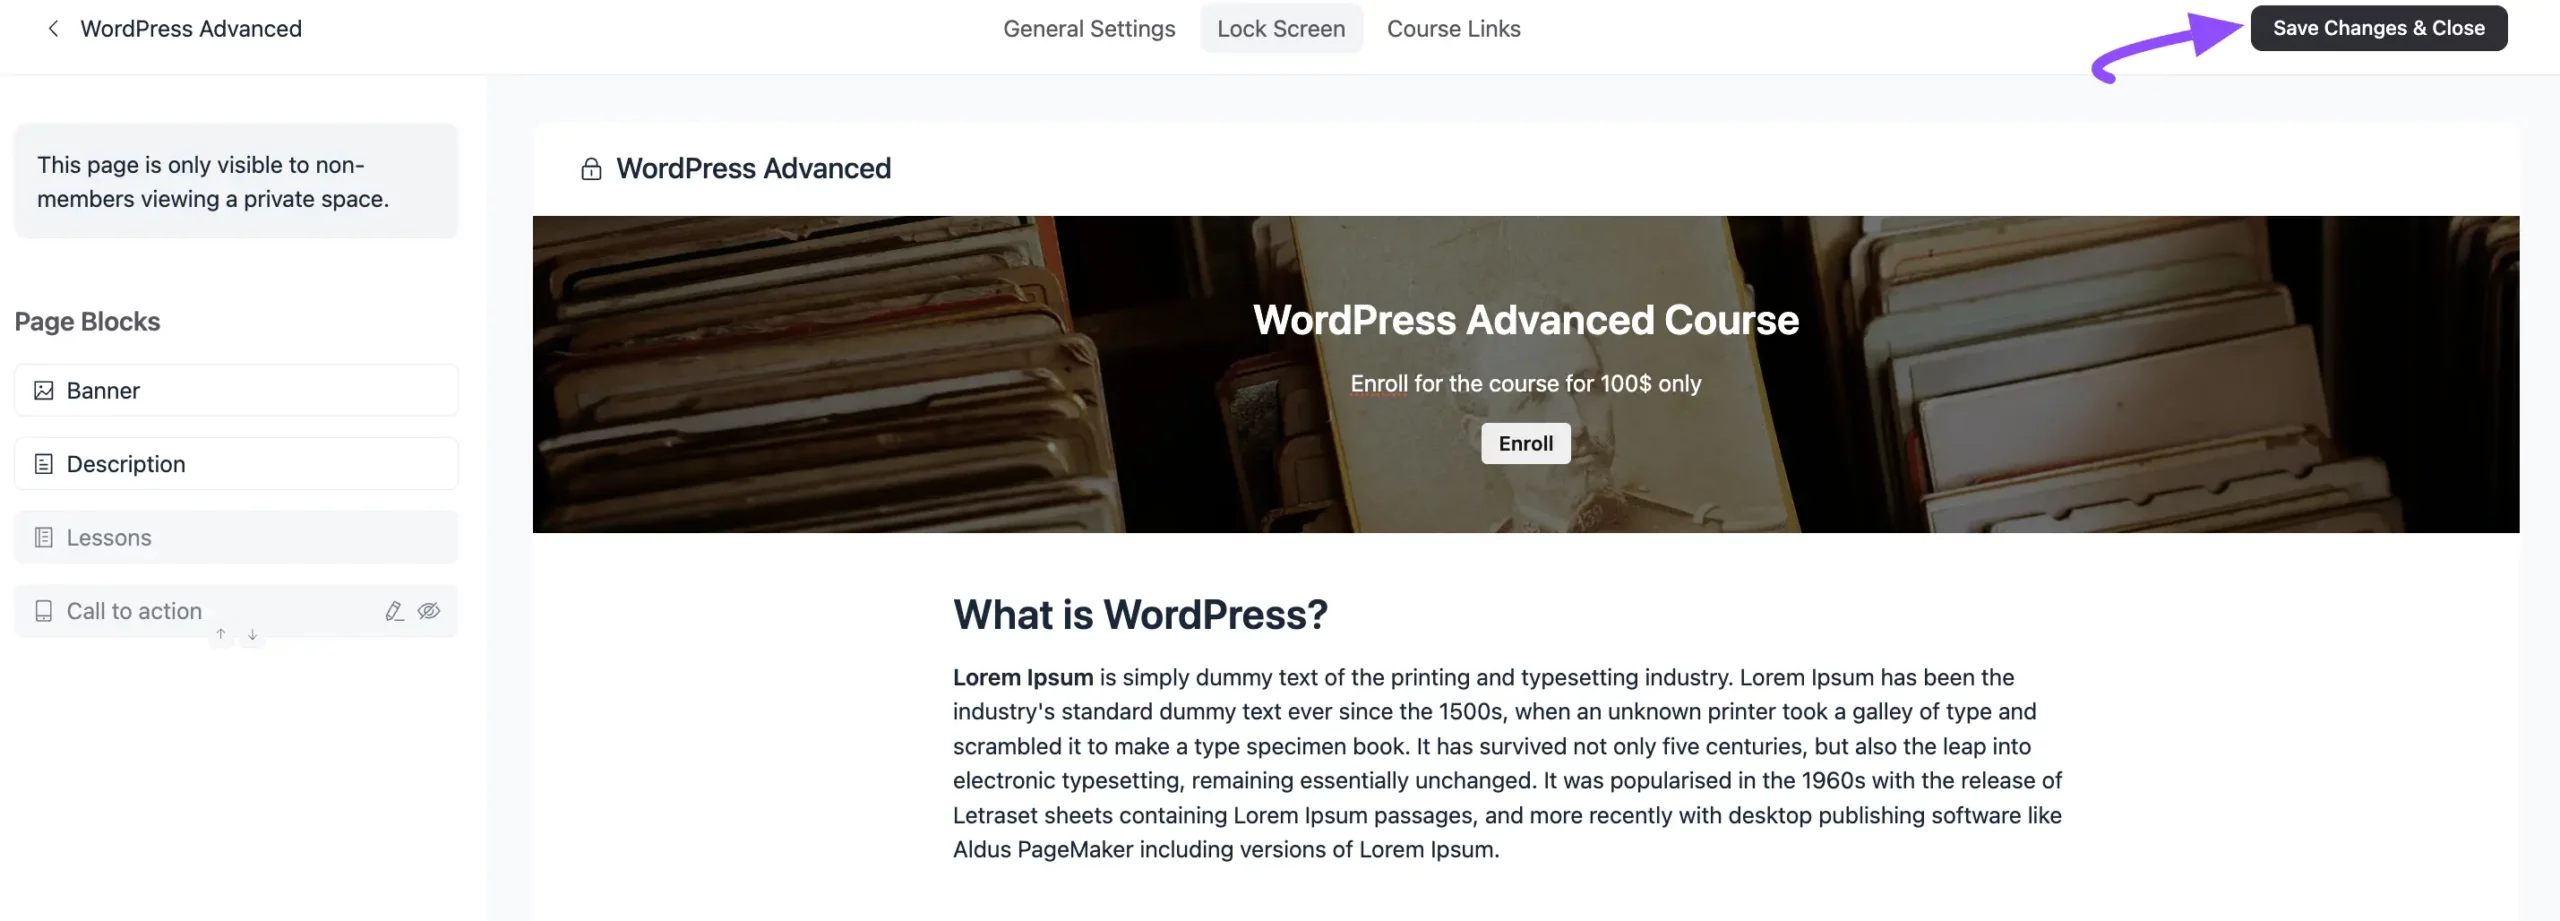
Here, you can see all the customization options in the left sidebar under Page Blocks to customize the Banner, Description, Lessons, and Call to action. These are:
- Edit: Click the Pencil Icon of the desired block you want to edit.
- Disable: Click this Eye Icon of the desired block you don’t want to show on your lock screen.
- Move: Click the Up-Down Arrows of the desired block you want to move up and down.
For instance, I edited the Banner block to show you the customization process.
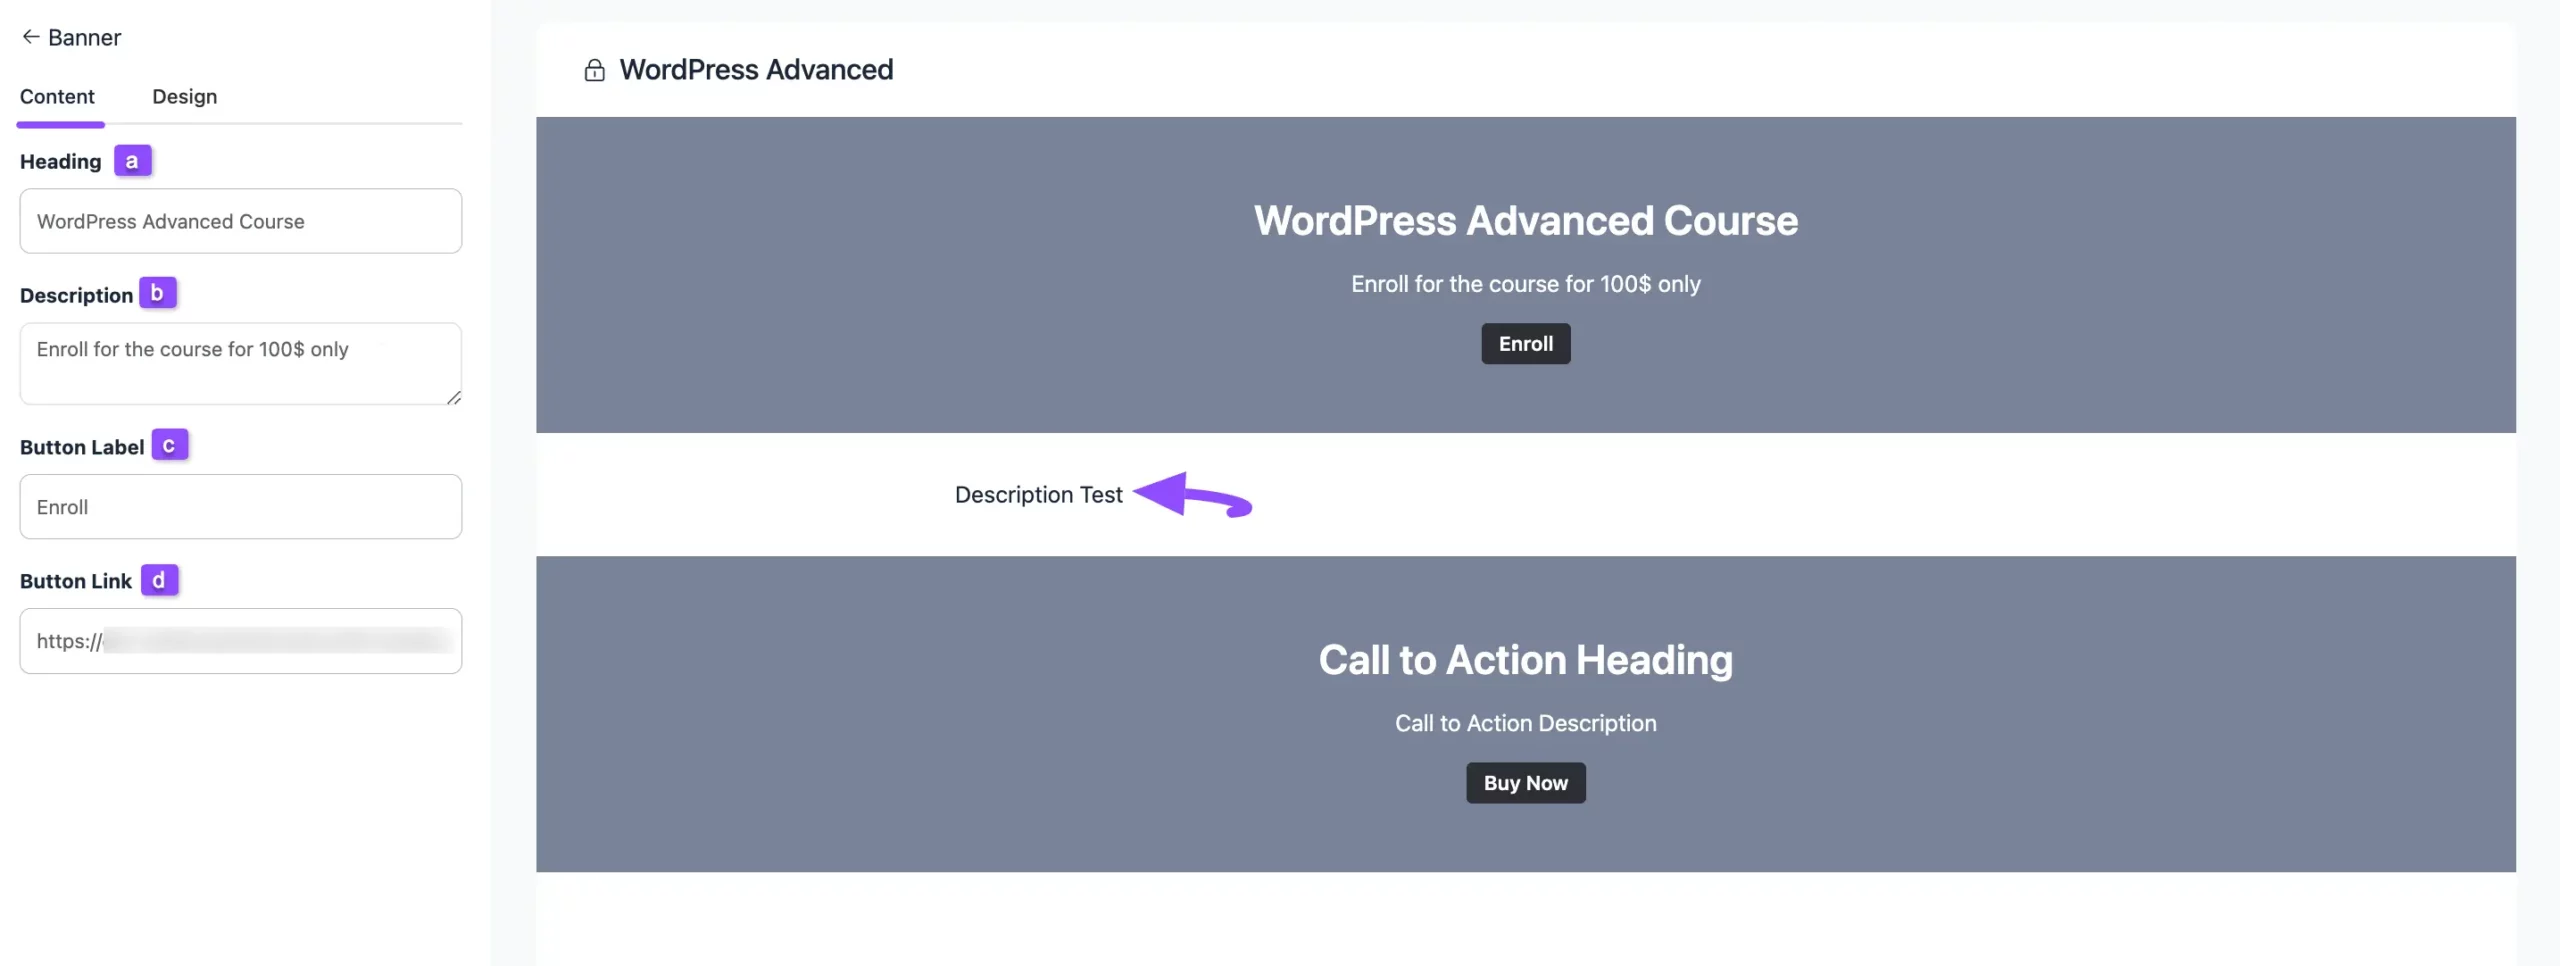
Once you click the Edit Icon, the Content tab will open to edit the content displayed on your lock screen. The customization options of Content are briefly explained below:
a) Heading: From here you can change the heading text.
b) Description: From here you can change the description text. You can also add the detailed description text below the banner by clicking the Description Text button.
c) Button Label: From here you can change the name of your button.
d) Button Link: Here, you can add the desired URL where you want to redirect your students after clicking the Button.
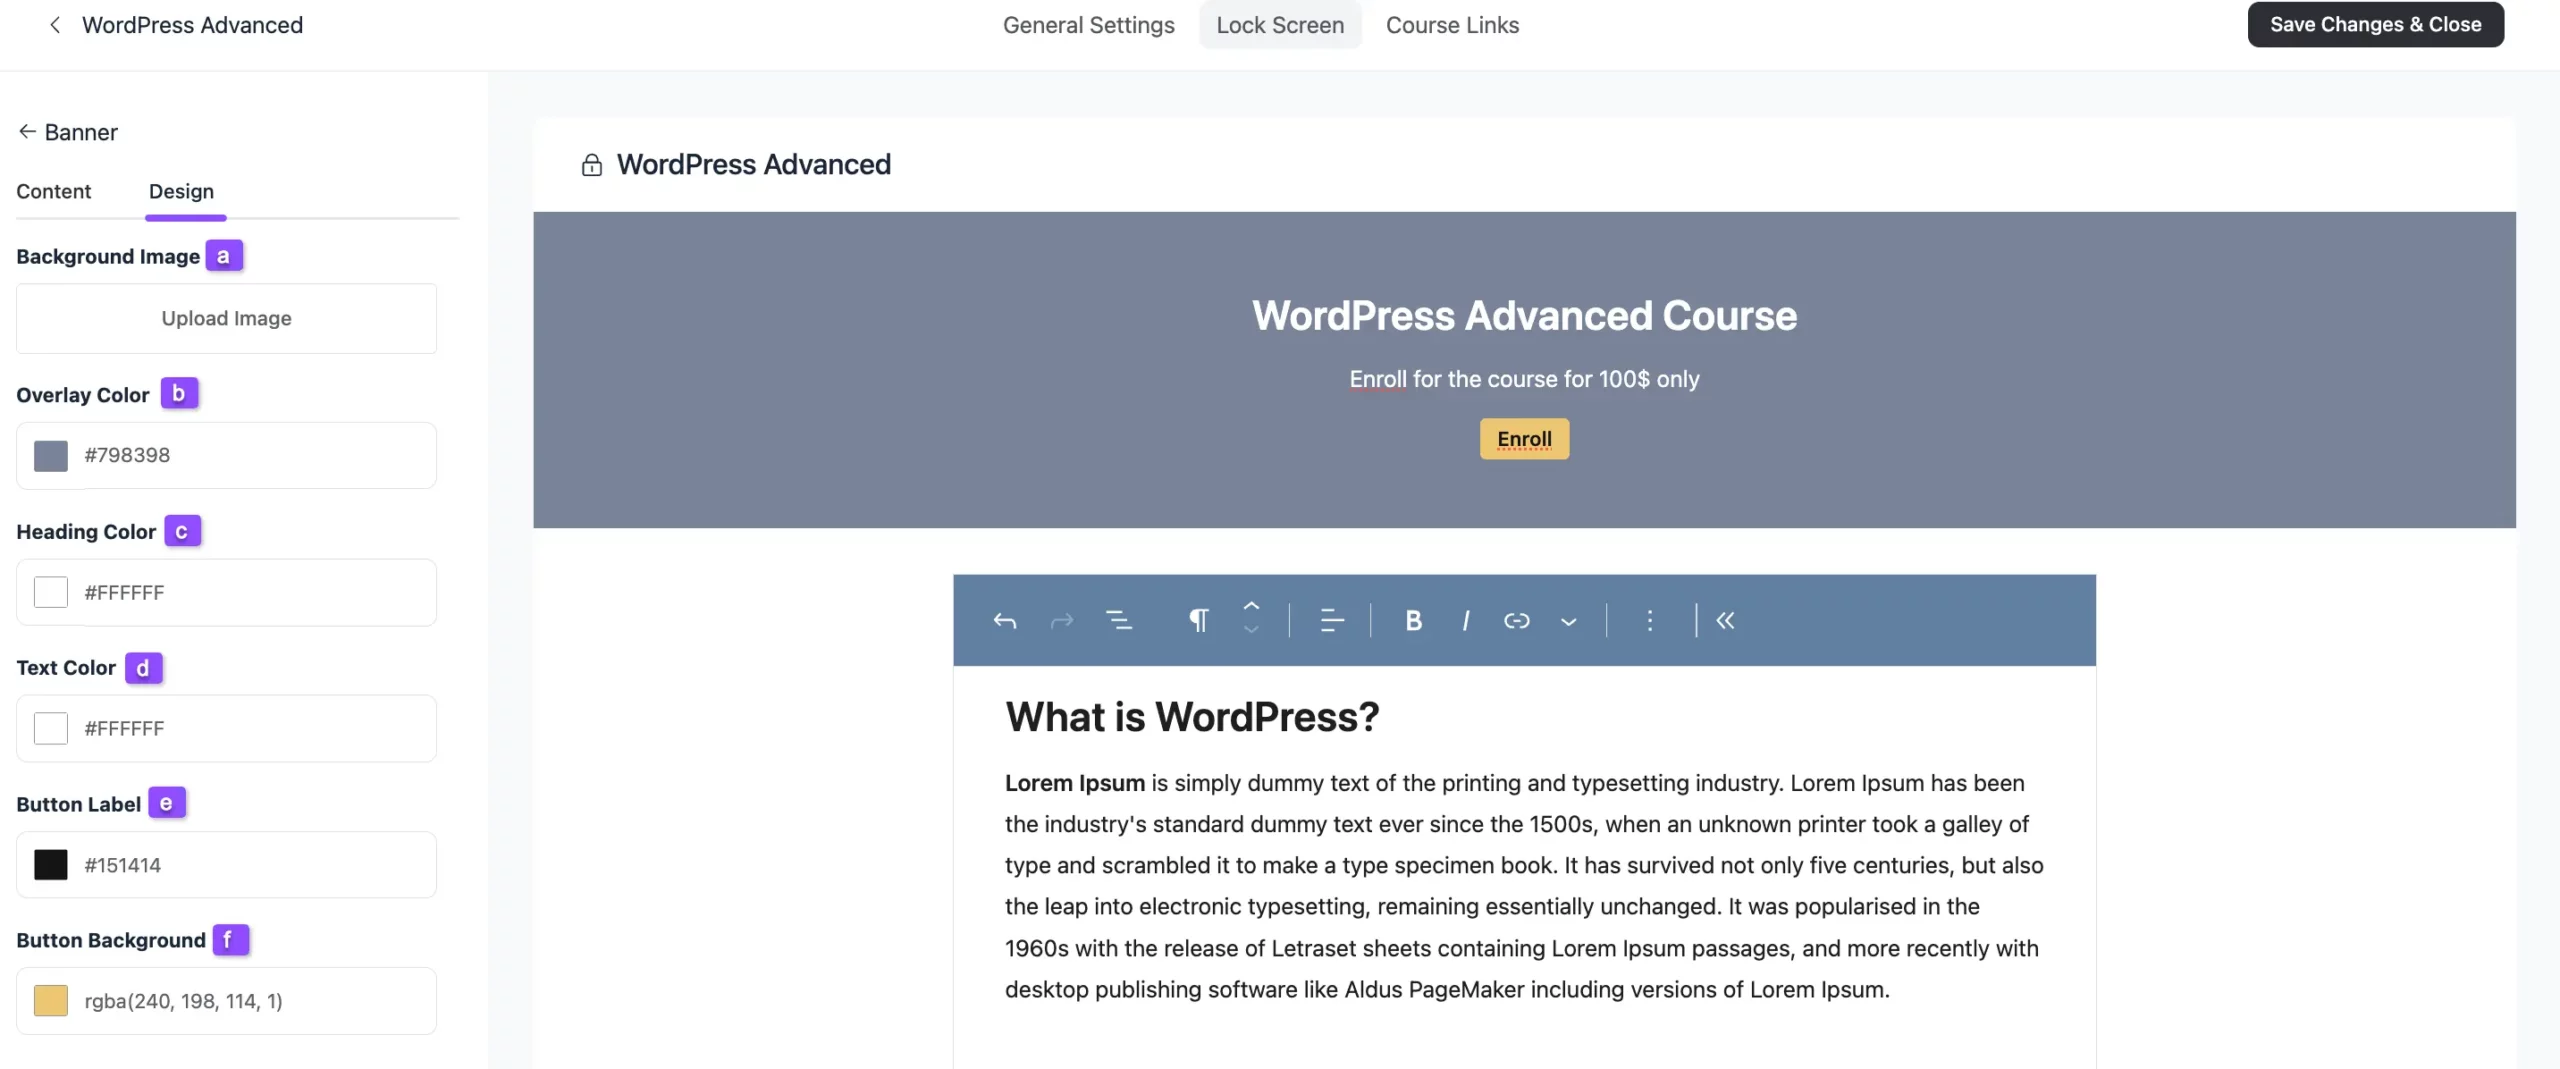
To customize the layout of the Lock Screen, open the Design Tab. The customization options of Design are briefly explained below:
a) Background Image: With this option, you can add images in the background of your banner by clicking the Upload Image button.
b) Overlay Color: With this option, you can add an overlay color to the Background Image. Color.
c) Heading Color: With this option, you can change the text color of the Heading.
d) Text Color: With this option, you can change the text color of the Description right below the Heading.
e) Button Label: With this option, you can change the text color of the Button.
f) Button Background: With this option, you can change the background color of the Button.
Once you complete the customization, click the Save Changes & Close button to save all your changes.
Secret #
If you select this option, the course will be locked for everyone. Only invited students can view and enroll in the course content.
After selecting your desired Privacy option for the Course, don’t forget to click the Save Changes & Close button to save all your changes.
If you have any further questions, concerns, or suggestions, please do not hesitate to contact our @support team. Thank you.


