
This comprehensive guide will walk you through the entire process of setting up CloudFlare R2 to work with the FluentCommunity Plugin. We’ll cover how to create and configure an R2 bucket, generate API tokens, and set up the plugin’s settings.
Follow these steps to set up Cloudflare R2 with your FluentCommunity.
Cloudflare Account ID #
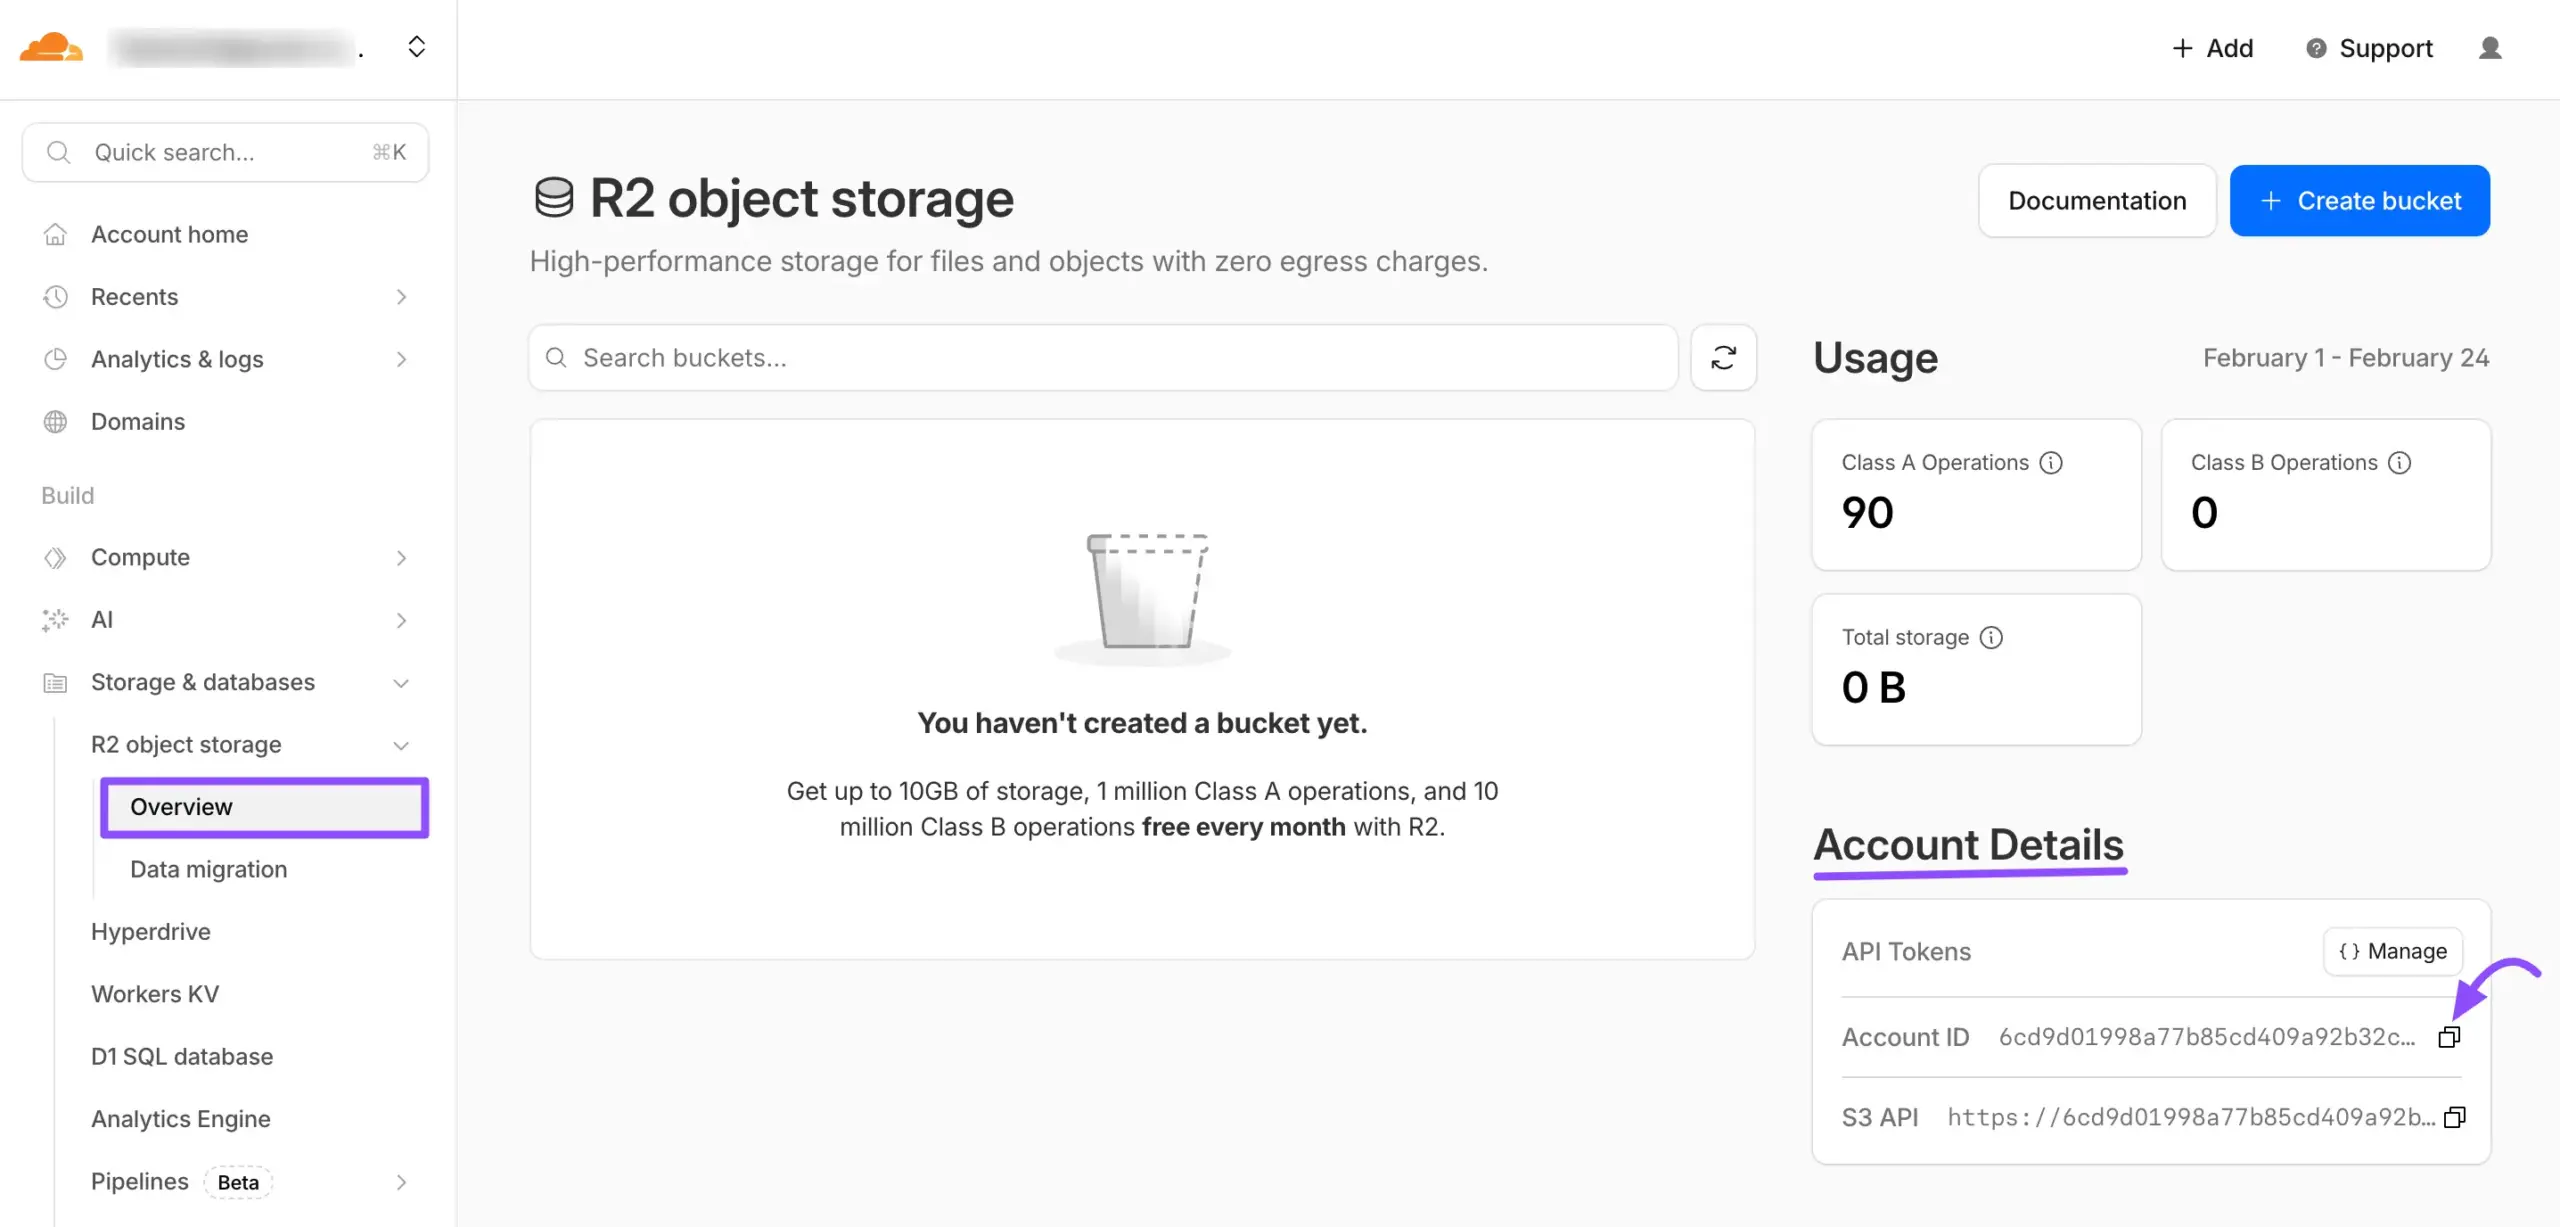
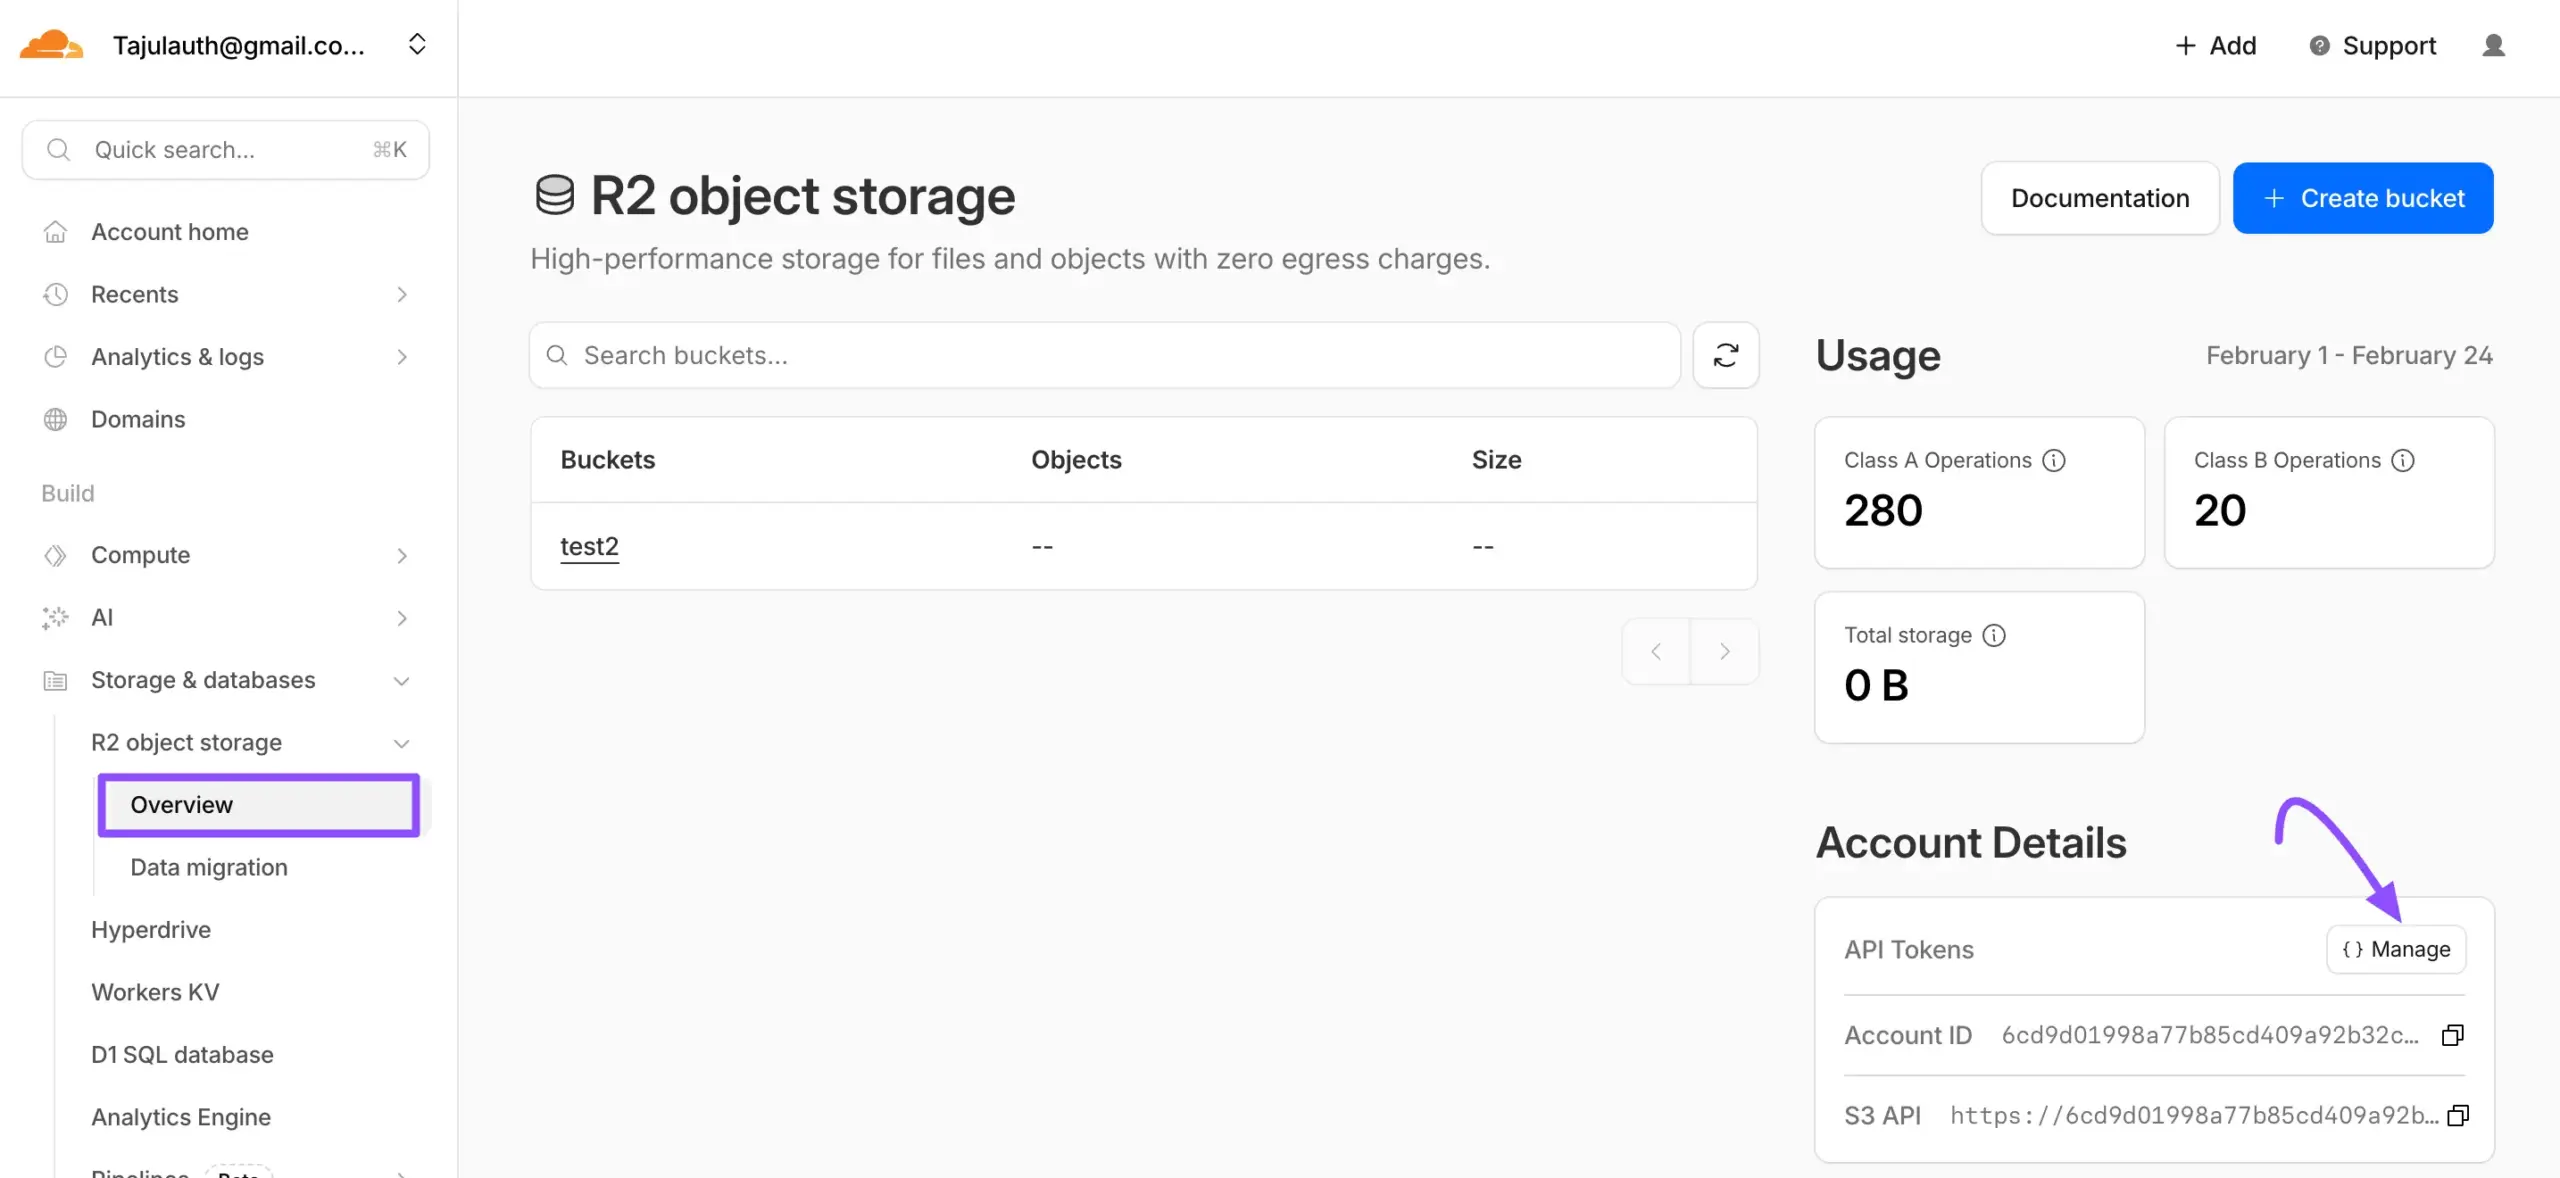
First, log in to your Cloudflare Account. Navigate to Storage & Databases > R2 Object Storage > Overview. On the right side of the page, you will find the Account Details section. Your Account ID is displayed here. Click the copy icon next to the ID to save it for later use.
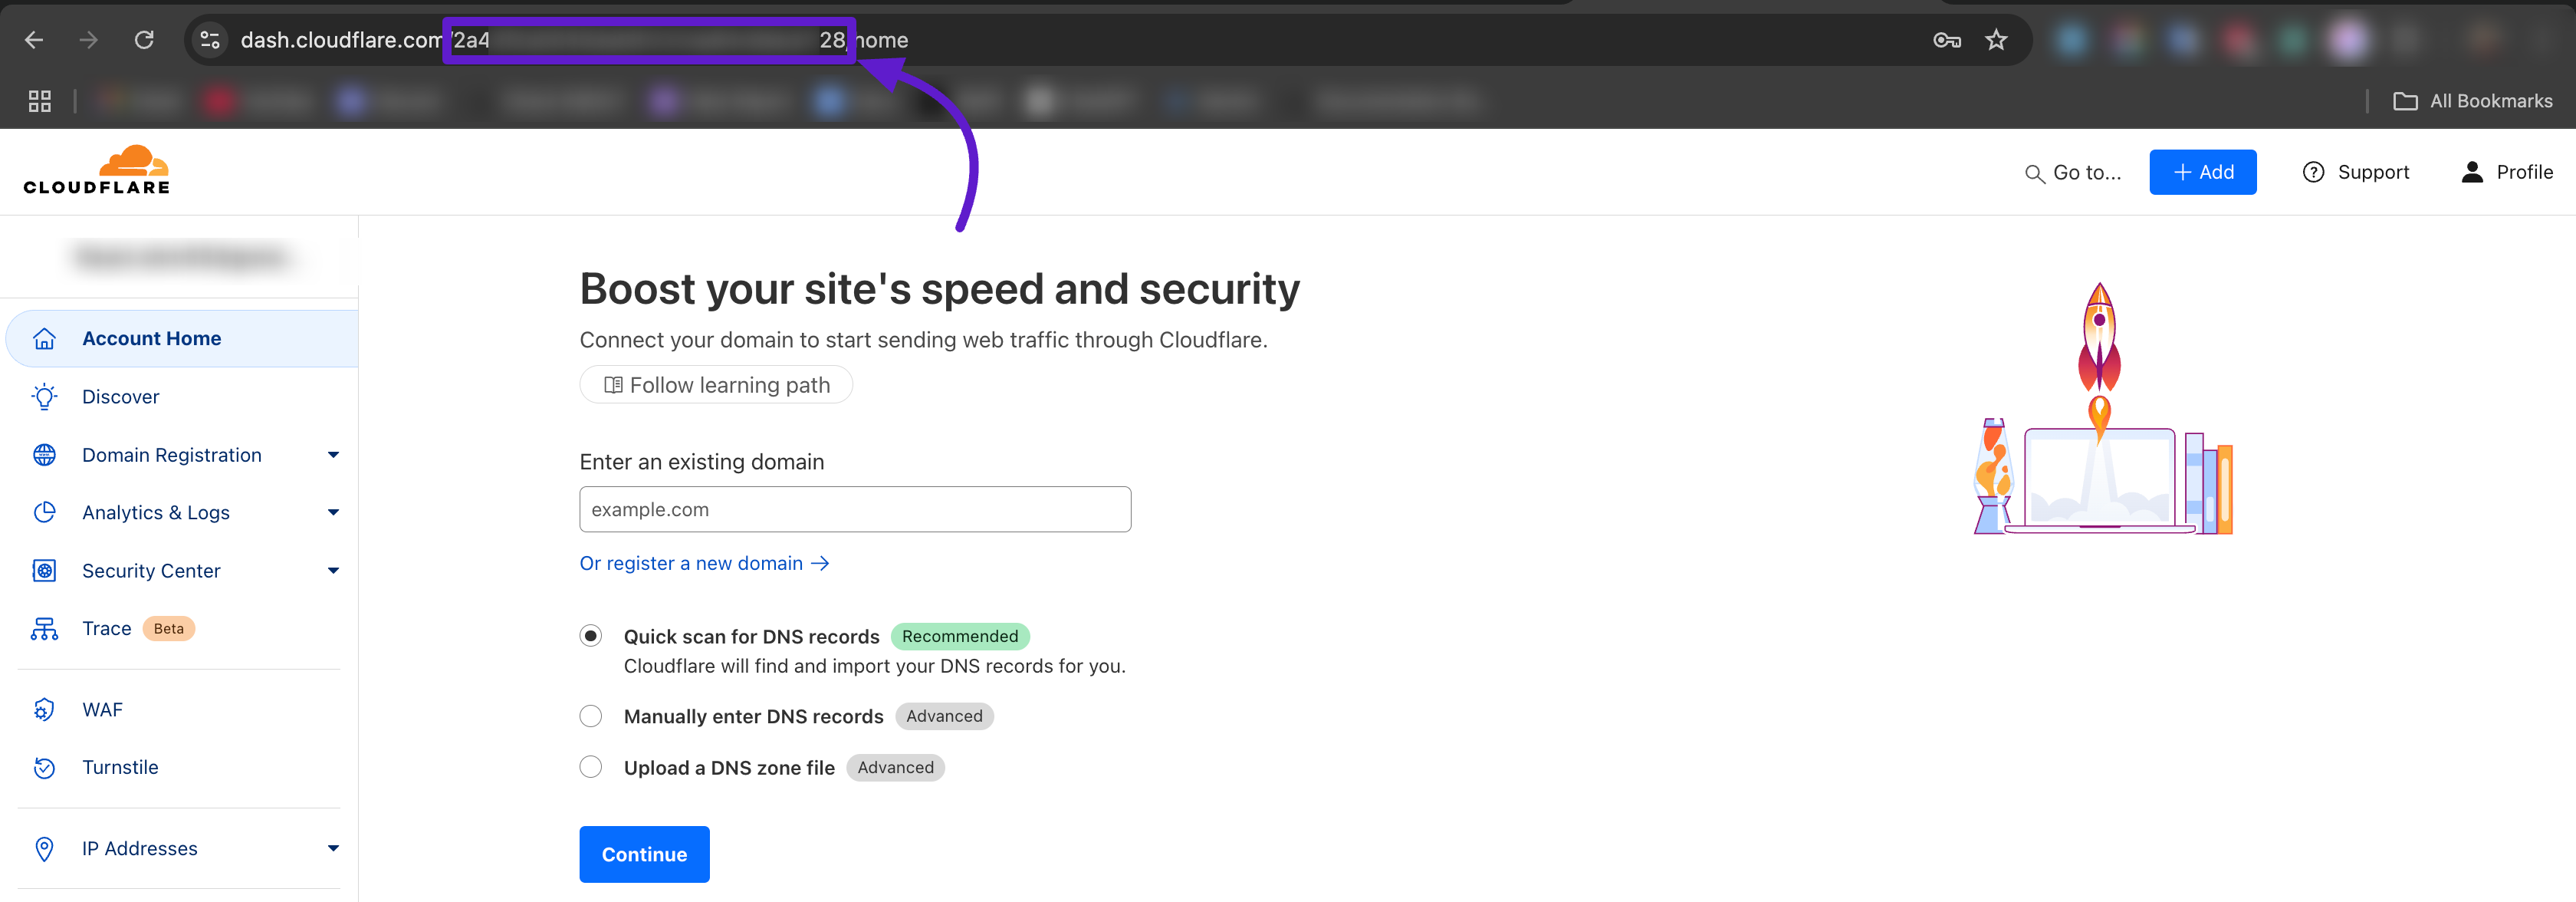
Alternatively, you can find your Account ID in the URL of your Cloudflare account, as shown in the screenshot below. You can also copy your Account ID from here.
Create a CloudFlare R2 Bucket (Bucket Name & Public URL) #
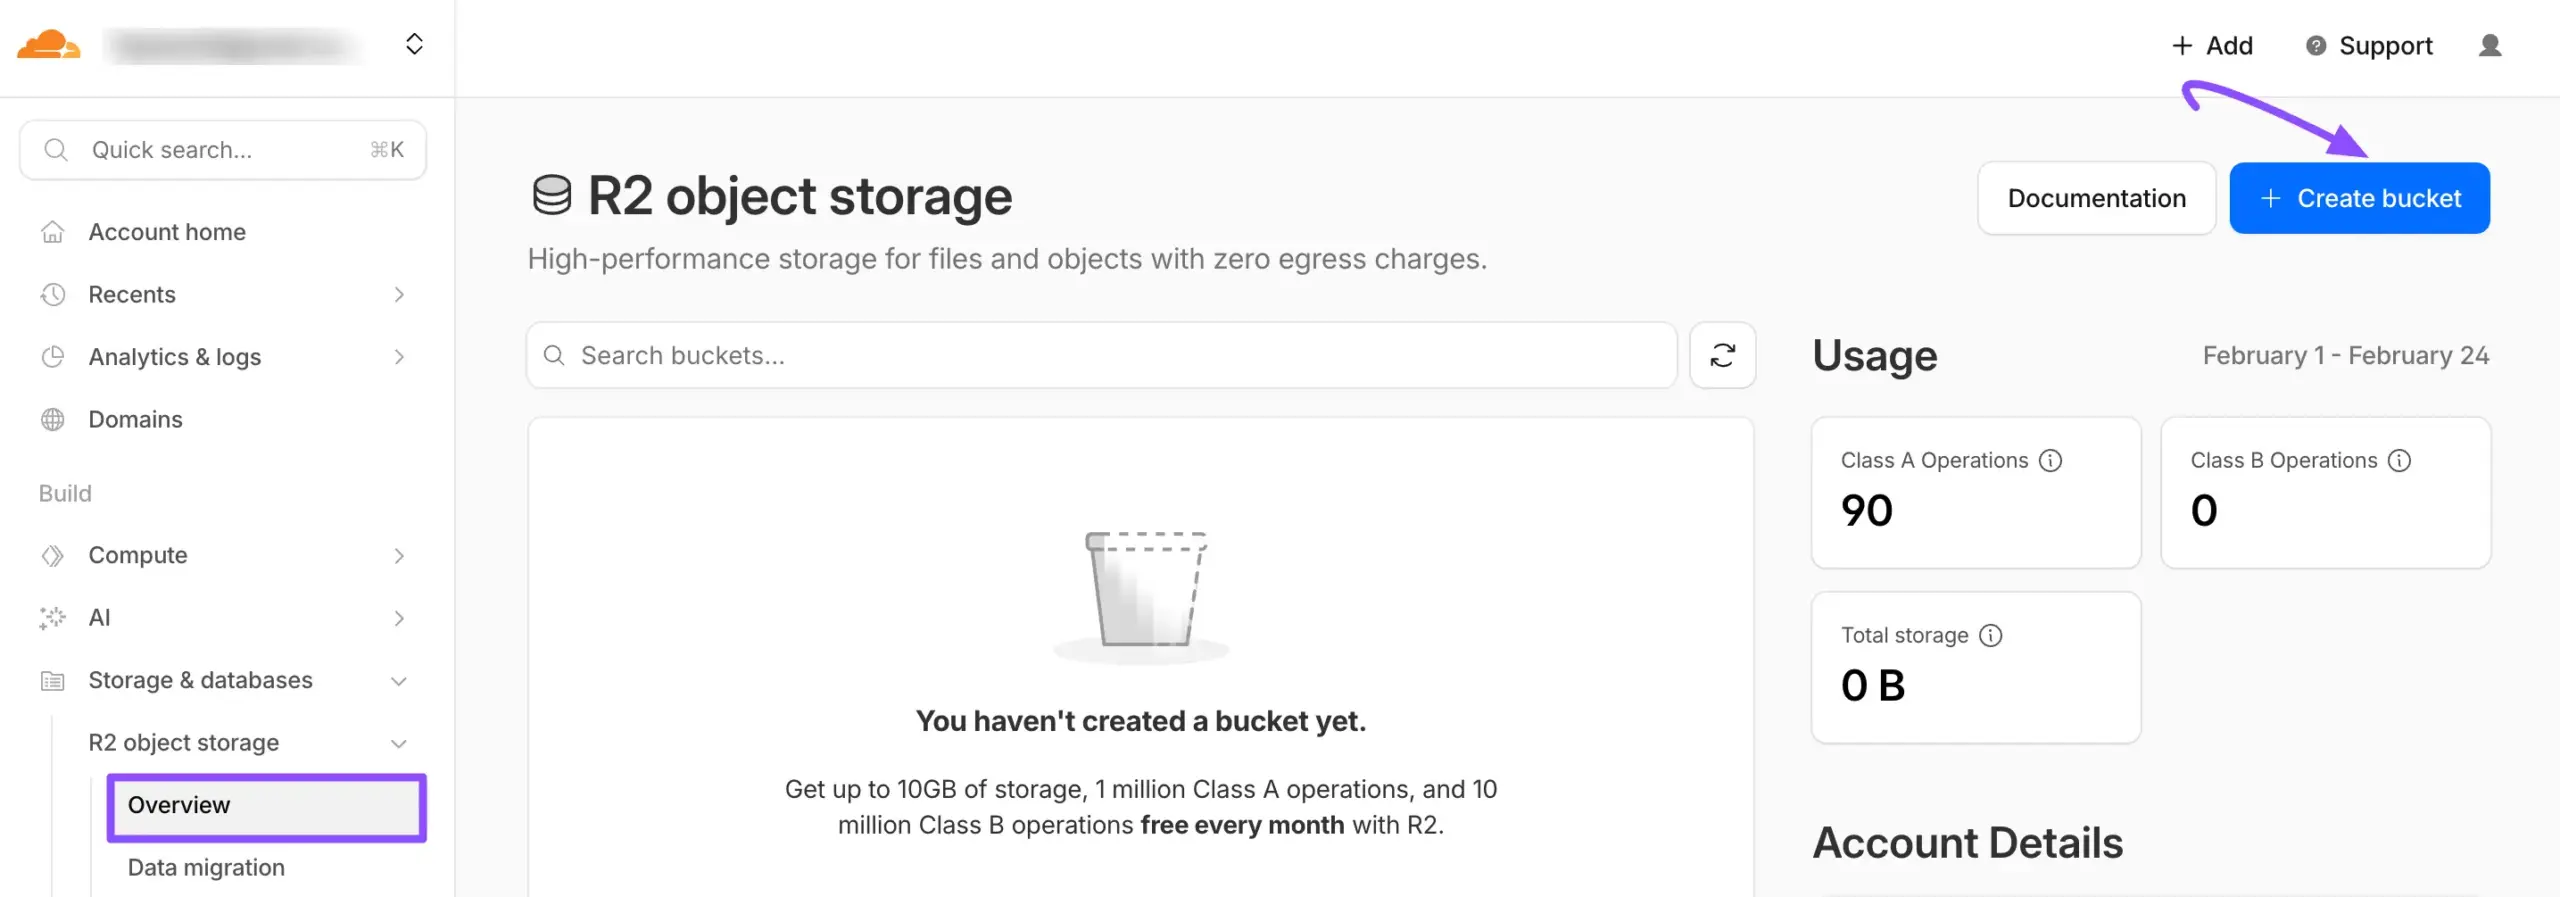
Navigate to R2 Object Storage from the left sidebar, find Overview under R2 Object Storage, and click on it. Now click on the Create Bucket button to create a bucket.
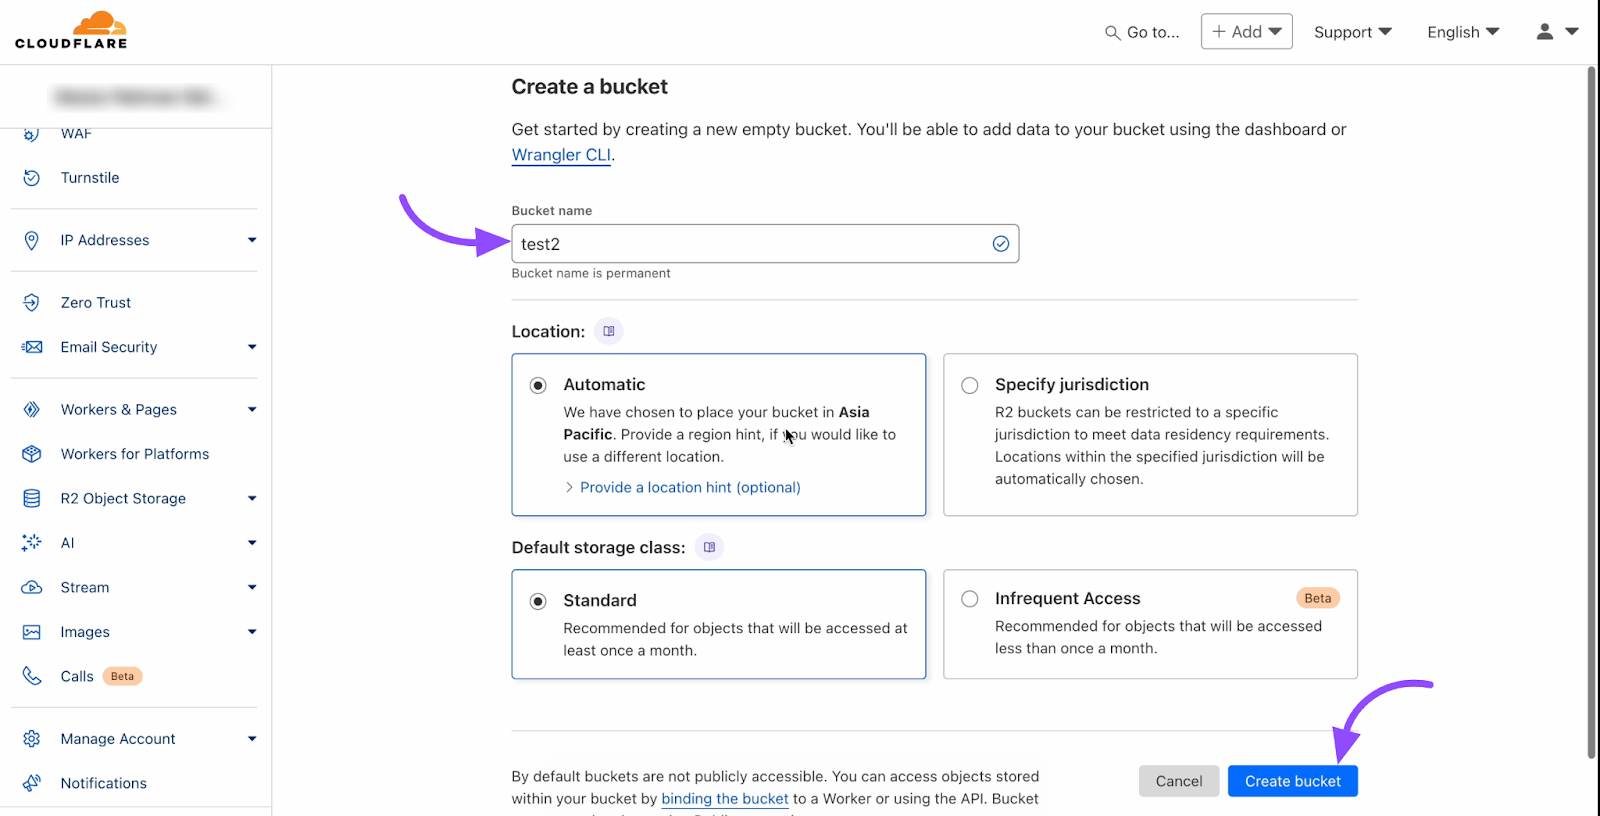
Enter a name for your bucket that is easy to identify and unique across your projects. Leave the Location of the bucket as Default unless you have specific storage.
Double-check your settings and click the Create Bucket button.
Cloudflare Bucket Public URL #
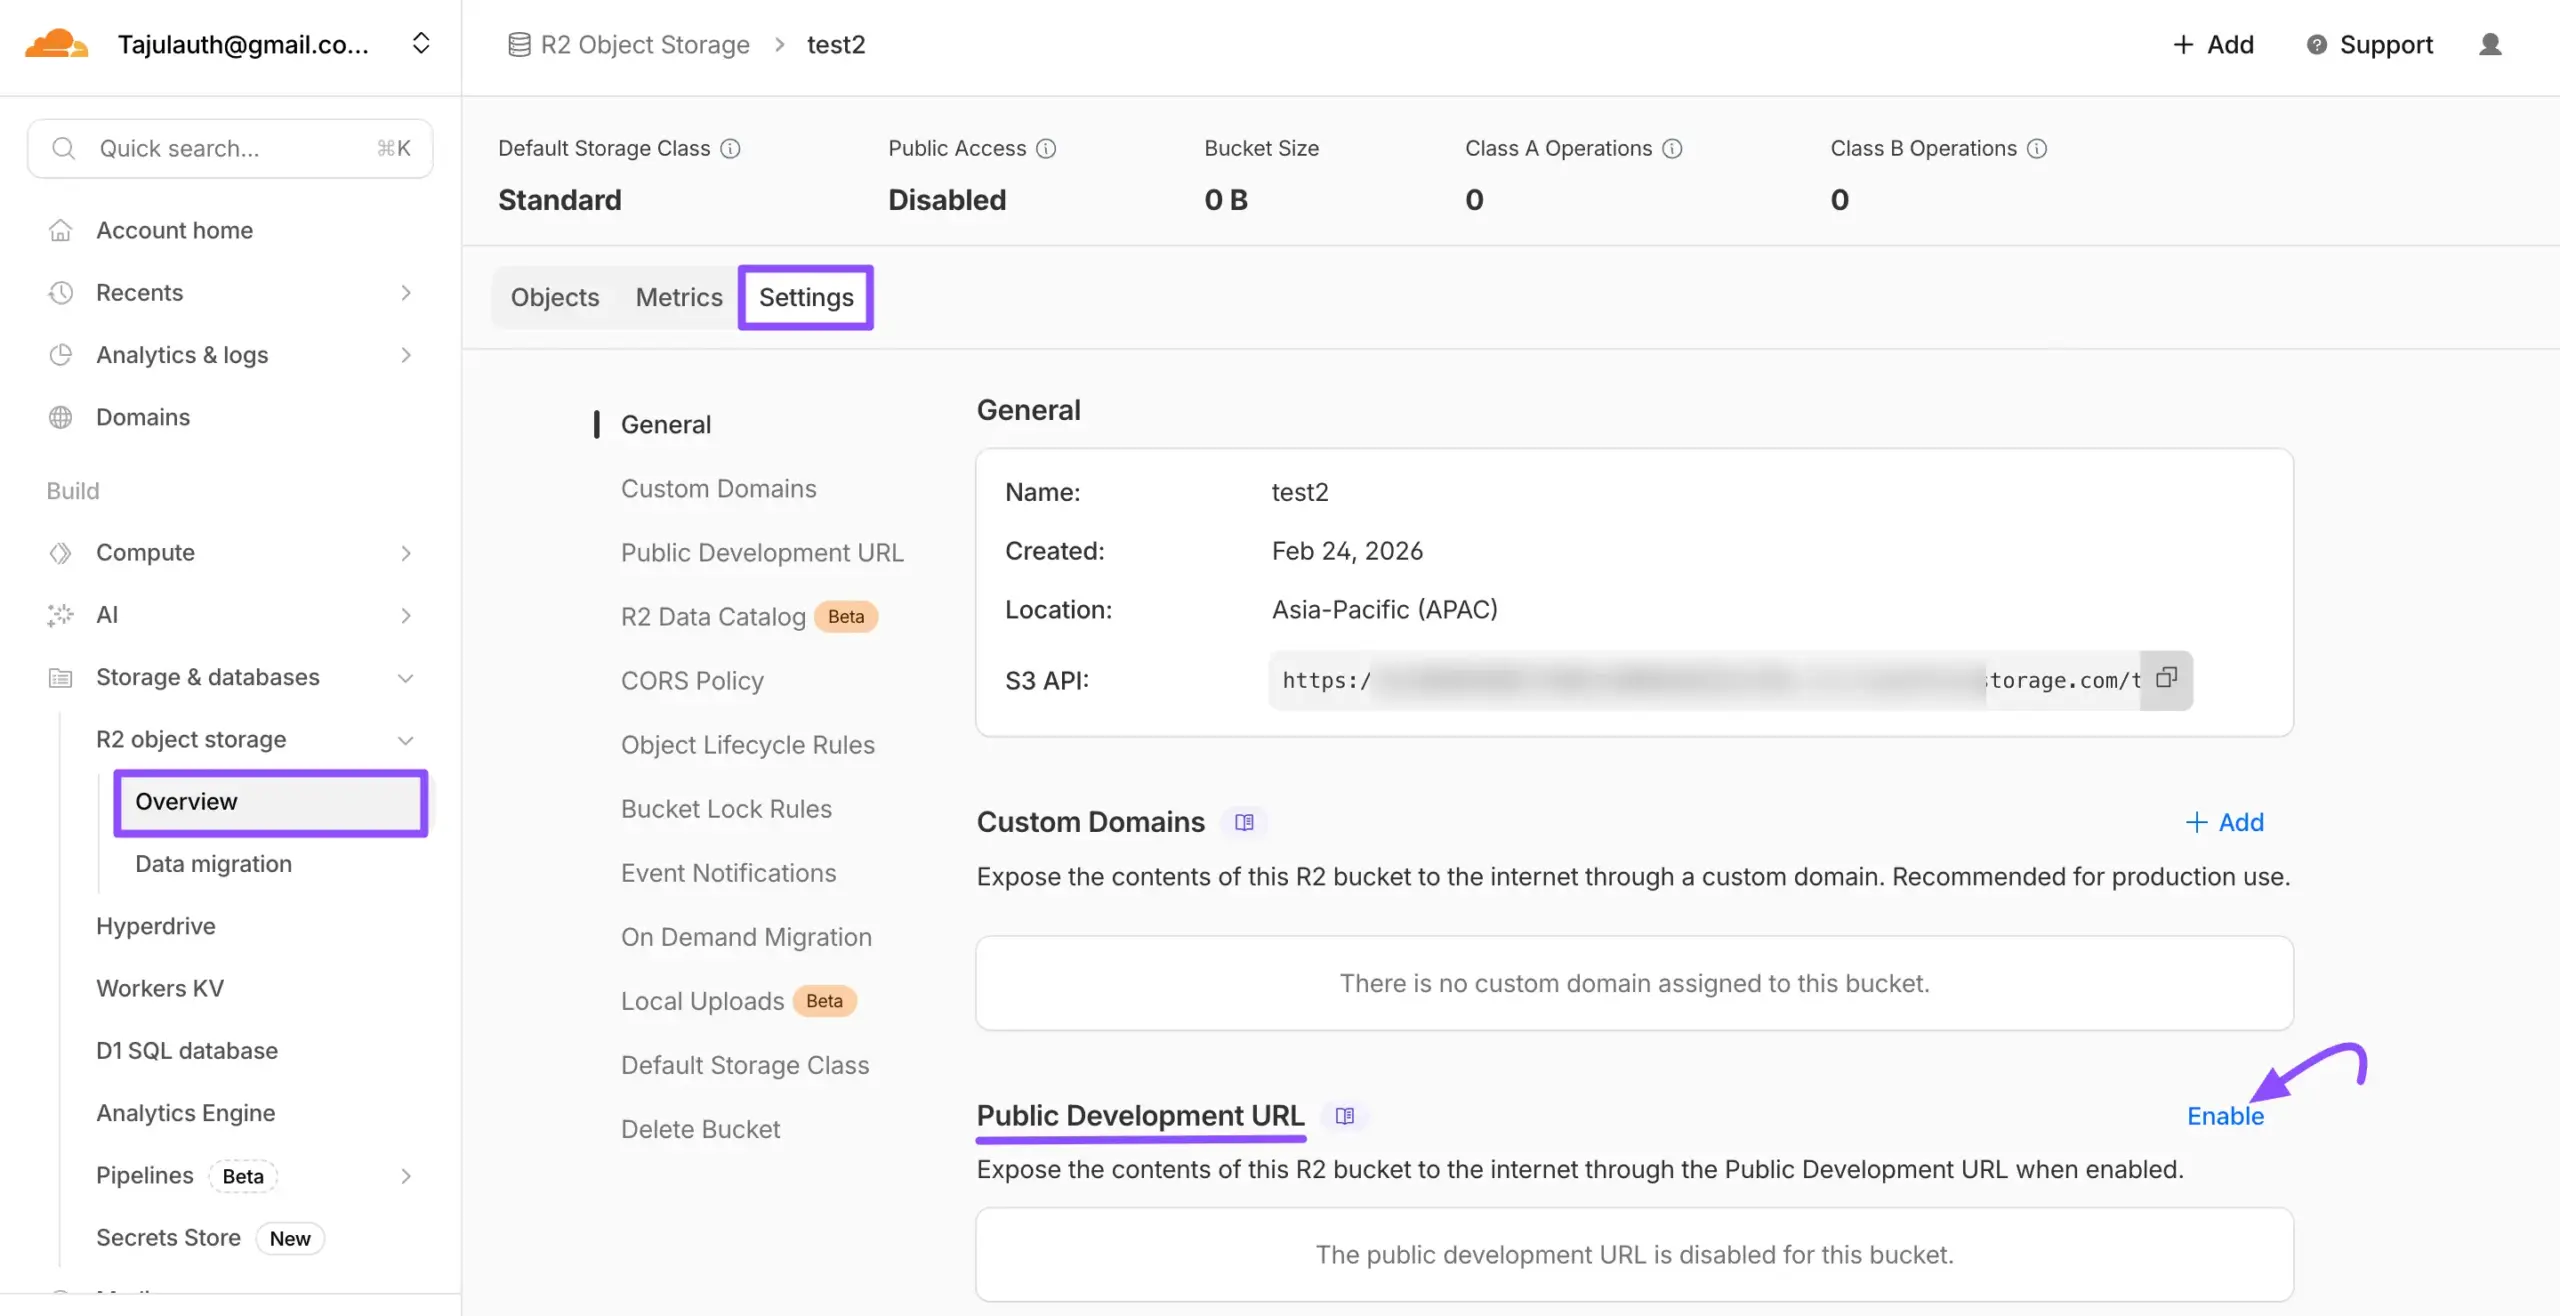
You can now see the Bucket Details. Scroll down to the Public Development URL section. Here, you need to enable access to this public URL.
Click the Enable link, and a pop-up will appear. Type “allow” in the field to grant access to the Public Development URL.
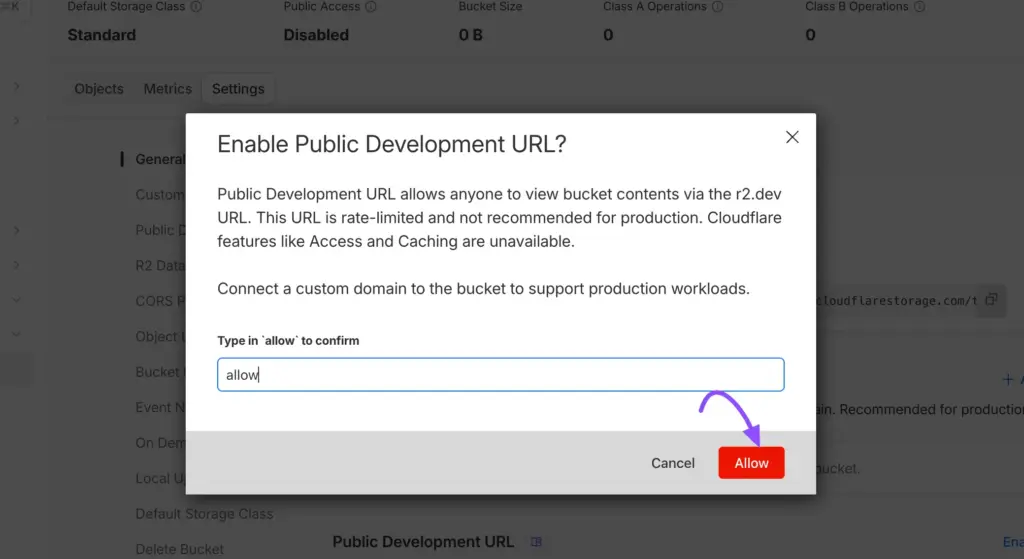
A pop-up will appear to Enable Public Development URL. Type in ‘allow’ to confirm. Then, press the Allow button.
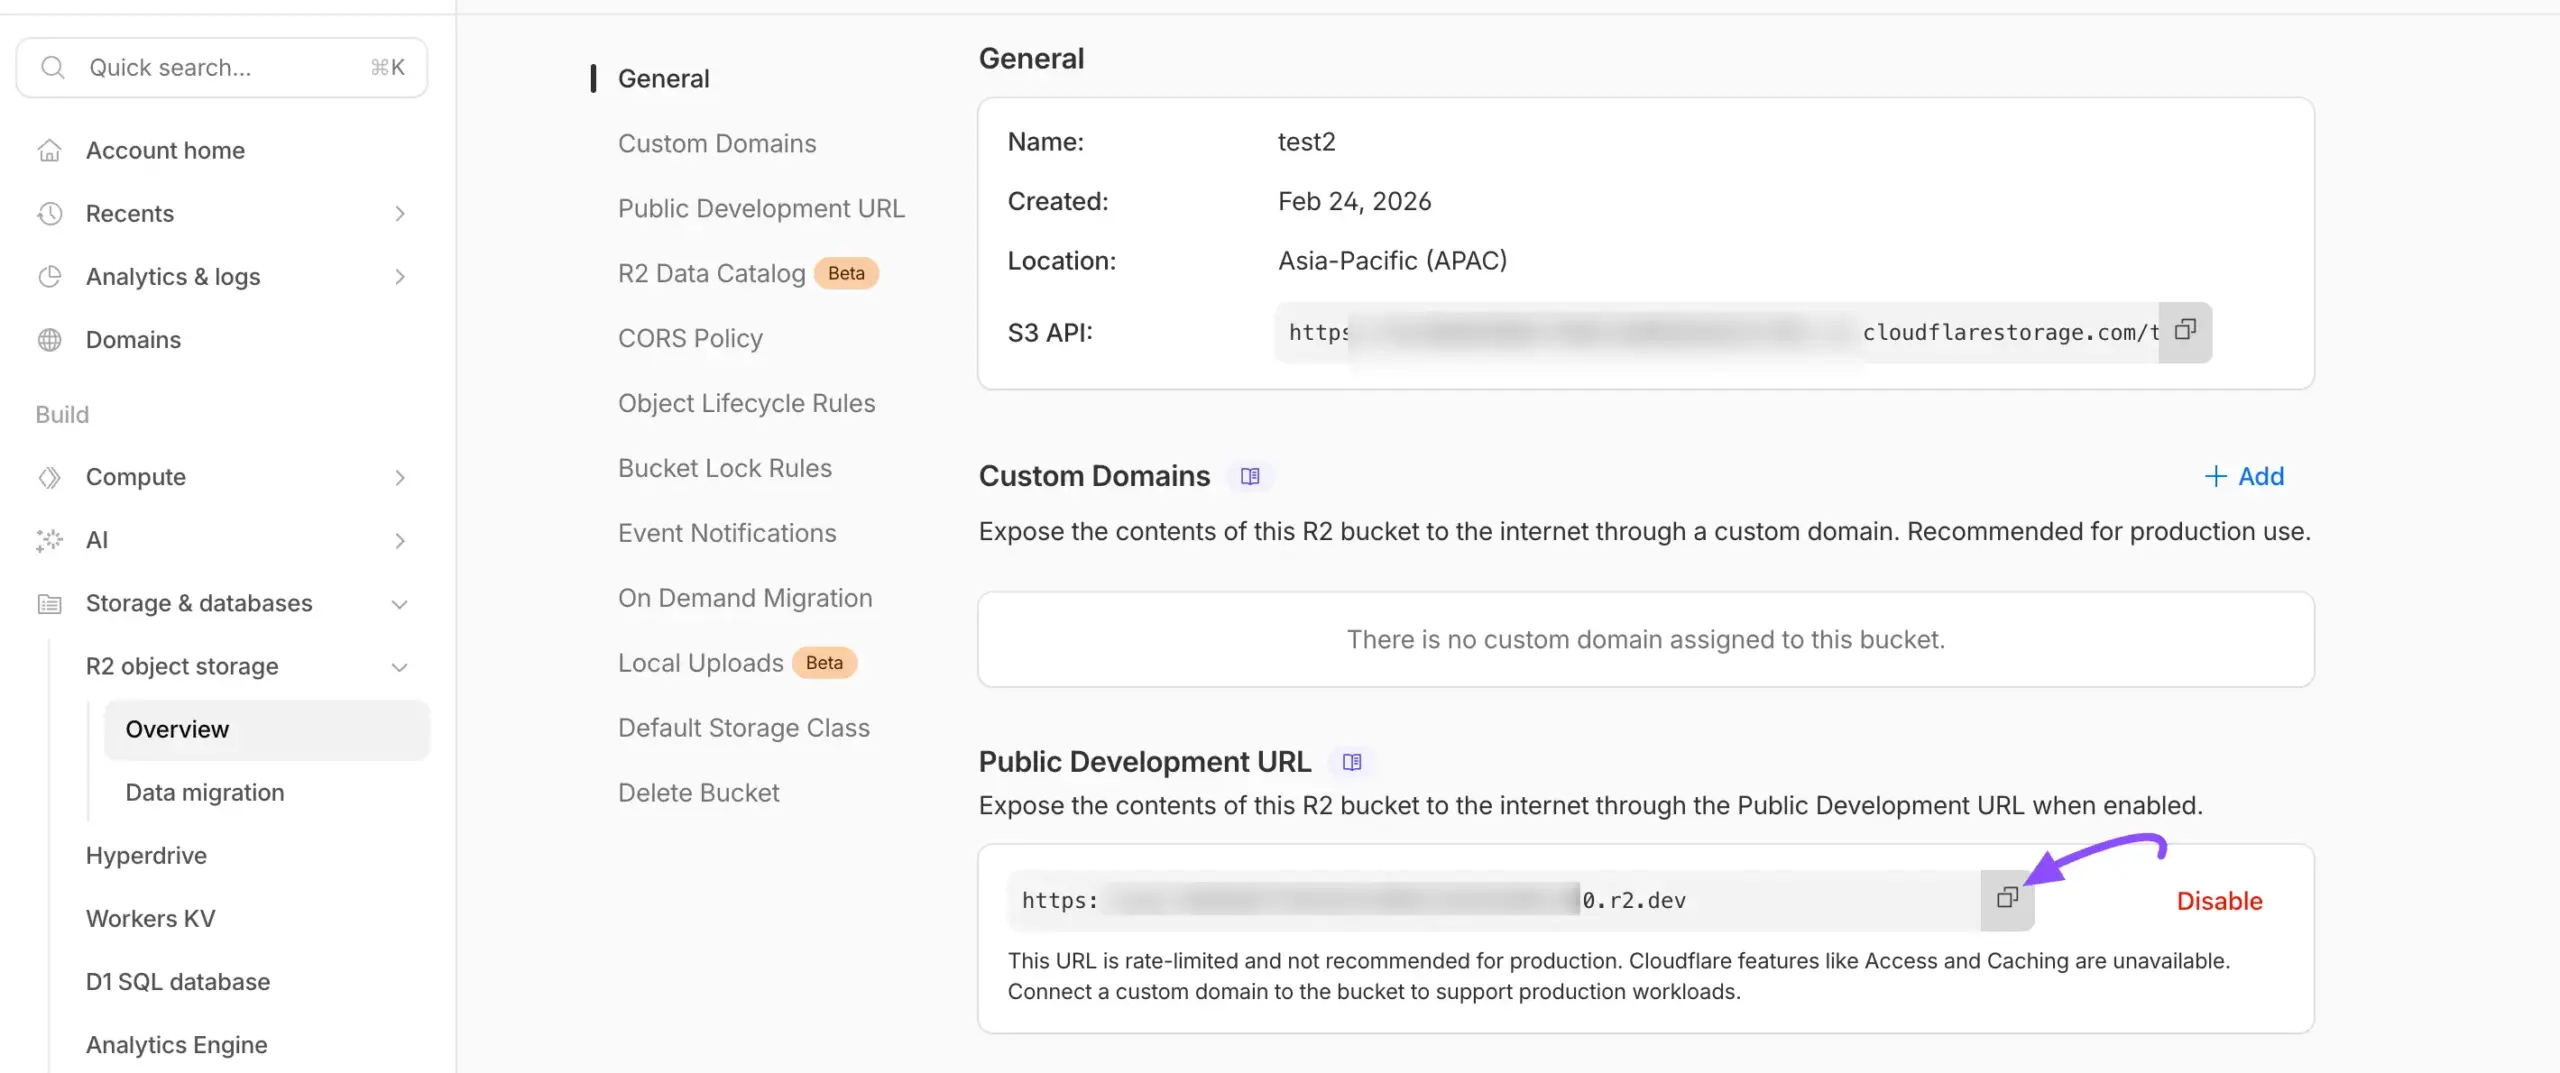
Now from here, you will get the Cloudflare Bucket Public URL.
Cloudflare Bucket EndPoint #
To connect FluentCommunity with Cloudflare R2, you also need the S3 API endpoint for your specific bucket.
- Navigate to R2 Object Storage > Overview from the left sidebar.
- Click on the specific Bucket you created in the previous steps.
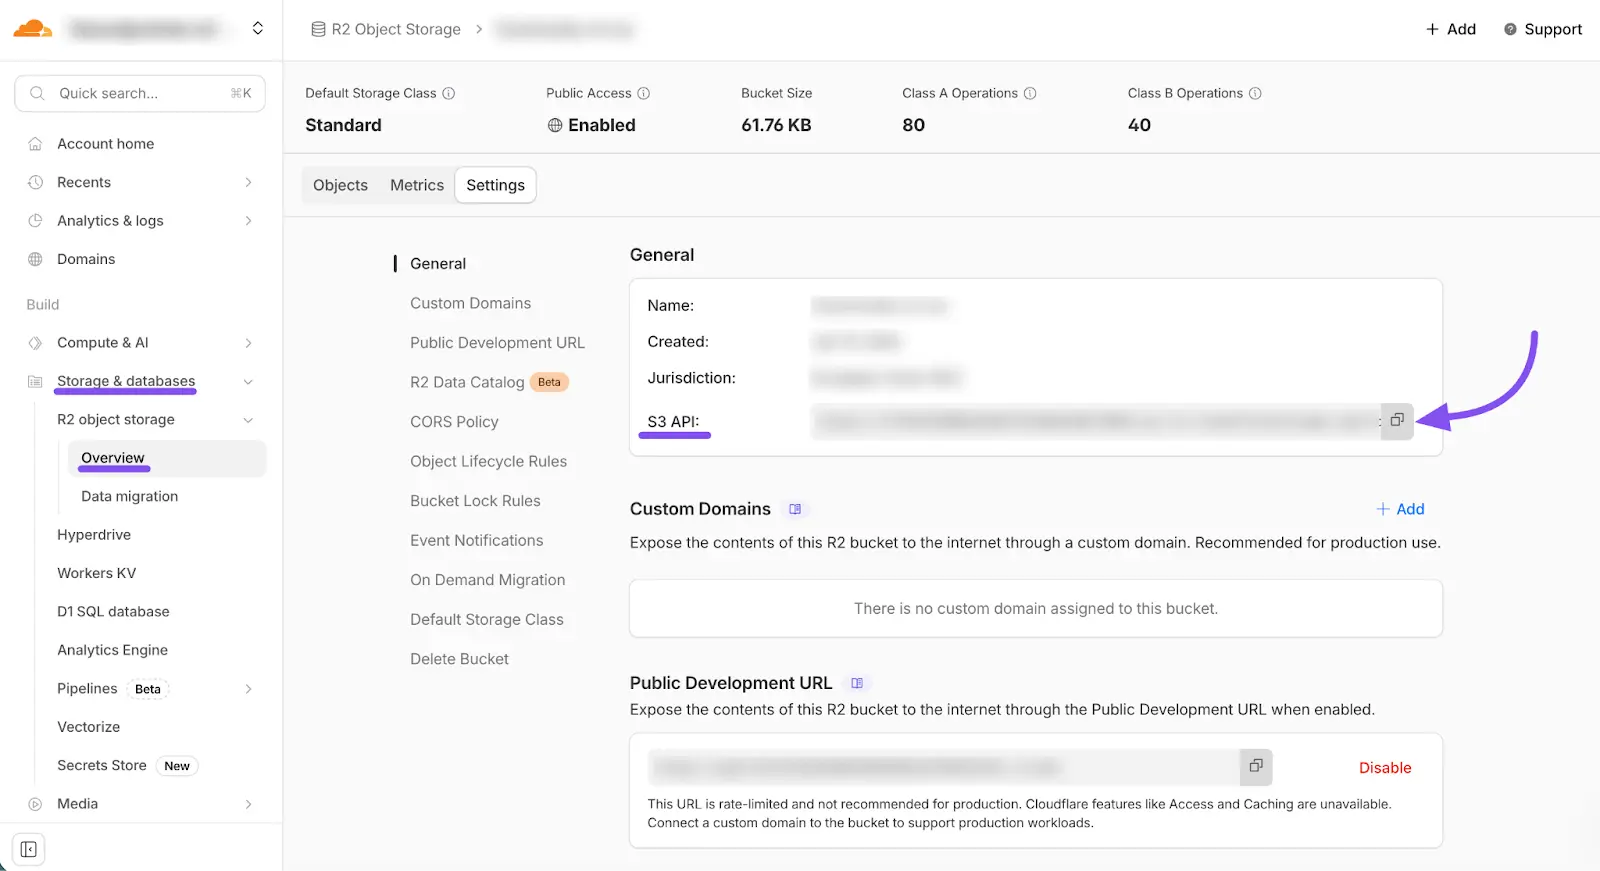
Once inside the bucket, switch to the Settings tab.
Under the General section, locate the S3 API field. Copy this URL (e.g., https://<account-id>.r2.cloudflarestorage.com/base-logs). This URL will be used as your Endpoint.

Cloudflare Access Key & Secret Key #
To generate your credentials, go back to the R2 Object Storage > Overview page. In the Account Details box on the right, click the {} Manage button next to API Tokens.
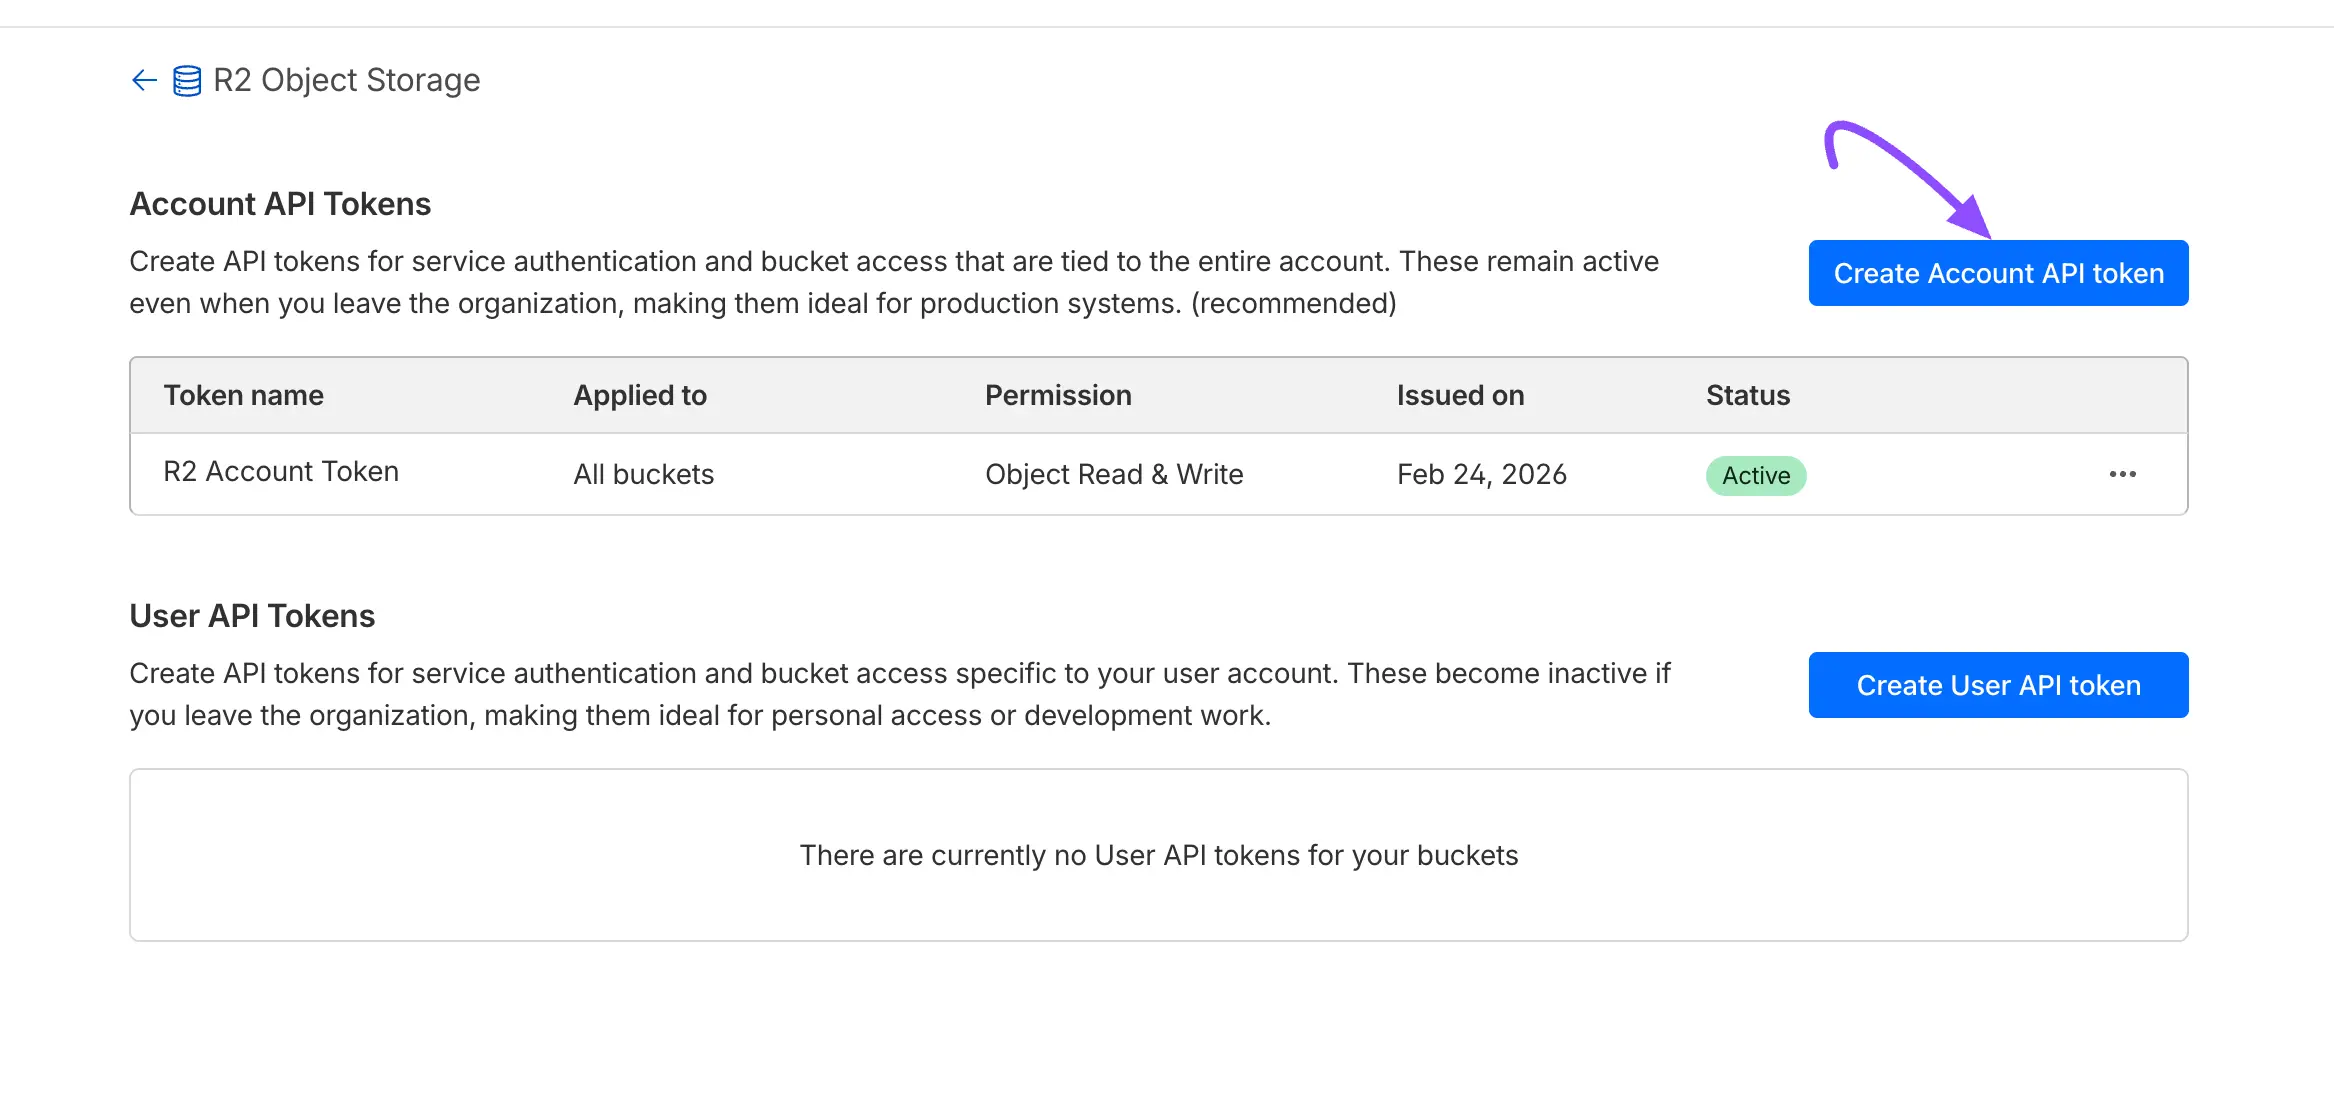
On the next page, click the Create API token button.
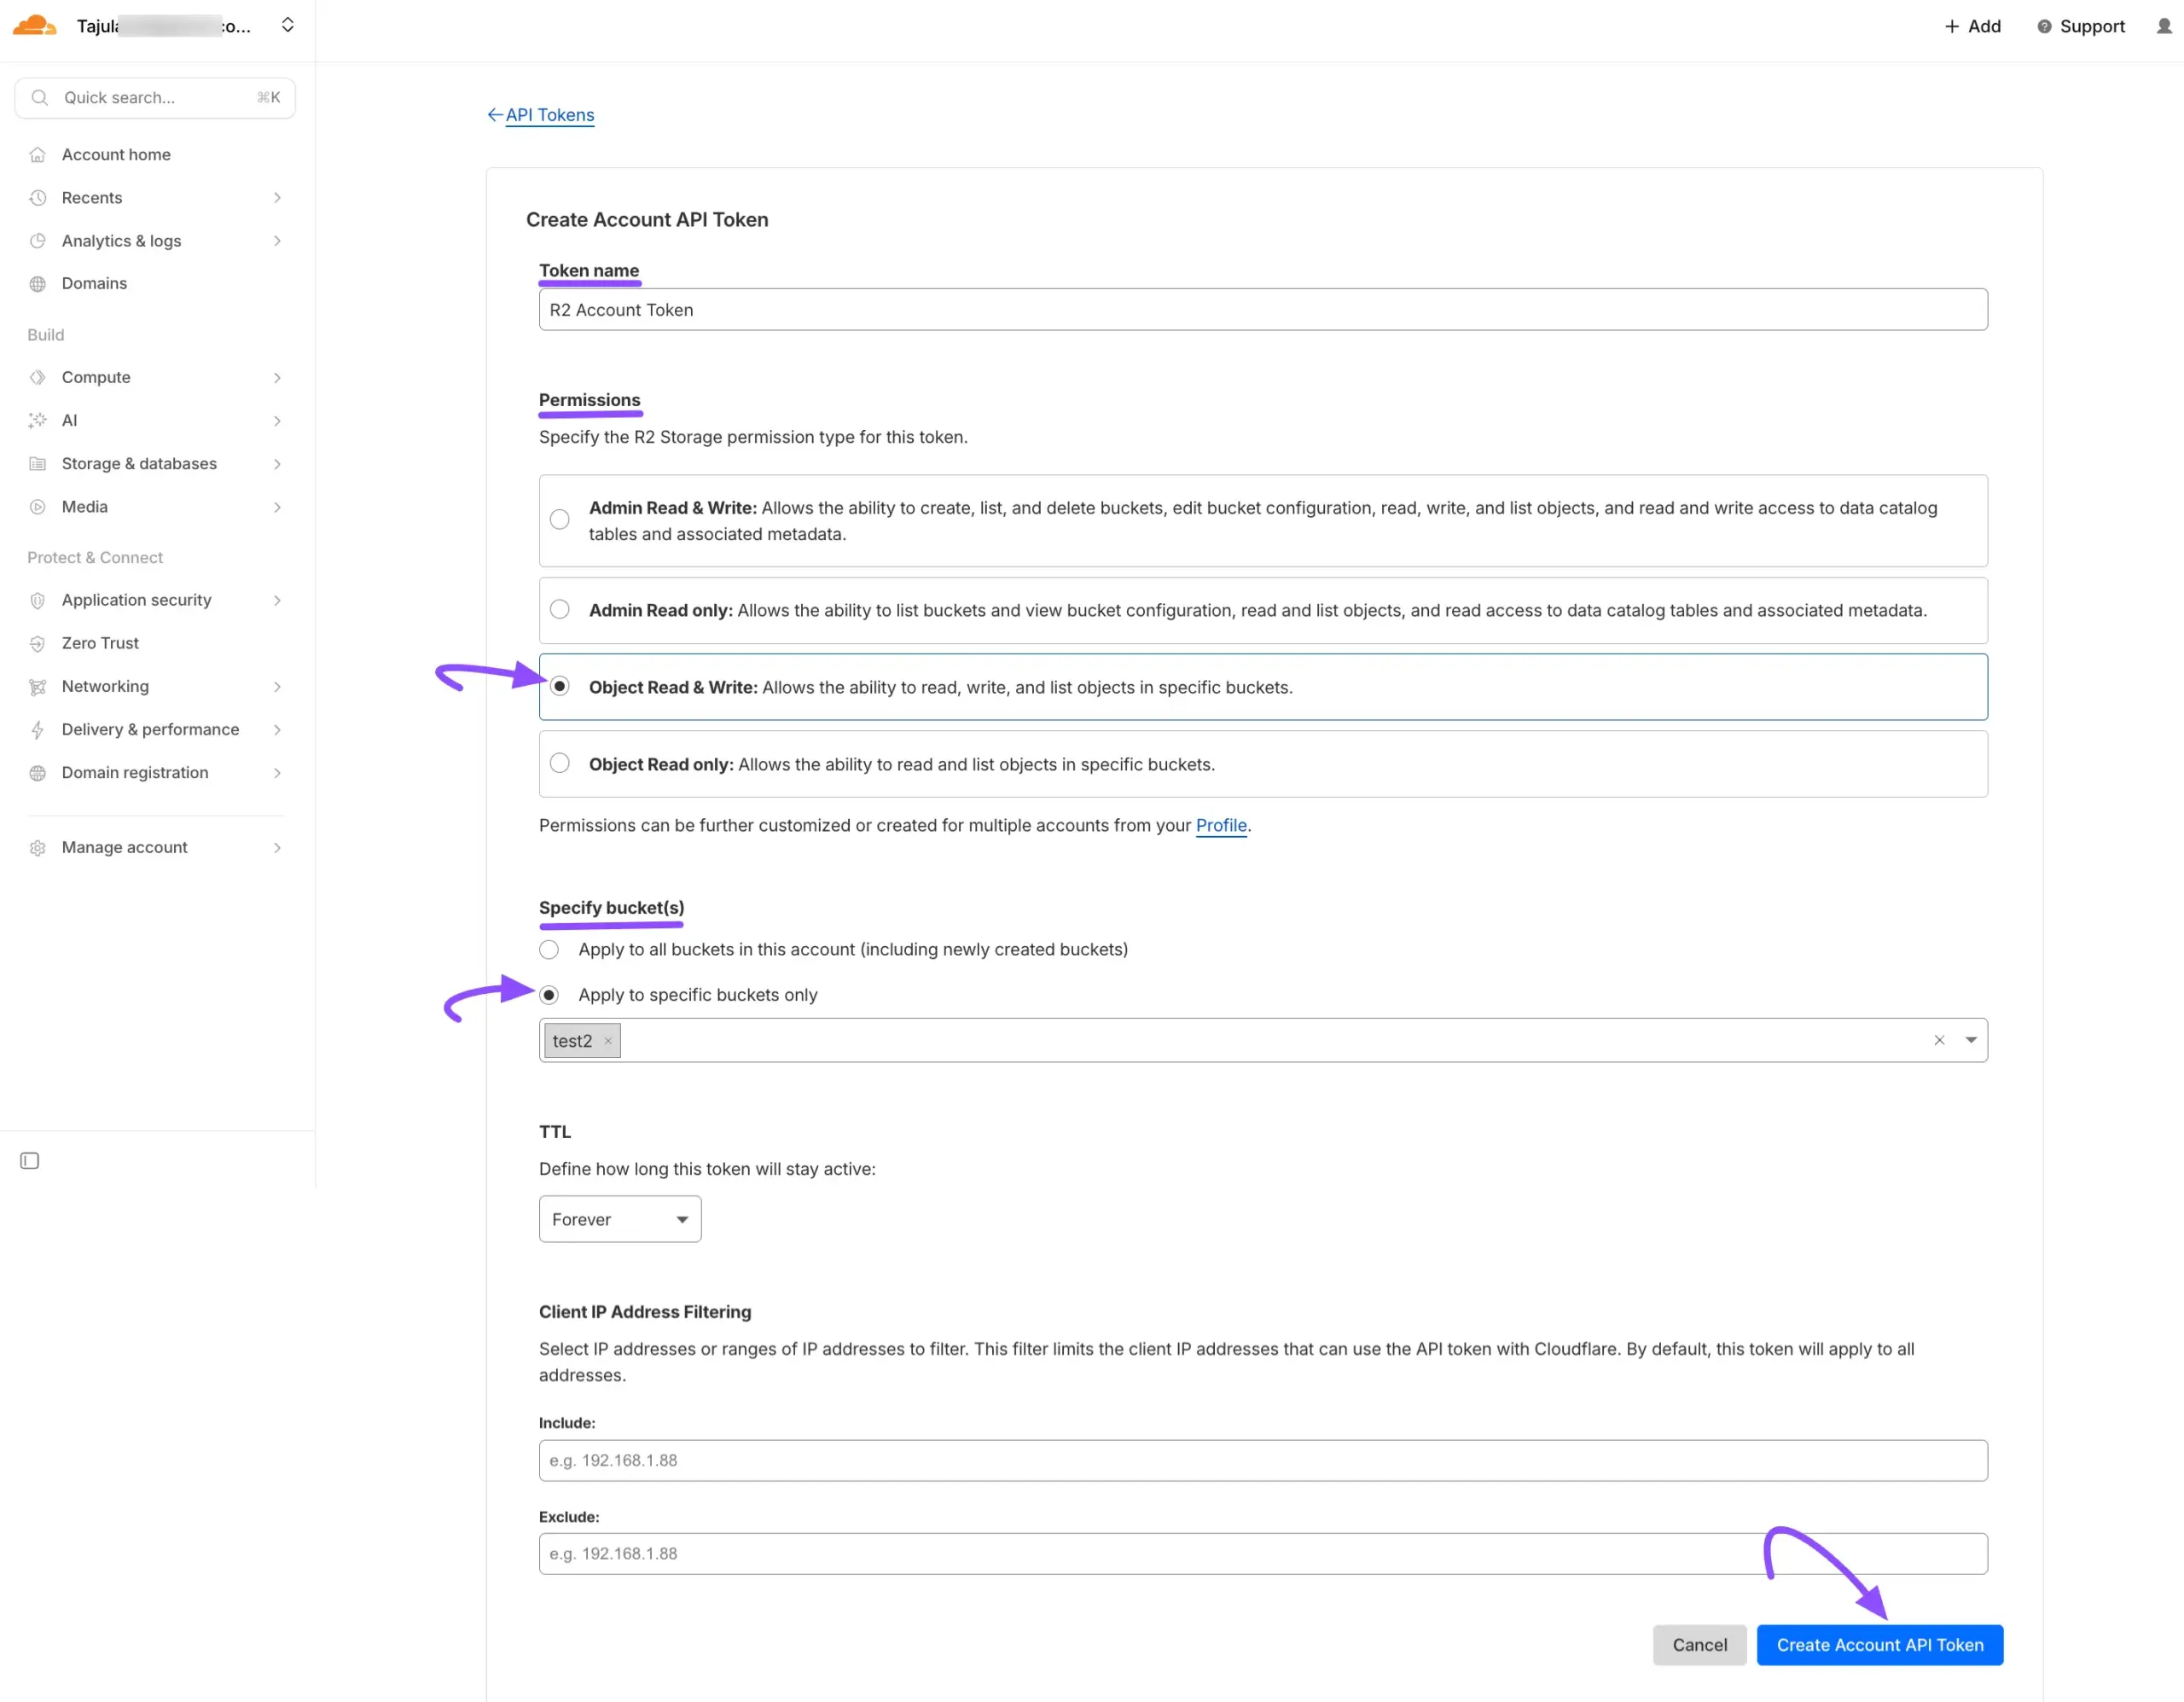
Now, configure your token with the following settings:
- Token Name: Give your token a descriptive name.
- Permissions: Select Object Read & Write.
- Bucket: Choose the specific bucket you created from the dropdown menu.
Next, click the Create Account API token button at the bottom.
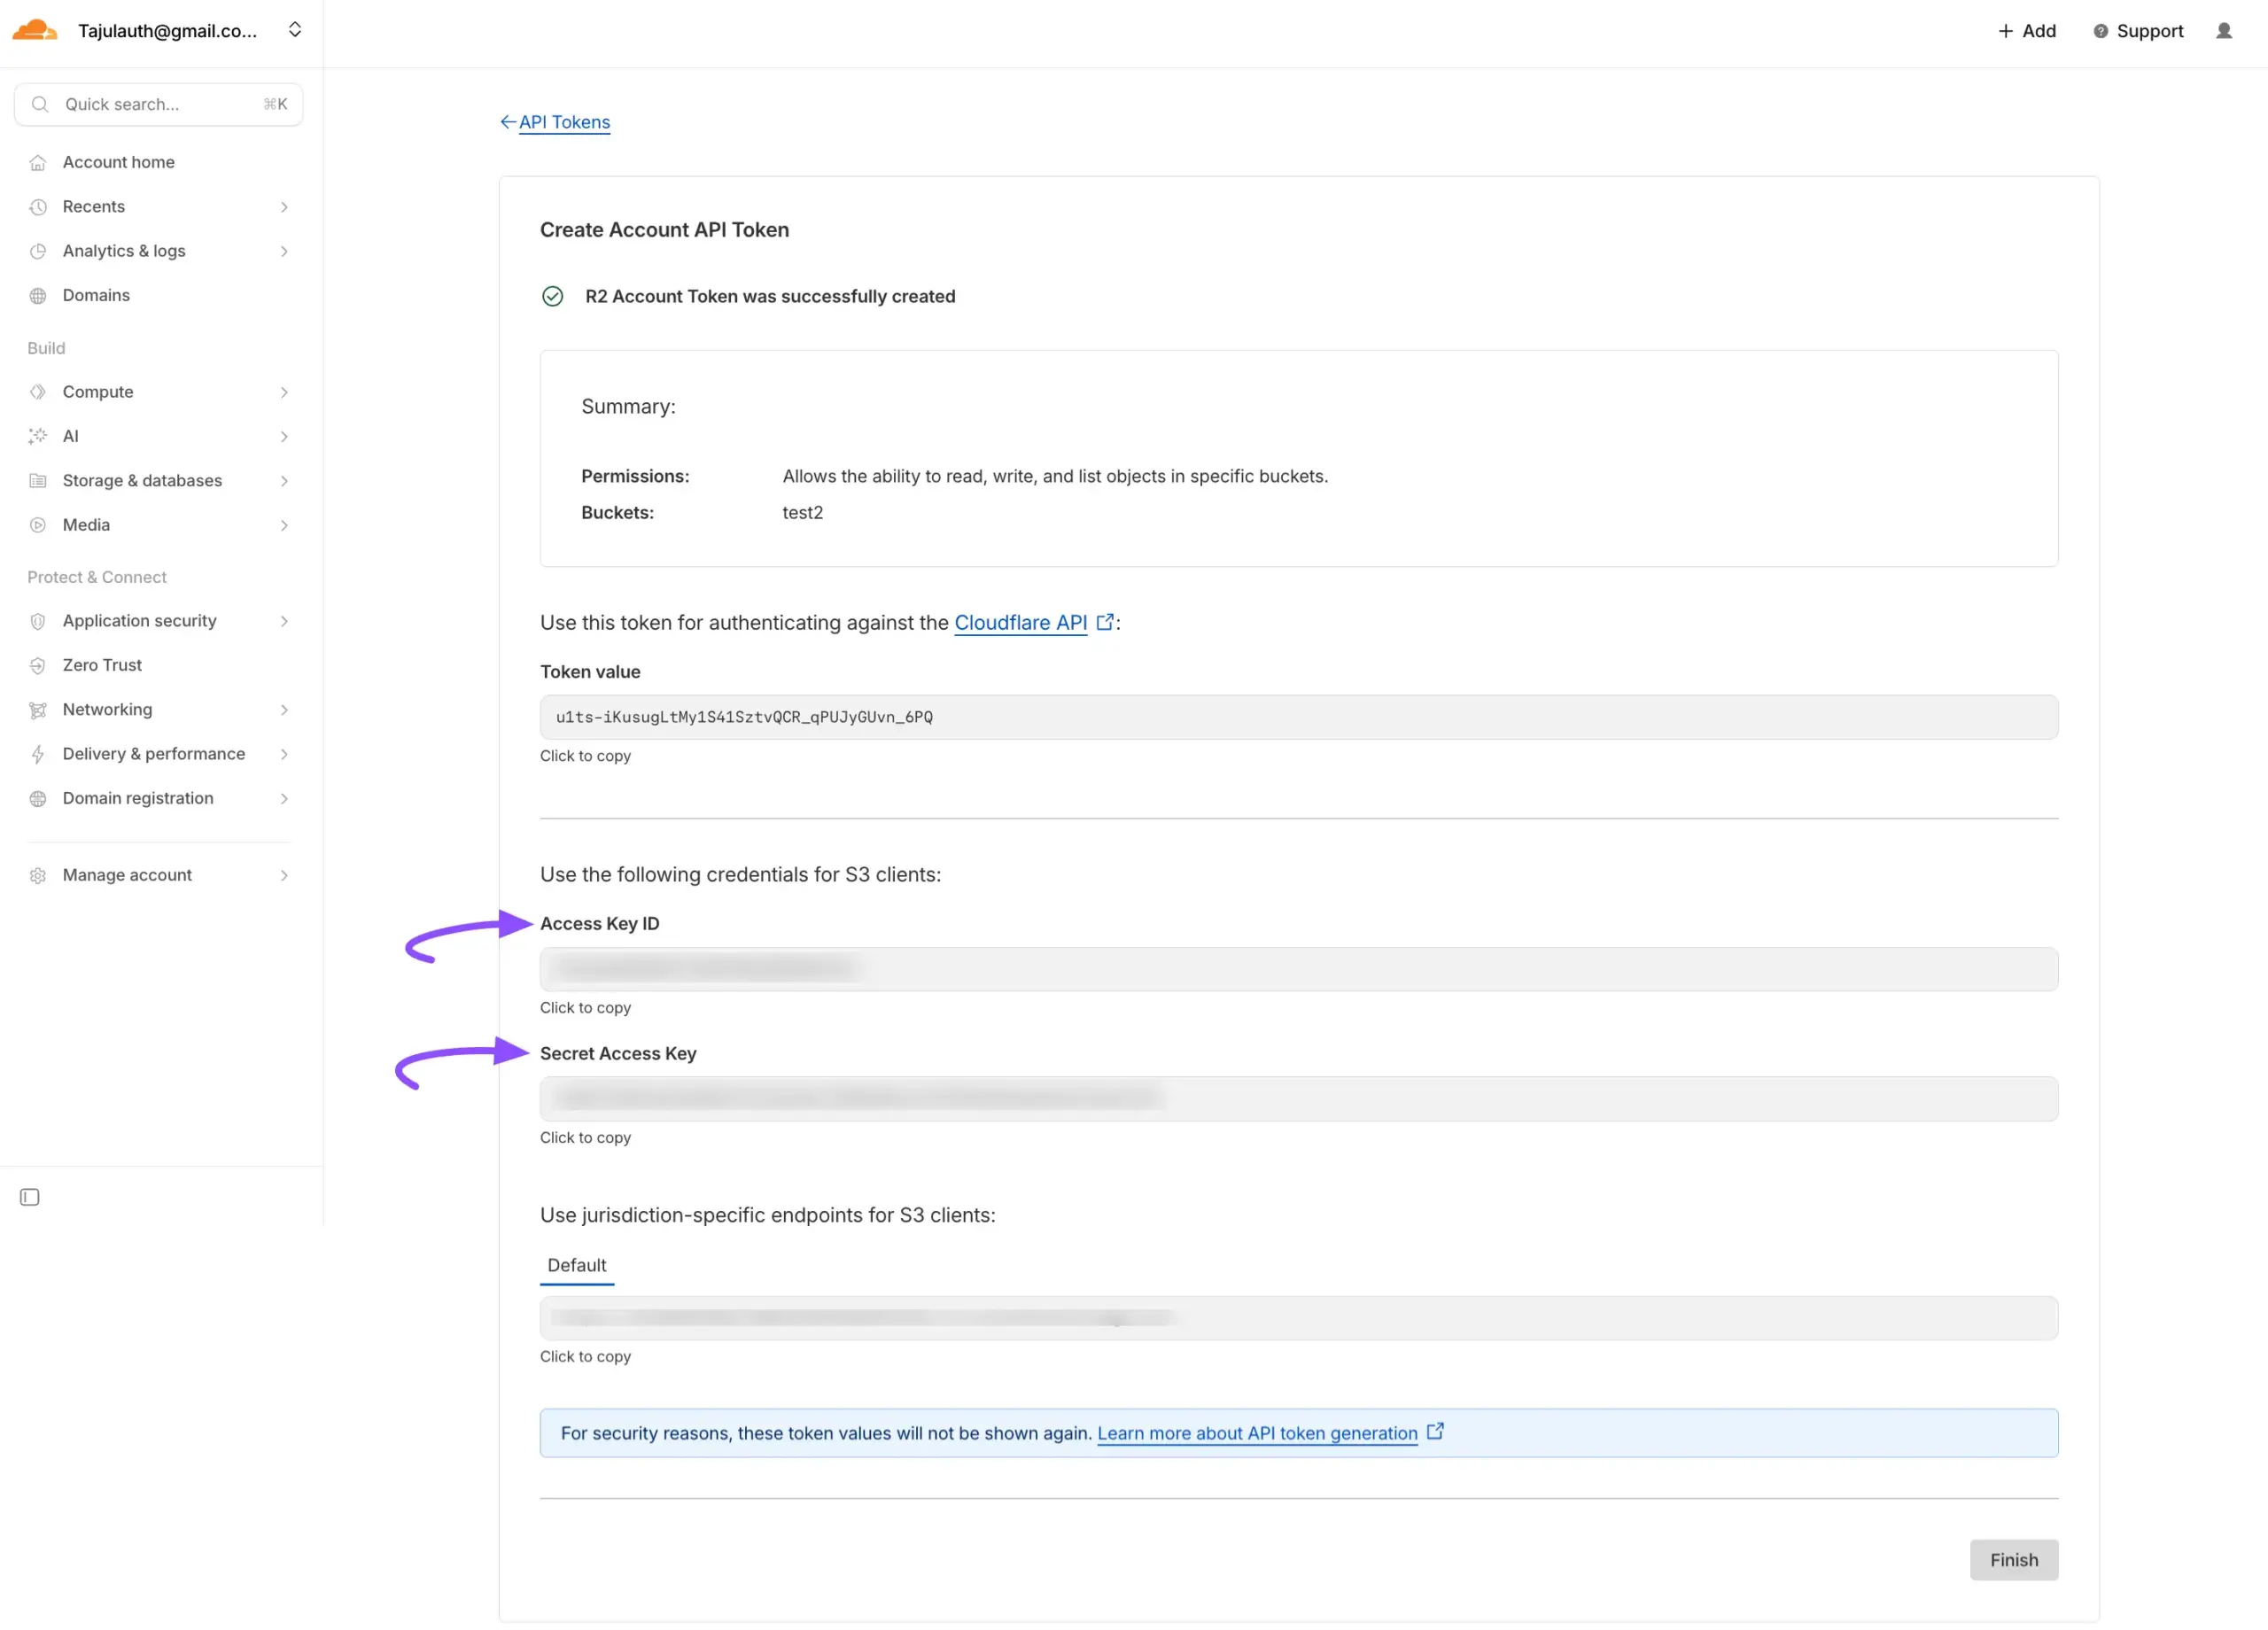
You will now see your Access Key ID and Secret Access Key. Copy them immediately, as the Secret Key will never be shown again for security reasons.
Configure FluentCommunity #
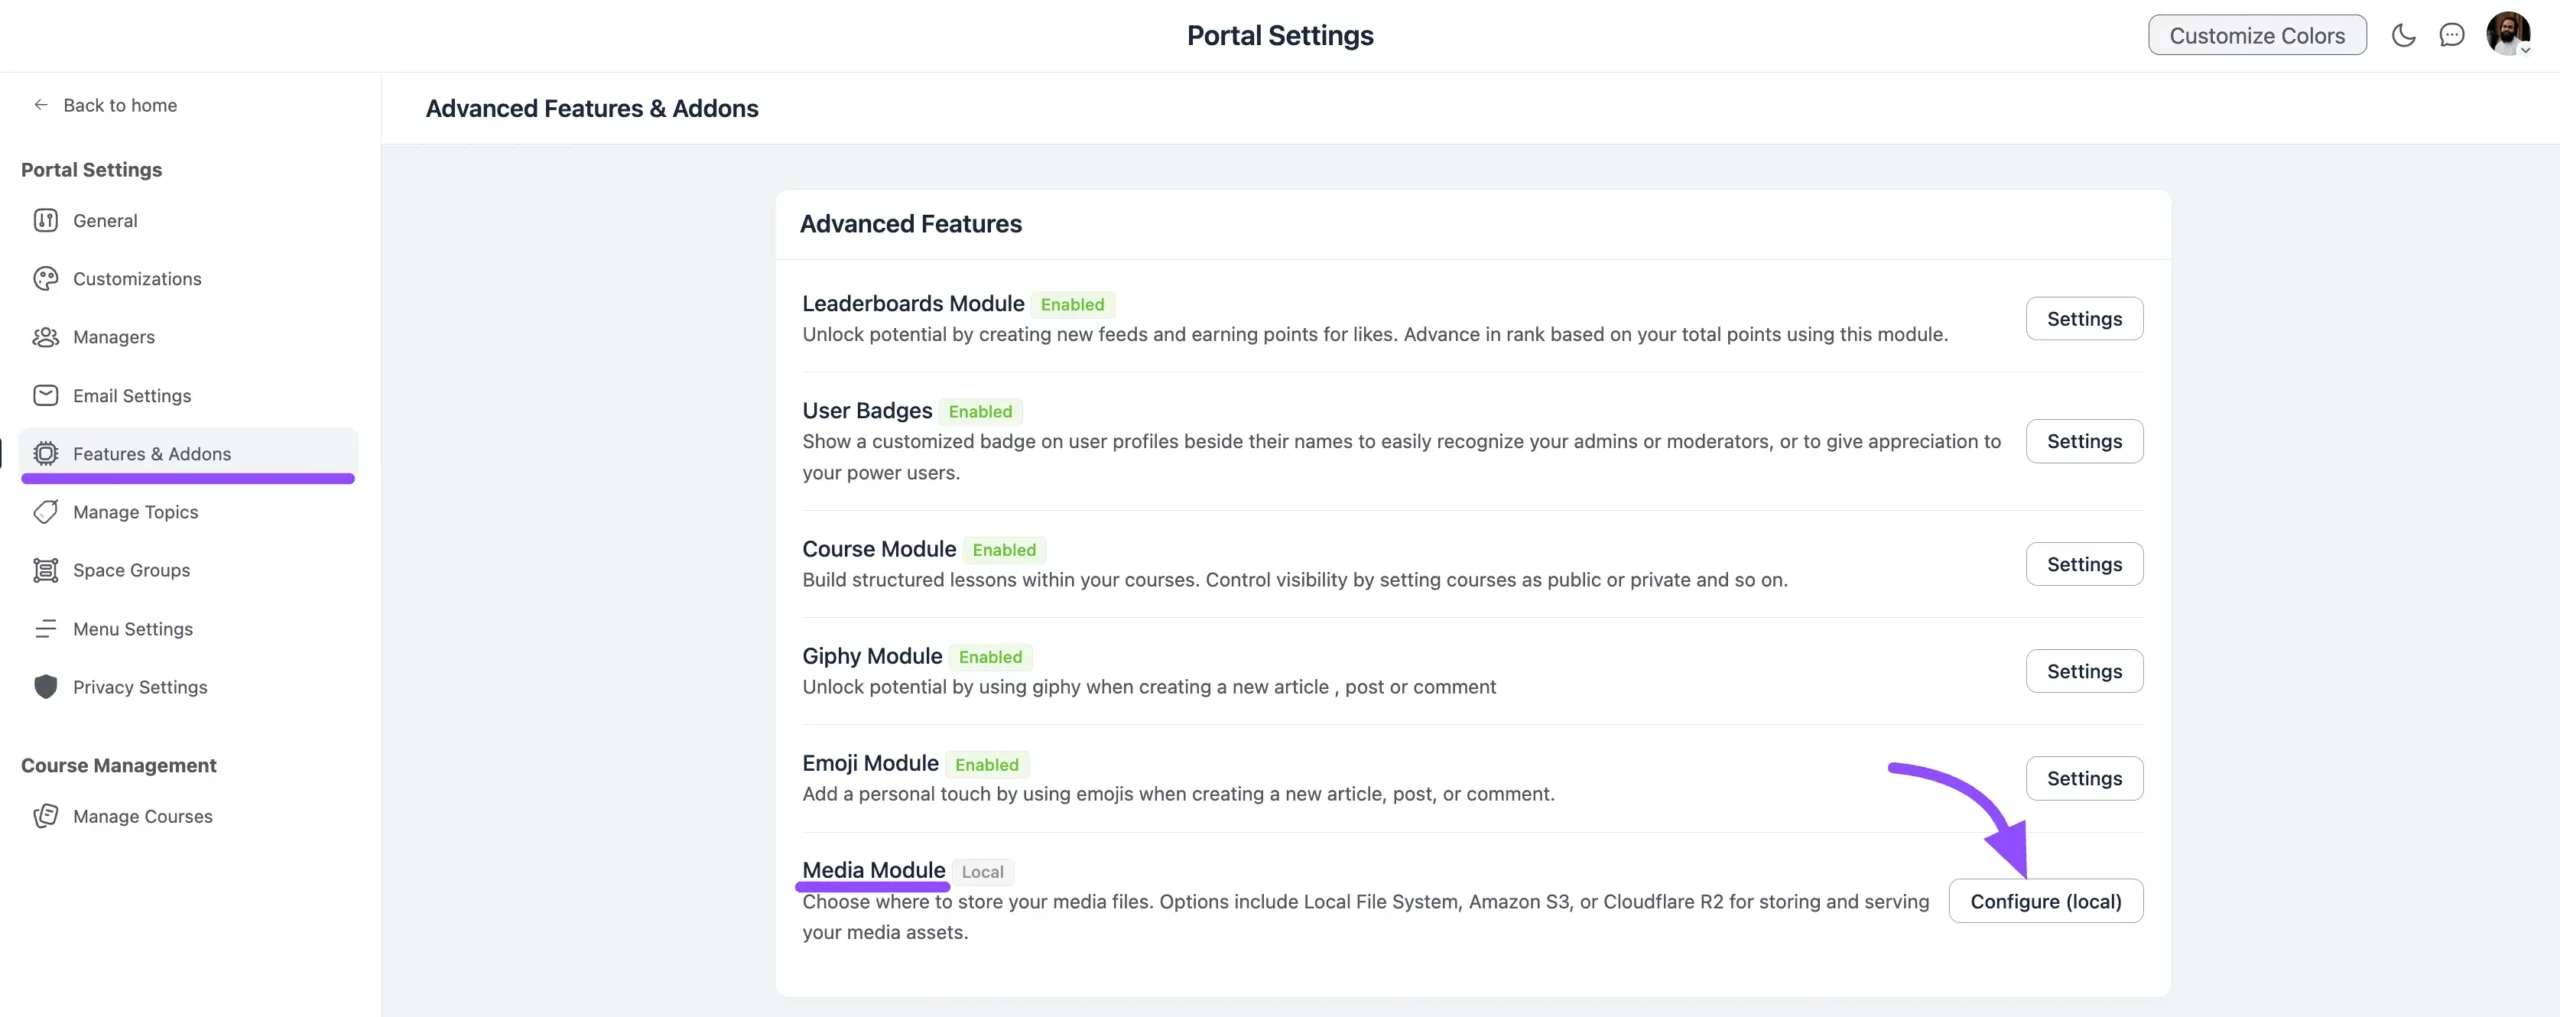
Now access FluentCommunity and go to Settings > Features & Addons. Here you will see the Media Module section and click on the Configure button.
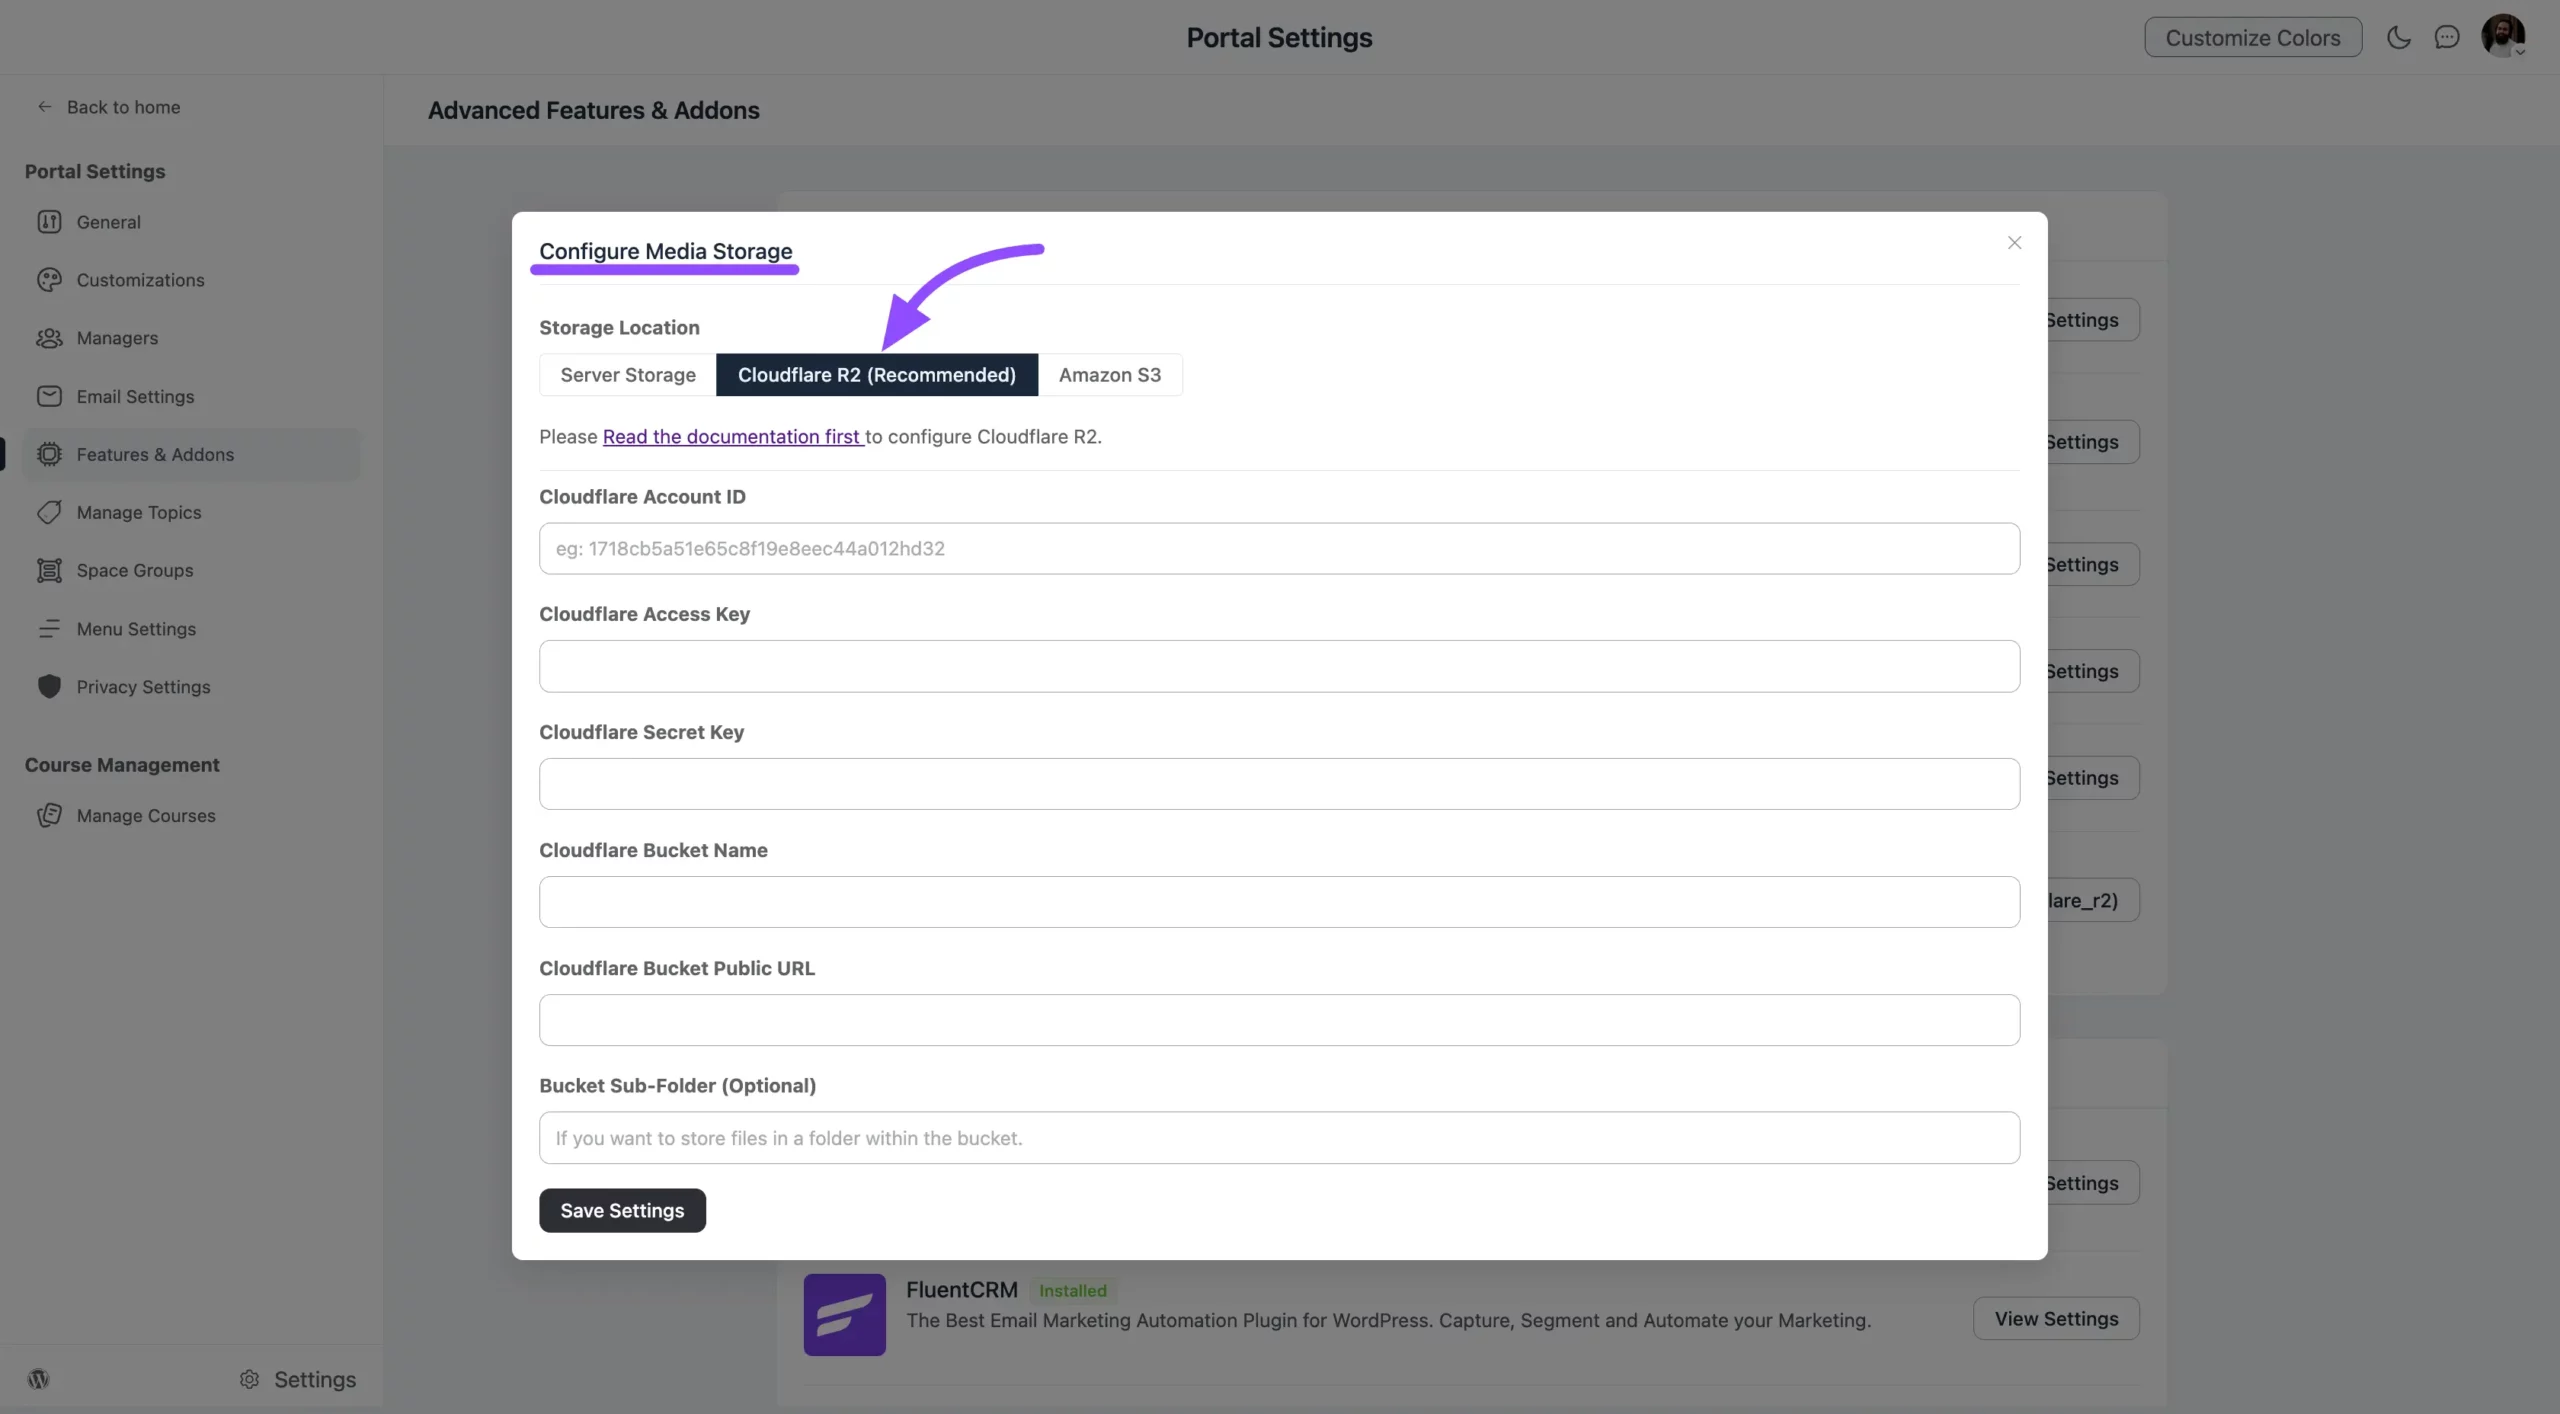
Next, select Cloudflare R2 and enter the credentials you collected from your Cloudflare account in the earlier steps of this guide.
Cloudflare Account ID: Input your CloudFlare Account ID.
Cloudflare Access Key: Paste the Access Key you got earlier from your CloudFlare API token.
Cloudflare Secret Key: Enter the Secret Key from your CloudFlare API token.
Cloudflare Bucket Name: Enter the name of the R2 bucket you created.
Cloudflare Bucket Public URL: Provide the Public R2.dev Bucket URL.
Bucket Sub-Folder (Optional): If you’d like to organize files within a specific subfolder in your bucket, specify the subfolder name here.
Once all fields are filled in correctly, click the Save Settings button to store your configuration.
Additional Configuration (Optional) #
For more advanced setups, you can define your CloudFlare R2 settings in your wp-config.php file. This method provides an extra layer of security and is useful for managing configurations across different environments.
// CloudFlare R2 Configuration

define('FLUENT_COMMUNITY_CLOUD_STORAGE', 'cloudflare_r2');

define('FLUENT_COMMUNITY_CLOUD_STORAGE_ACCOUNT_ID', 'YOUR_ACCOUNT_ID'); // Example: 1718cb5a51e65c8f19e8sahdakh763

define('FLUENT_COMMUNITY_CLOUD_STORAGE_ACCESS_KEY', 'YOUR_ACCESS_KEY');

define('FLUENT_COMMUNITY_CLOUD_STORAGE_SECRET_KEY', 'YOUR_SECRET_KEY');

define('FLUENT_COMMUNITY_CLOUD_STORAGE_BUCKET', 'YOUR_BUCKET_NAME');

define('FLUENT_COMMUNITY_CLOUD_STORAGE_PUBLIC_URL', 'https://pub-SOME_RANDOM_STRINGS.r2.dev'); // Custom domain if configured

define('FLUENT_COMMUNITY_CLOUD_STORAGE_SUB_FOLDER', 'your-subfolder-name'); // OptionalNote: Defining these values in wp-config.php will override any settings configured in the FluentCommunity plugin’s admin panel.
Troubleshooting Common Issues #
- API Token Permissions: Ensure your API token has the correct permissions for R2 access.
- Incorrect Bucket or URL: Double-check that your bucket name and public URL are accurate and correctly configured.
- Custom Domain Setup: If using a custom domain, confirm it is properly configured in CloudFlare to avoid connectivity issues.
For any additional support, feel free to reach out to our support team. We’re here to assist you!


