

You can integrate your Amazon S3 bucket with FluentCommunity to store media files externally, reducing your site’s load and maintaining its storage health.
This guide will walk you through the easy steps to set up Amazon S3 with FluentCommunity.
Steps to Configure Amazon S3 #
First, navigate to the Settings of your FluentCommunity. From the left sidebar, click on Features & Addons, then select Media Module Settings.
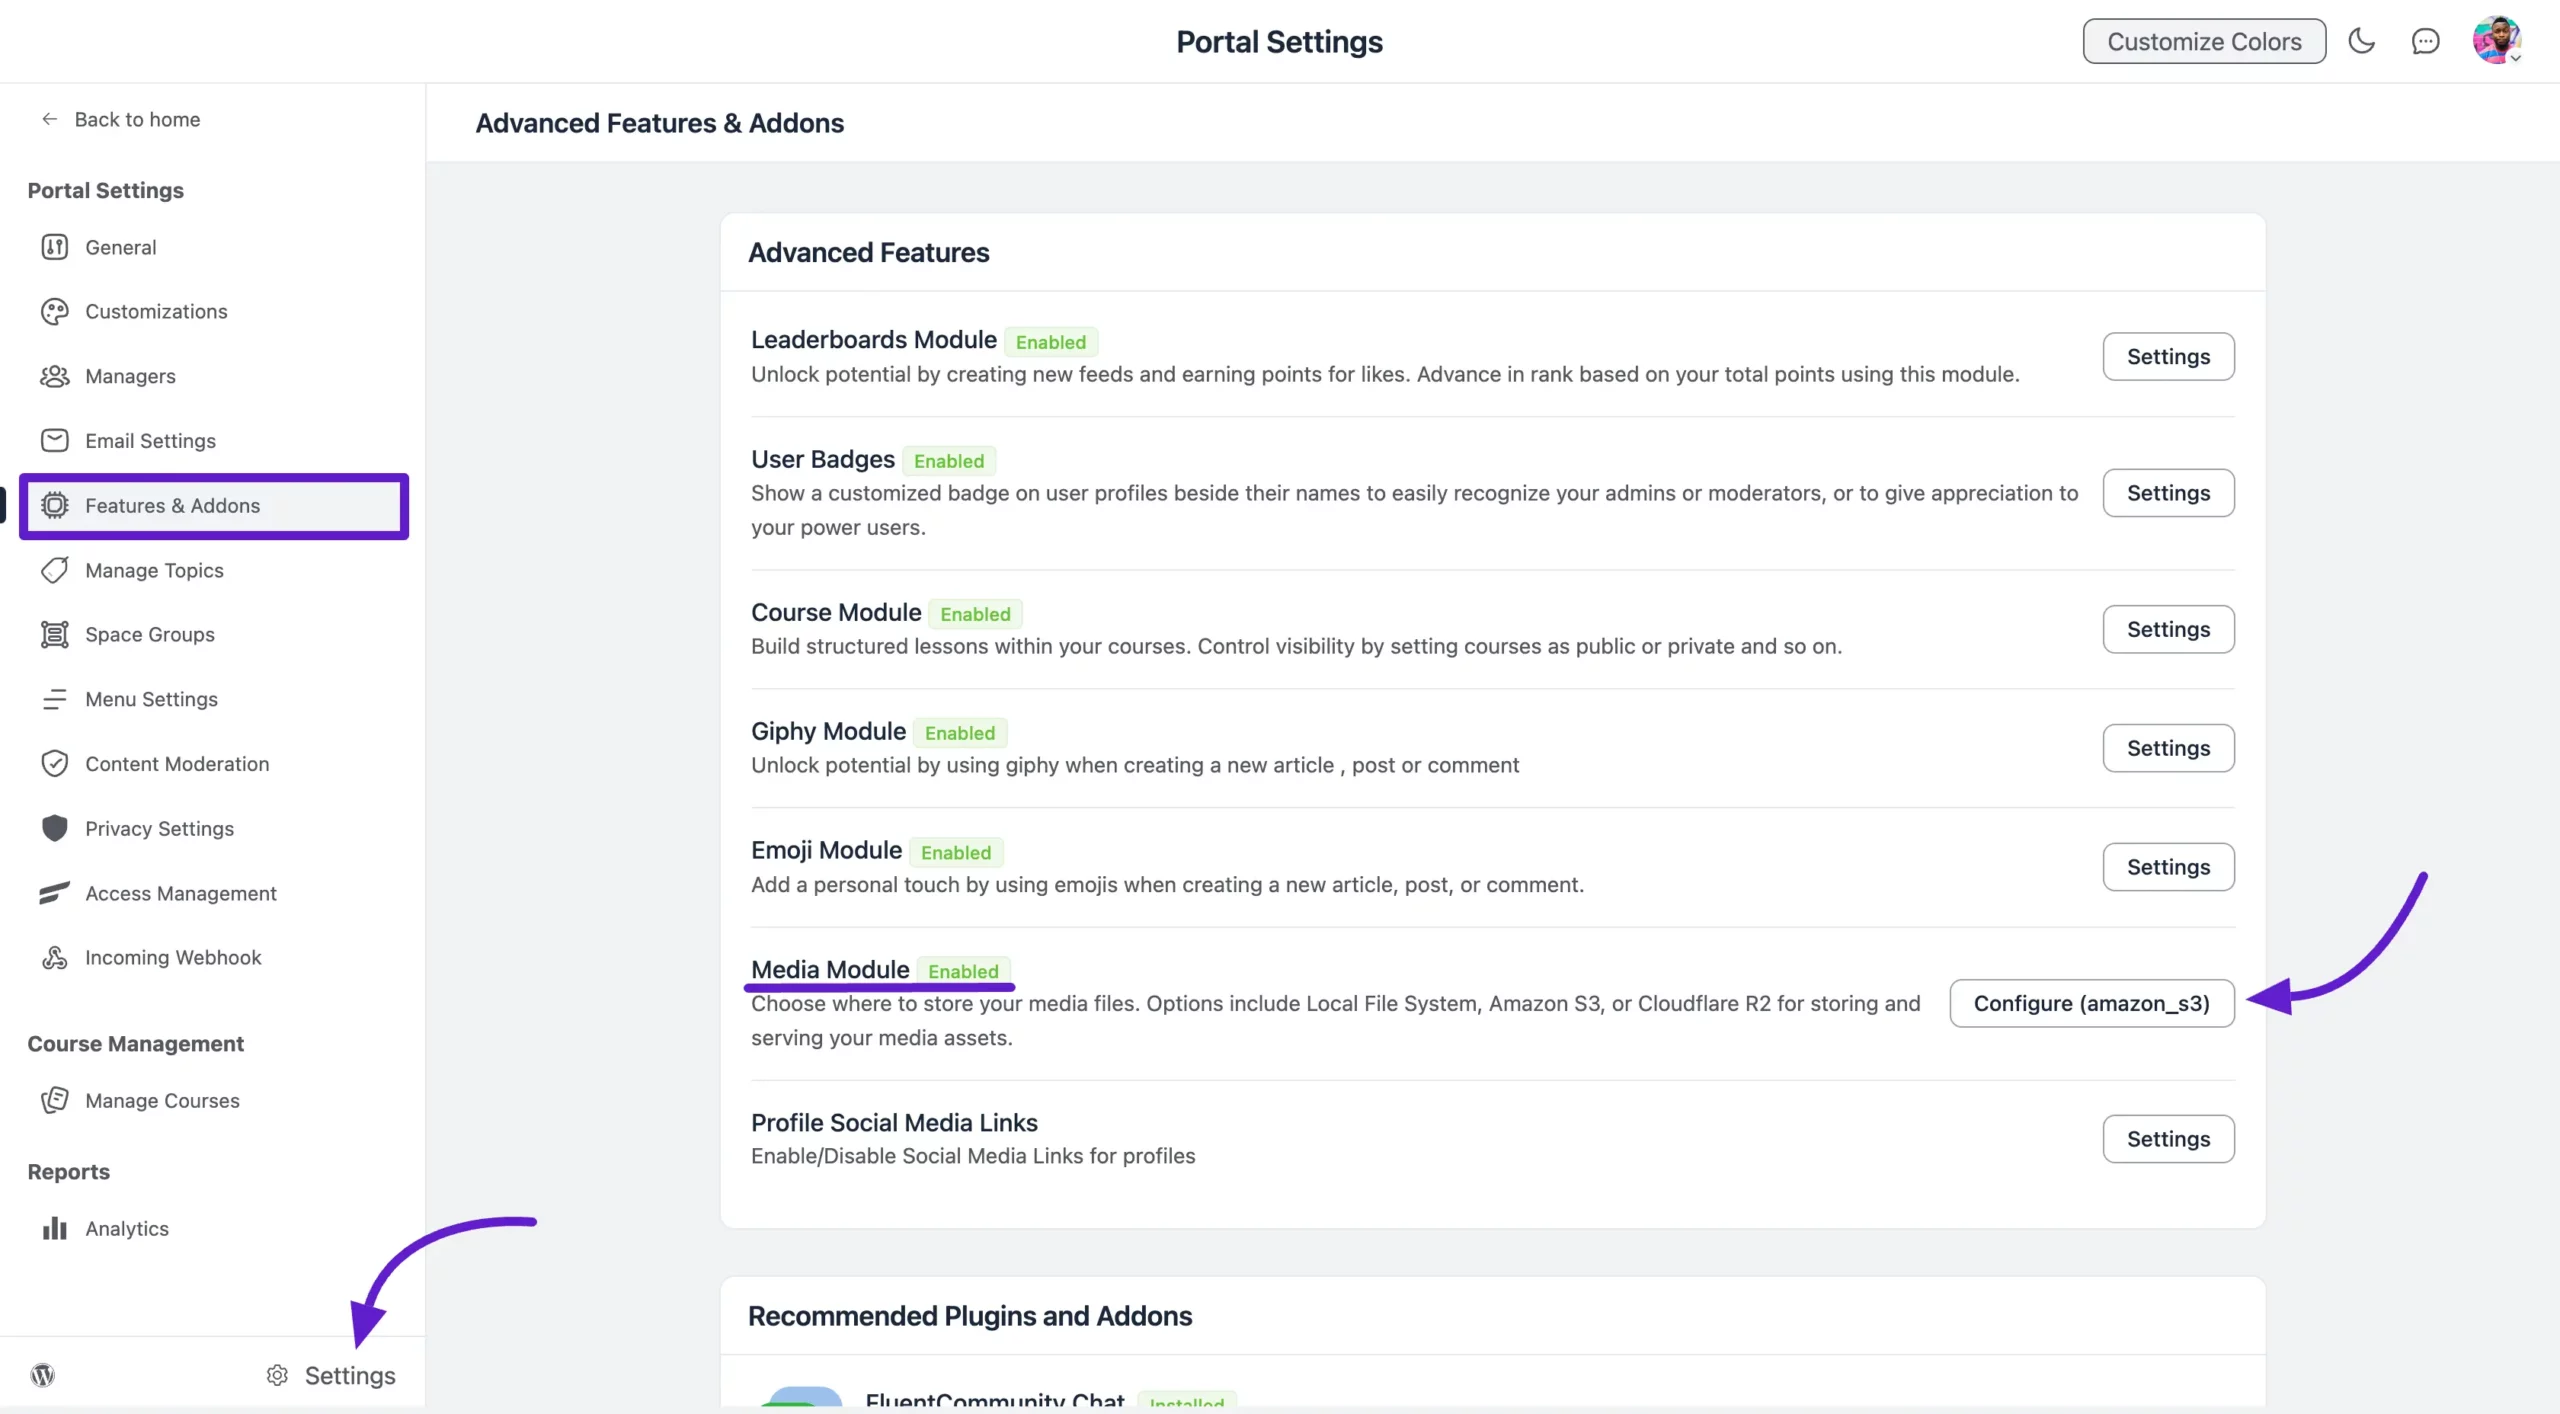
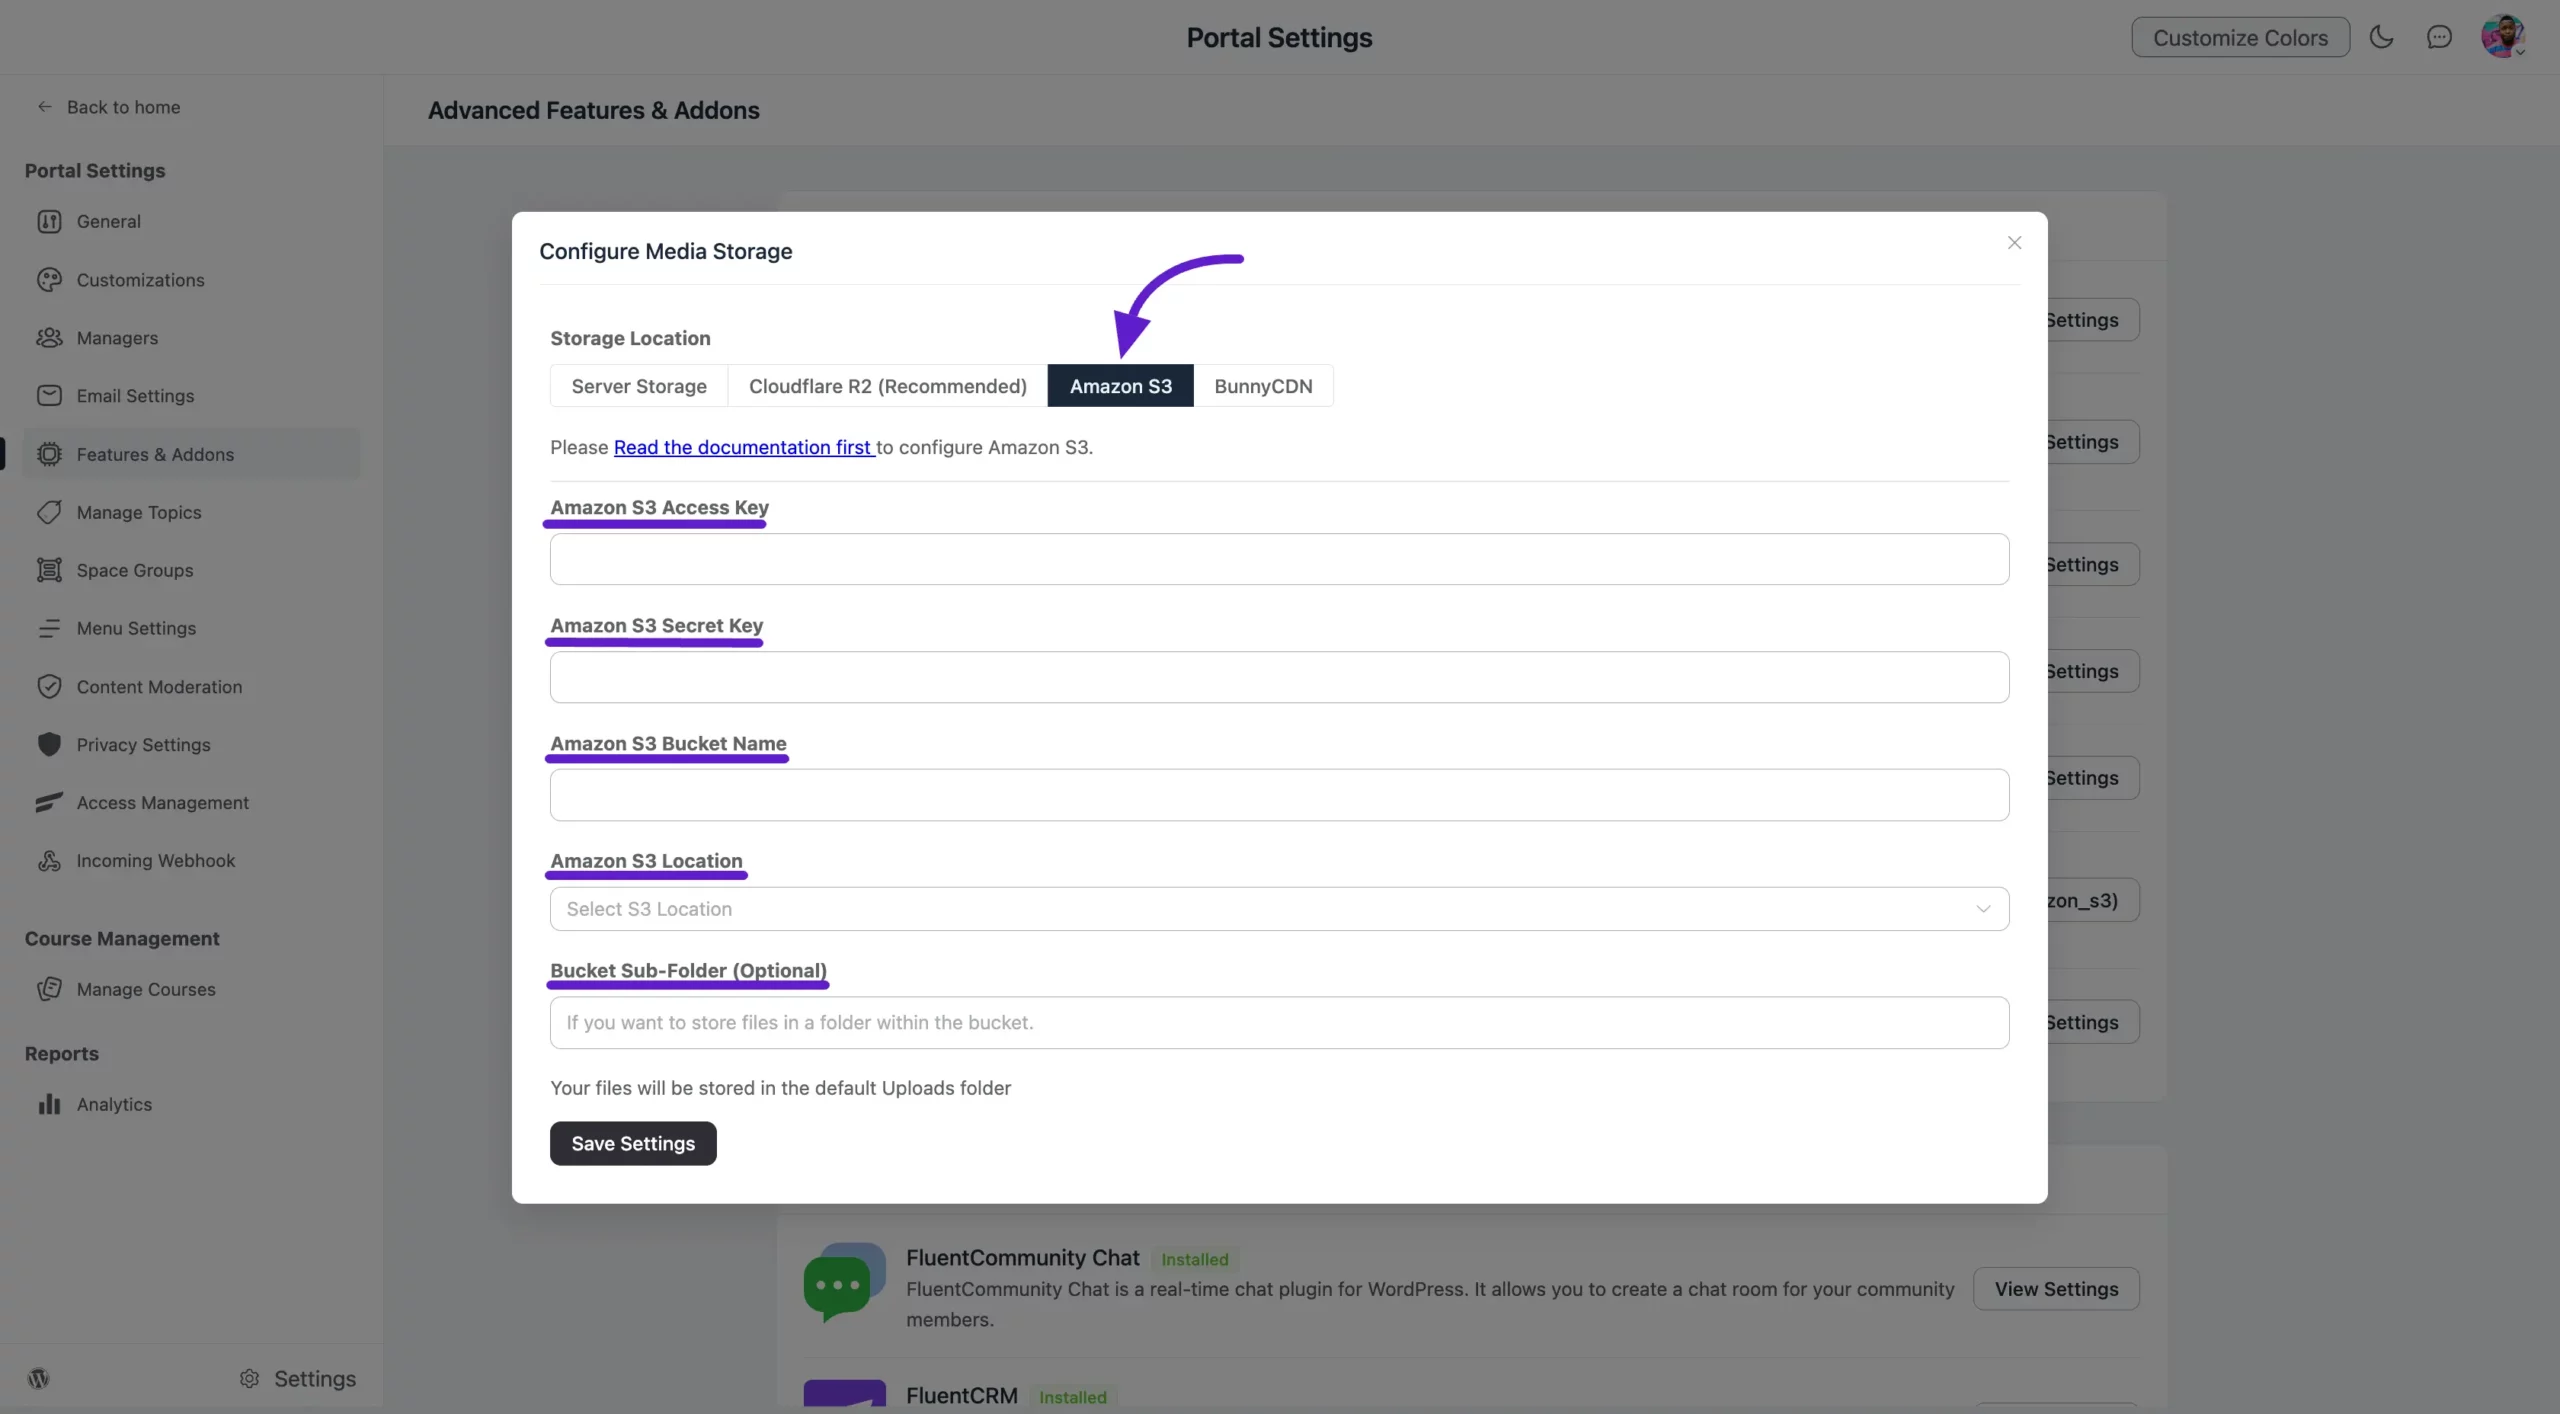
Next, you’ll see all the available cloud storage options. Click on Amazon S3 from the menu, and the required fields to connect FluentCommunity with Amazon S3 will appear.
To set up the connection, you’ll need the following credentials:
- Amazon S3 Access Key
- Amazon S3 Secret Key
- Amazon S3 Bucket Name
- Amazon S3 Location
- Bucket Sub Folder (Optional)
You can find these credentials in your Amazon S3 account. In the next section, we’ll walk you through how to retrieve them step by step.
Get the Credentials #
Creating S3 Bucket #
Log in to your Amazon AWS account to get the necessary credentials.
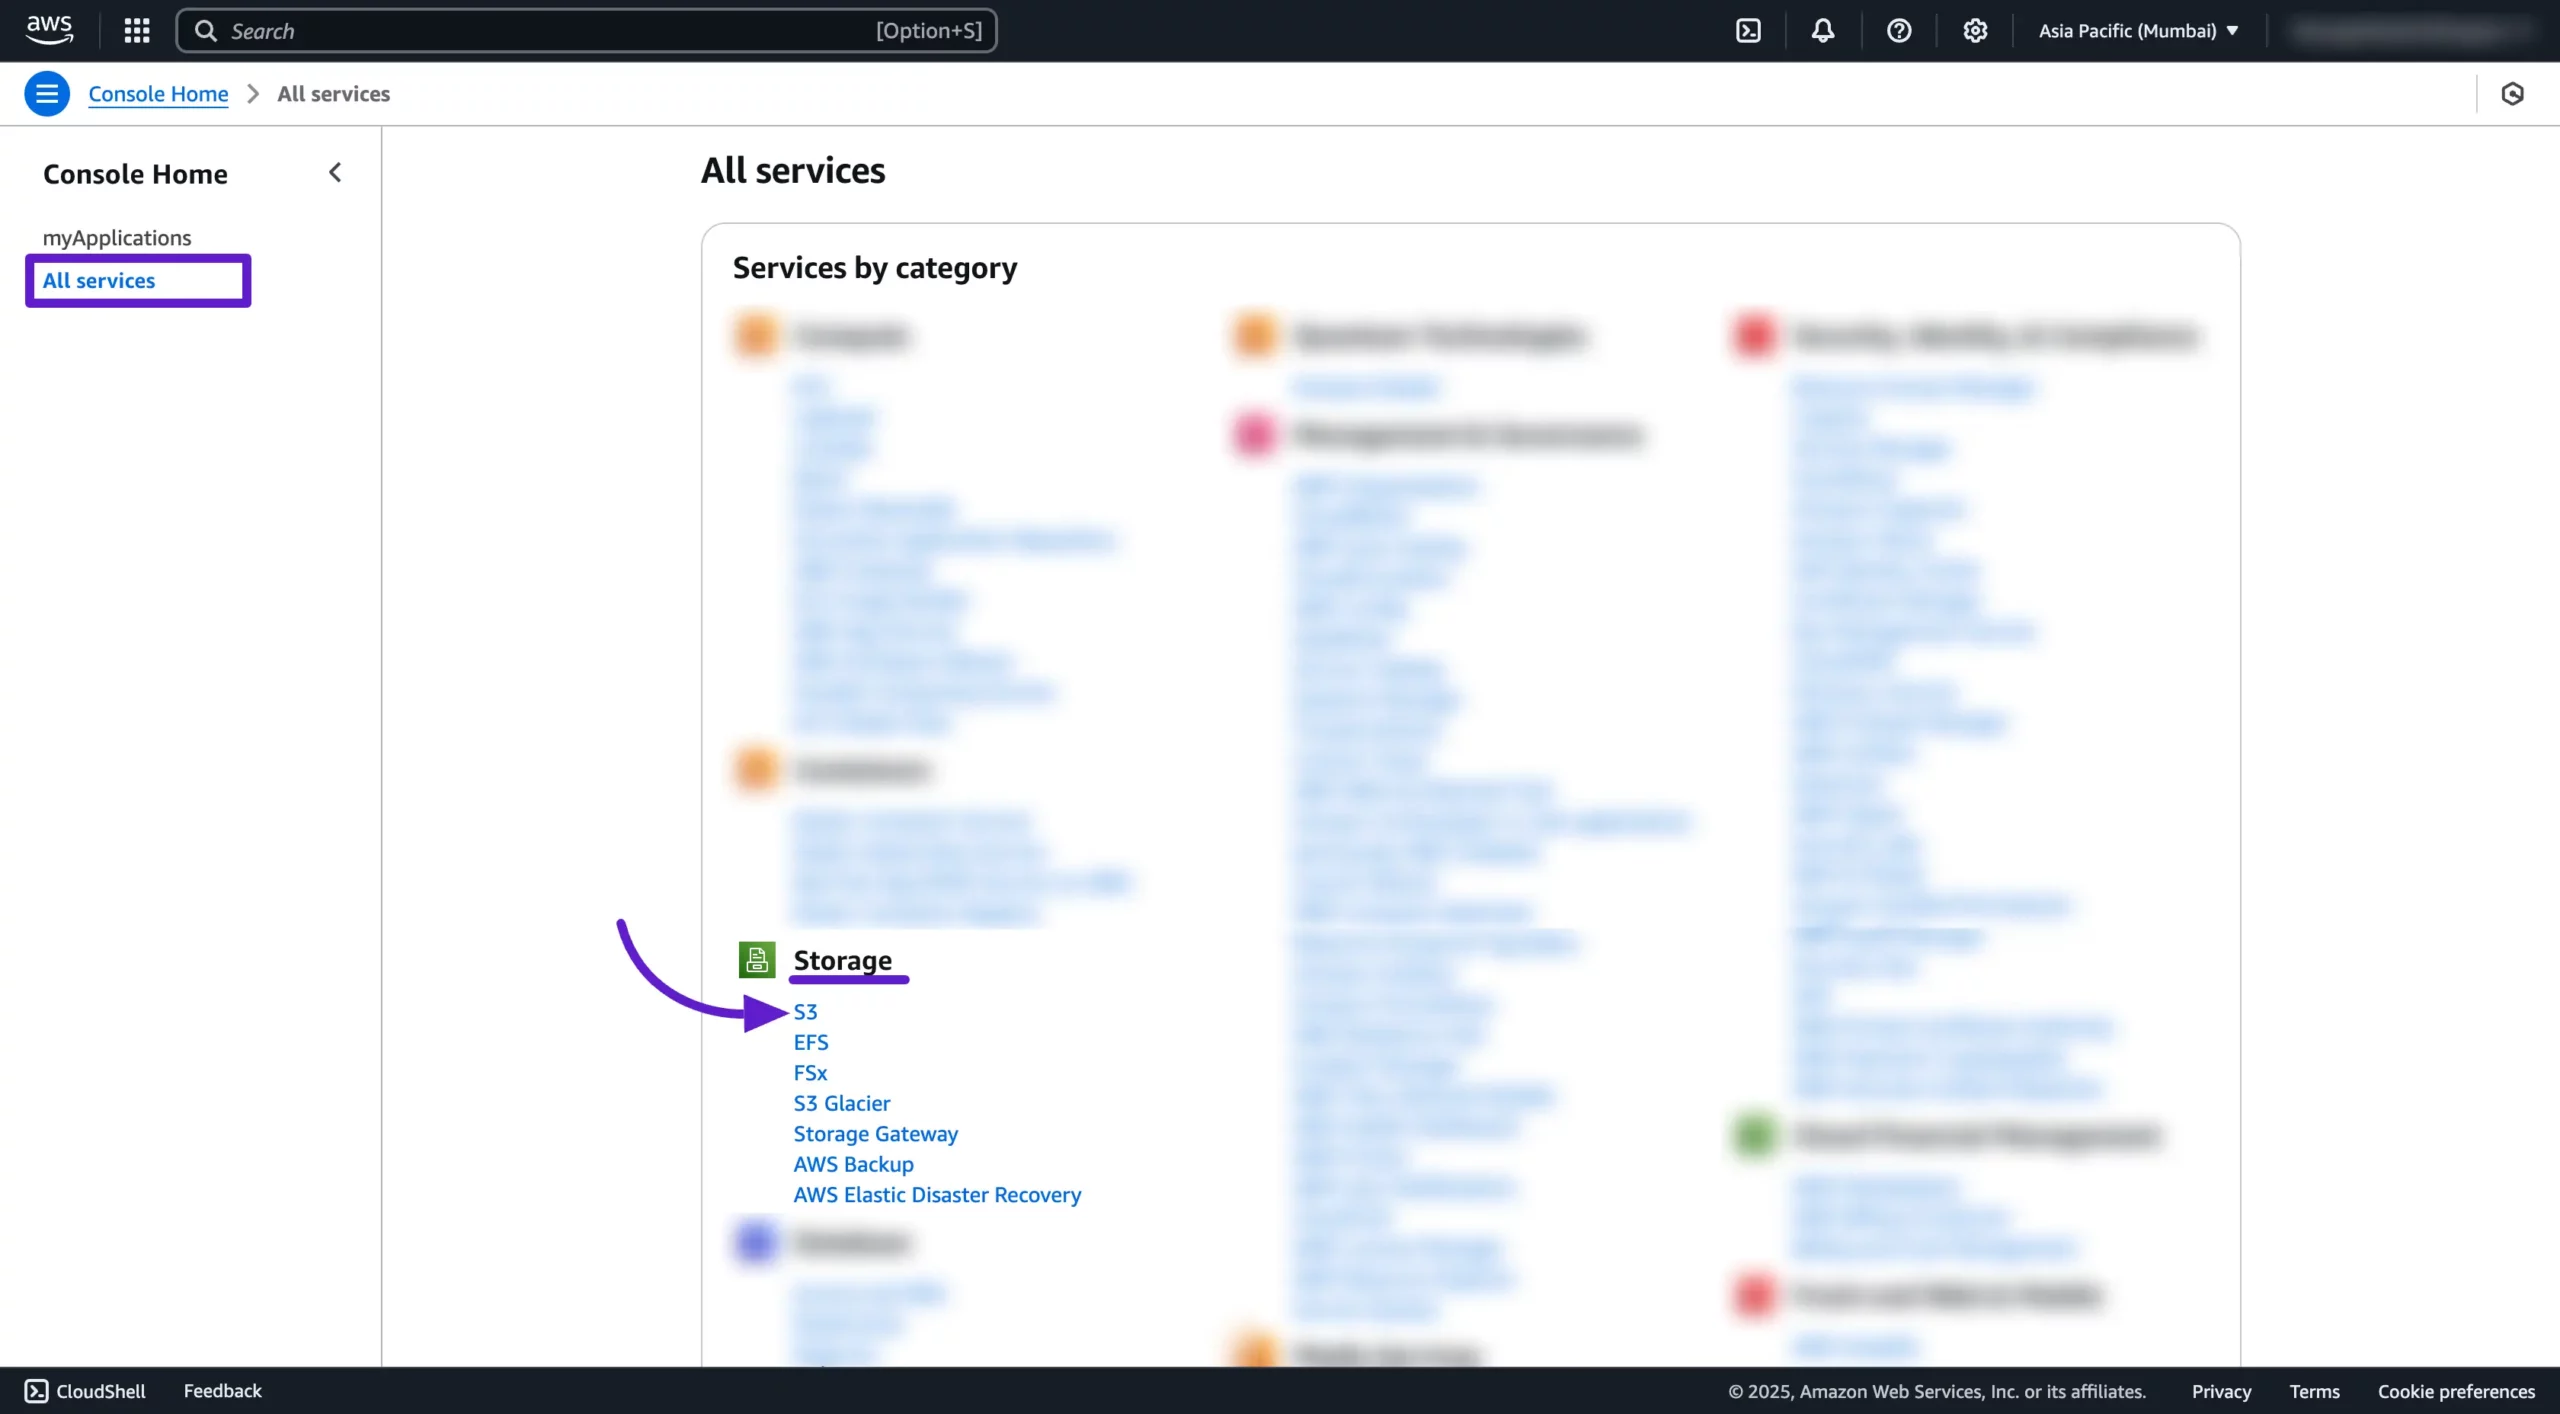
From the Dashboard, click on All Services in the left sidebar. A full list of AWS services will appear—scroll down to the Storage section and select S3 to proceed.
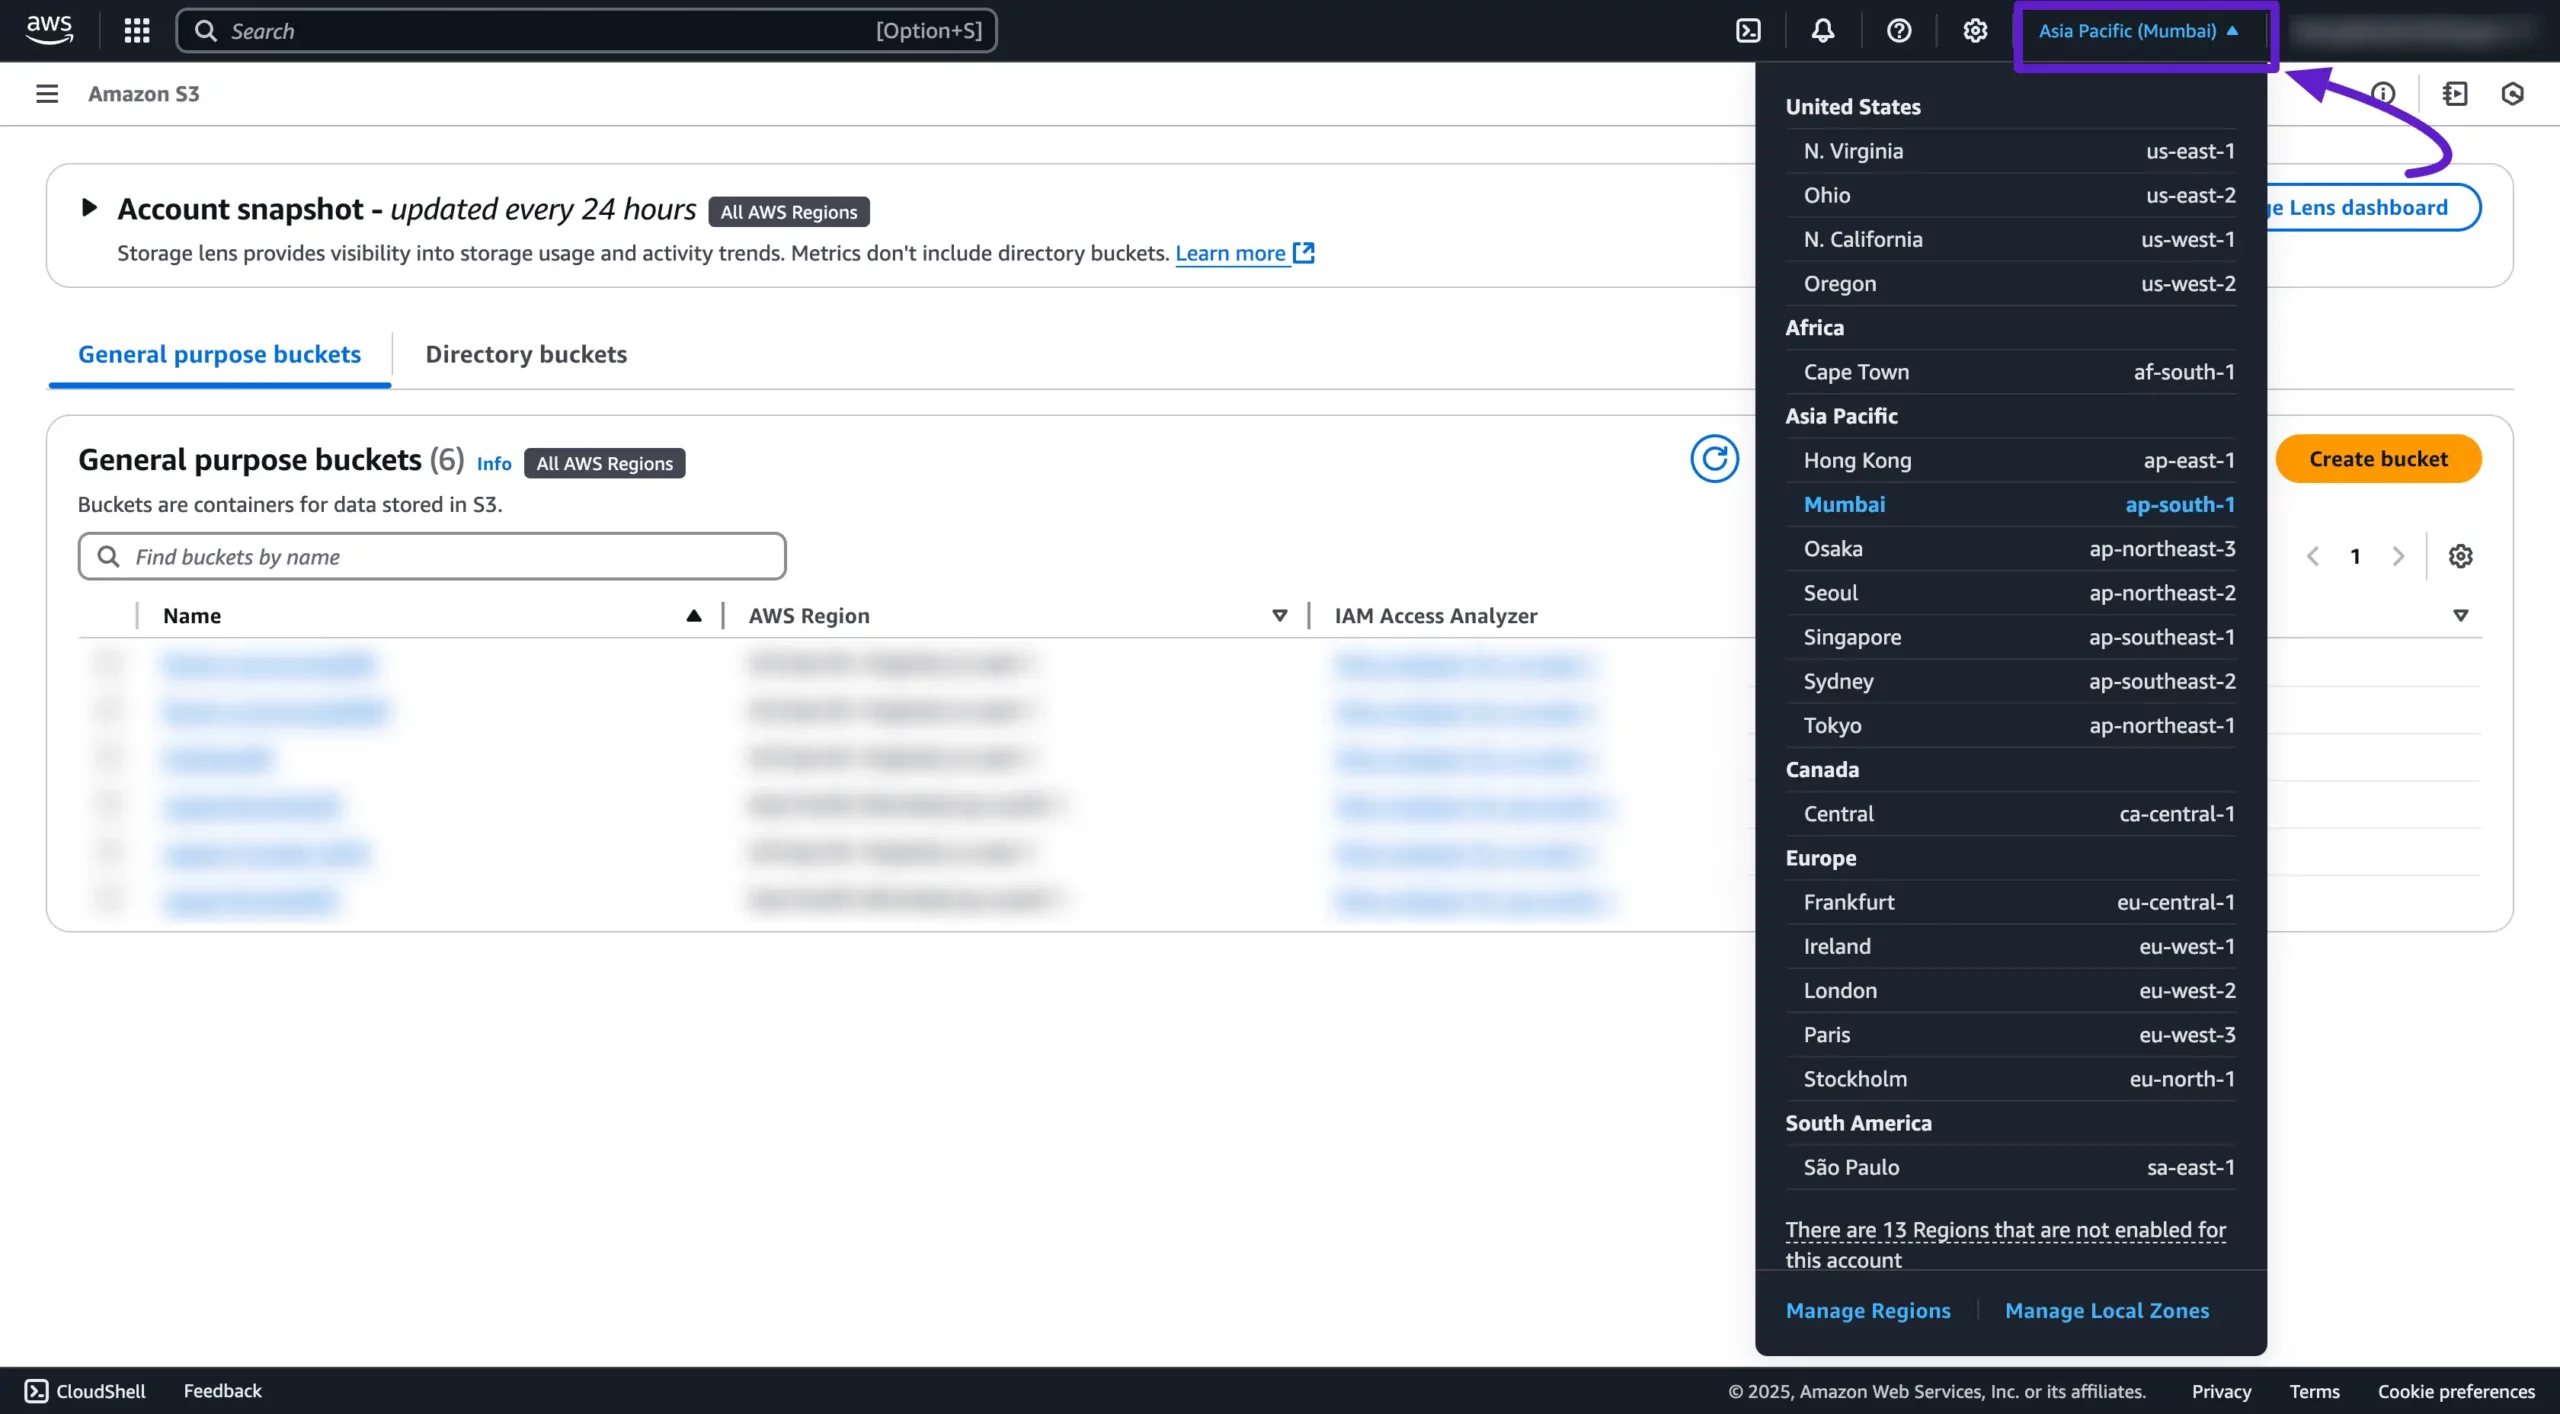
Before creating your bucket, you need to select a region. Amazon S3 creates each bucket in the region you choose, which can help optimize performance, reduce latency, lower costs, or meet data compliance requirements.
For instance, if you’re based in Europe, it’s often best to choose a region like EU (Ireland) or EU (Frankfurt).
To select a region, click the Region name at the top of your AWS console and choose your preferred region from the dropdown list. For a full list of available AWS S3 regions, check this Regions and Endpoints.
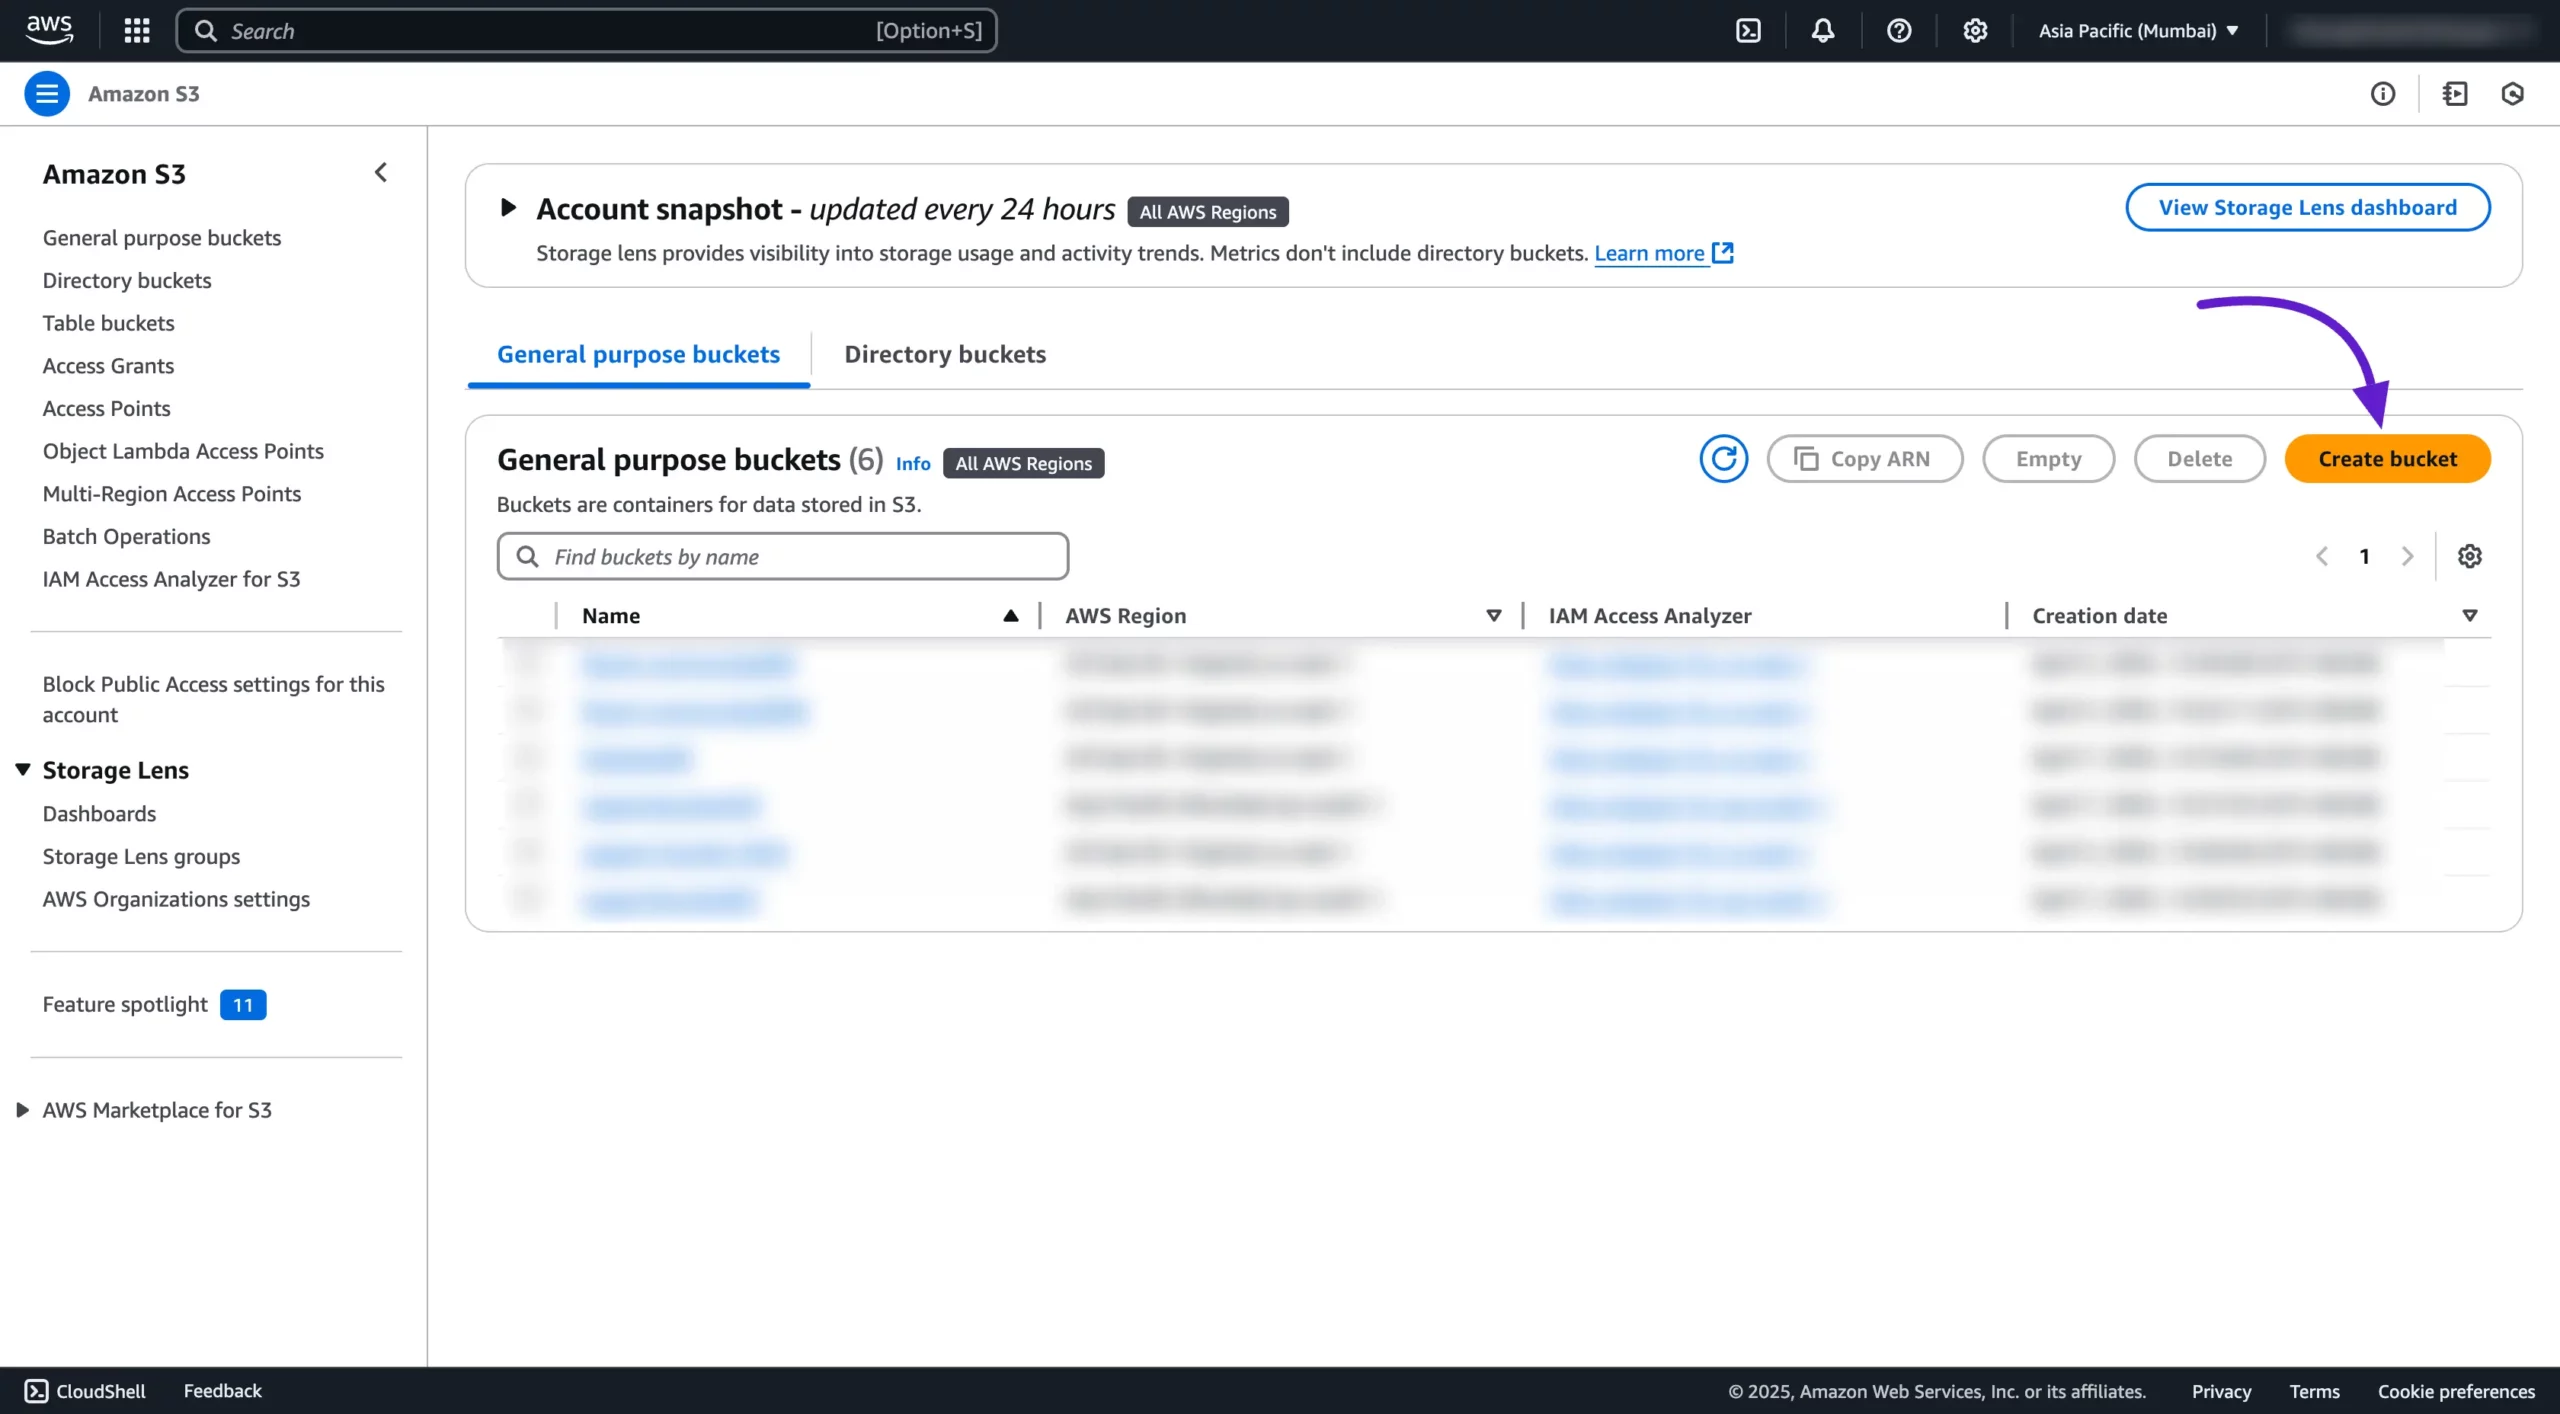
Now it’s time to create a bucket where all your FluentCommunity media files will be stored.
To do this, simply click the Create Bucket button. This will start the setup process for your new storage bucket.
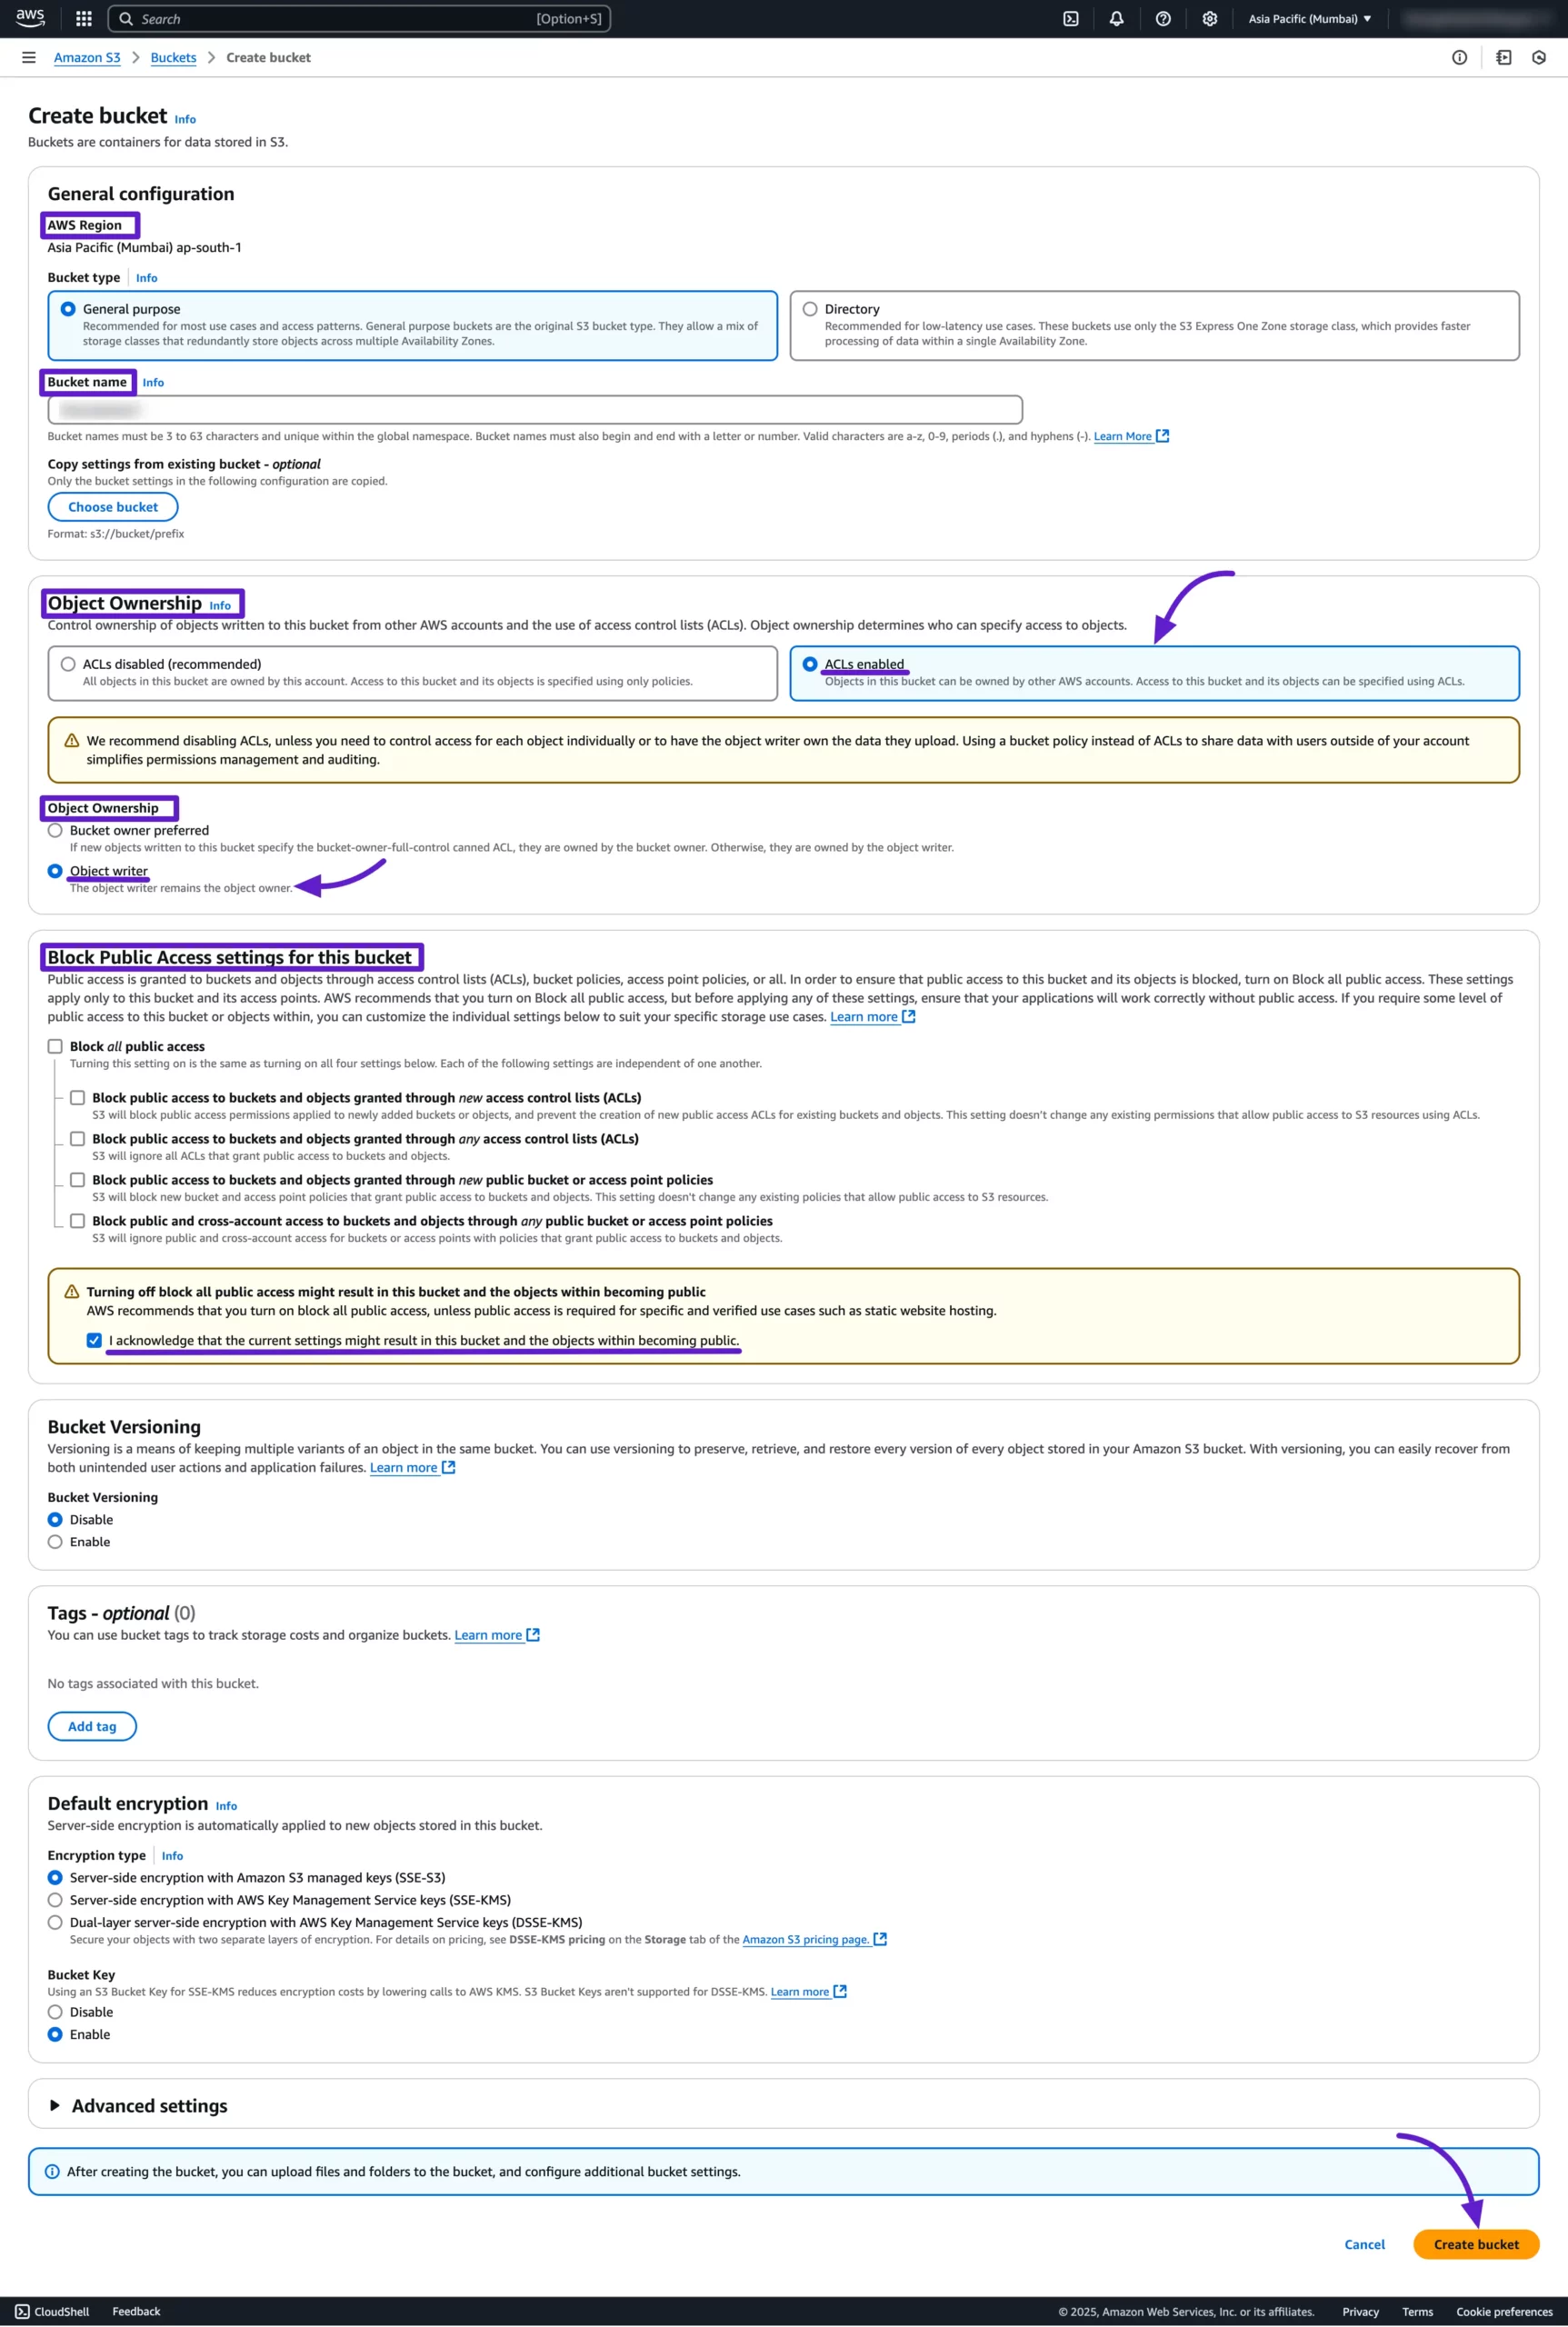
You’ll now be redirected to the bucket creation page. Here’s how to fill out the form and set the correct permissions:
- AWS Region: Make sure the region matches the one you selected earlier.
- Bucket Name: Enter a unique name for your bucket.
- Object Ownership:
- Select ACLs enabled.
- Then choose Object writer under Object Ownership.
- Select ACLs enabled.
- Block Public Access Settings for this Bucket:
- Disable Block All Public Access permissions.
- Check the box saying I acknowledge that the current settings might result in this bucket and the objects within becoming public.
- Disable Block All Public Access permissions.
- Other Settings: You can customize them based on your needs or keep the defaults.
Finally, click the Create Bucket button to complete the process.
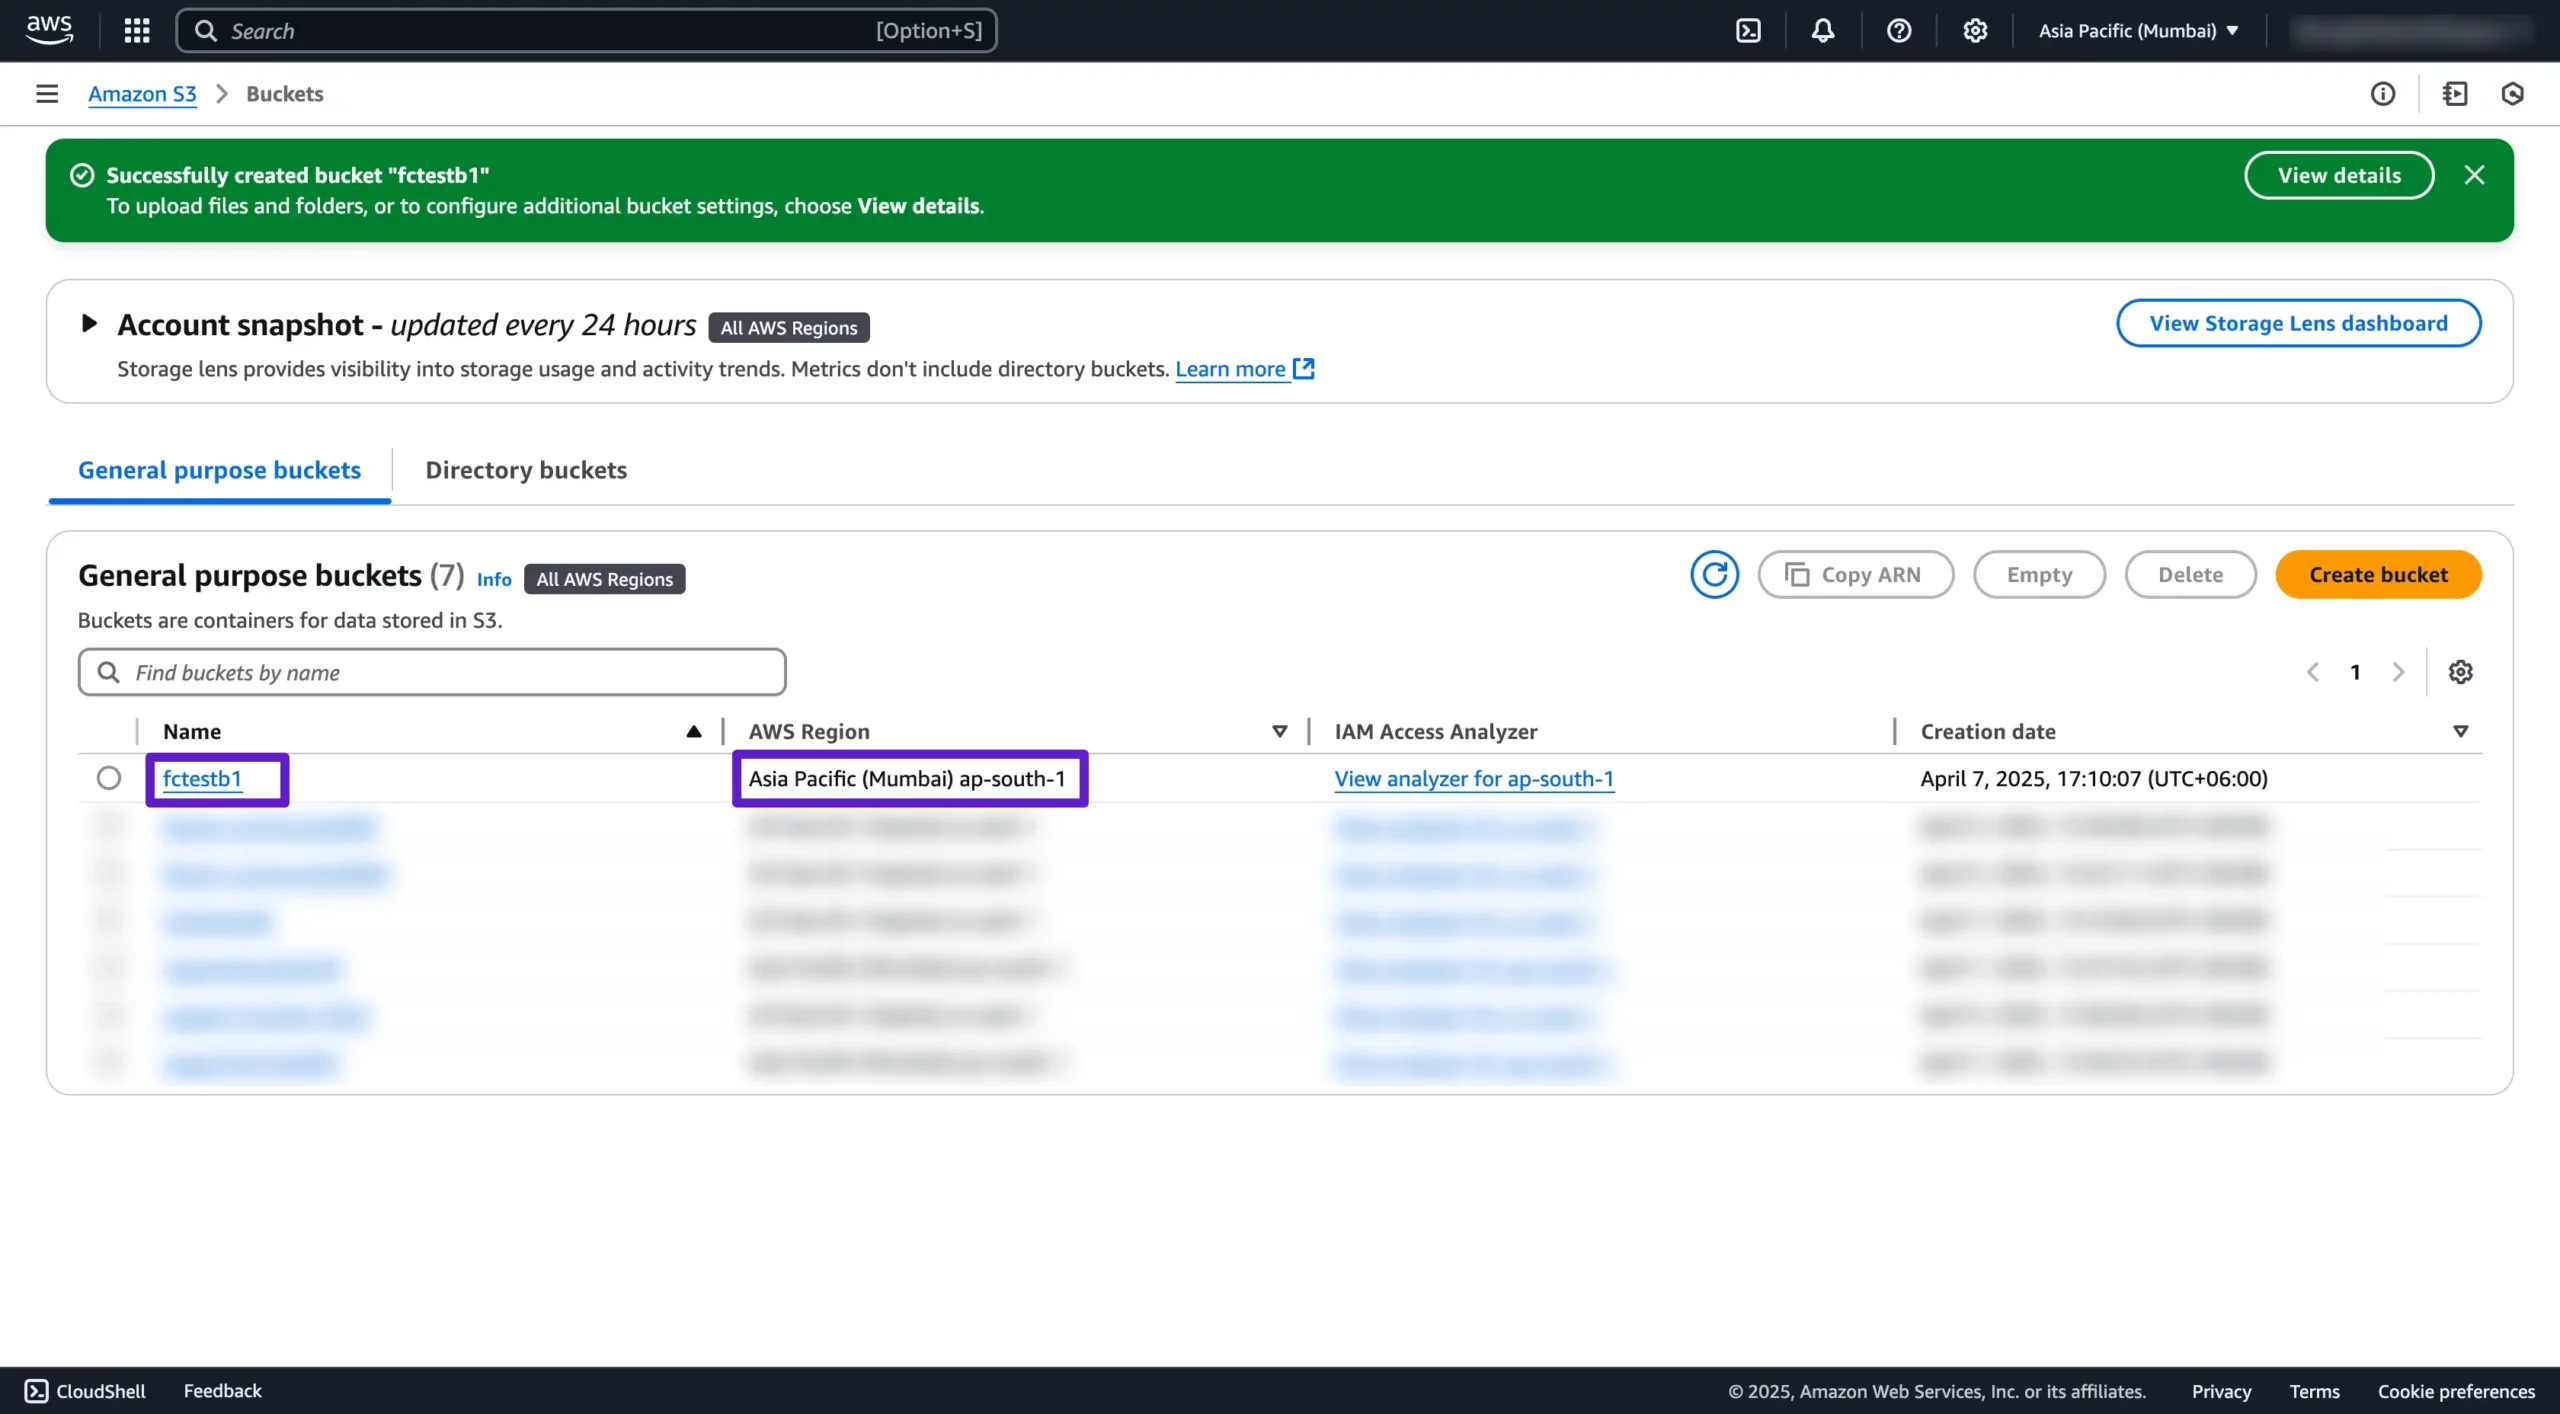
Once your bucket is successfully created, you’ll see a confirmation message, and the bucket will appear in your list.
Make sure to copy the Bucket Name and Region—you’ll need these to fill in the Bucket Name and Location fields in your FluentCommunity settings.
Creating IAM User for Access #
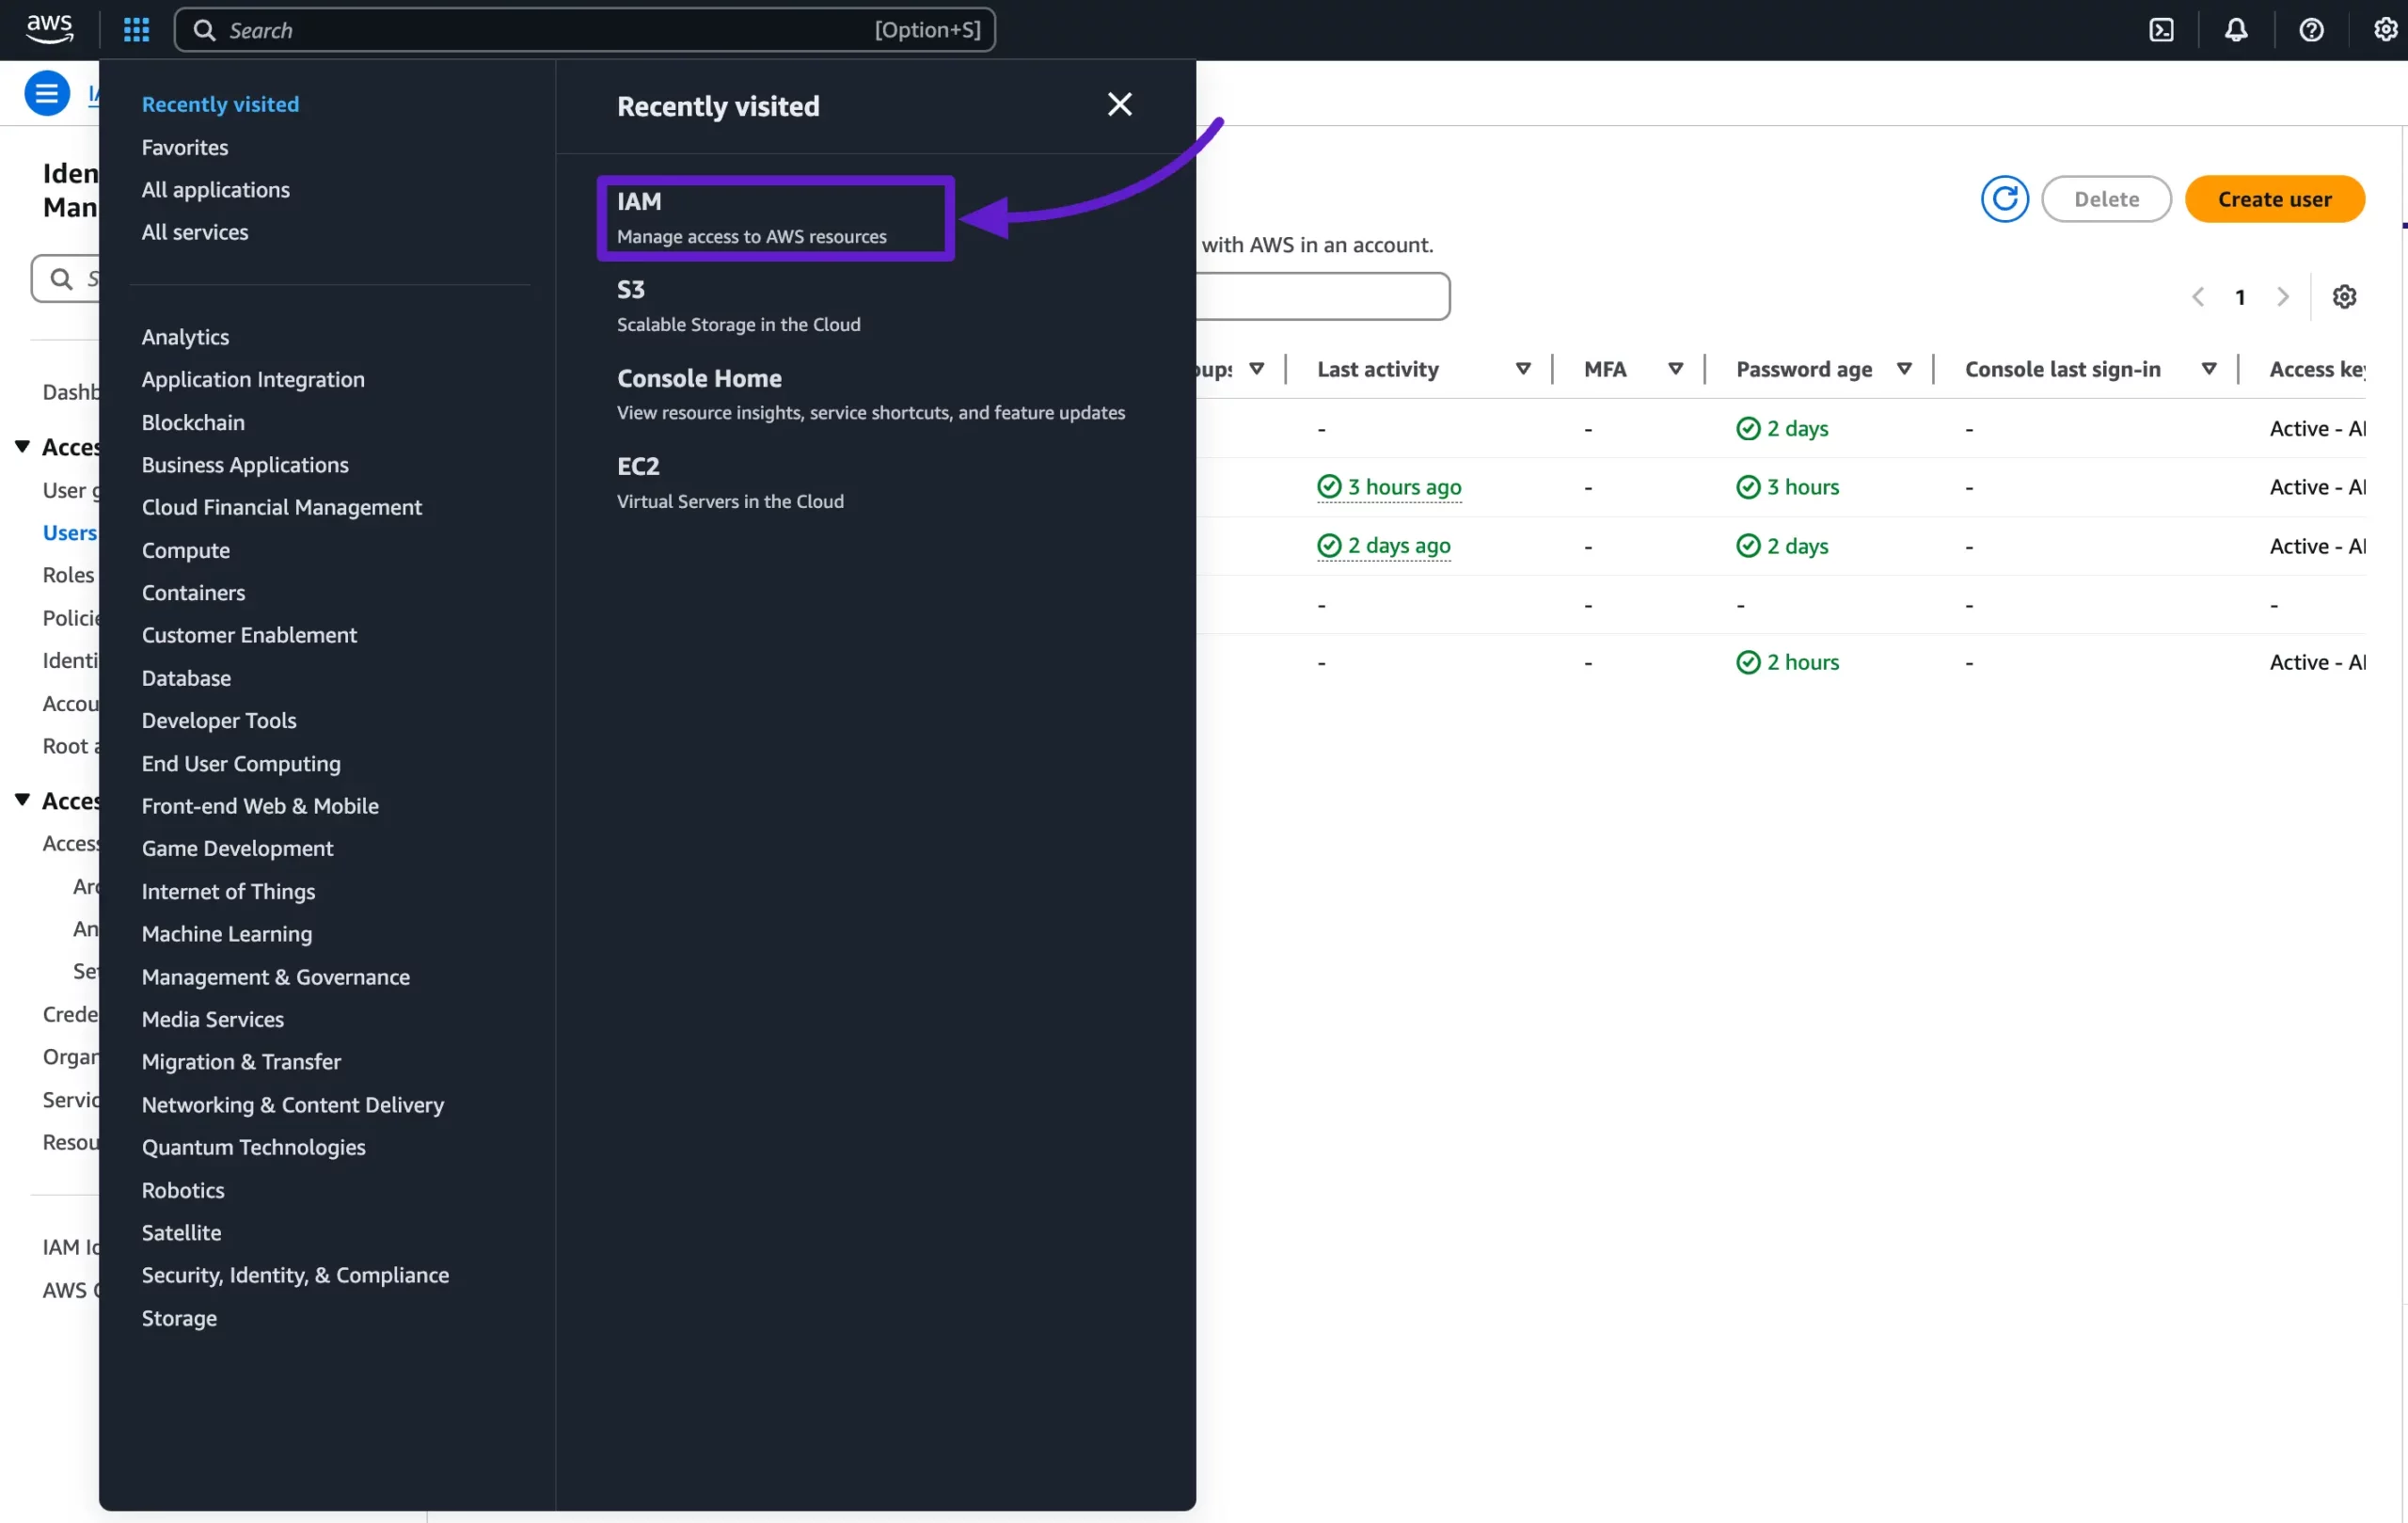
Click the Services dropdown in the AWS navbar or search for IAM. Select IAM to begin creating a new IAM user for access.
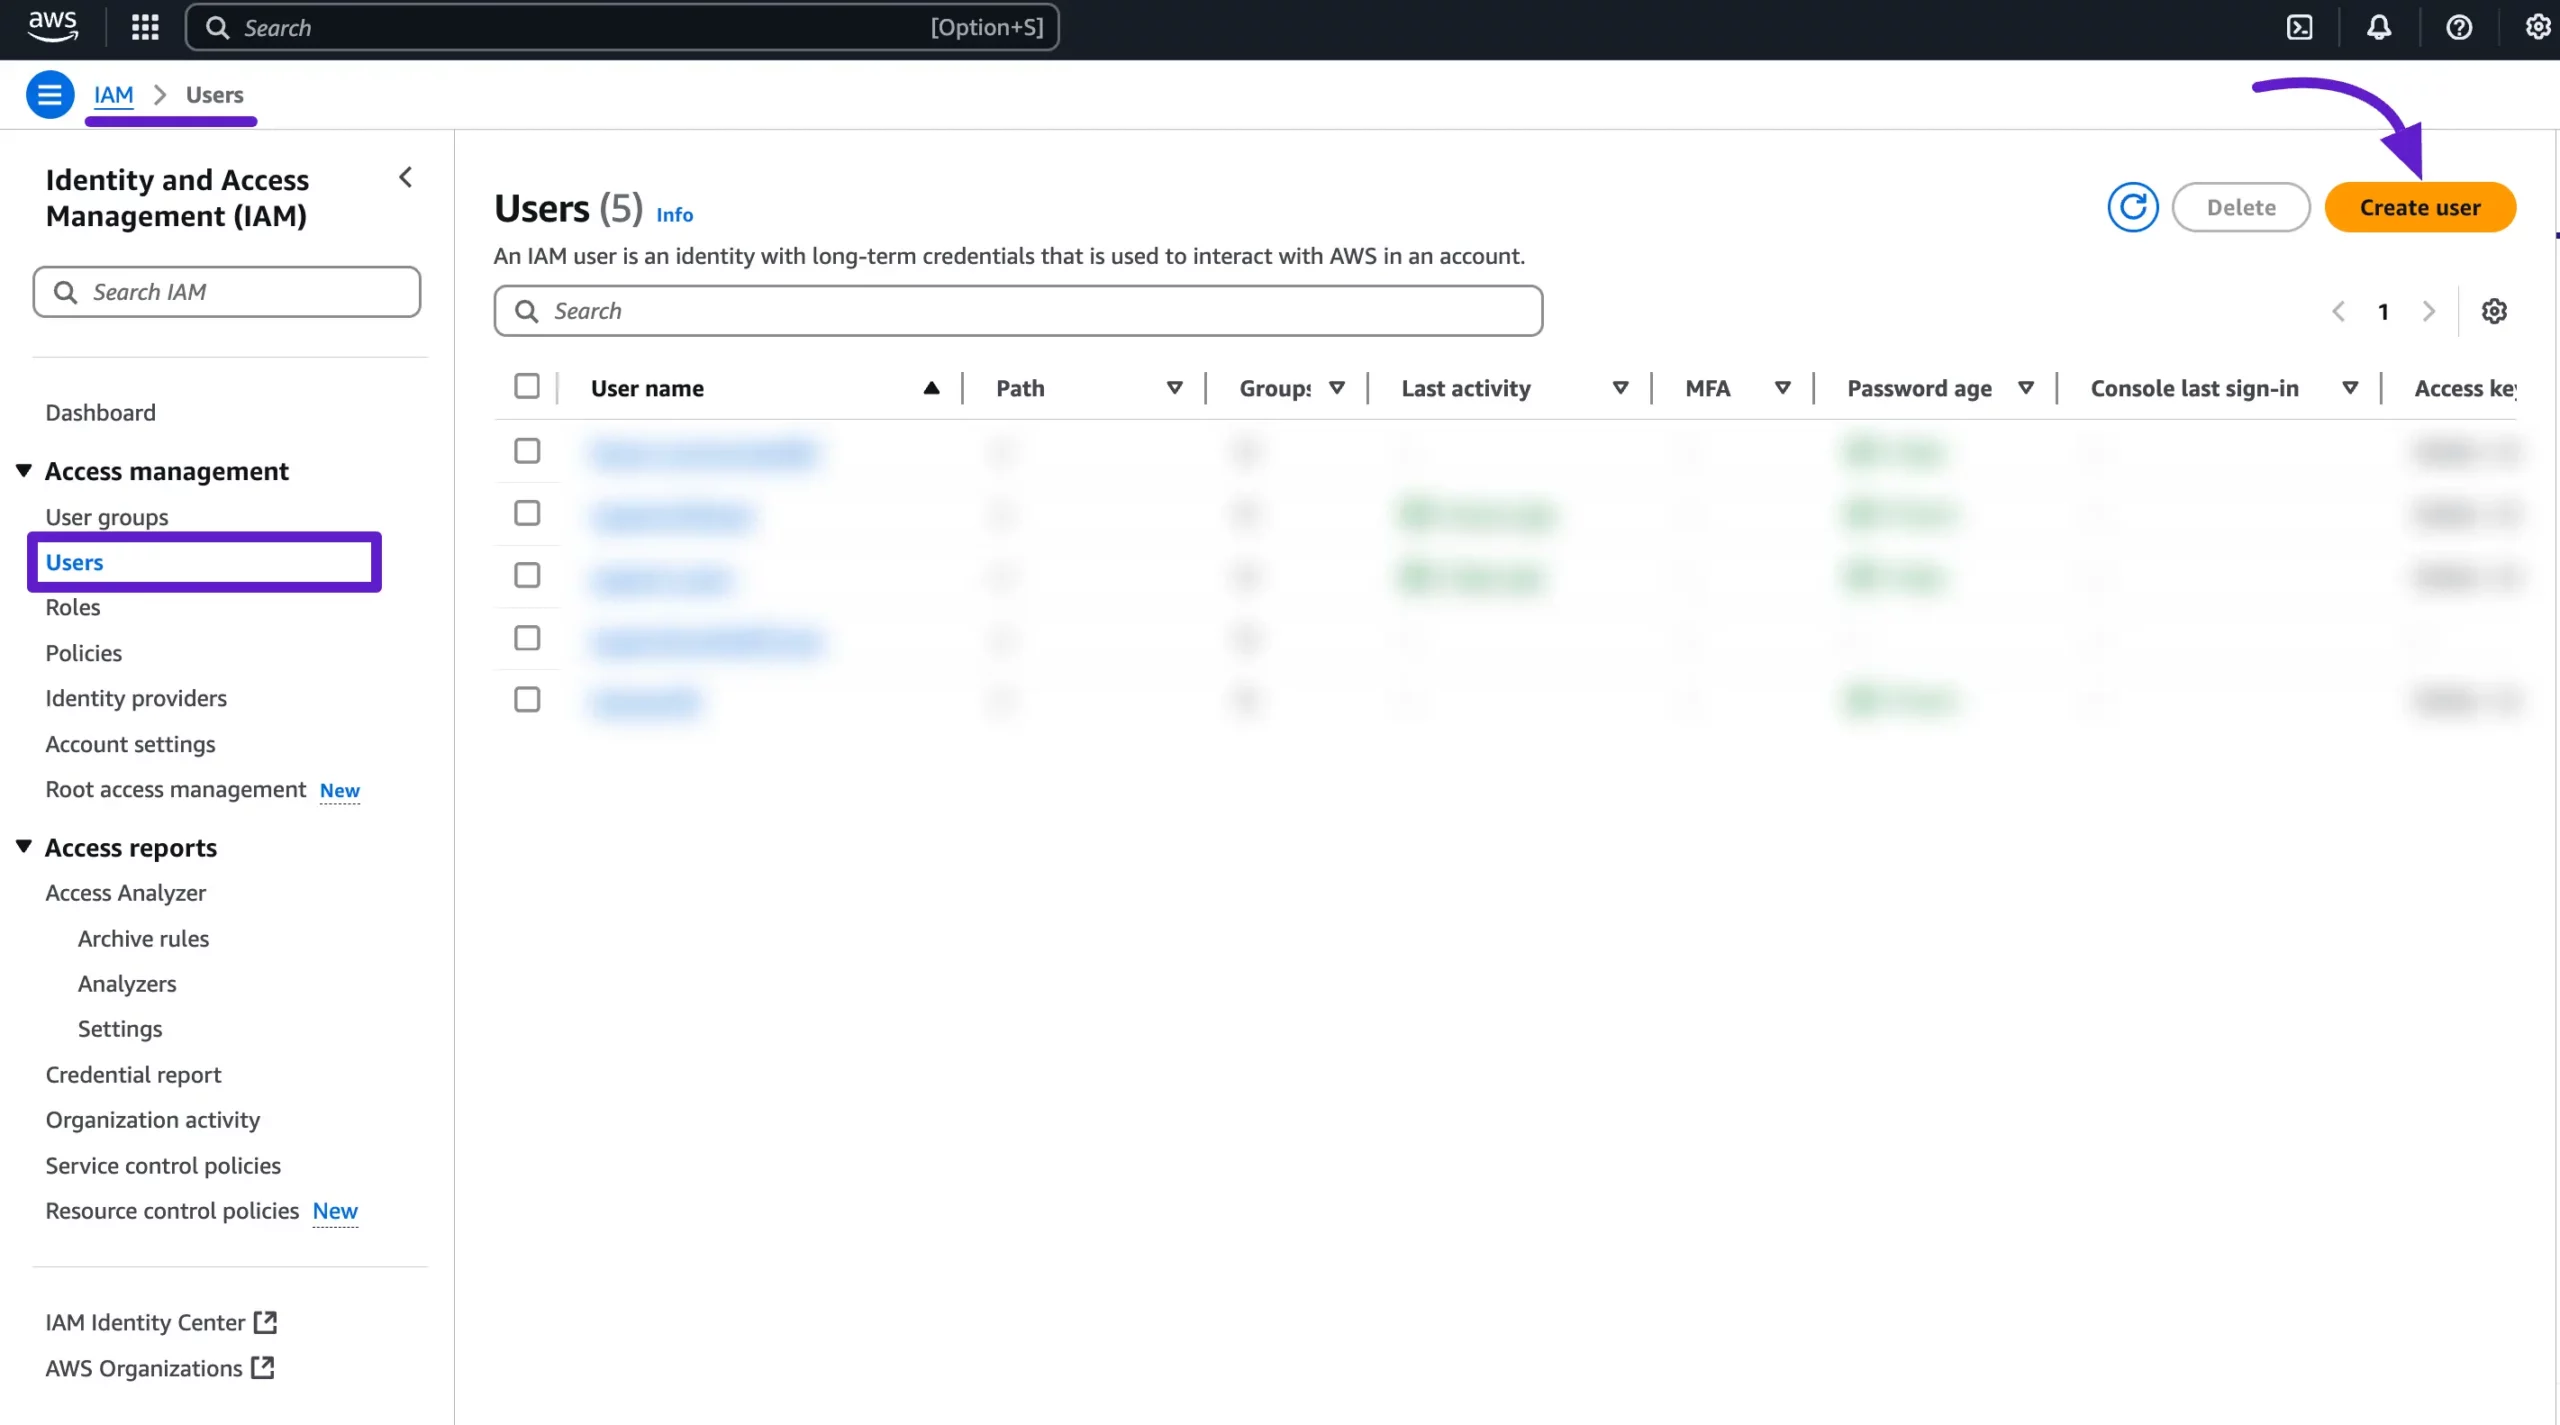
Once you’re on the IAM dashboard, click Users from the left sidebar. Then hit the Create User button to start setting up a new IAM user.
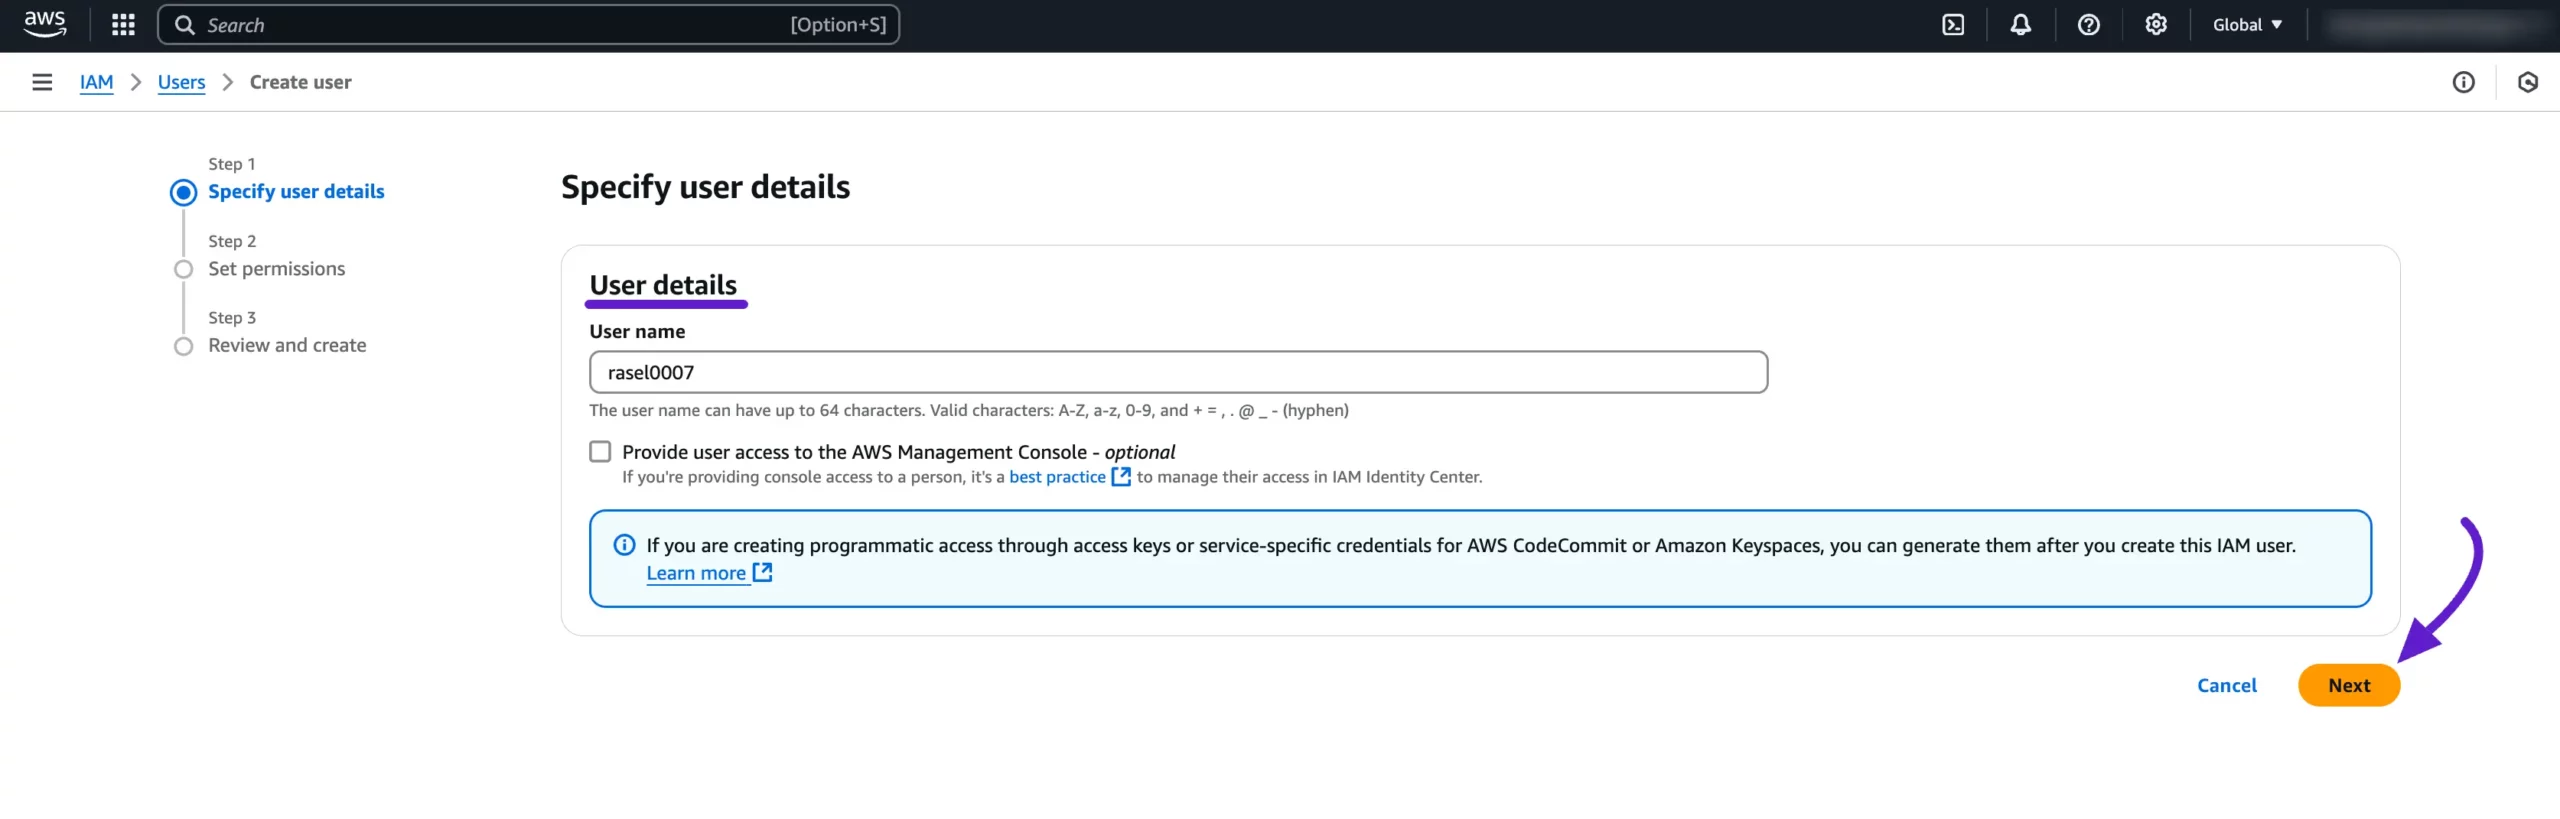
On the Create User page, start by entering your desired User name.
Next, leave the Provide user access to the AWS Management Console (optional) option unchecked, as it’s not needed for FluentCommunity integration.
Then, click the Next button to proceed to the permissions setup.
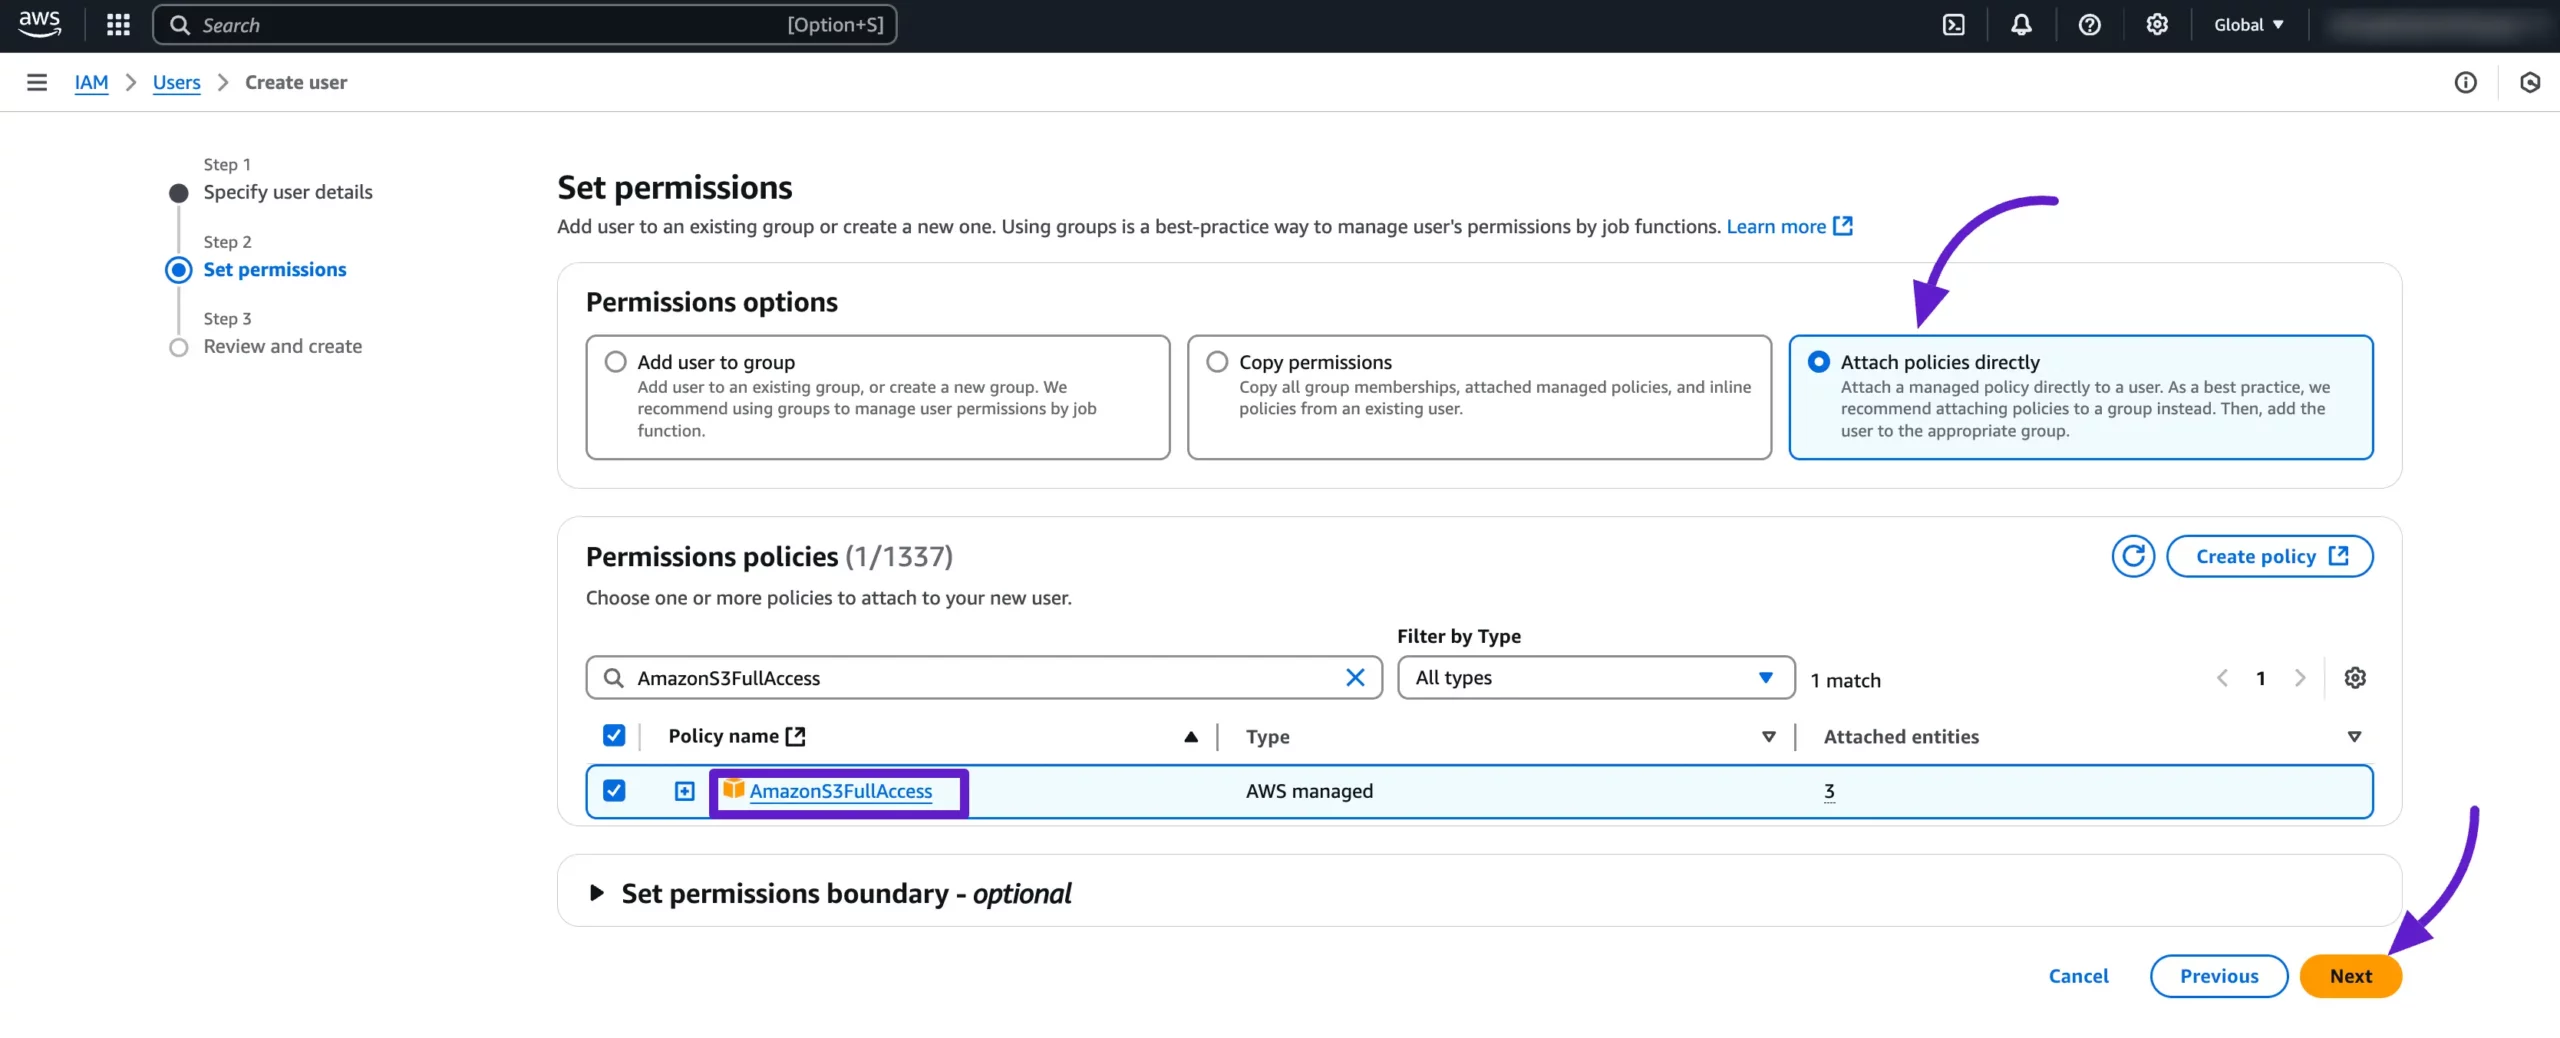
In the Set Permissions step, select Attach policies directly. Then, search for AmazonS3FullAccess in the search bar, select the policy, and click the Next button to proceed.
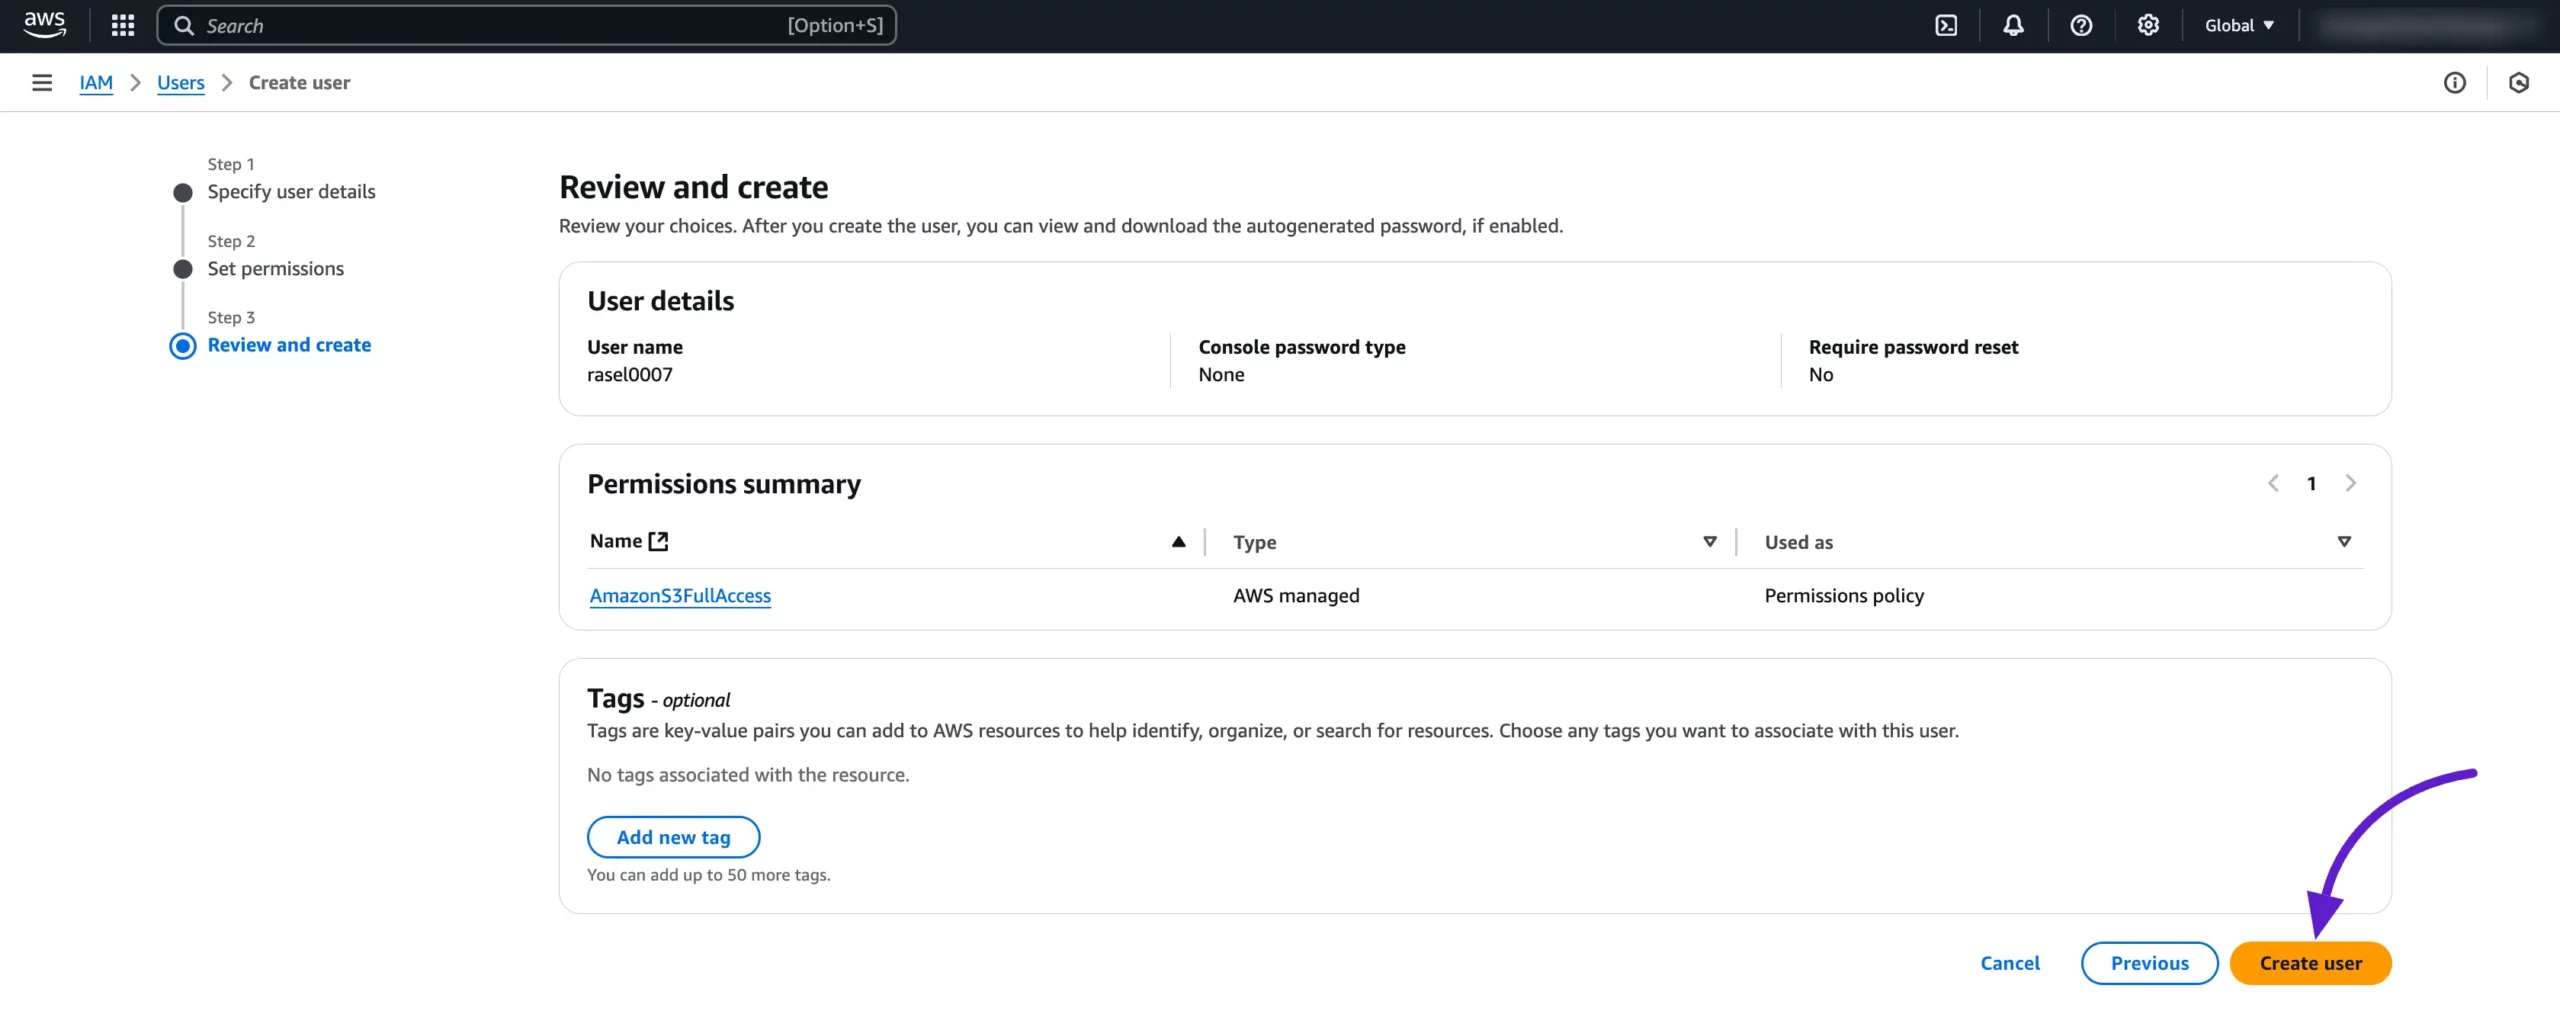
You can skip the Review and Create step and click on the Create User button to create the new user.
Your user is created successfully. In the Users section, you will now see the newly created user. Click on the User Name to view the details.
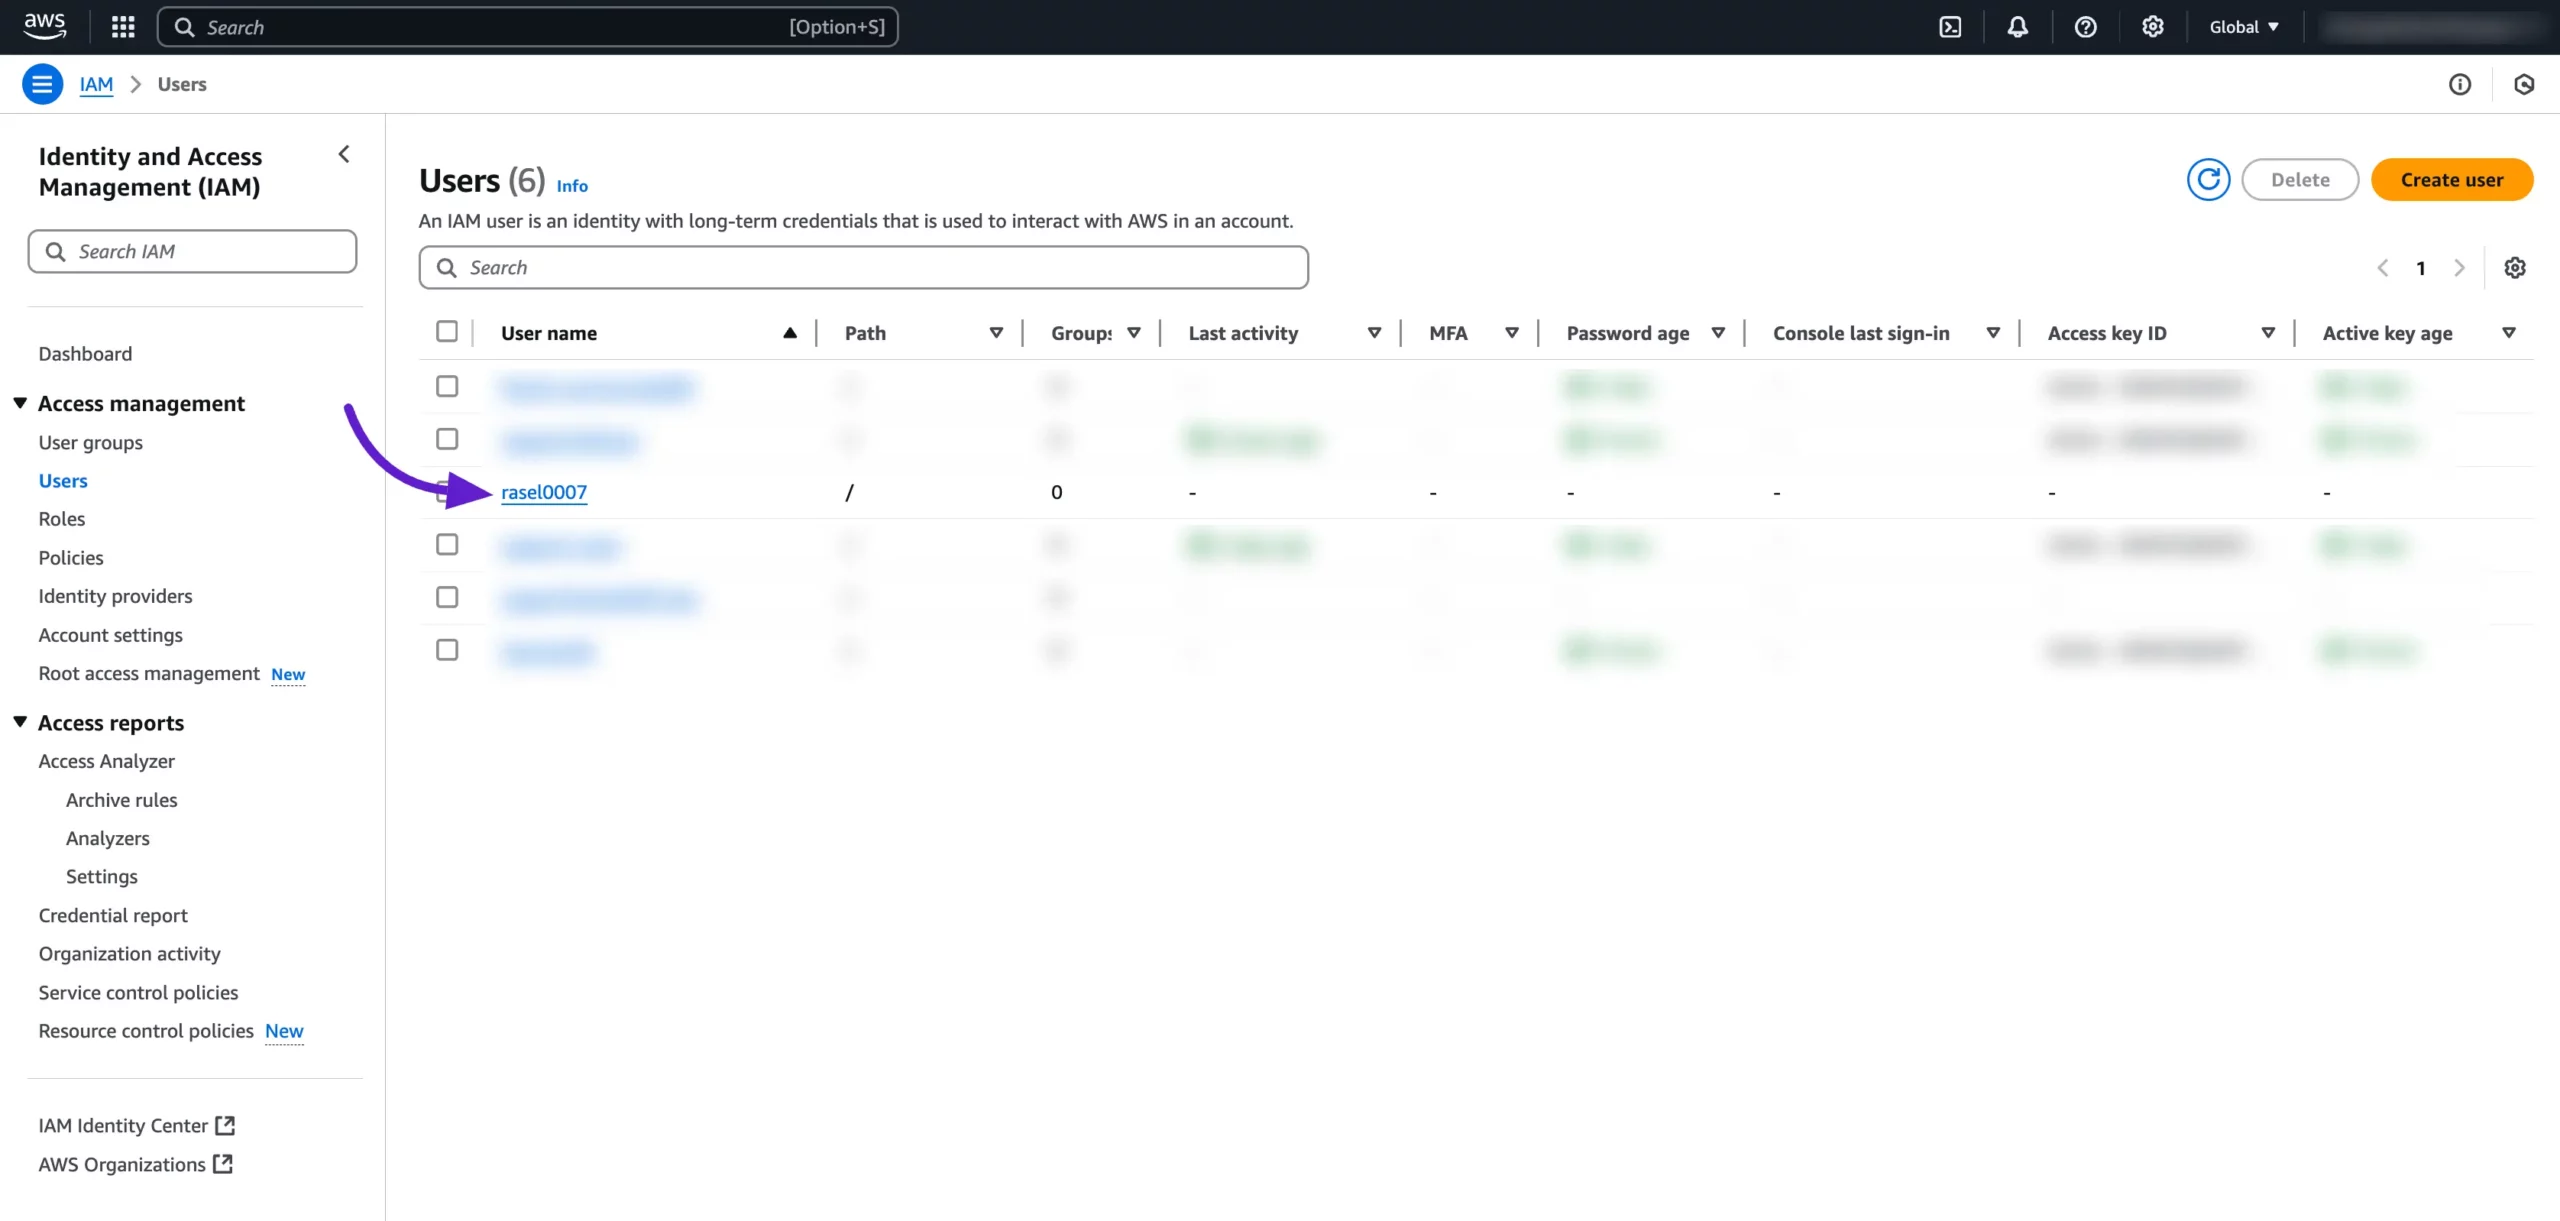
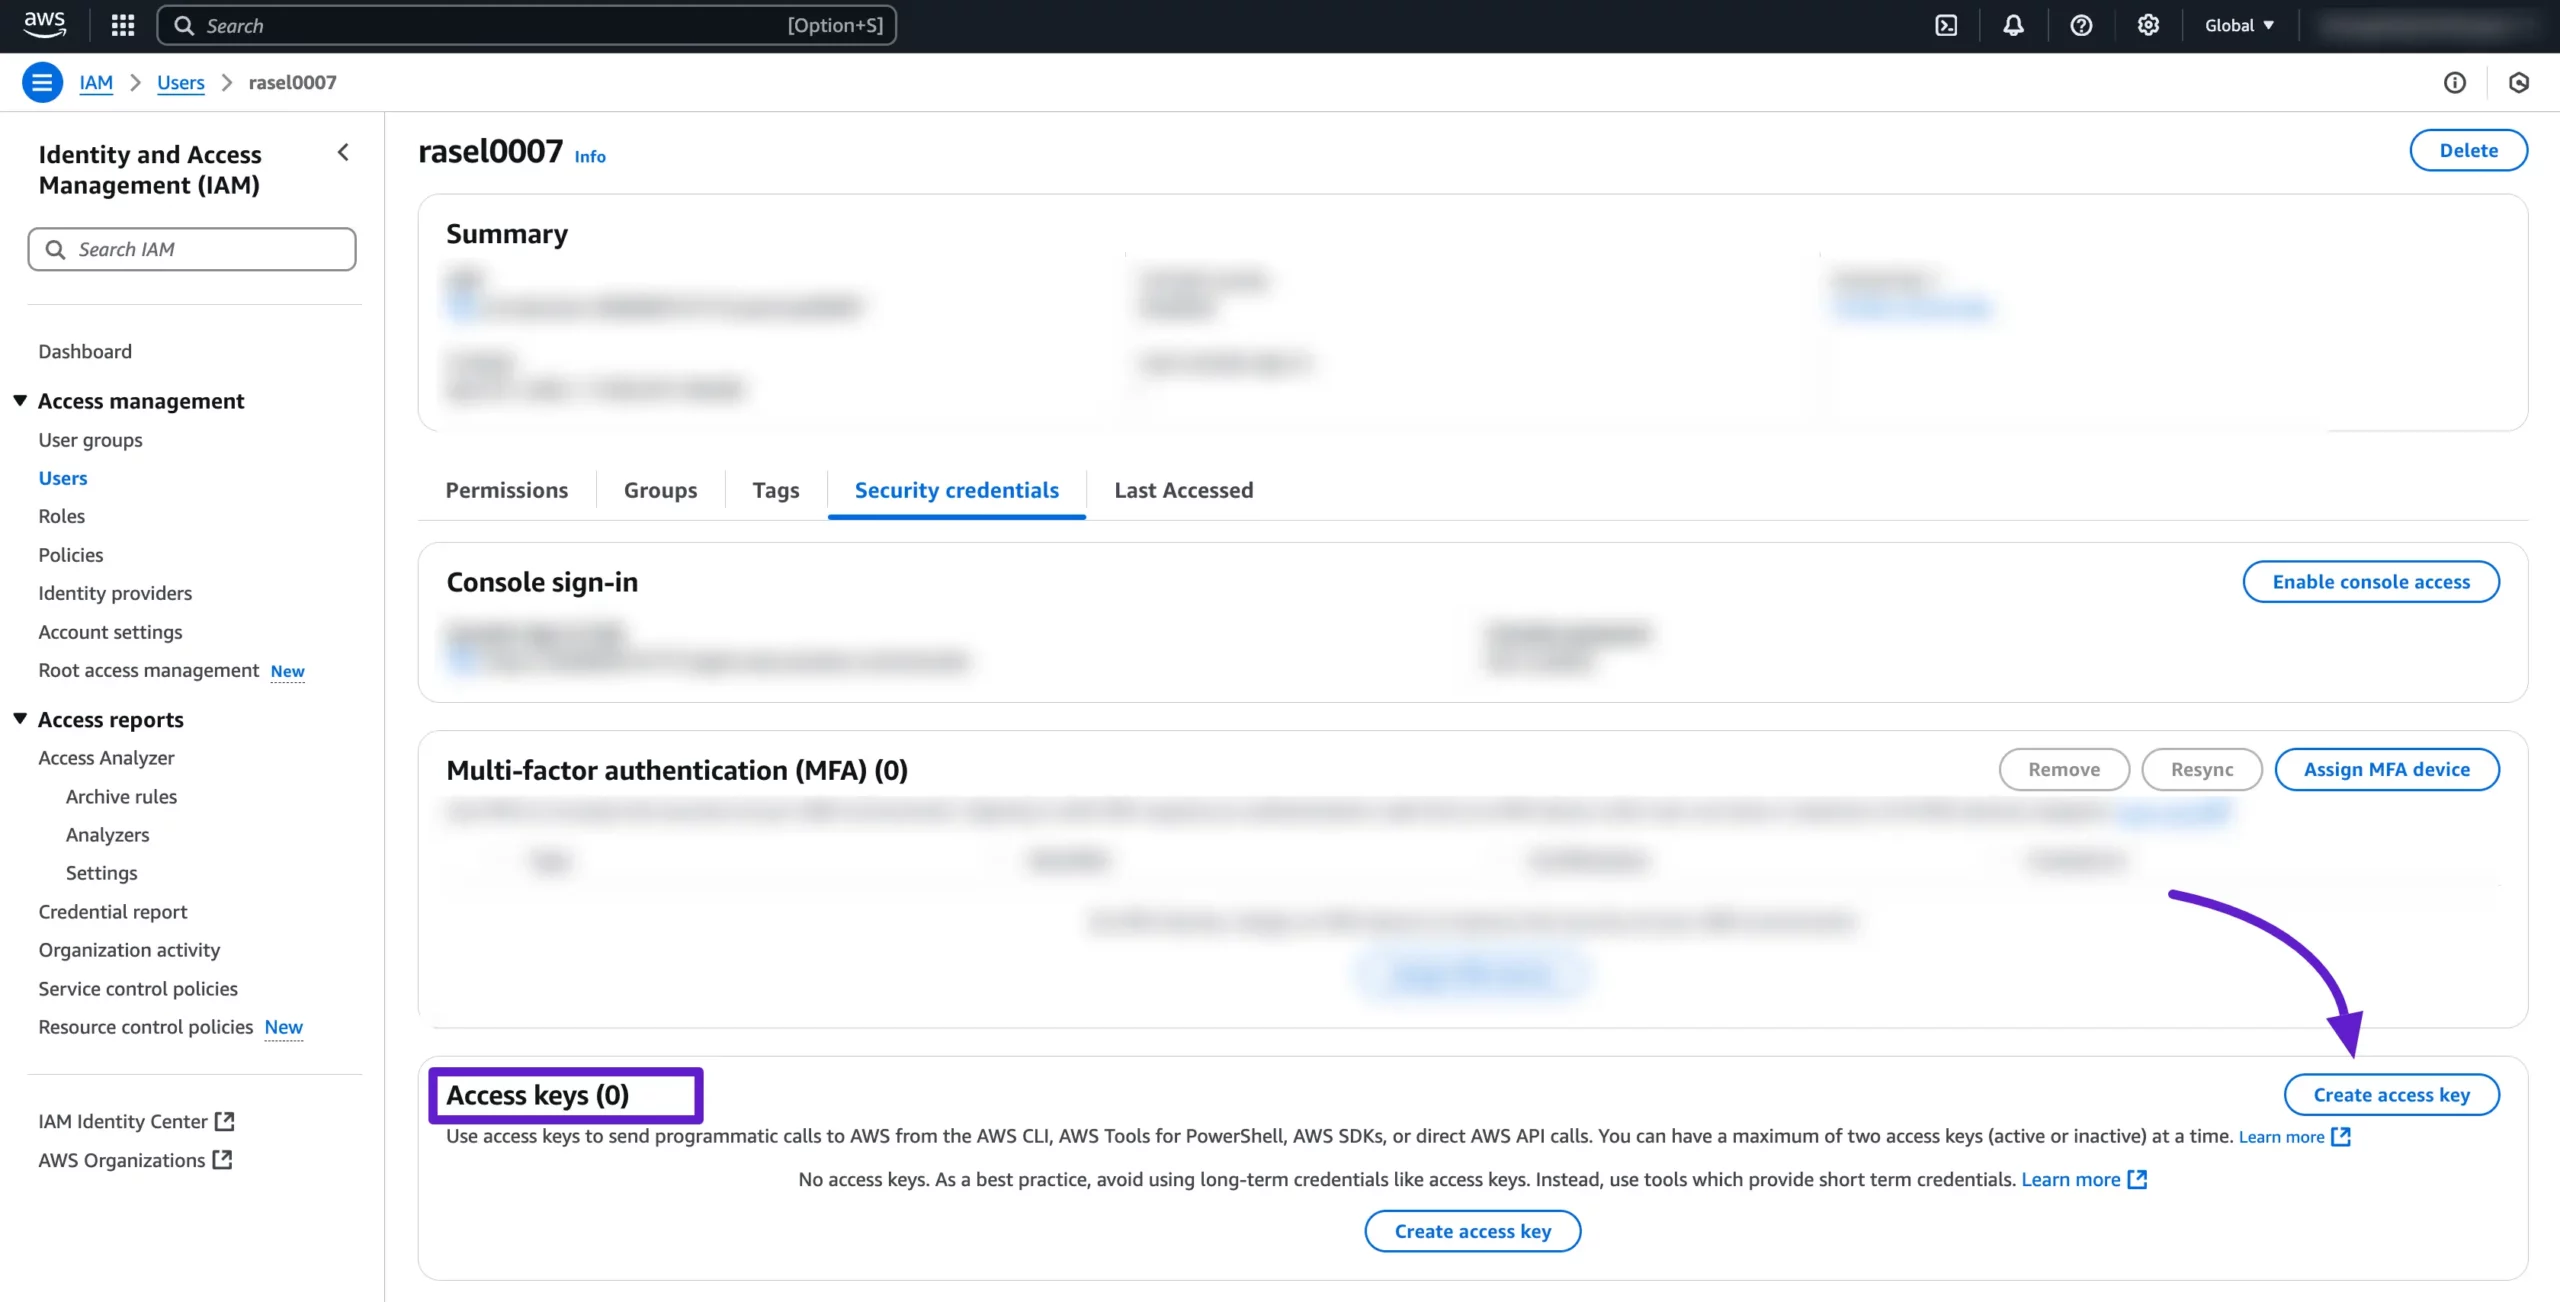
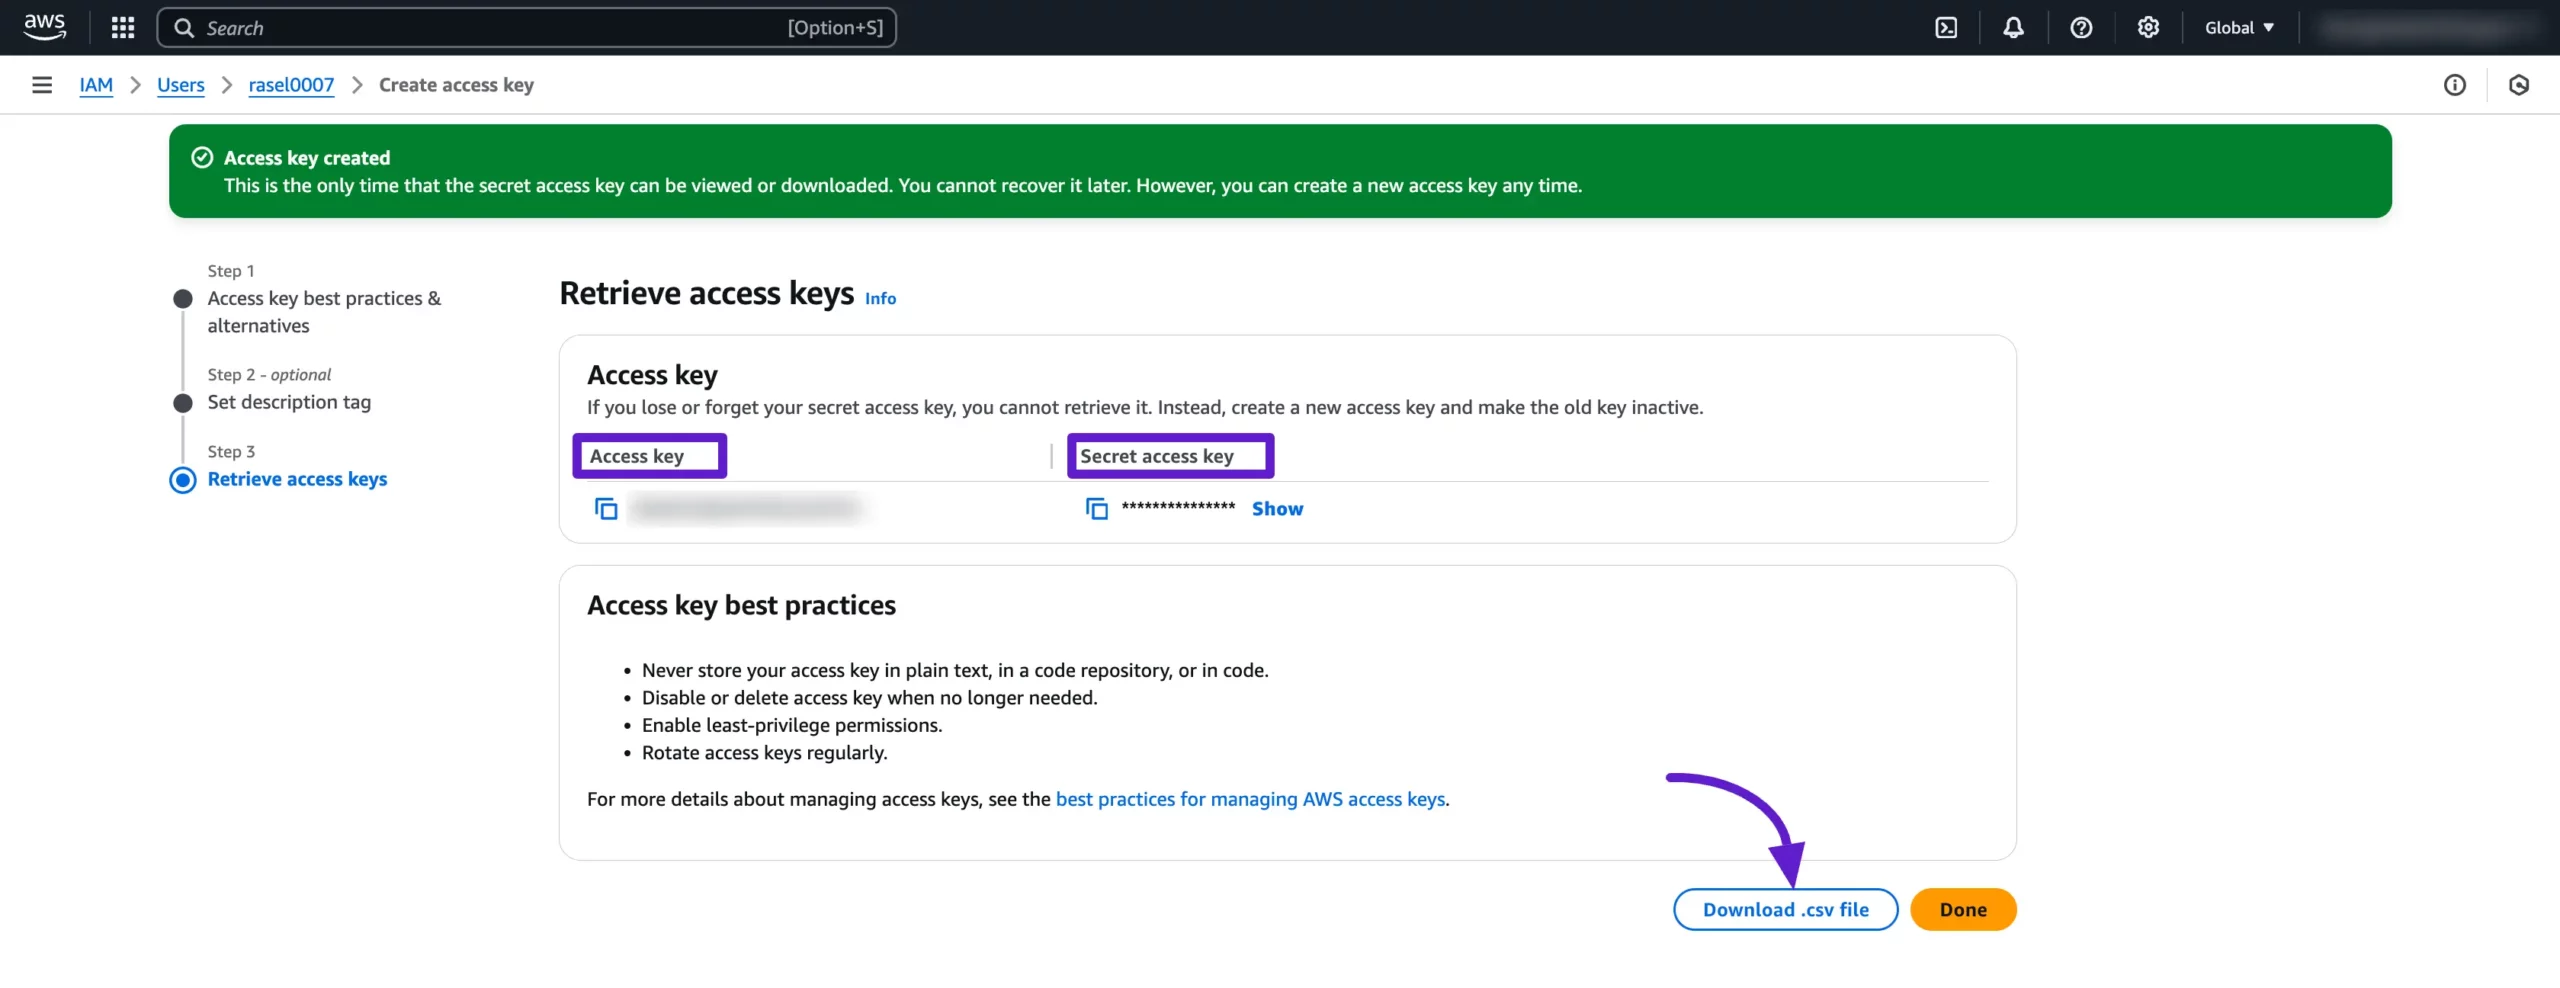
Now, go to the Security Credentials tab from the User Details page. Under this tab, you will find the Access Keys section. Click on the Create Access Key button to generate new access credentials for the user.
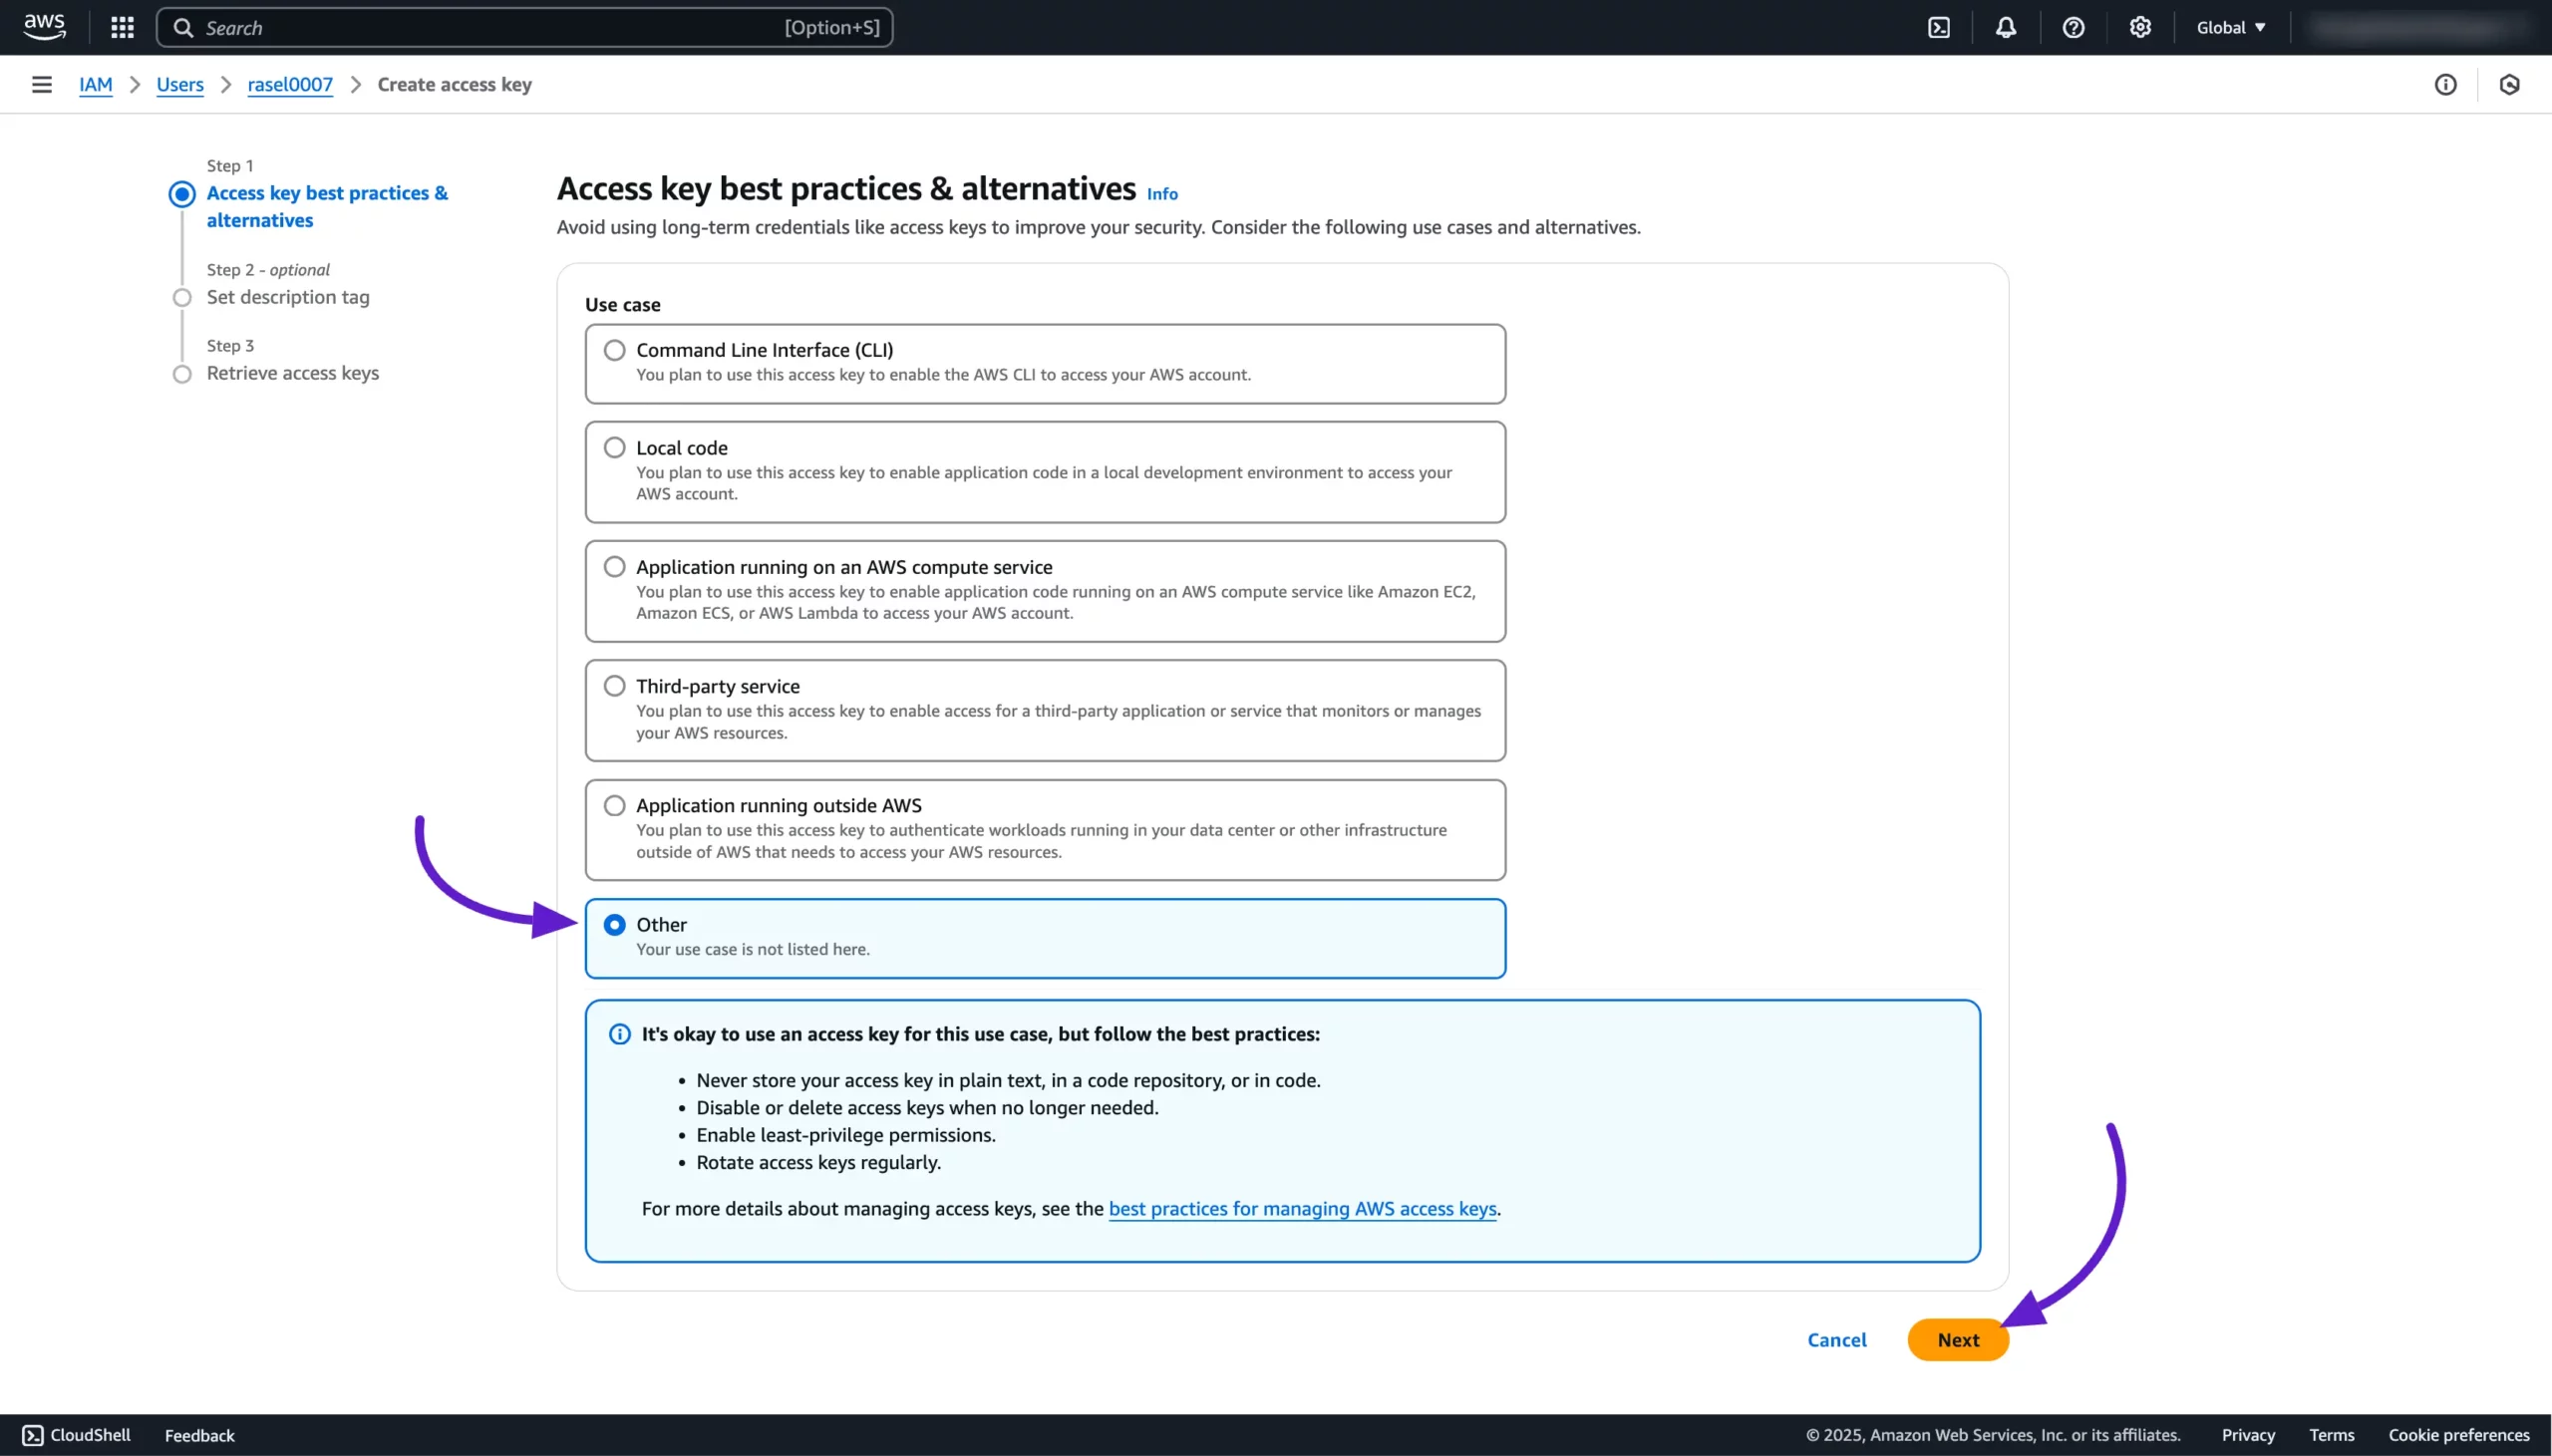
The steps to create Access Keys will appear. In the Access Key Best Practices & Alternatives step, select the Other option and click on the Next button to proceed.
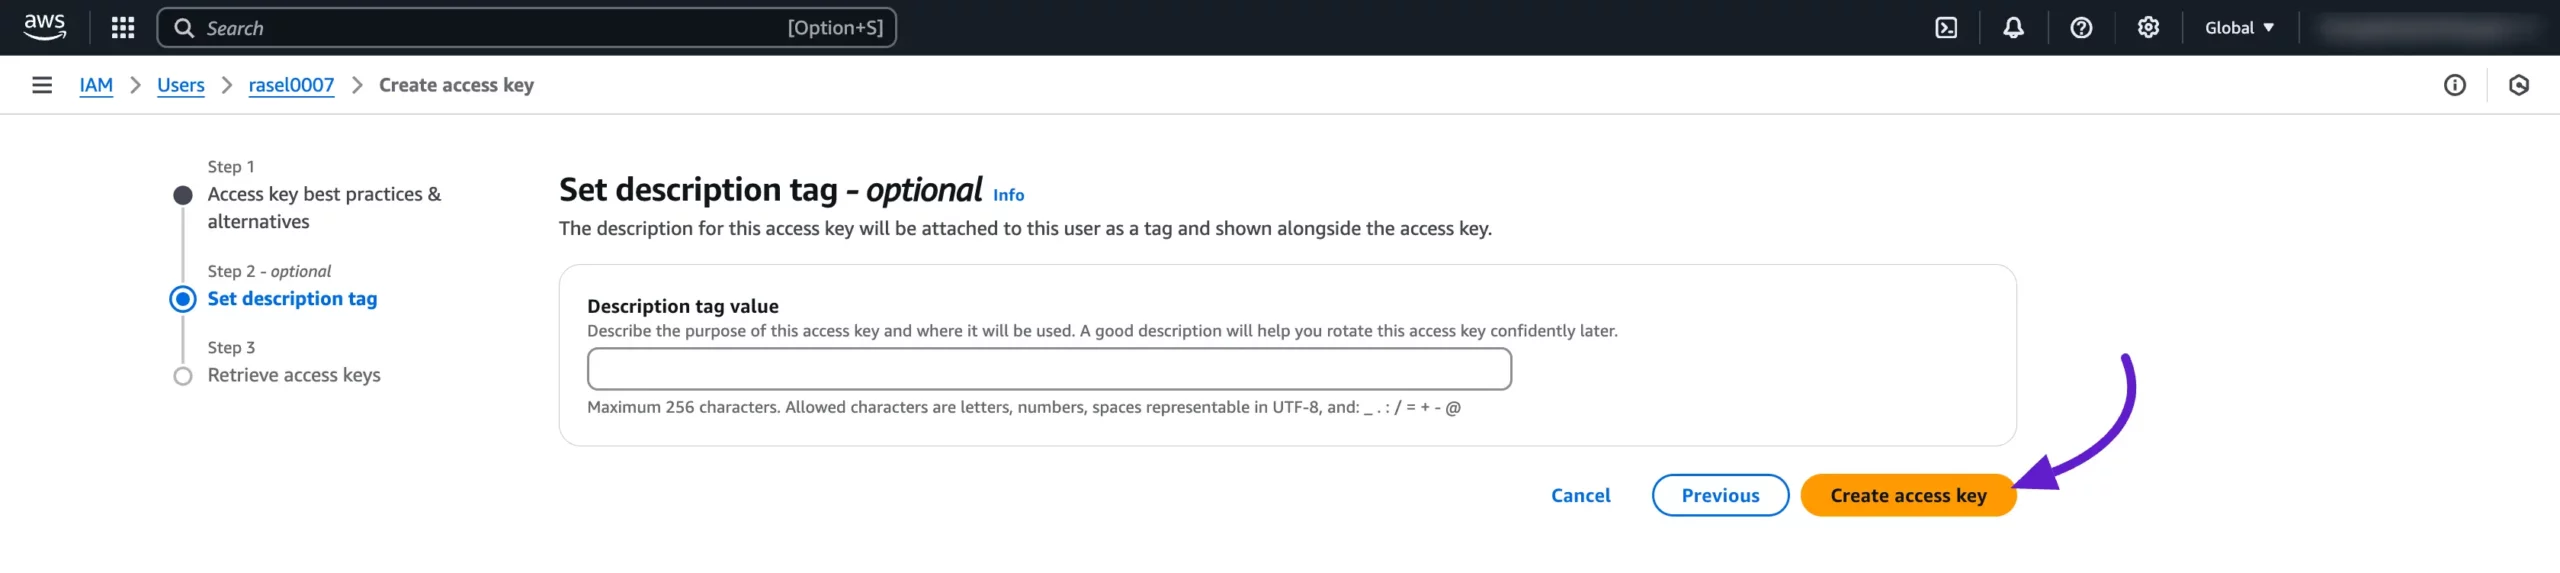
You can simply skip this step and click on the Create Access Key button to generate the access key.
Your Access Keys are created now. You can see the Access Key and Secret Key here. Copy these credentials to your clipboard for later use or download them as a CSV file by clicking on the Download CSV File button.
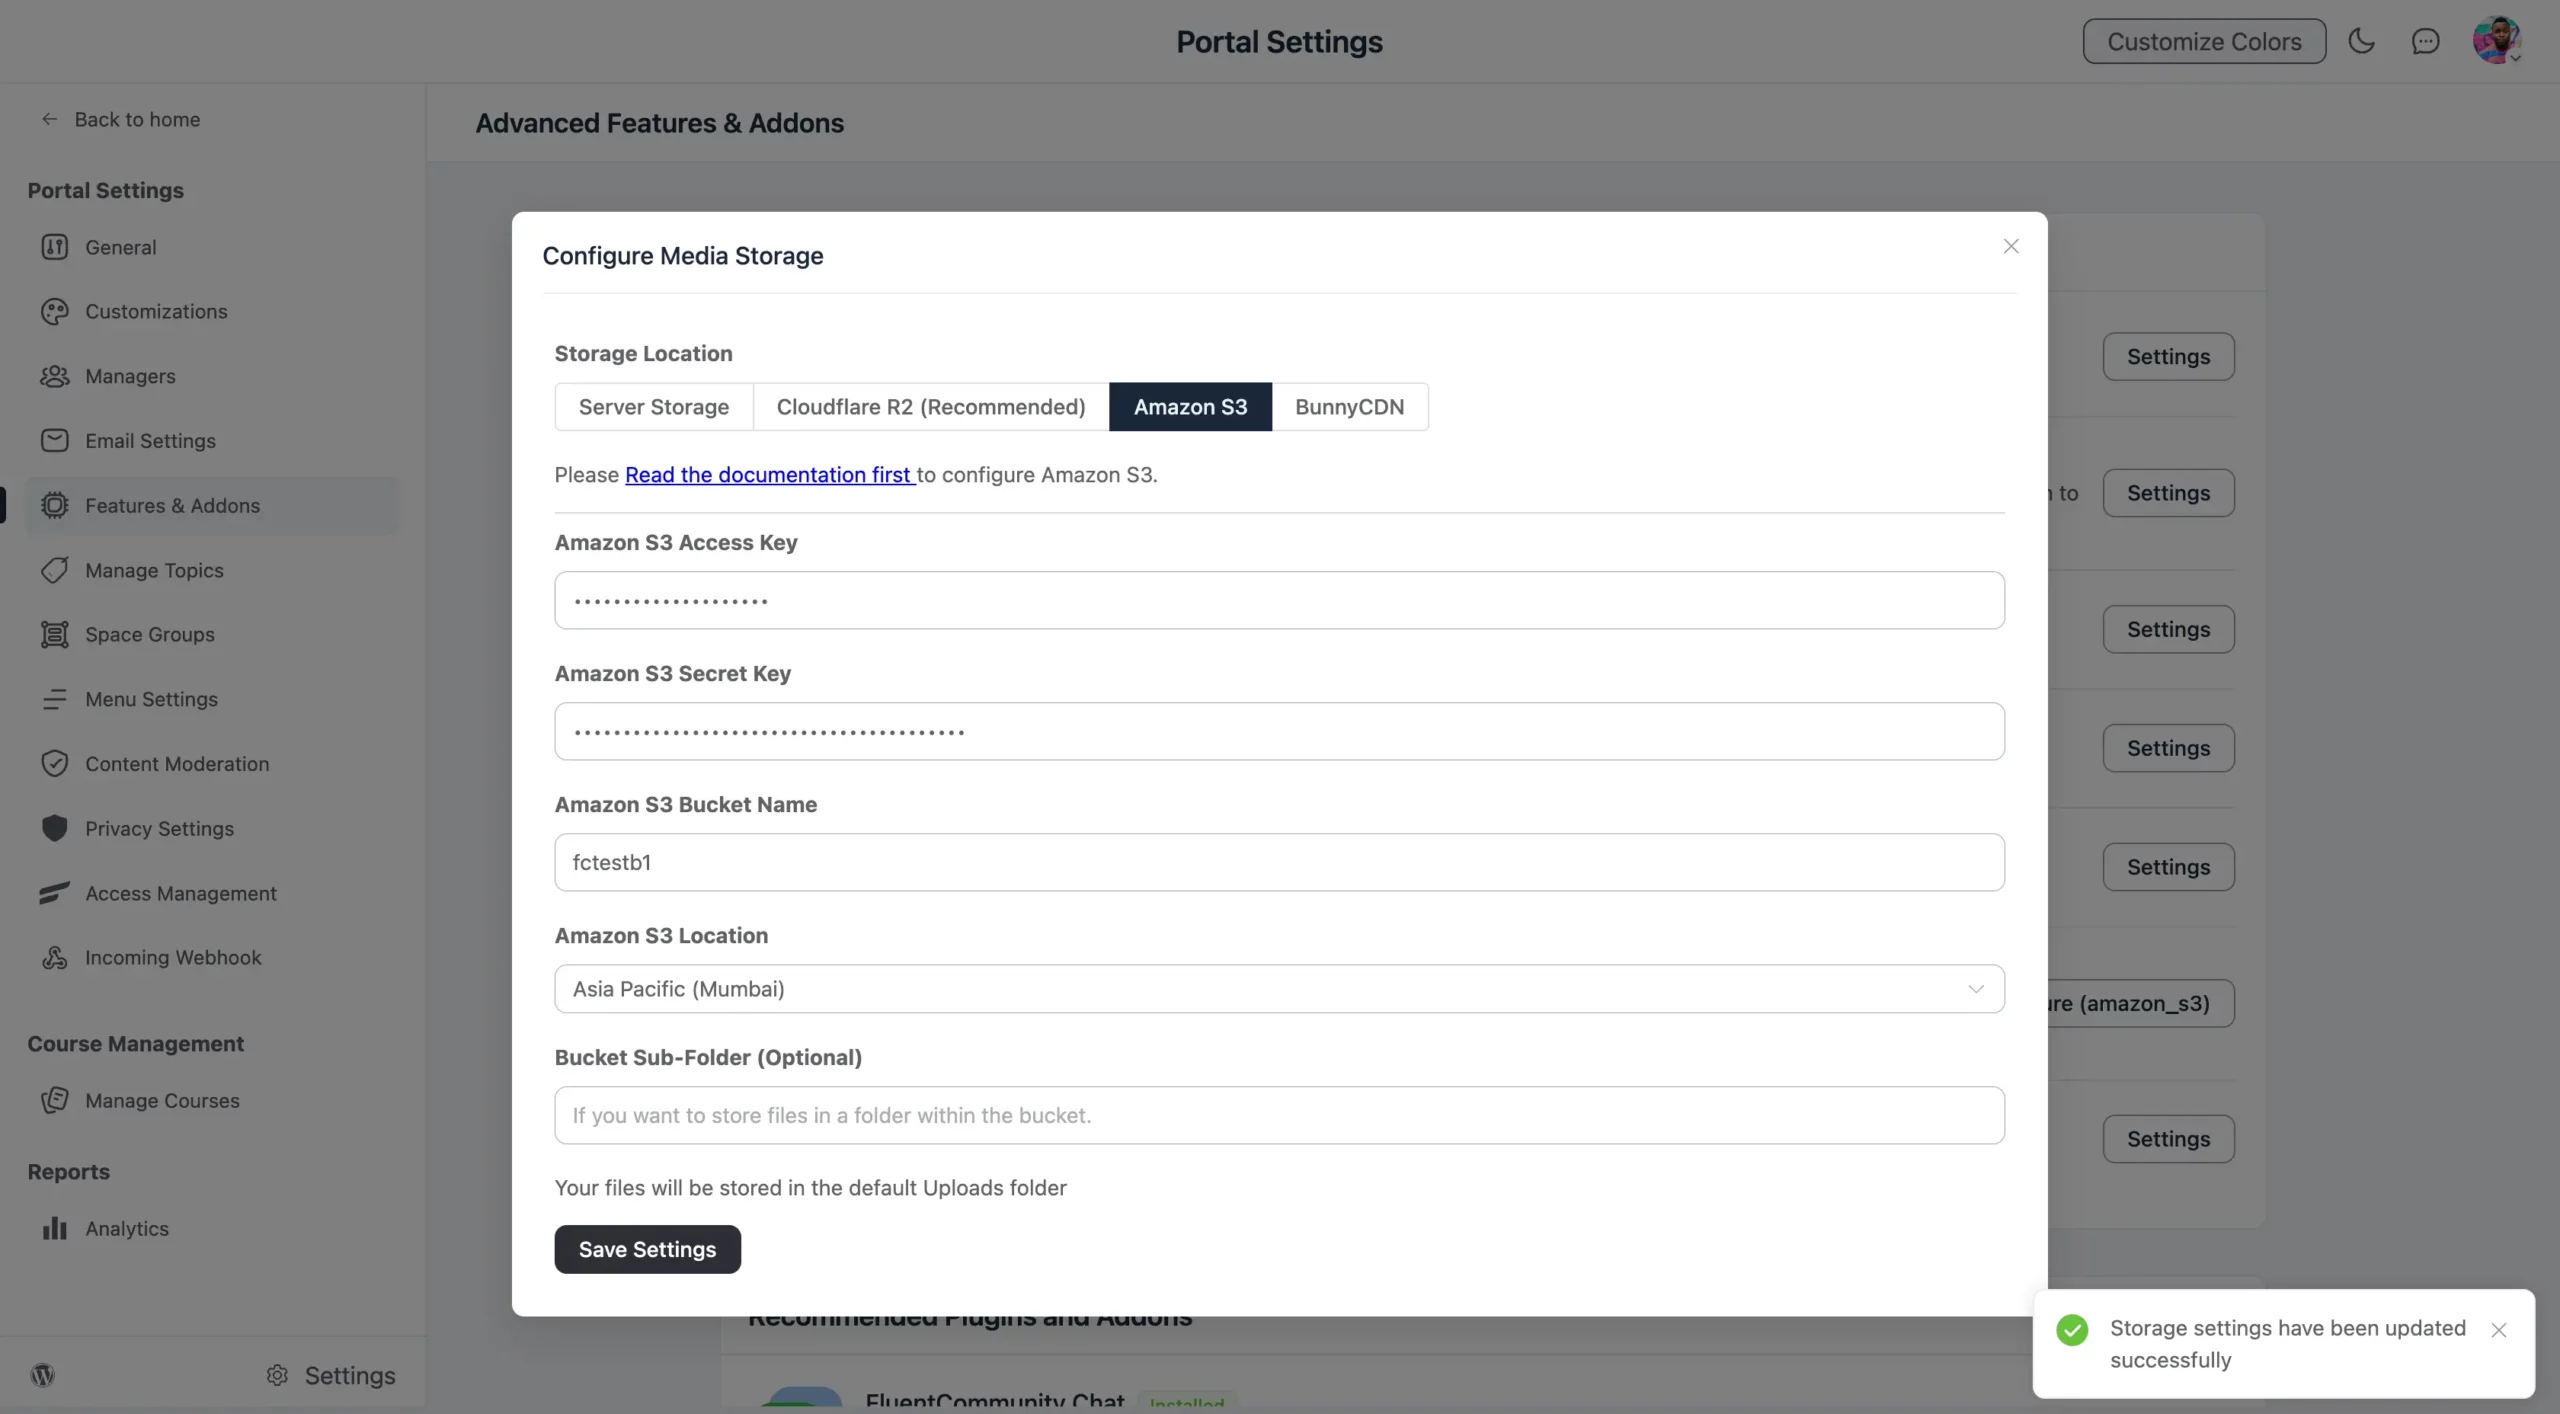
Configuring Amazon S3 #
Now, go to the FluentCommunity Media Storage Settings and select Amazon S3. Paste the credentials you collected from your Amazon AWS account:
- Amazon S3 Access Key: Paste the Access Key from the IAM User.
- Amazon S3 Secret Key: Paste the Secret Key from the IAM User.
- Amazon S3 Bucket Name: Enter the Bucket Name you created in Amazon S3.
- Amazon S3 Location: Select the region from the dropdown that matches the one you used when creating your bucket.
- Bucket Sub Folder (Optional): If you created a subfolder for file uploads, provide its name. Otherwise, leave it empty.
Finally, click the Save Settings button. Your Amazon S3 will now be successfully connected with FluentCommunity, and all media files will be stored in Amazon S3.
Configure Amazon S3 Using wp-config.php #
Add the following definitions to your wp-config.php file, adjusting the values according to your Amazon S3 setup.
// Amazon S3 Configuration
define('FLUENT_COMMUNITY_CLOUD_STORAGE', 'amazon_s3');
define('FLUENT_COMMUNITY_CLOUD_STORAGE_REGION', 'us-east-1'); // change with your region. If it's global just remove this line or keep it empty
define('FLUENT_COMMUNITY_CLOUD_STORAGE_ACCESS_KEY', '********************');
define('FLUENT_COMMUNITY_CLOUD_STORAGE_SECRET_KEY', '********************');
define('FLUENT_COMMUNITY_CLOUD_STORAGE_BUCKET', 'your-bucket-name'); // change with your bucket name
define('FLUENT_COMMUNITY_CLOUD_STORAGE_SUB_FOLDER', 'site-name'); // optional. If you want to store the files in a subfolder of that bucket
Replace the placeholder values with your actual Amazon S3 credentials and information.
Notes #
- If you use both methods, the wp-config.php settings will take precedence over the UI settings.
- The UI method is more user-friendly and doesn’t require direct file access to your WordPress installation.
- The wp-config.php method is more secure as it keeps sensitive information out of the database.
- Ensure that all the credentials are correctly entered, regardless of the method you choose.
- The sub-folder setting is optional and can be used if you want to organize your files within the bucket.
Troubleshooting #
- If you encounter permission issues, review your bucket policy and IAM user permissions.
- Ensure that your S3 bucket is in the correct region and that it’s accessible from your WordPress server.
- Check that your access key and secret key are entered correctly without any extra spaces.
If you have any questions regarding this guideline, please don’t hesitate to reach out to our support team. We’re here to assist you!


