
FluentCommunity allows you to automatically Join/Enroll the Members/Students and give them access to manage the Spaces/Courses based on FluentCRM Tags.
This article covers detailed information about Access Management of Spaces/Courses for FluentCommunity using FluentCRM Tags.
Remember, before starting the process, make sure you install and activate the FluentCommunity Pro Plugin and FluentCRM plugin on your WordPress Site to use this feature.
Enabling Access Management #
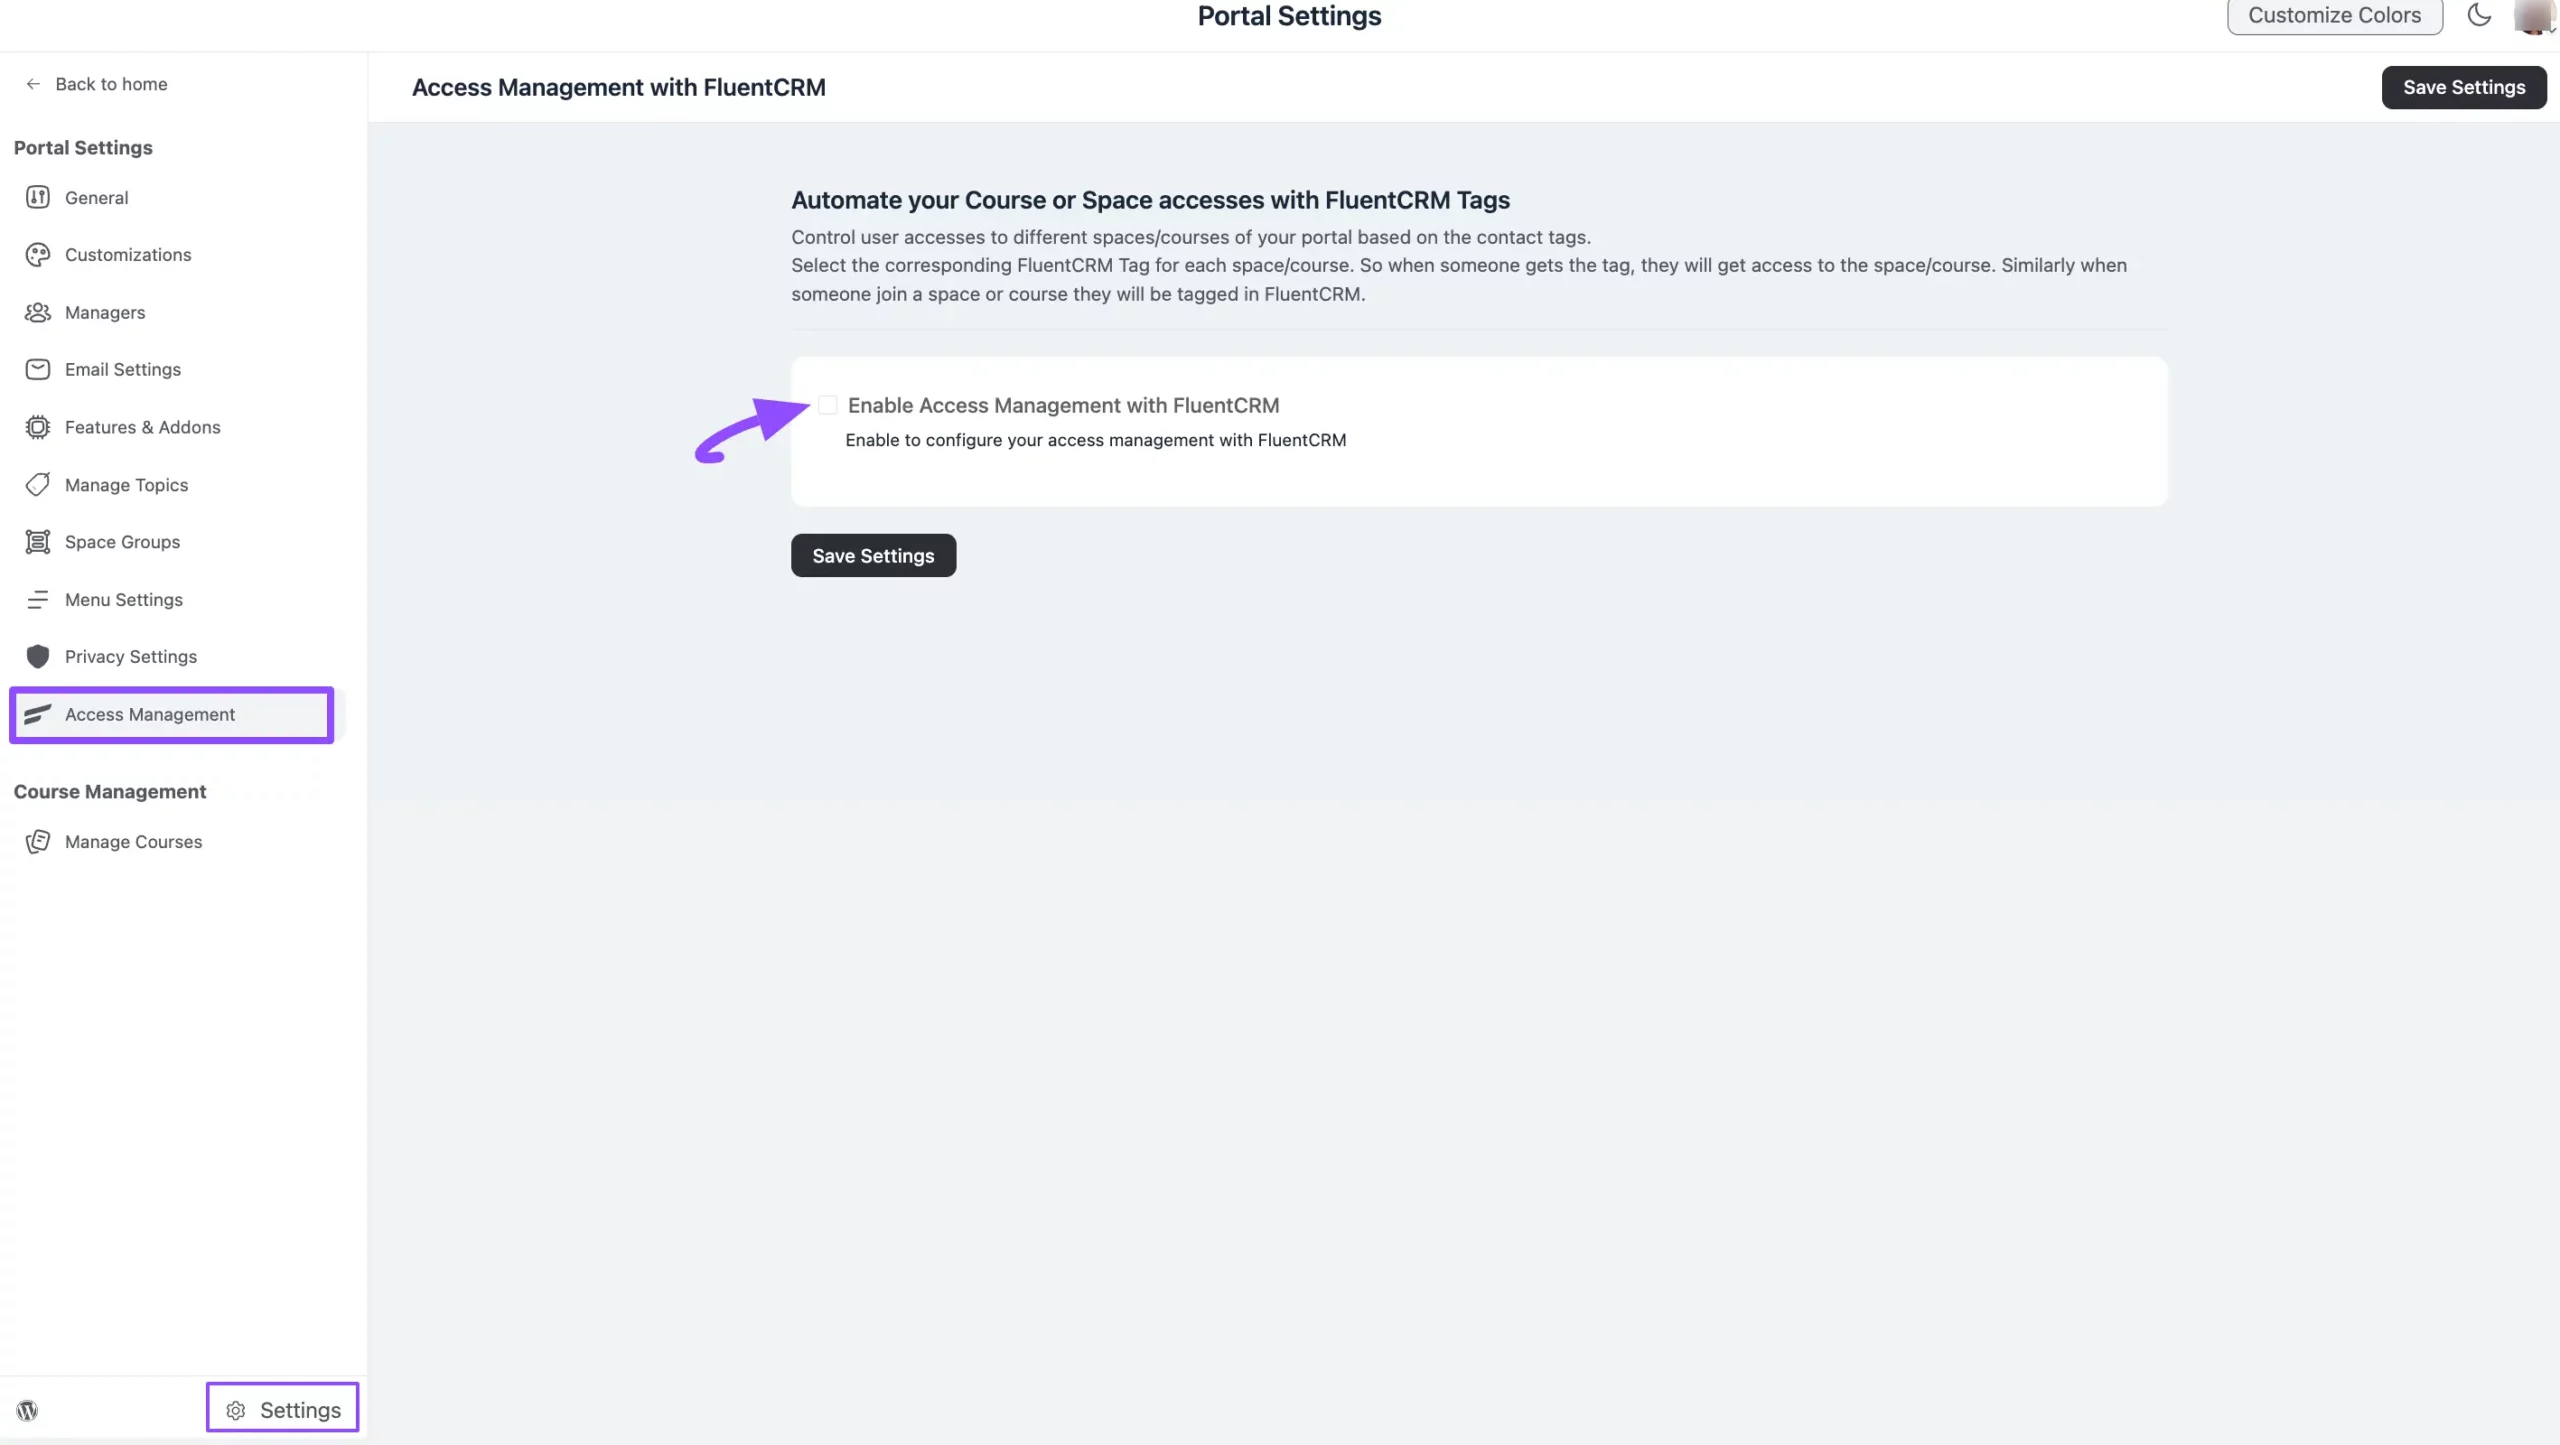
First, go to Settings of FluentCommunity from the below-left corner and open the Access Management tab from the left-side menu.
Now, check the Enable Access Management with FluentCRM box to enable this feature.
Configuring Tags with Spaces/Courses #
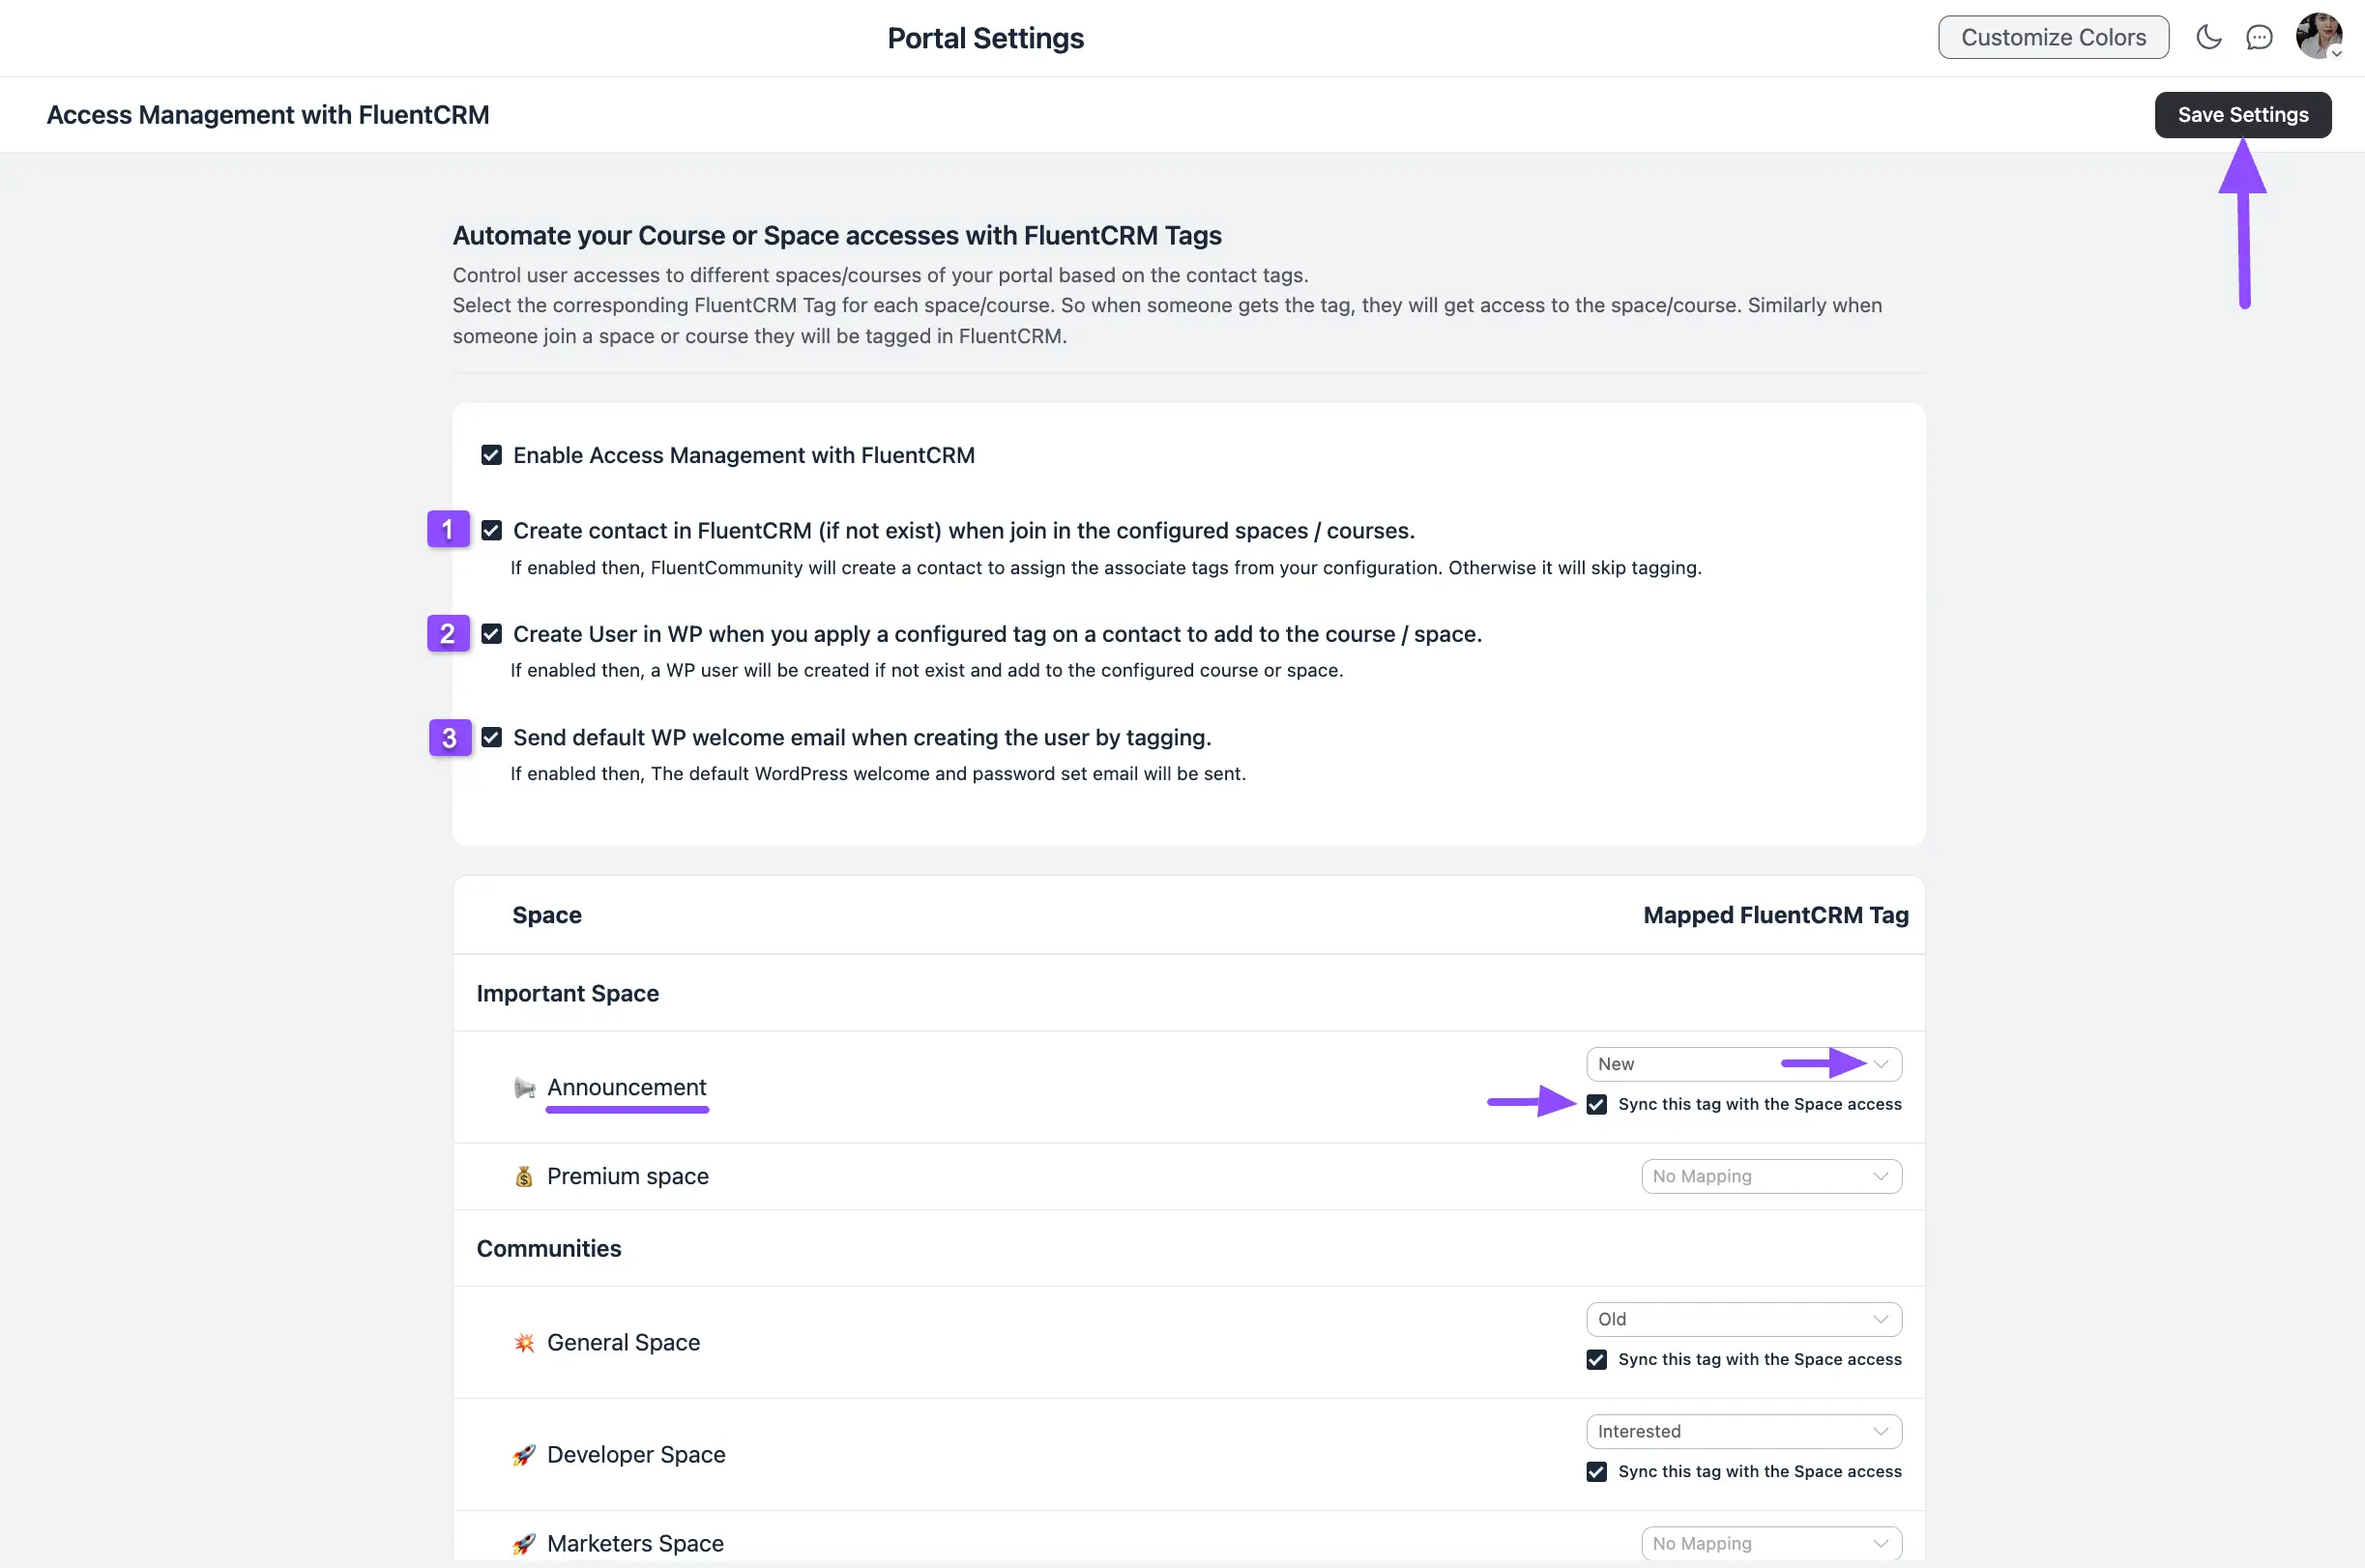
Once you enable the Access Management option, you will get three more checkboxes. These are:
- Create Contact in Fluent CRM: Check this box if you want to create a new contact in FluentCRM when a member who does not exist in CRM Contacts joins the configured Spaces/Courses.
- Create User in WordPress: Check this box if you want to create a new WordPress when configured tag will be applied to a CRM contact to add to the Spaces/Courses.
- Send default welcome email: Check this box if you want to send the default WordPress welcome and password set email to the users created through tagging.
Finally, map the FluentCRM Tag/s to their corresponding Space/s or Course/s by clicking the Arrow Icon.
Also, don’t forget to check the “Sync this tag with Space/Course access” box to ensure the CRM Contacts add to the Spaces/Courses based on selected Tag/s.
“For example, I set “New” as the CRM tag for the “Announcement” space. Now, any CRM Contact with the “New” tag will automatically become a member of the Announcement space.”
Once you are done, click the Save Settings button to save all the changes.
Workaround for Existing Contacts #
Access Management controls adding contacts to Spaces and Courses based on tags. However, it only takes effect after a tag is set within Access Management. If a contact already had the tag before it was configured in Access Management, they won’t be added automatically. The contact will only join the Space or Course once the tag is set through Access Management.
Here, we’ll show you how to add contacts to your Space or Courses using that tag. This workaround also allows you to perform various actions in Fluent Community.
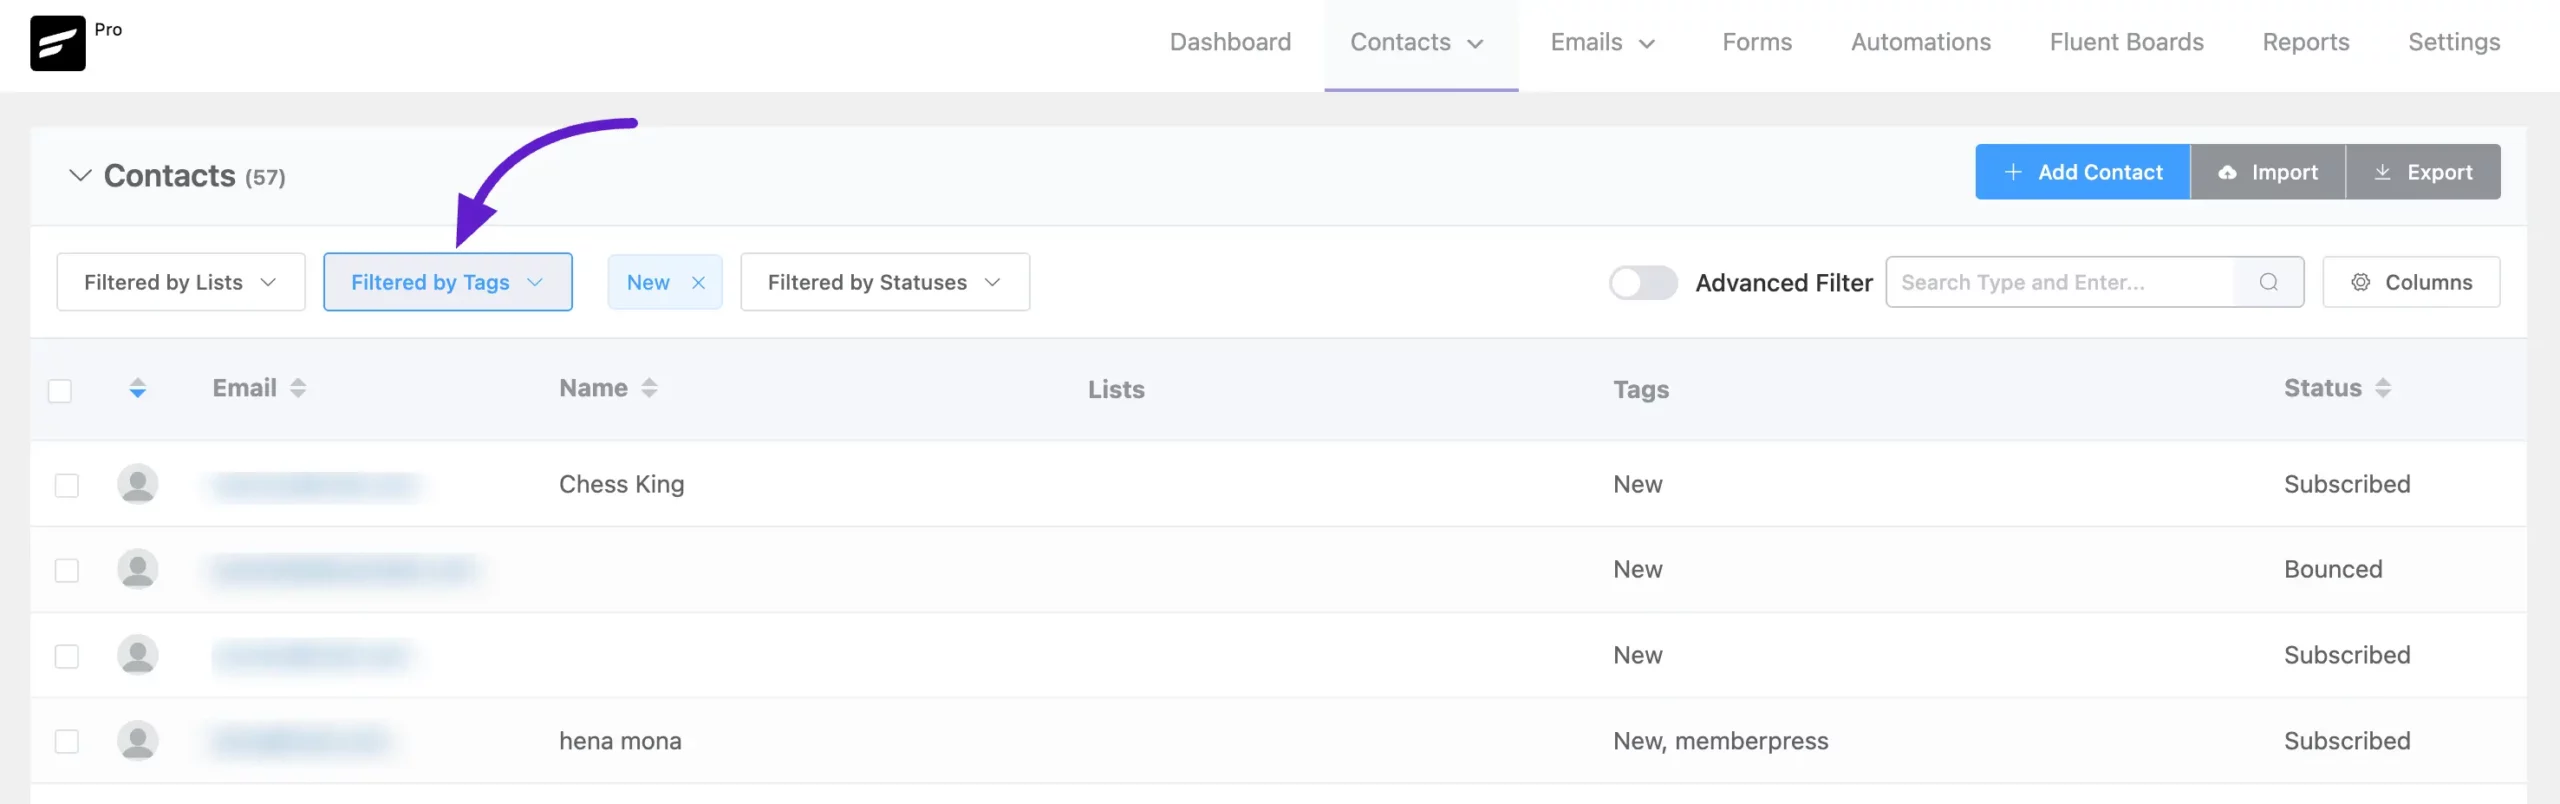
First, go to FluentCRM and select Contacts from the navigation bar. Then, filter your contacts by Tags and find the tag that you’ve set in FluentCommunity Access Management. Once you locate it, select the tag.
For example, here, we have selected the “New” tag.
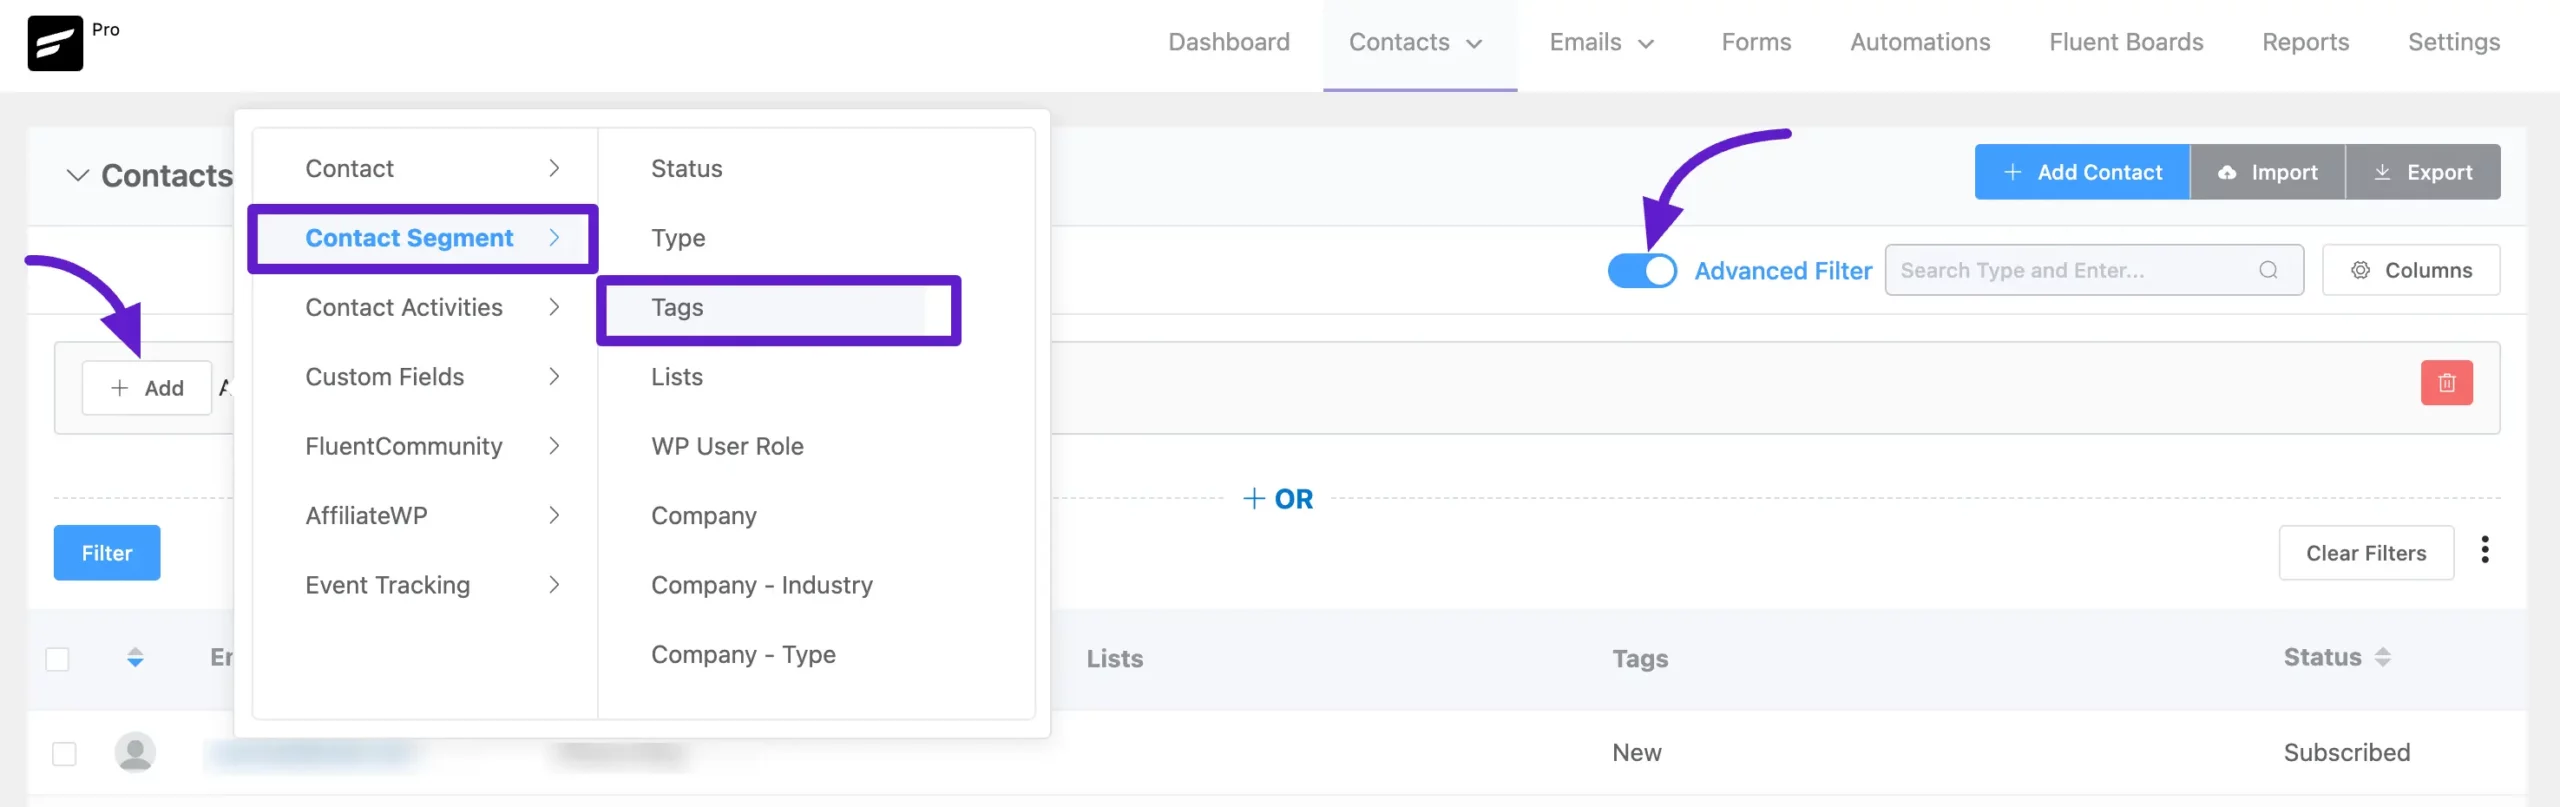
Alternatively, you can use FluentCRM’s Advanced Filter option to find contacts more precisely, add them to another tag, or perform other actions as needed.
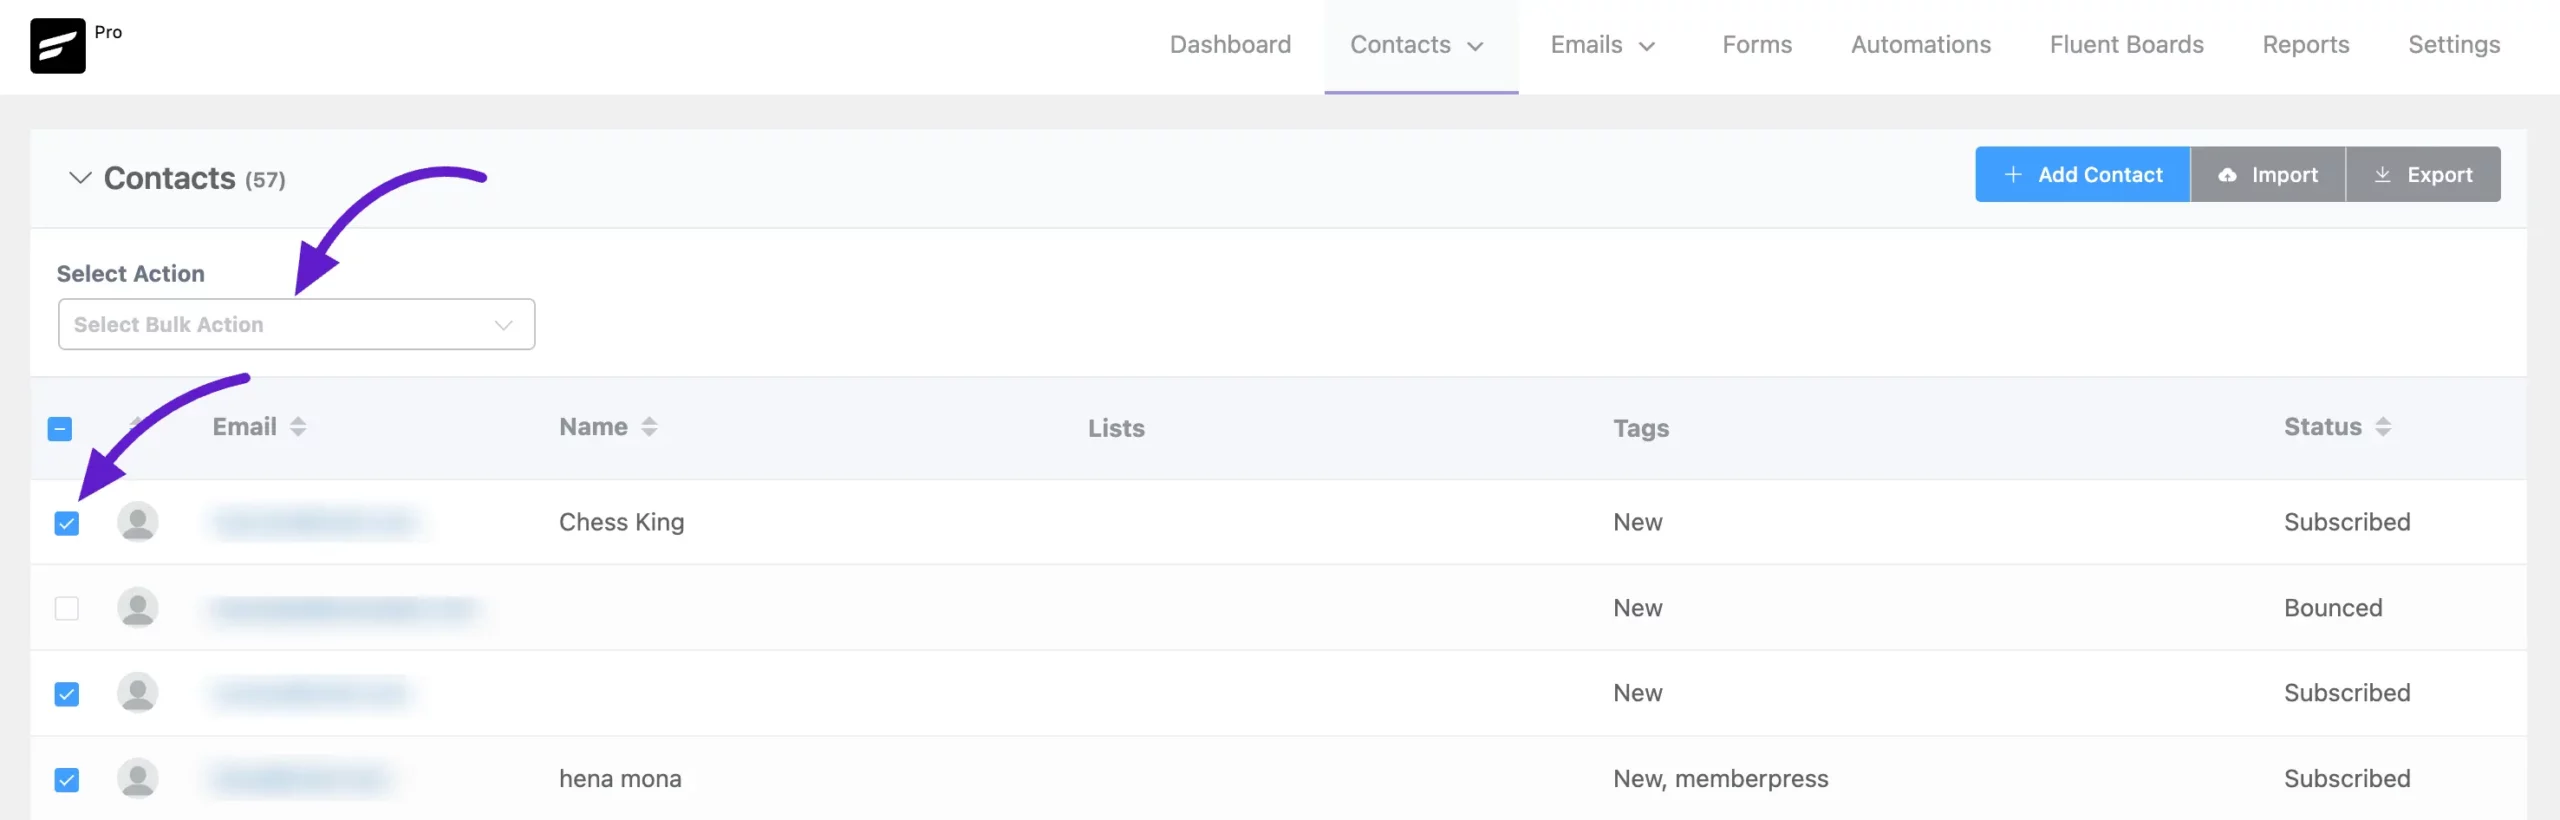
Now, you’ll see the filtered contacts for the “New” tag that we selected as an example. Select all contacts or choose specific ones that existed previously, based on your preference.
Next, you’ll find the Select Action option, which provides various bulk actions for your contacts.
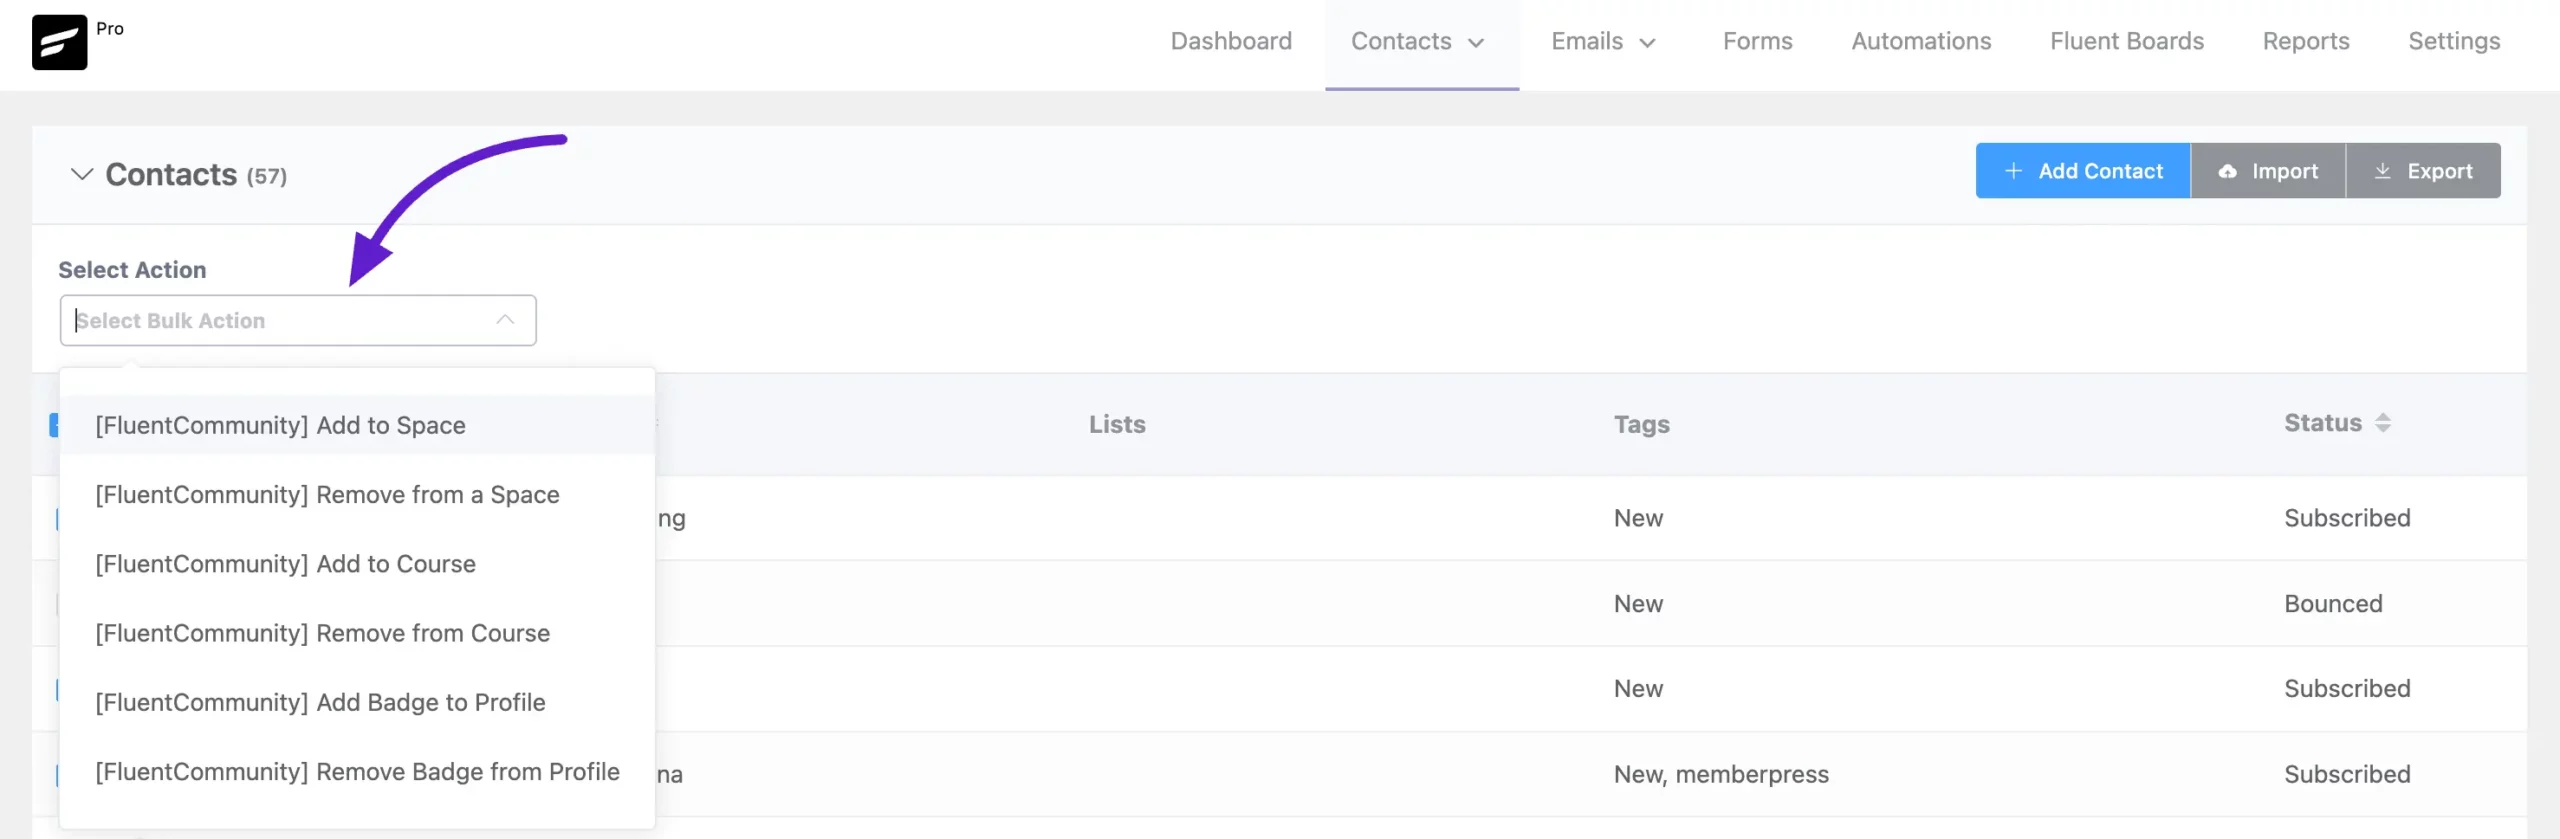
In the dropdown menu, you’ll find several FluentCommunity actions, including:
- Add to Space
- Remove from Space
- Add to Course
- Remove from Course
- Add Badge to Profile
- Remove Badge from Profile
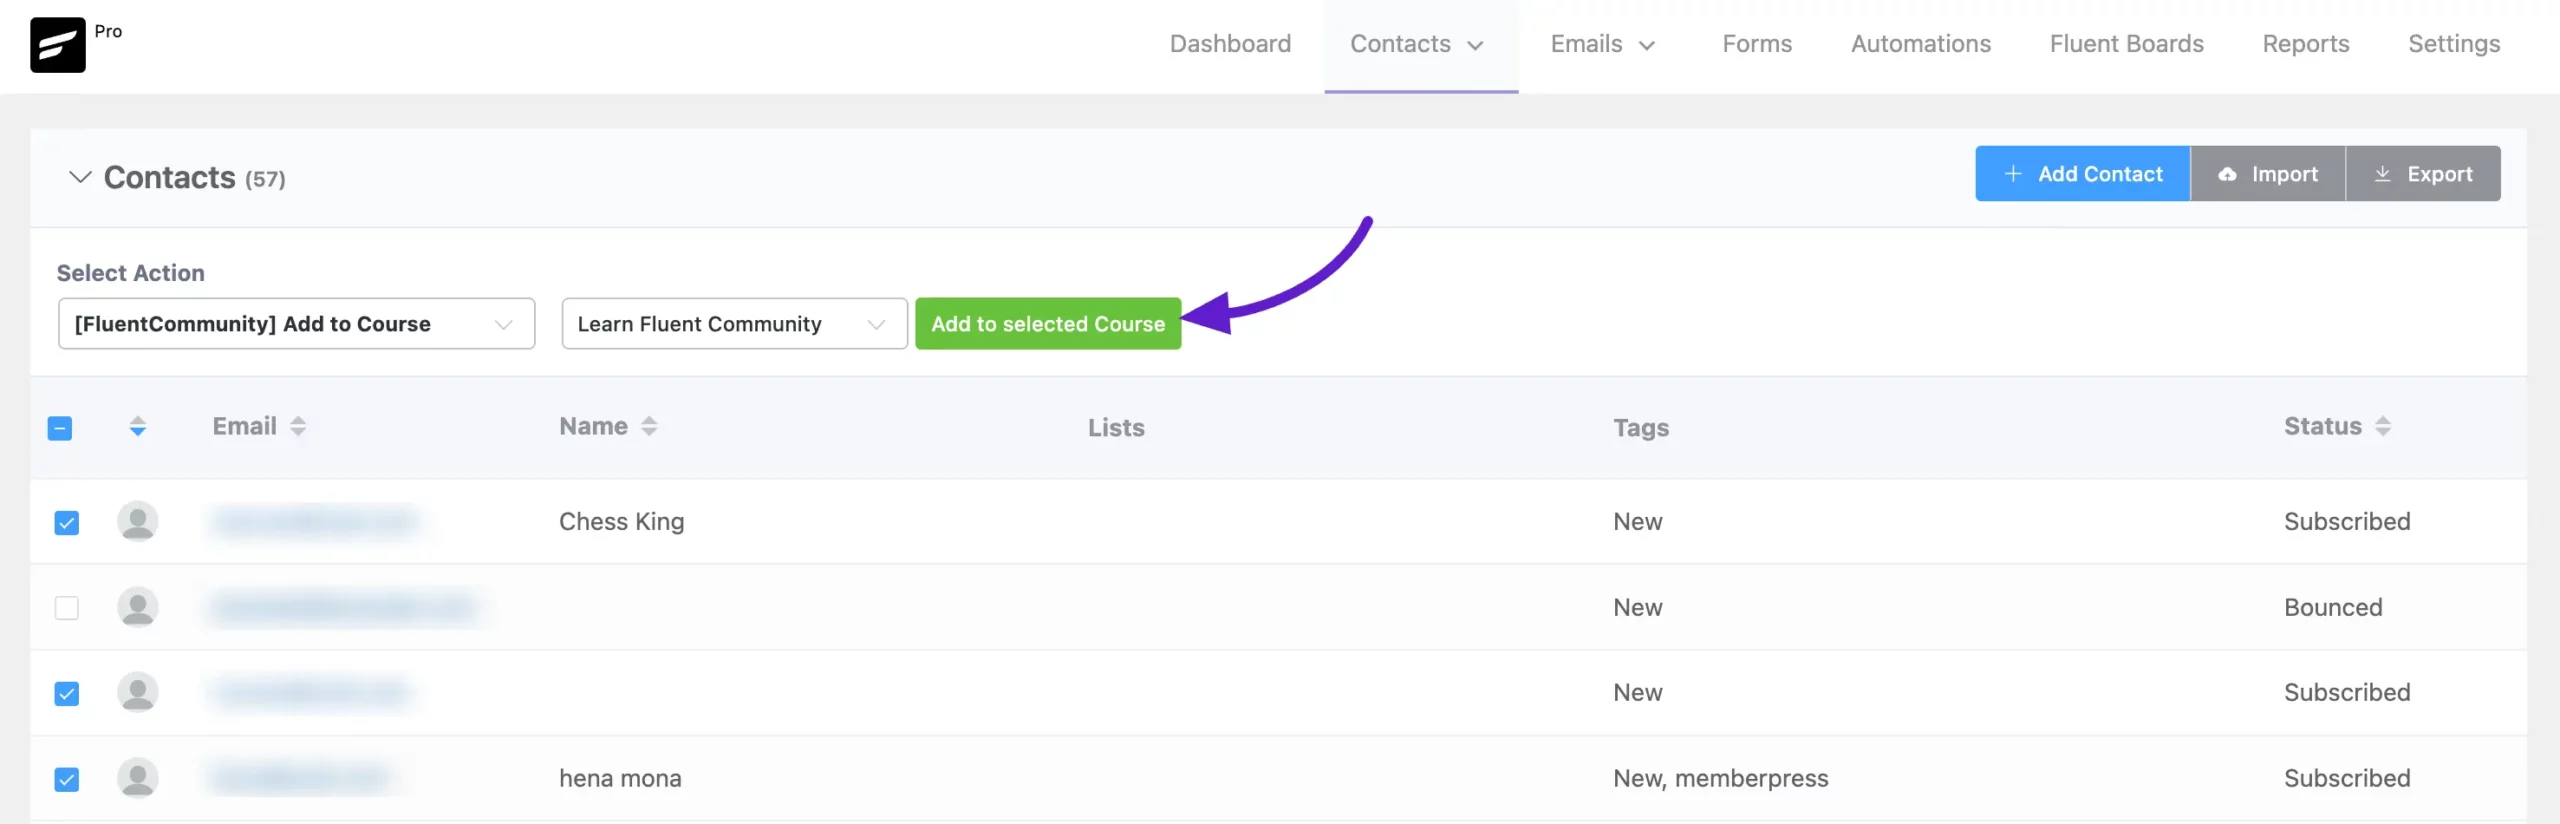
Select the action you want to apply to your contacts. For example, here, we’re choosing “Add to Course.” After selecting this option, another dropdown will appear where you can choose the specific course to add your contacts to.
Finally, click the “Add to Selected Course” button, and all selected contacts will be added to the course you’ve chosen.
Preview of Added Contacts #
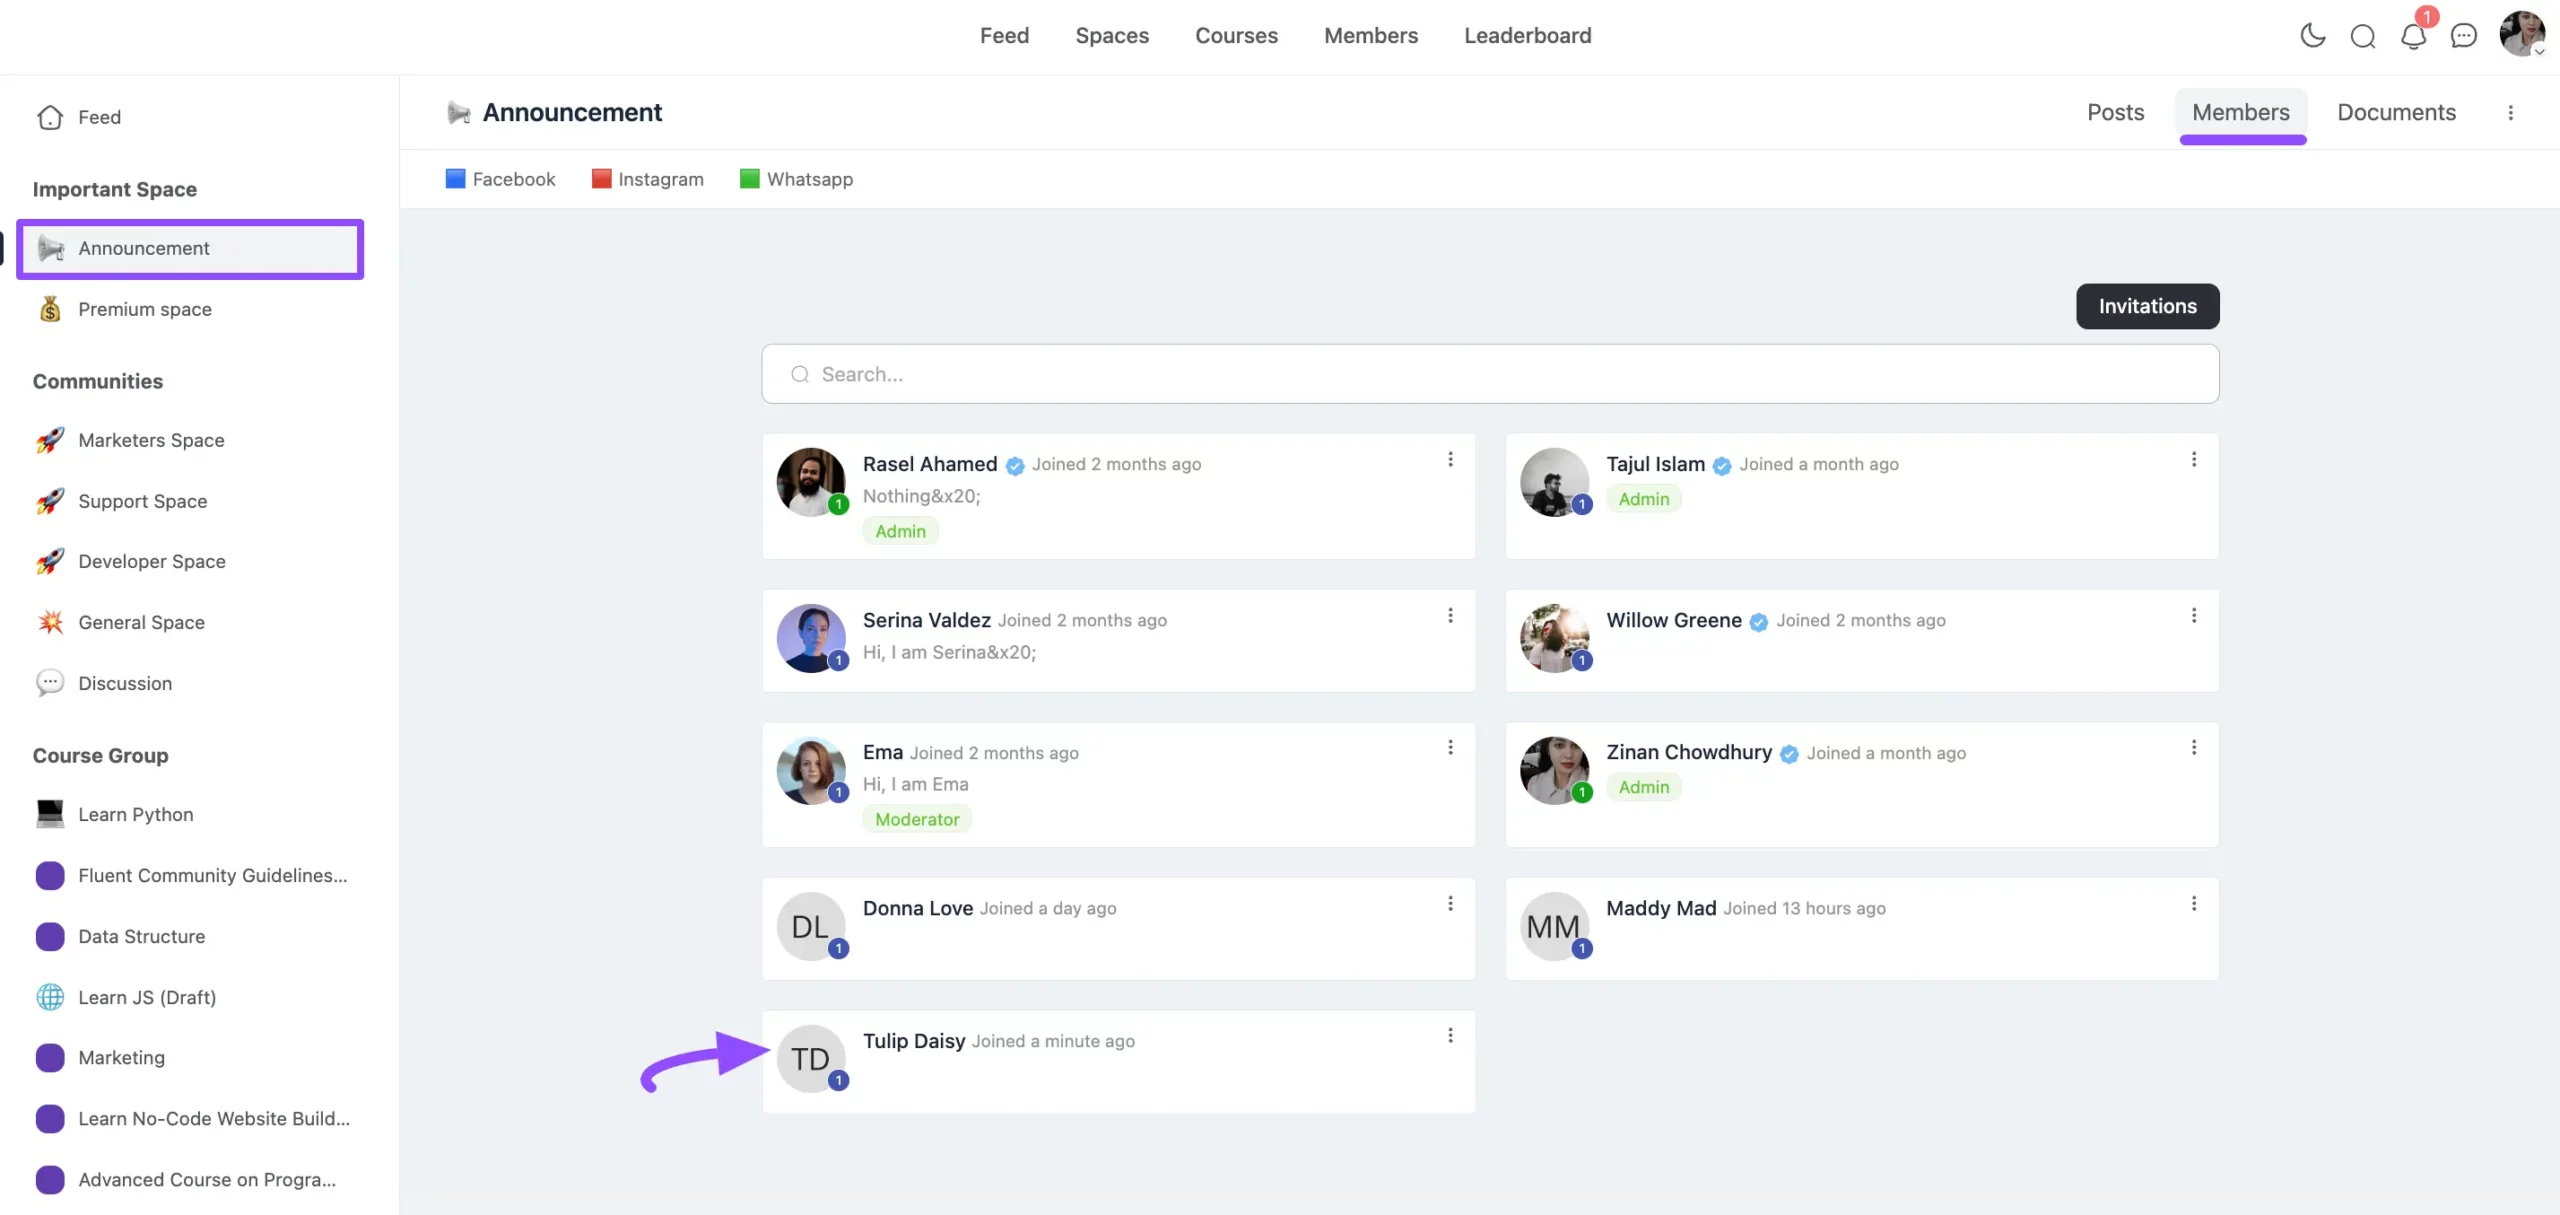
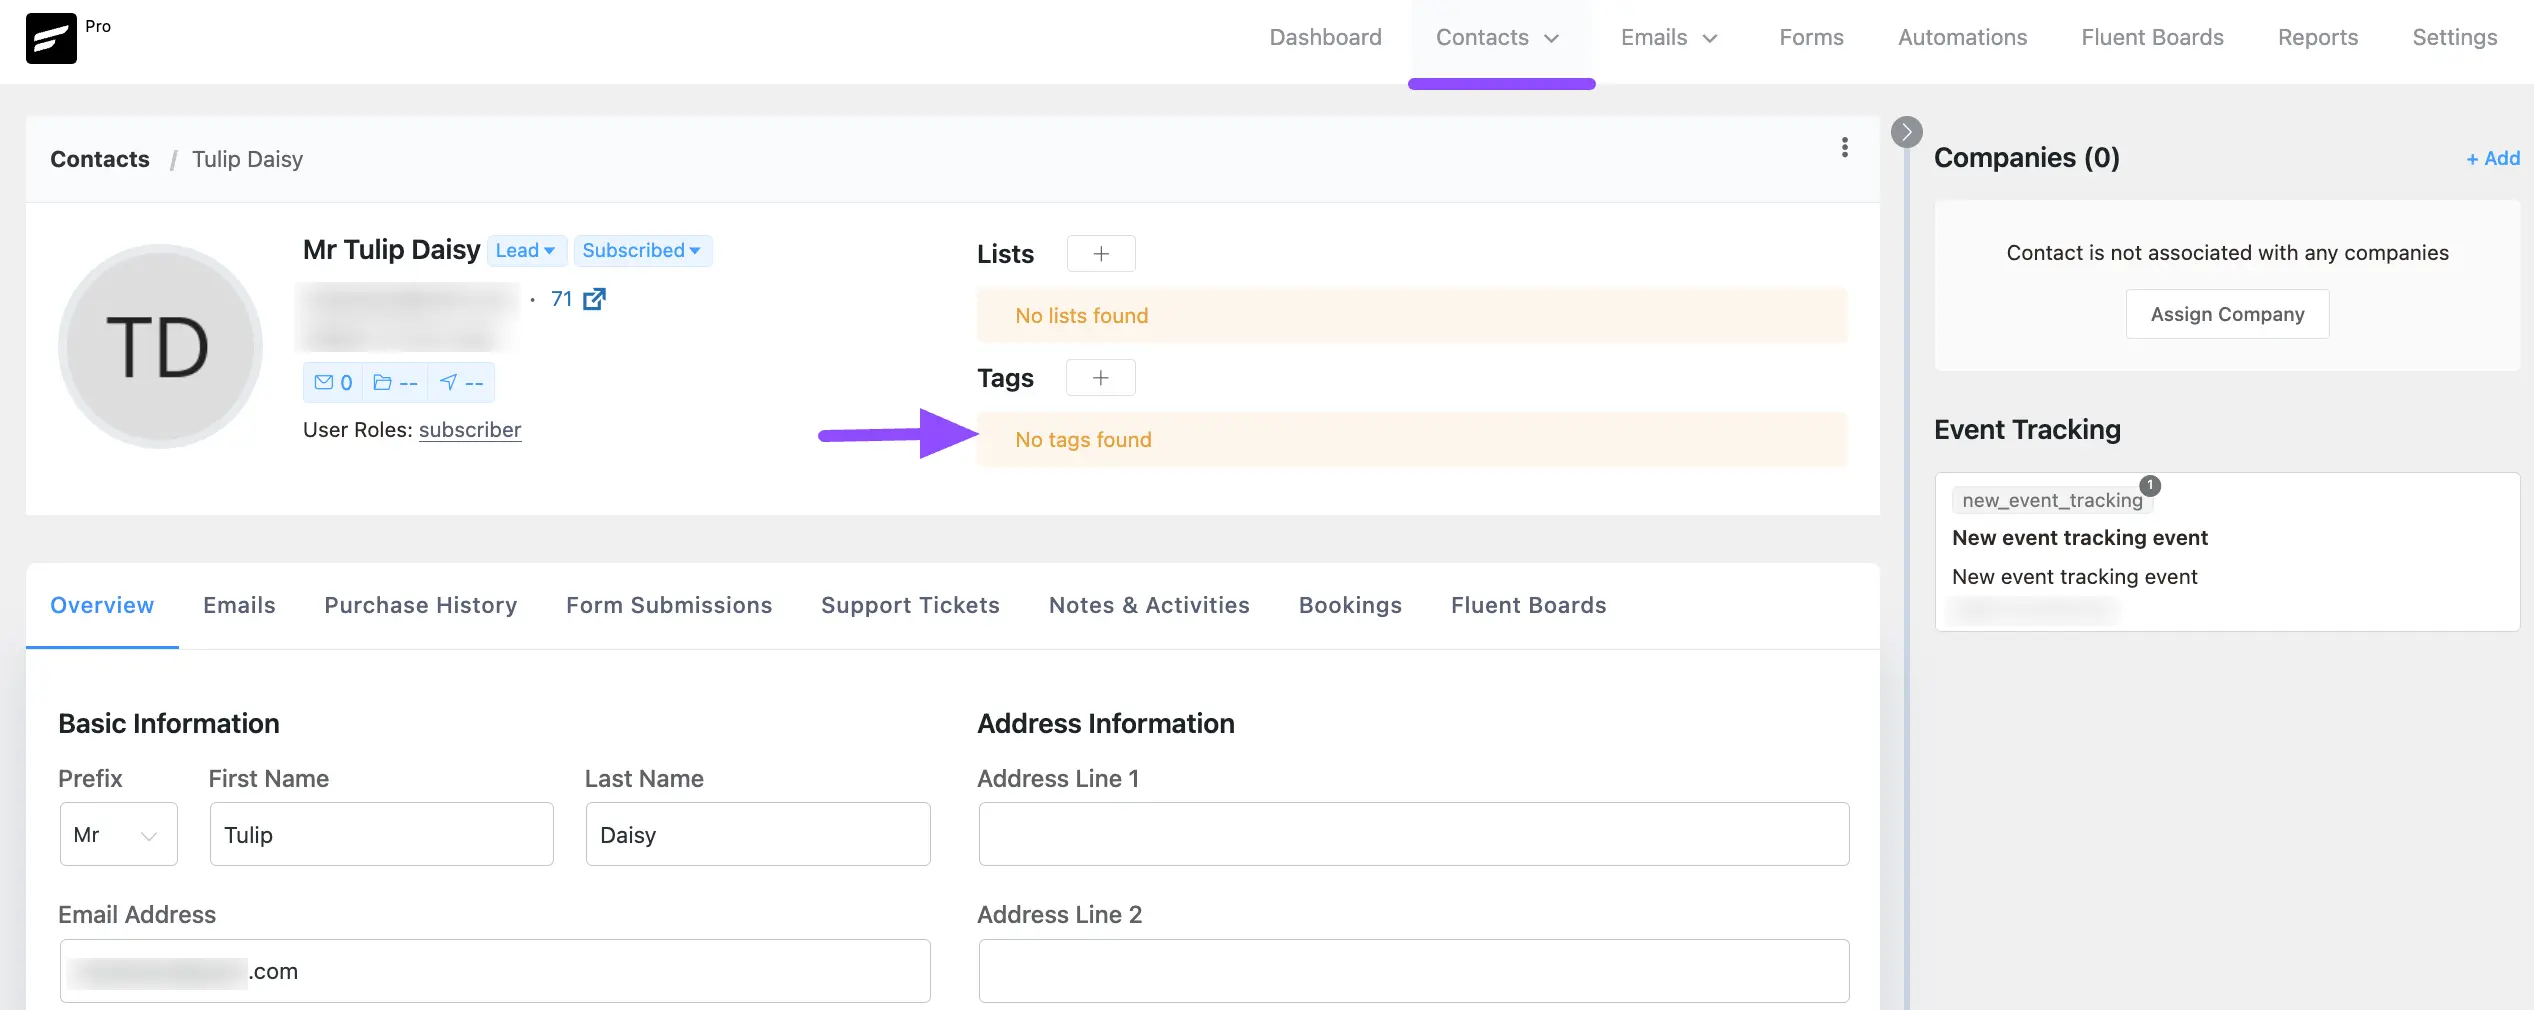
Here, you can see the “New” tag is applied to a CRM Contact named “Tulip Daisy”.

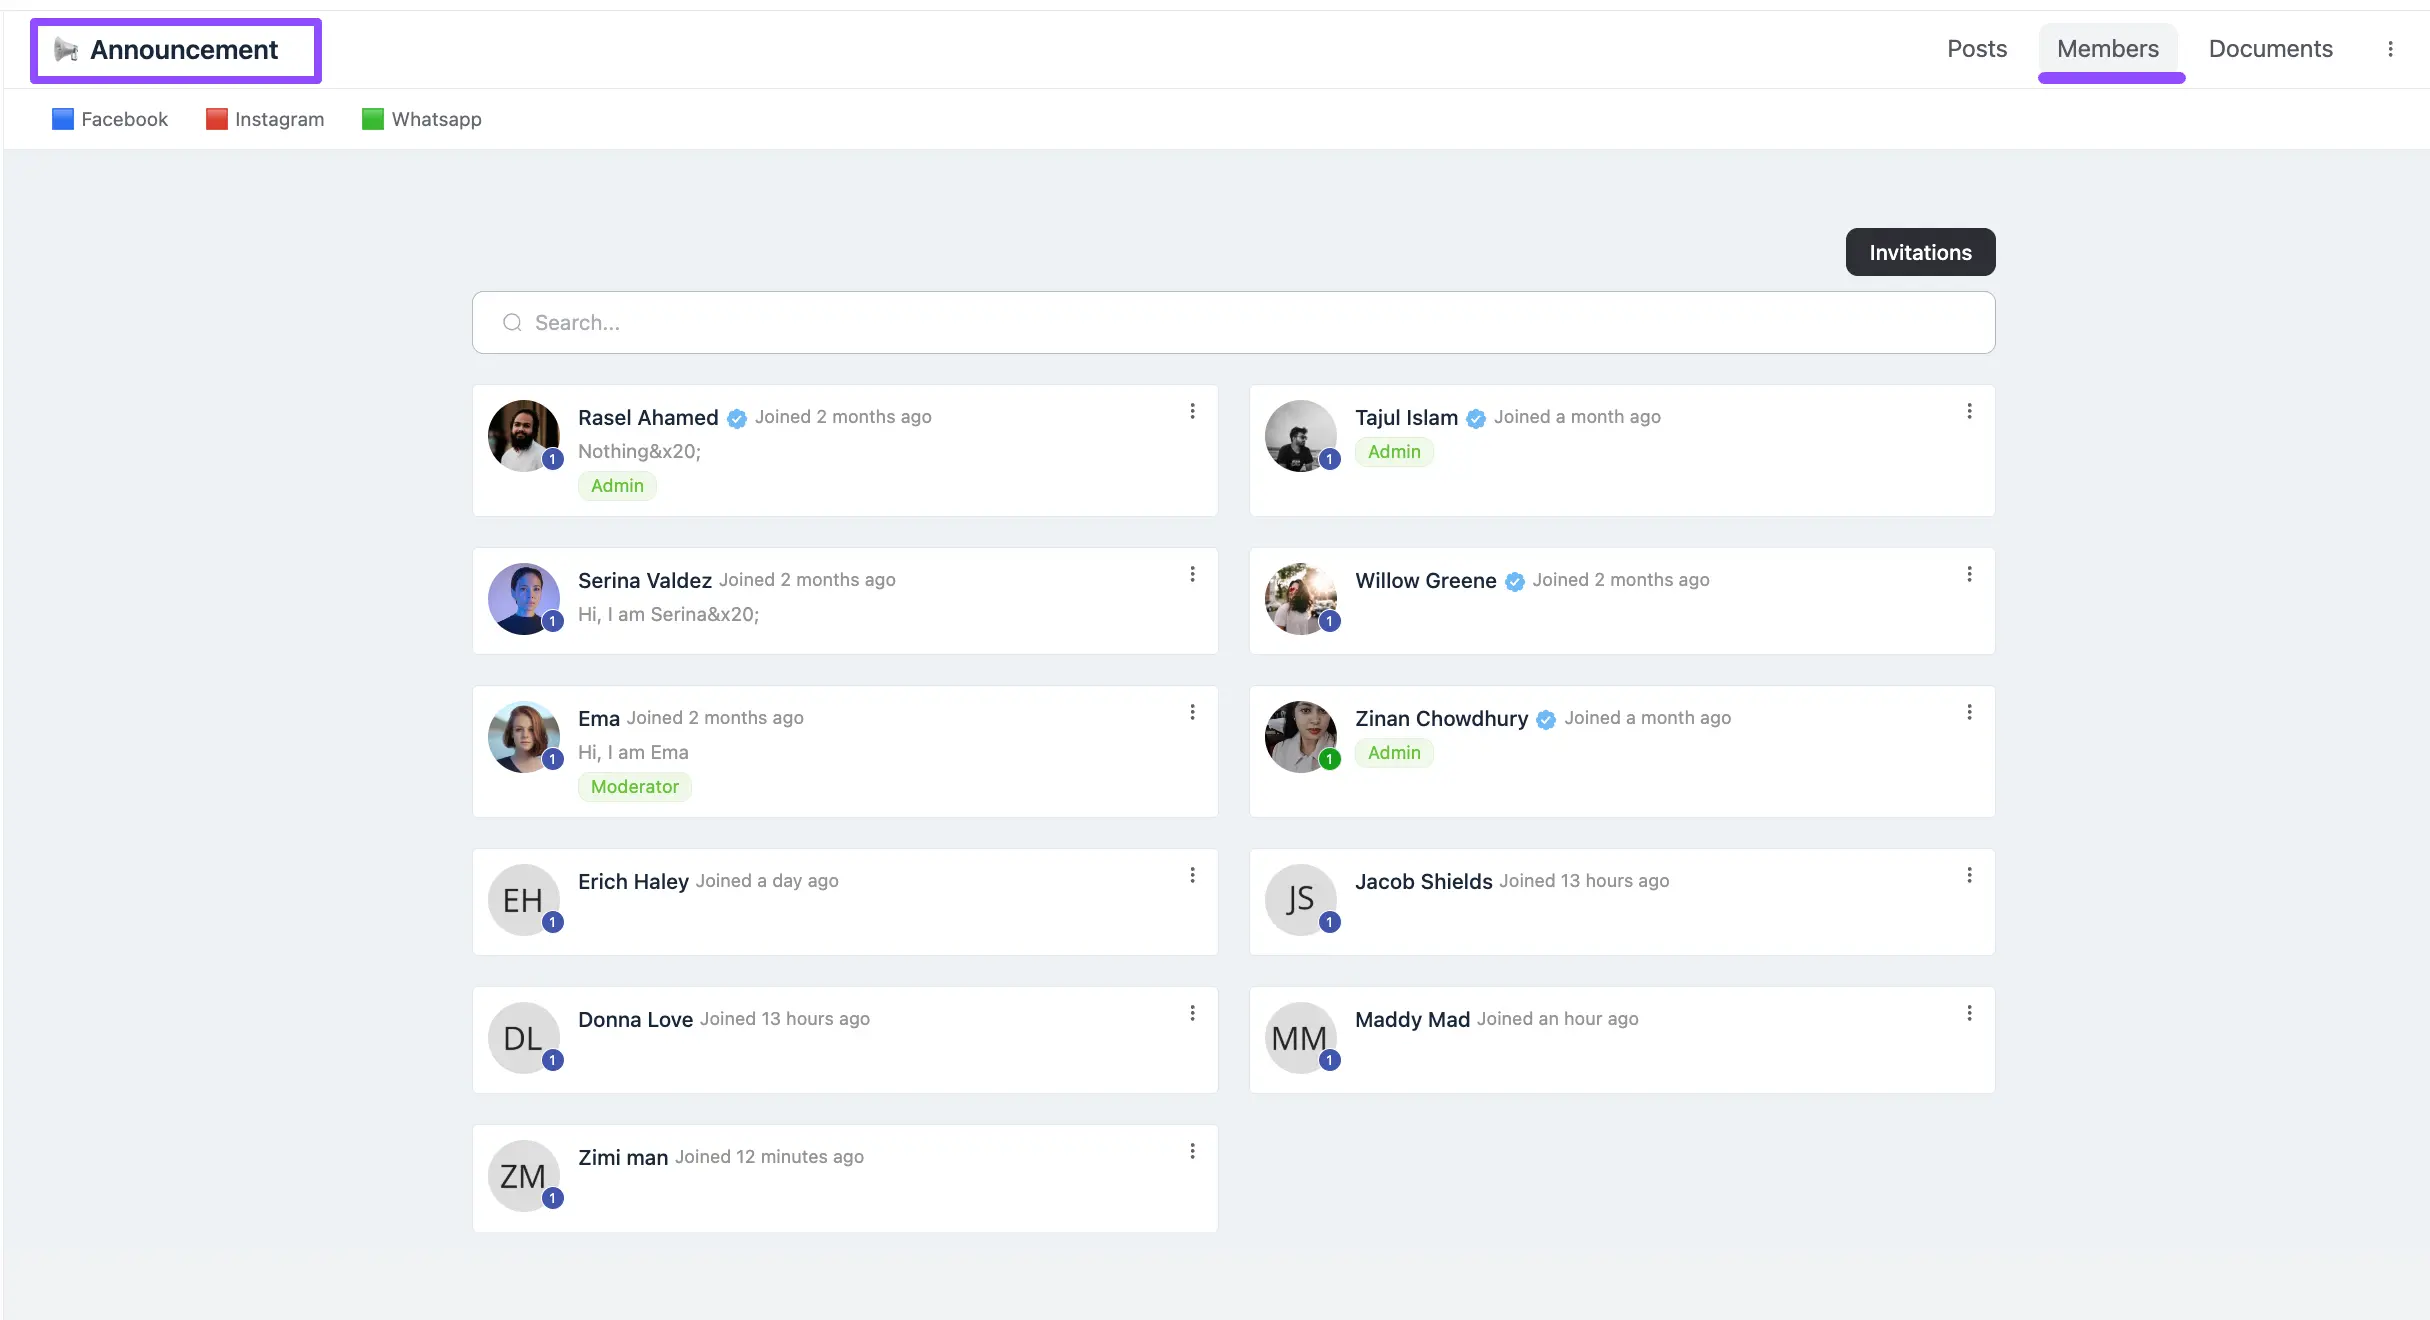
And, you can see the “Tulip Daisy” contact is directly added to the “Announcement” space.
Removing Tags from Contacts #
Also, if you removed the configured tag from the CRM Contacts like below.
You can see, the contact will be automatically removed from the configured space.
Viewing Added Contacts through Specific User Profile #
You can also, see the added contacts from the Members section in the top navbar.
Once you go to a specific user profile, you can see the added Tag/s and CRM Profile activities in the right-hand box.
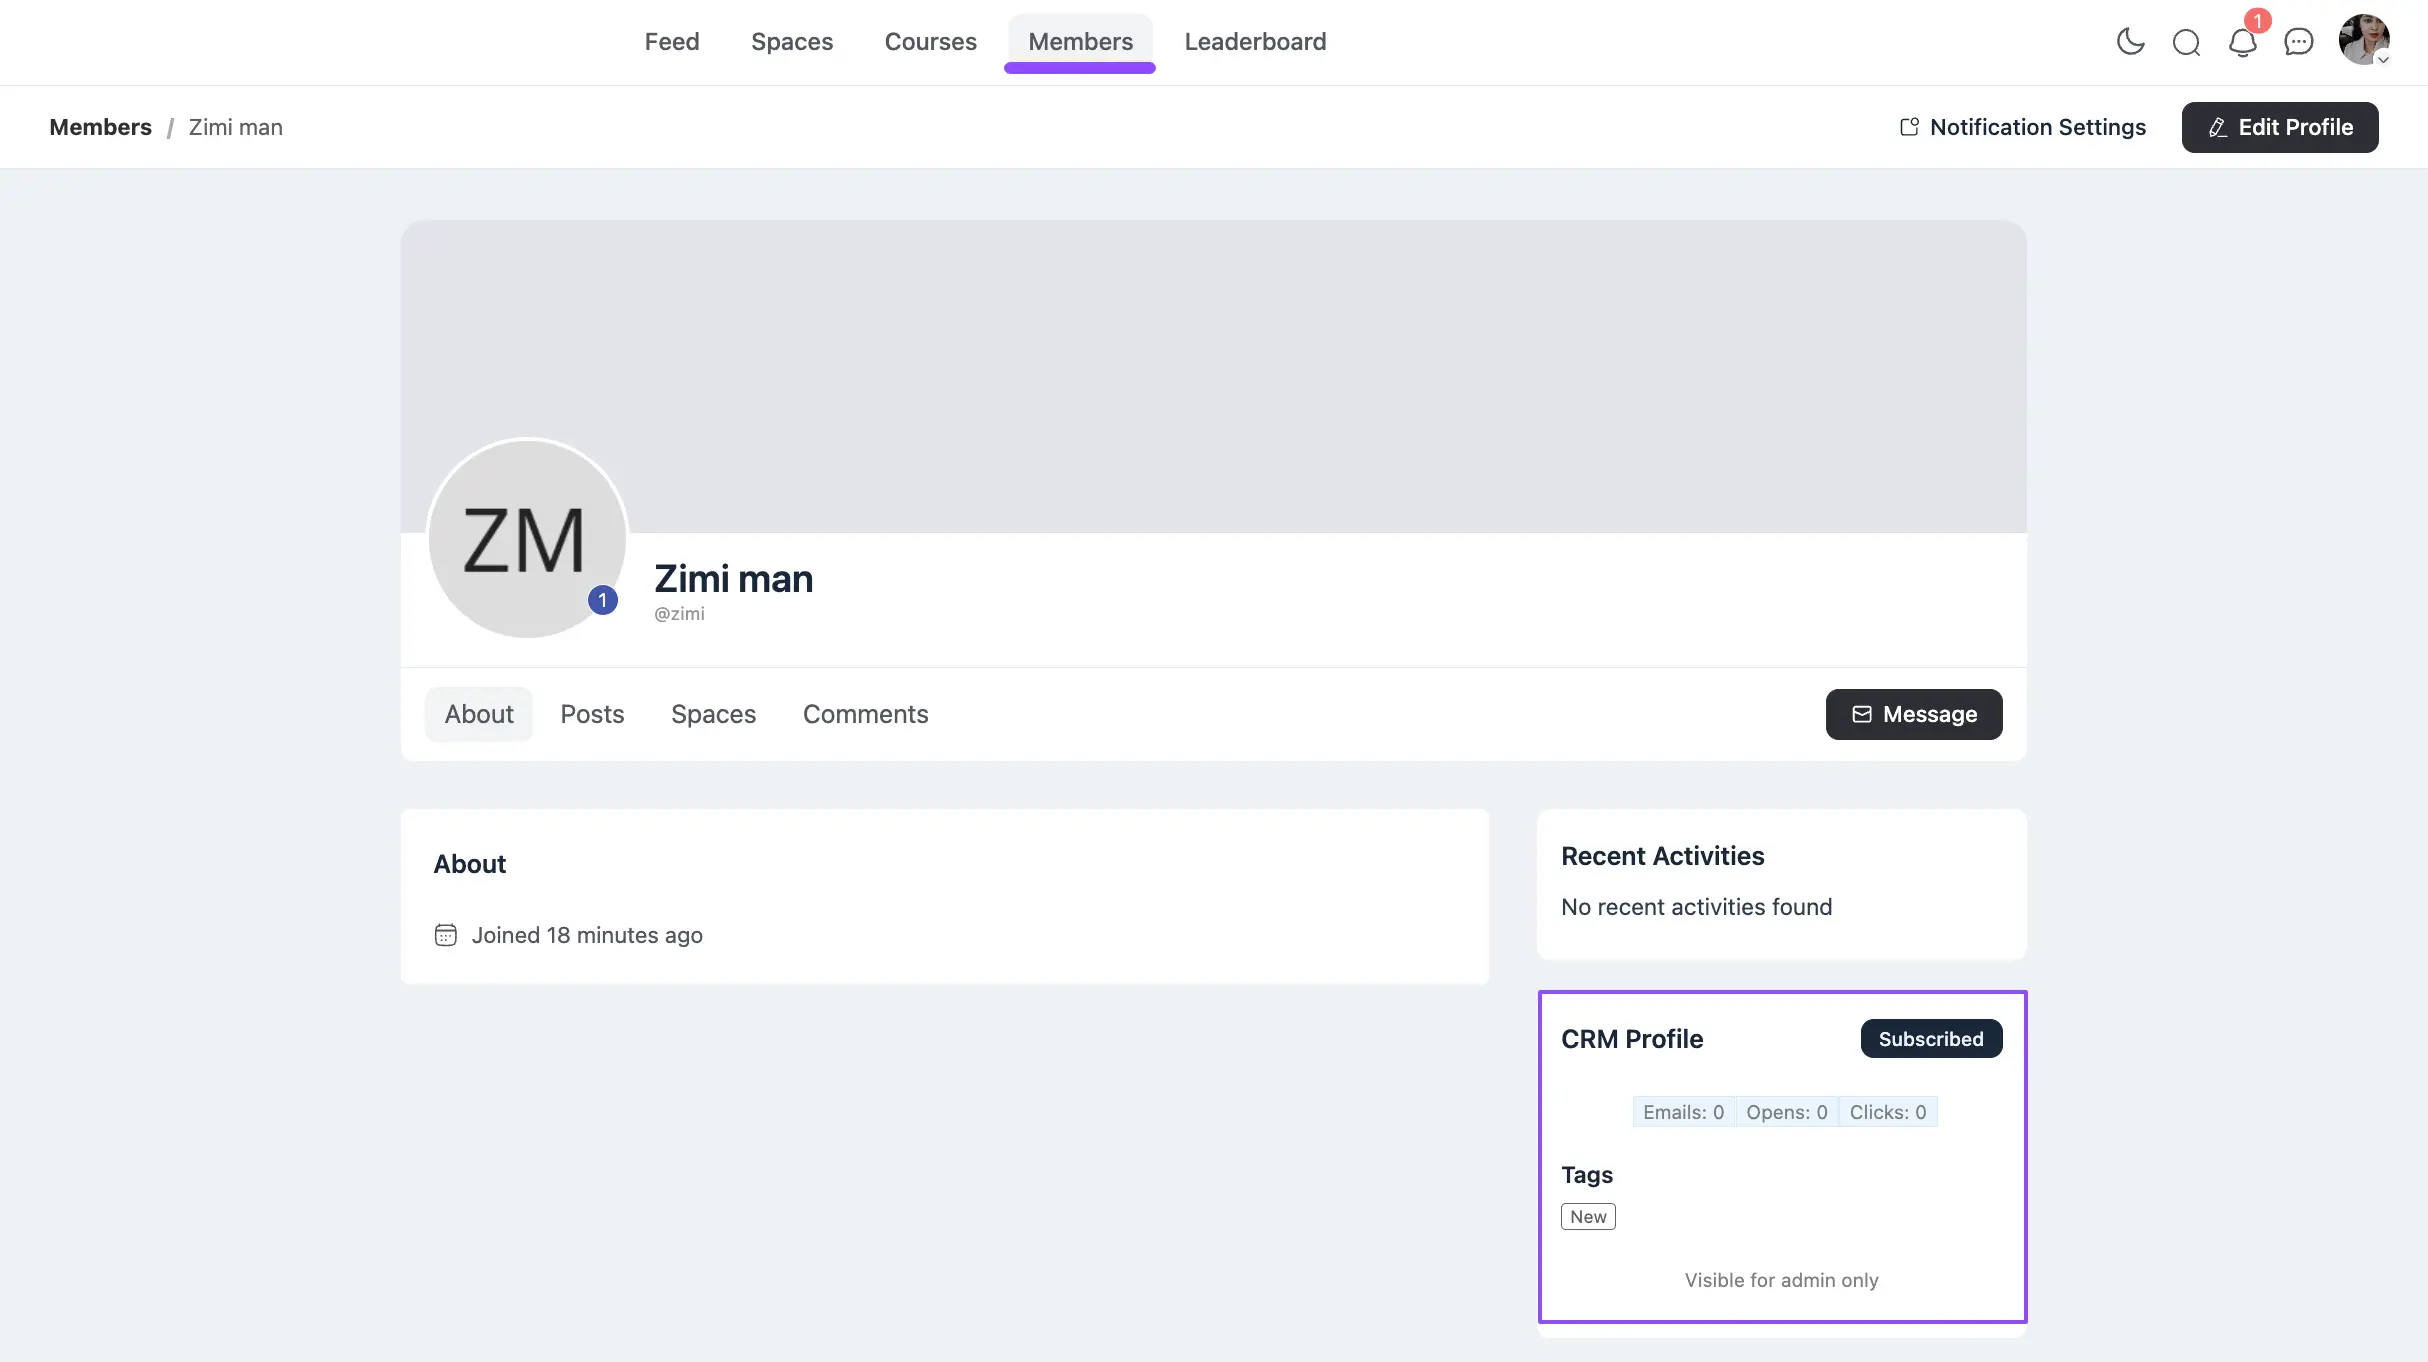
From this user profile, you can also view all the configured space/s or course/s joined as a member through FluentCRM Tag/s.

If you have any further questions, concerns, or suggestions, please do not hesitate to contact our @support team. Thank you.


