

In FluentCommunity, you can make your Spaces and Courses private to get paid by your clients. In this case, if you need to collect recurring payments from your clients, you can use Paymattic (a WordPress Plugin for collecting payments through Forms). Paymattic will allow you to collect Recurring Payments for the Private Space/Course.
This guide will guide you on how to collect recurring payments from a space/course within FluentCommunity using Paymattic.
Collect Recurring Payments from Space/Course #
Before starting the process, ensure you monetize your Space/Course through the Paymattic.
To learn how to Monetize Space/Course using Paymattic Plugin, read this Documentation thoroughly.
Add Monetized Space/Course in Paymattic Subscription Form #
To collect recurring payments for a space/course, you need to integrate the desired Space/Course of FluentCommunity into a Subscription Form of Paymattic.
To learn how to add a space/course in a Subscription Form of Paymattic, follow the steps below –
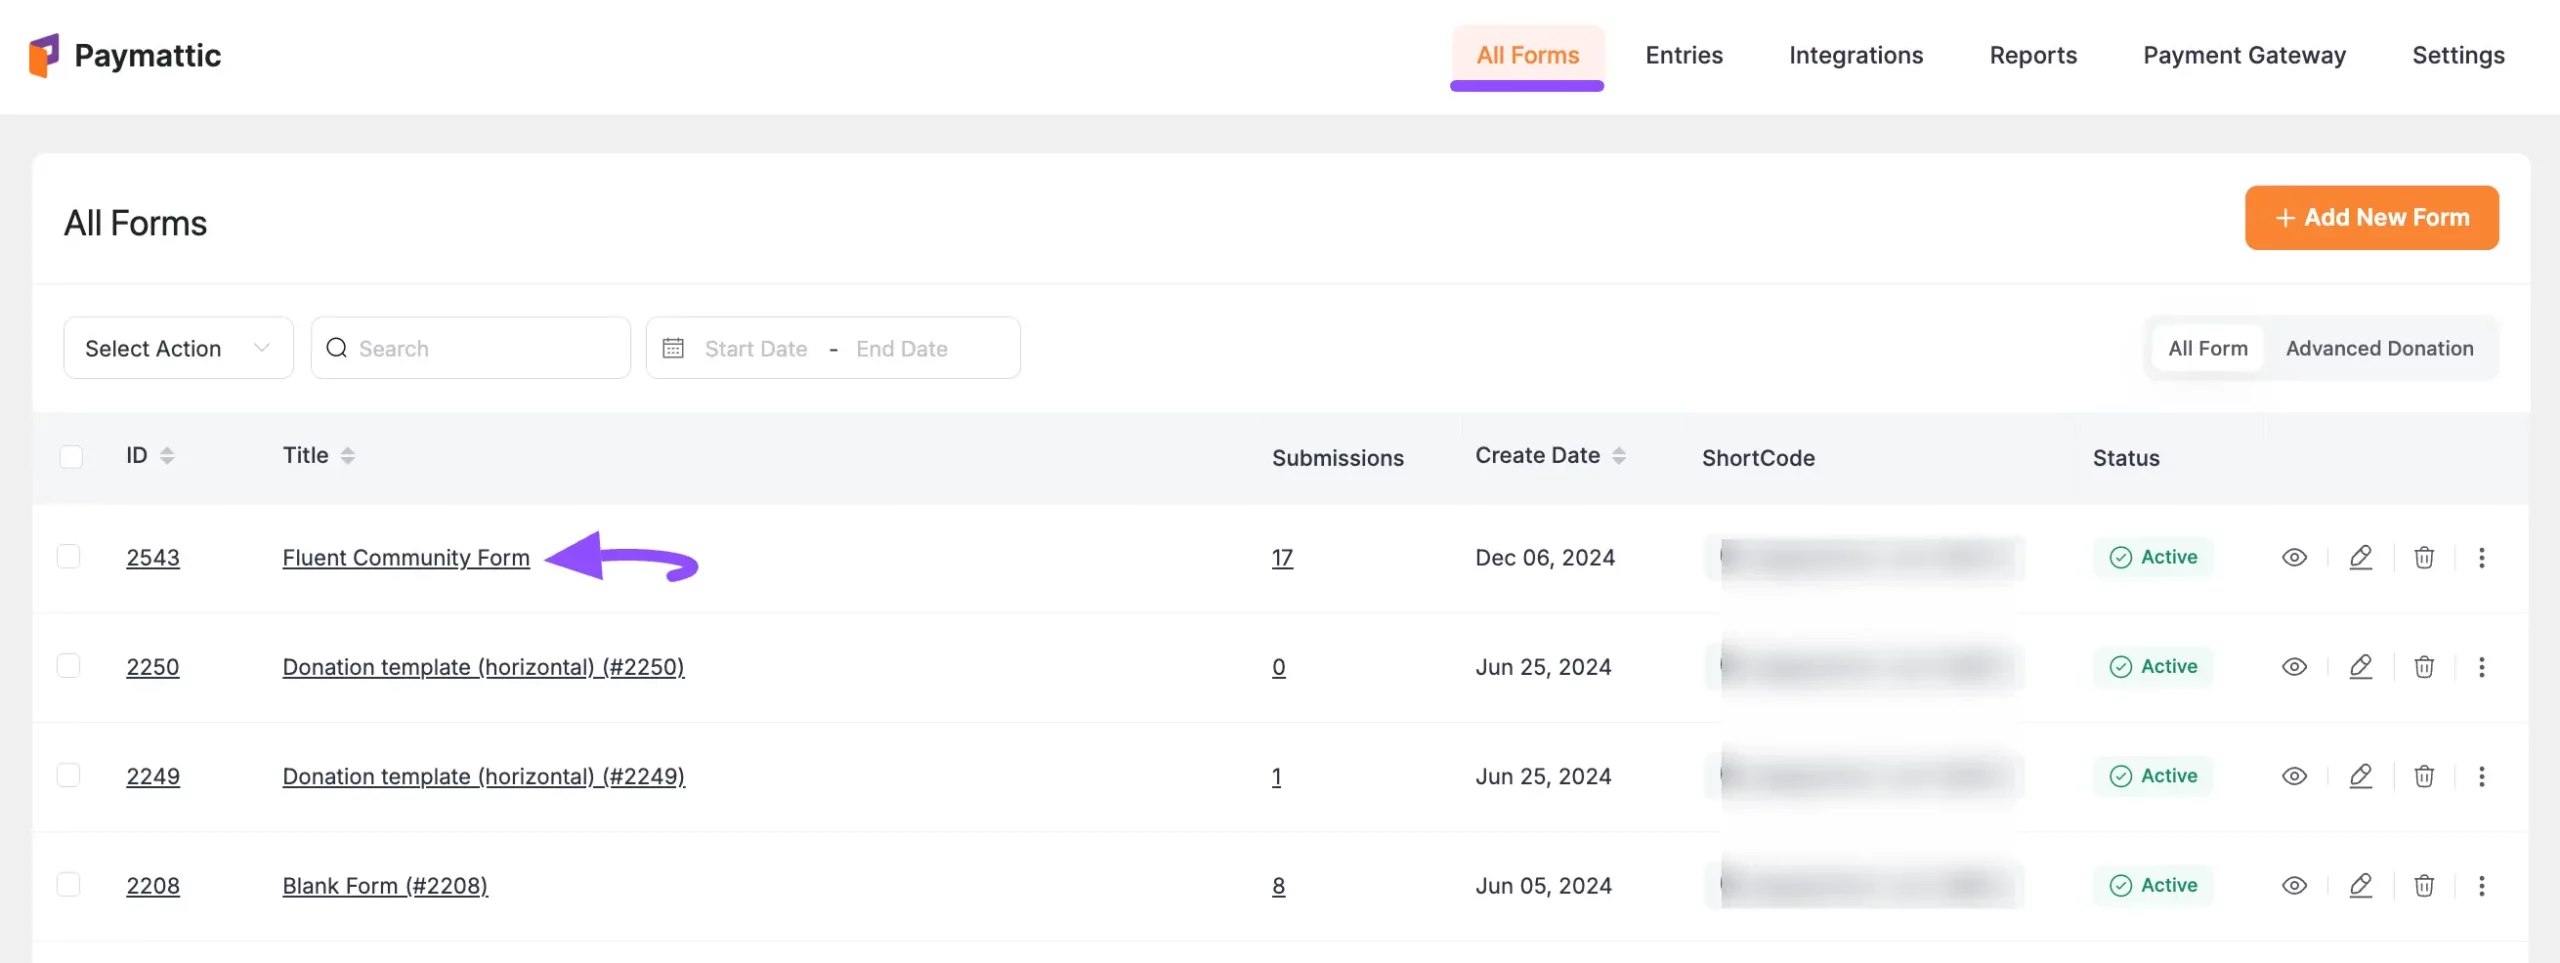
First, go to Paymattic Dashboard, go to All Forms, and open a desired Subscription Form where you want to add the space/course.
But, if you do not have an existing Subscription Form, read this Documentation to create a new one.
For example, I chose an existing subscription form to show you the process.
Once you are on the Editor page, you can see that the Subscription Item field is already added.
You can customize its settings anytime according to your requirements by clicking the Settings Icon on the right side.
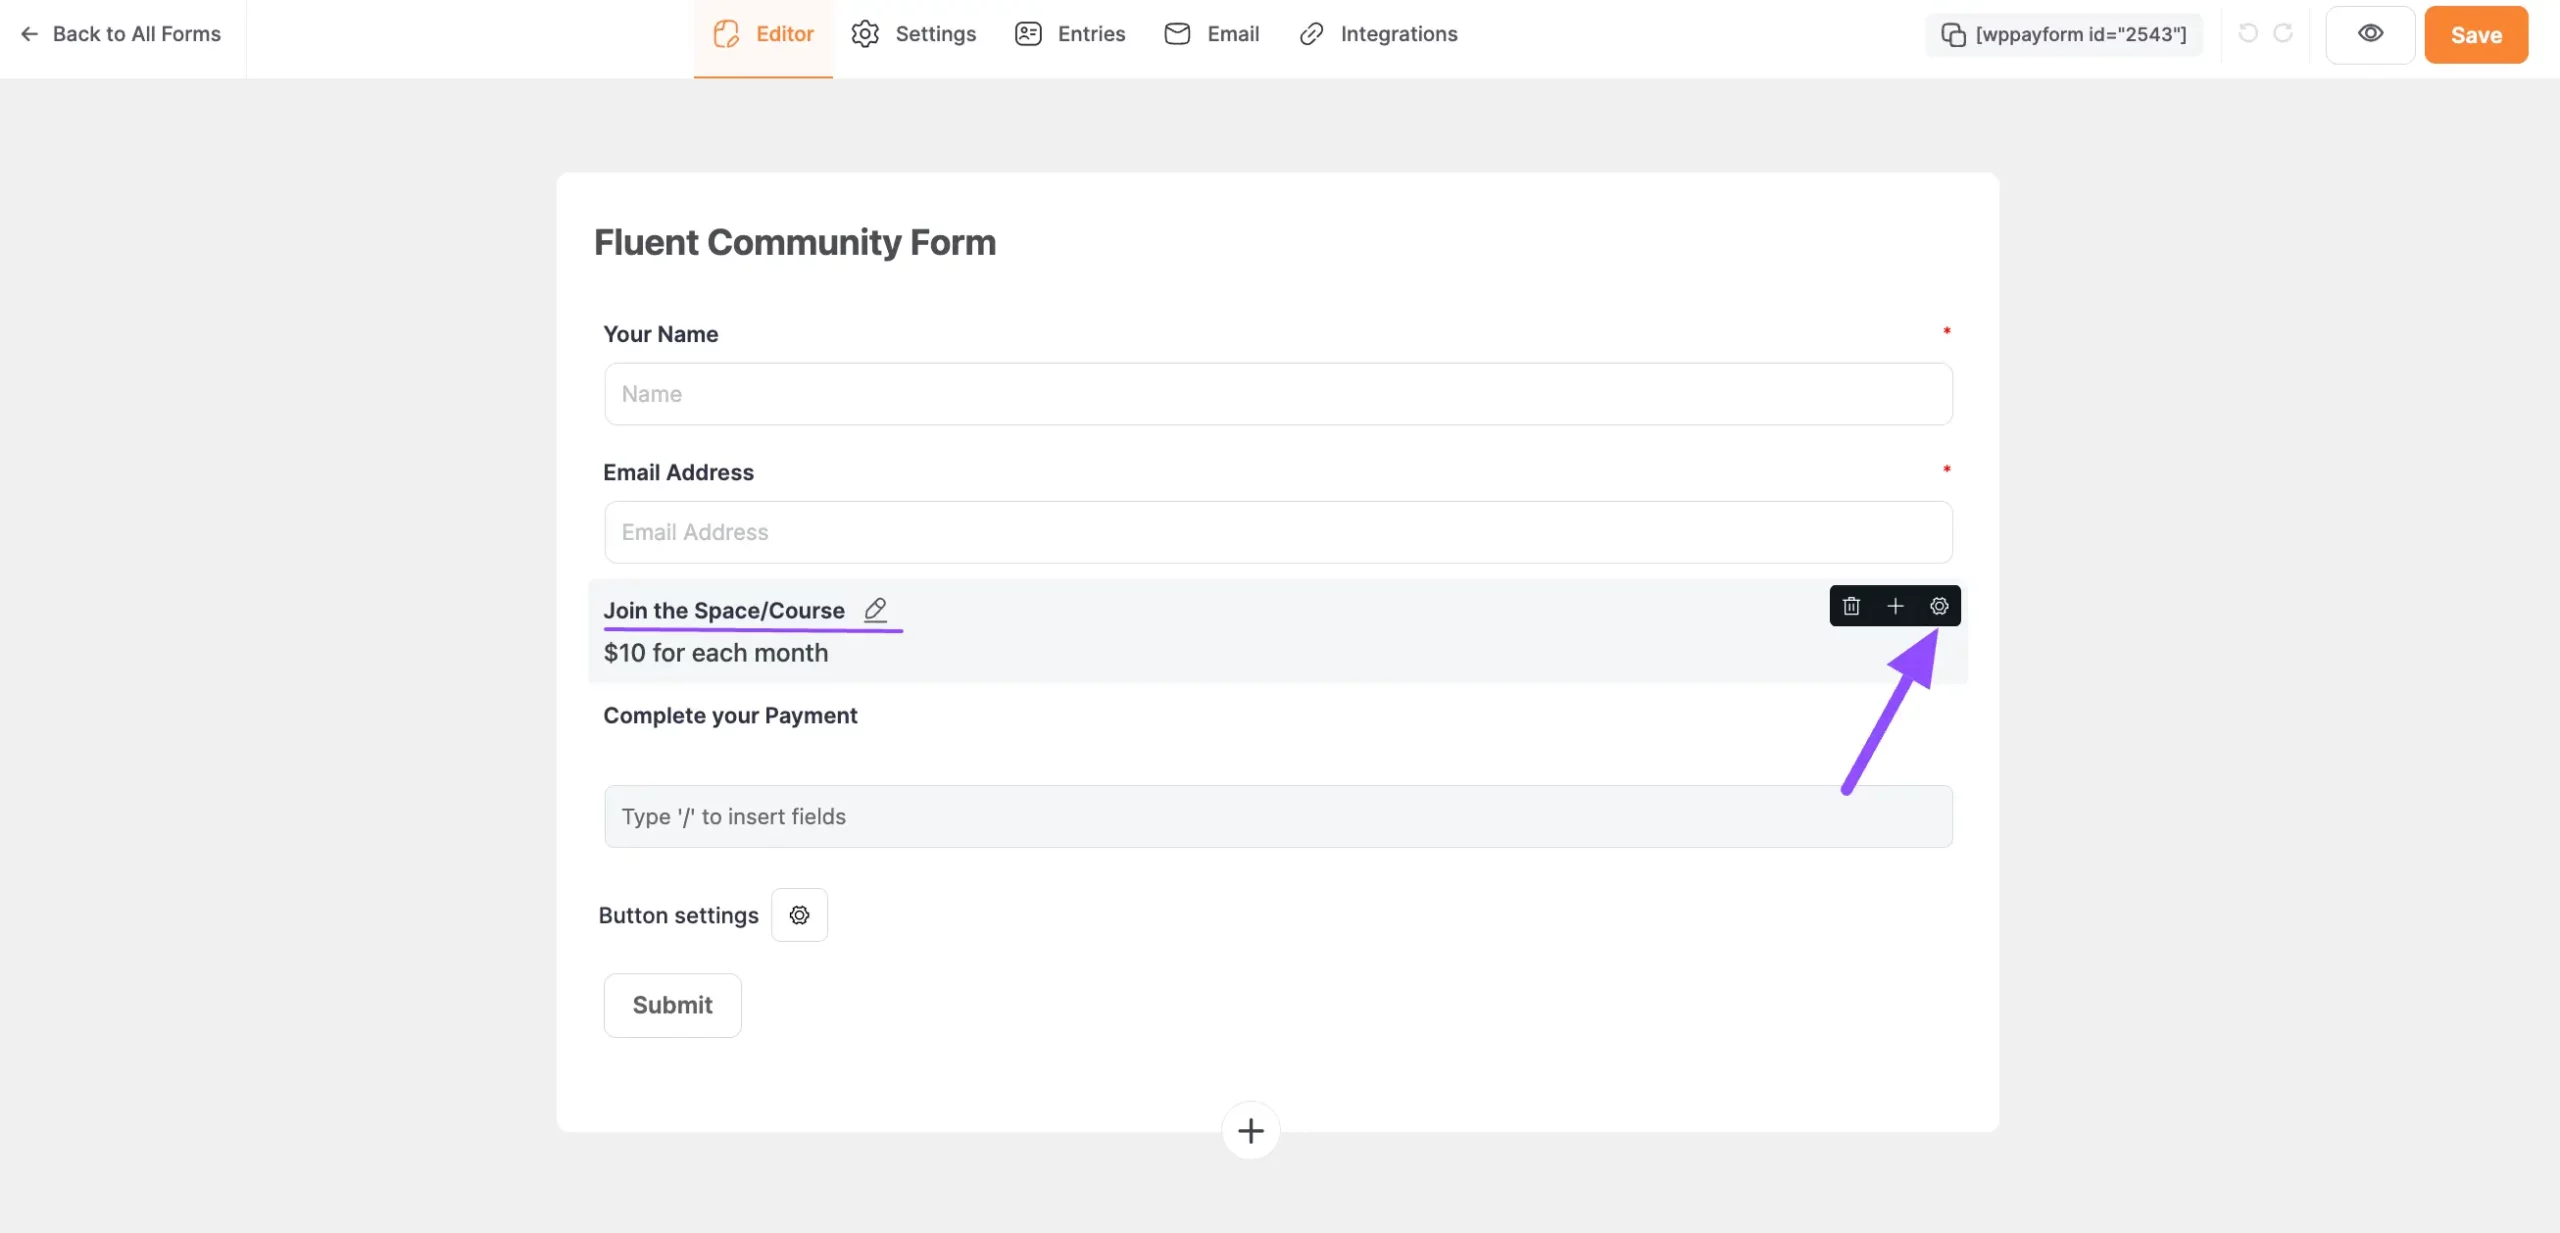
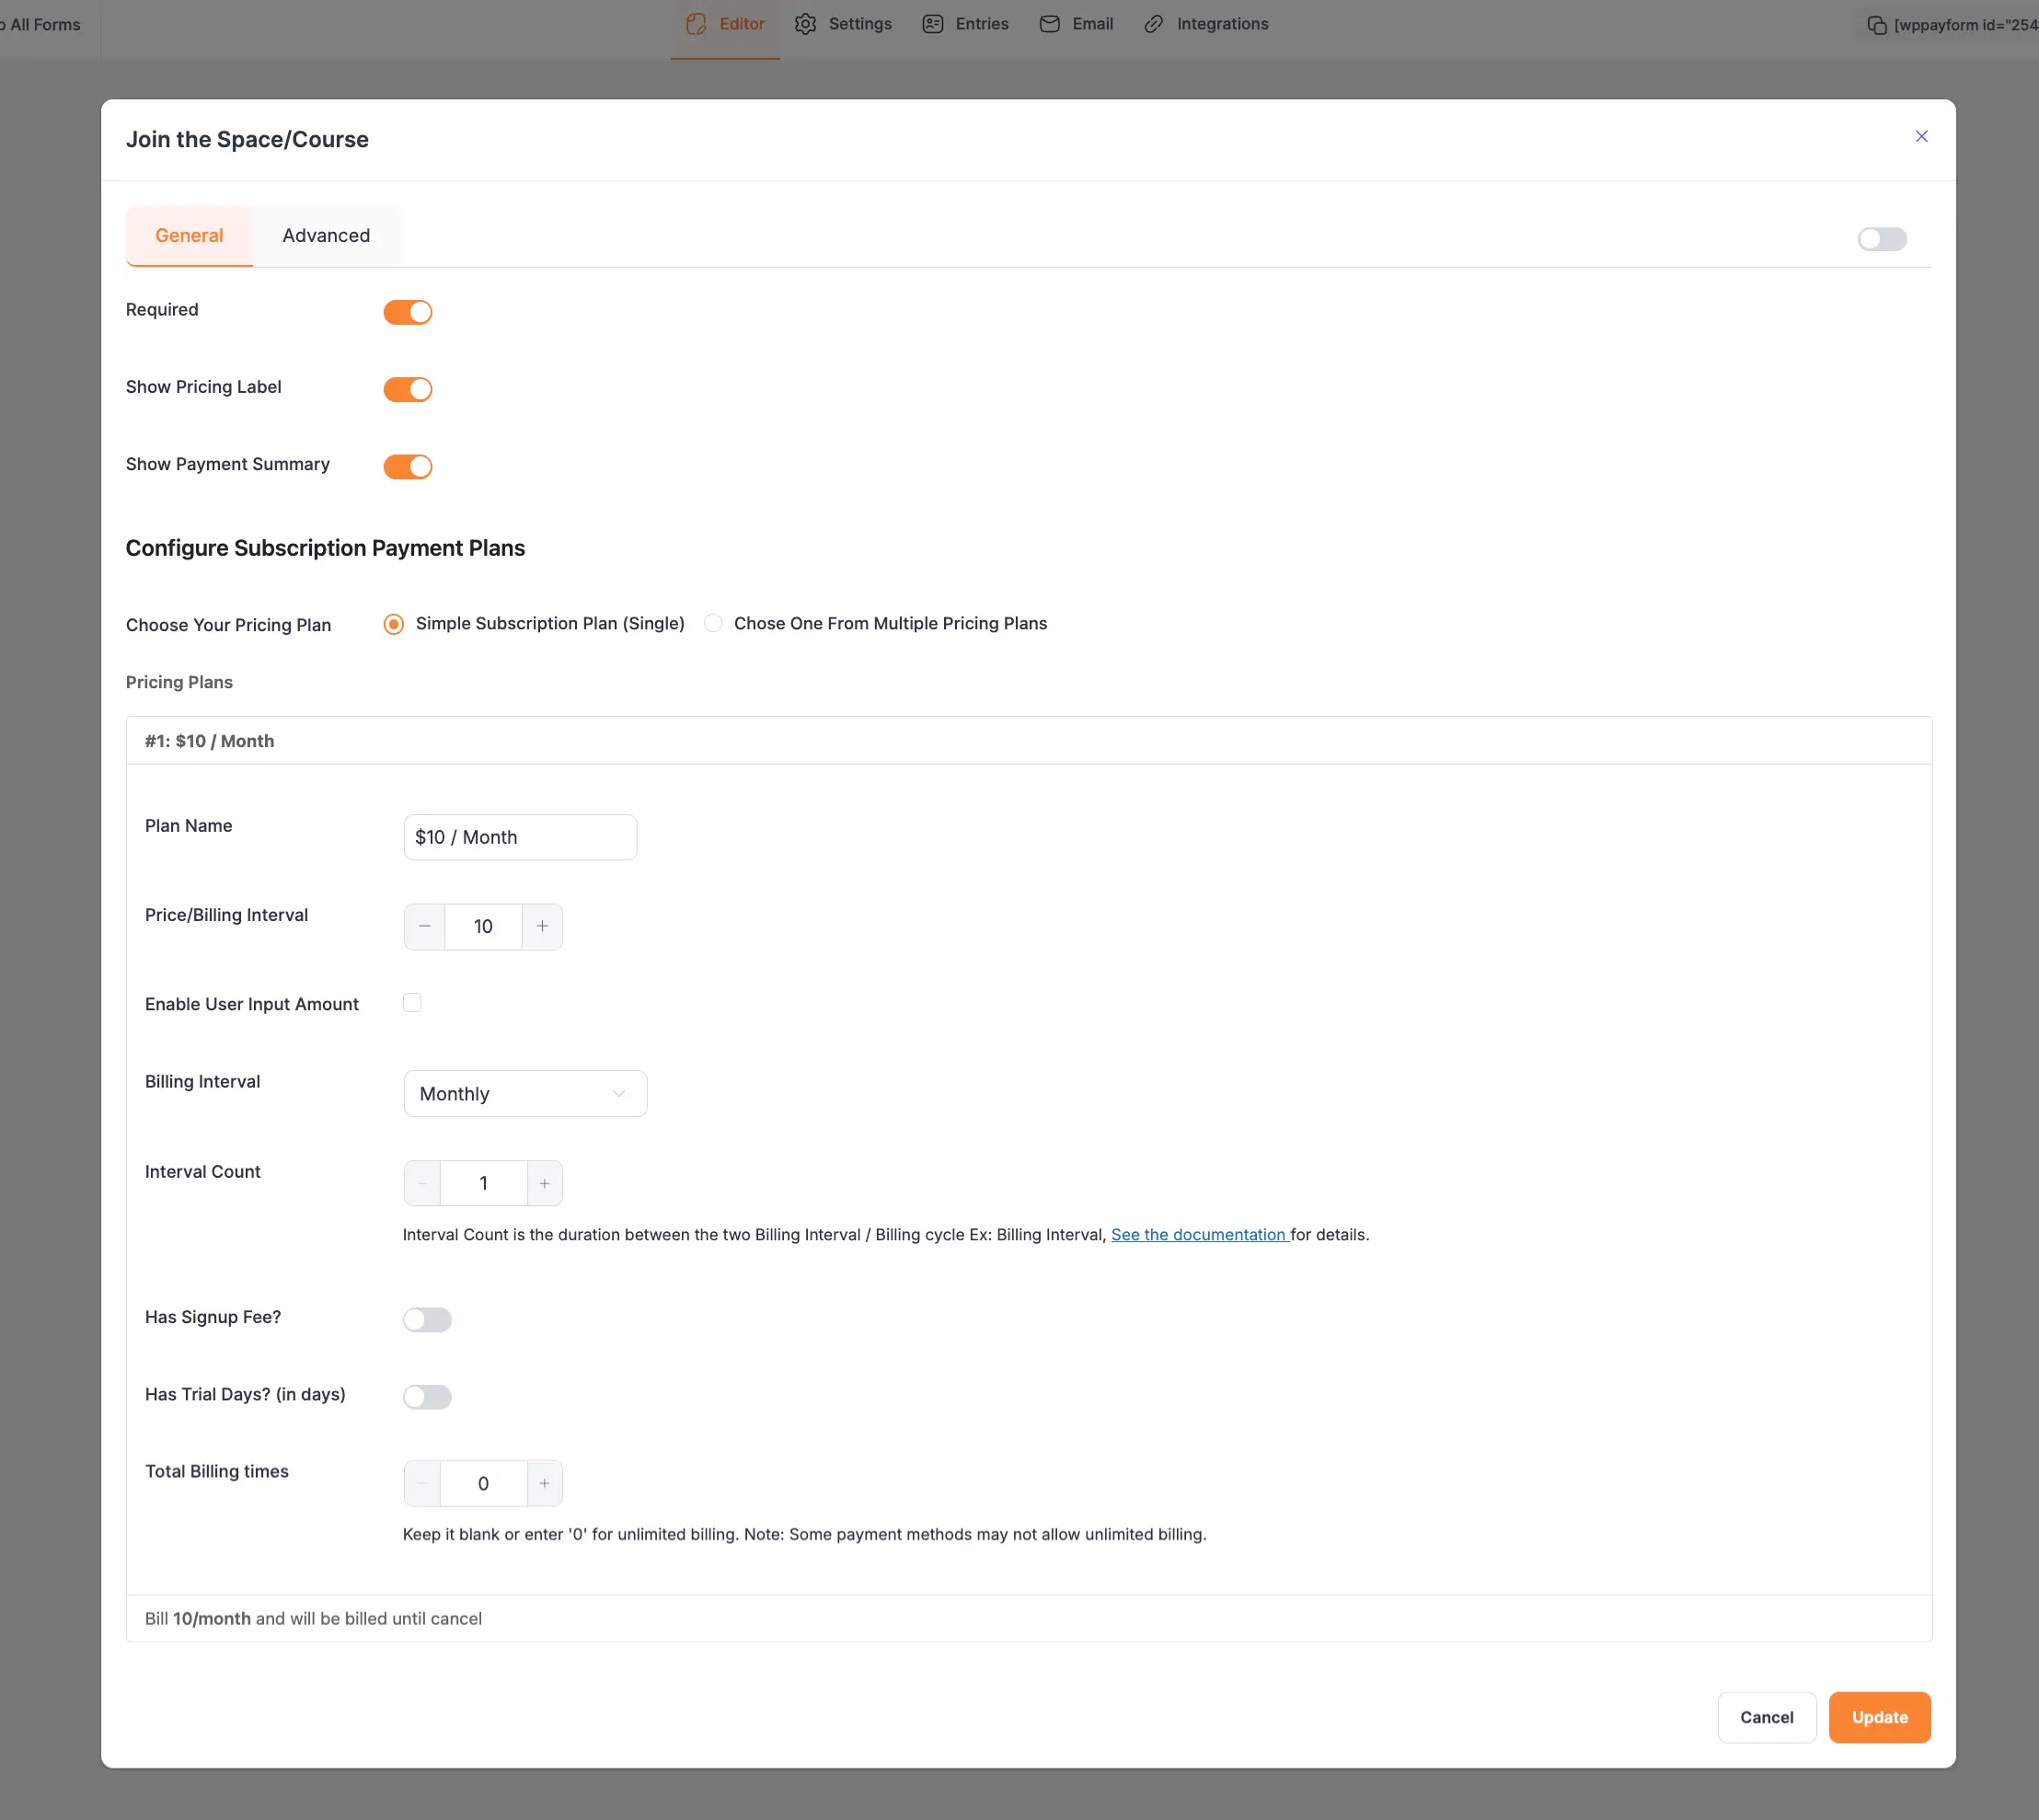
Once you click the Settings, you will get all the options shown in the screenshot below to set up your subscription payment plans based on your needs.
To learn the detailed use of all settings options, click here.
Once you complete the setup of your subscription field, go to the Integrations tab, open the Add New Integration dropdown list, and add the FluentCommunity Integration option.
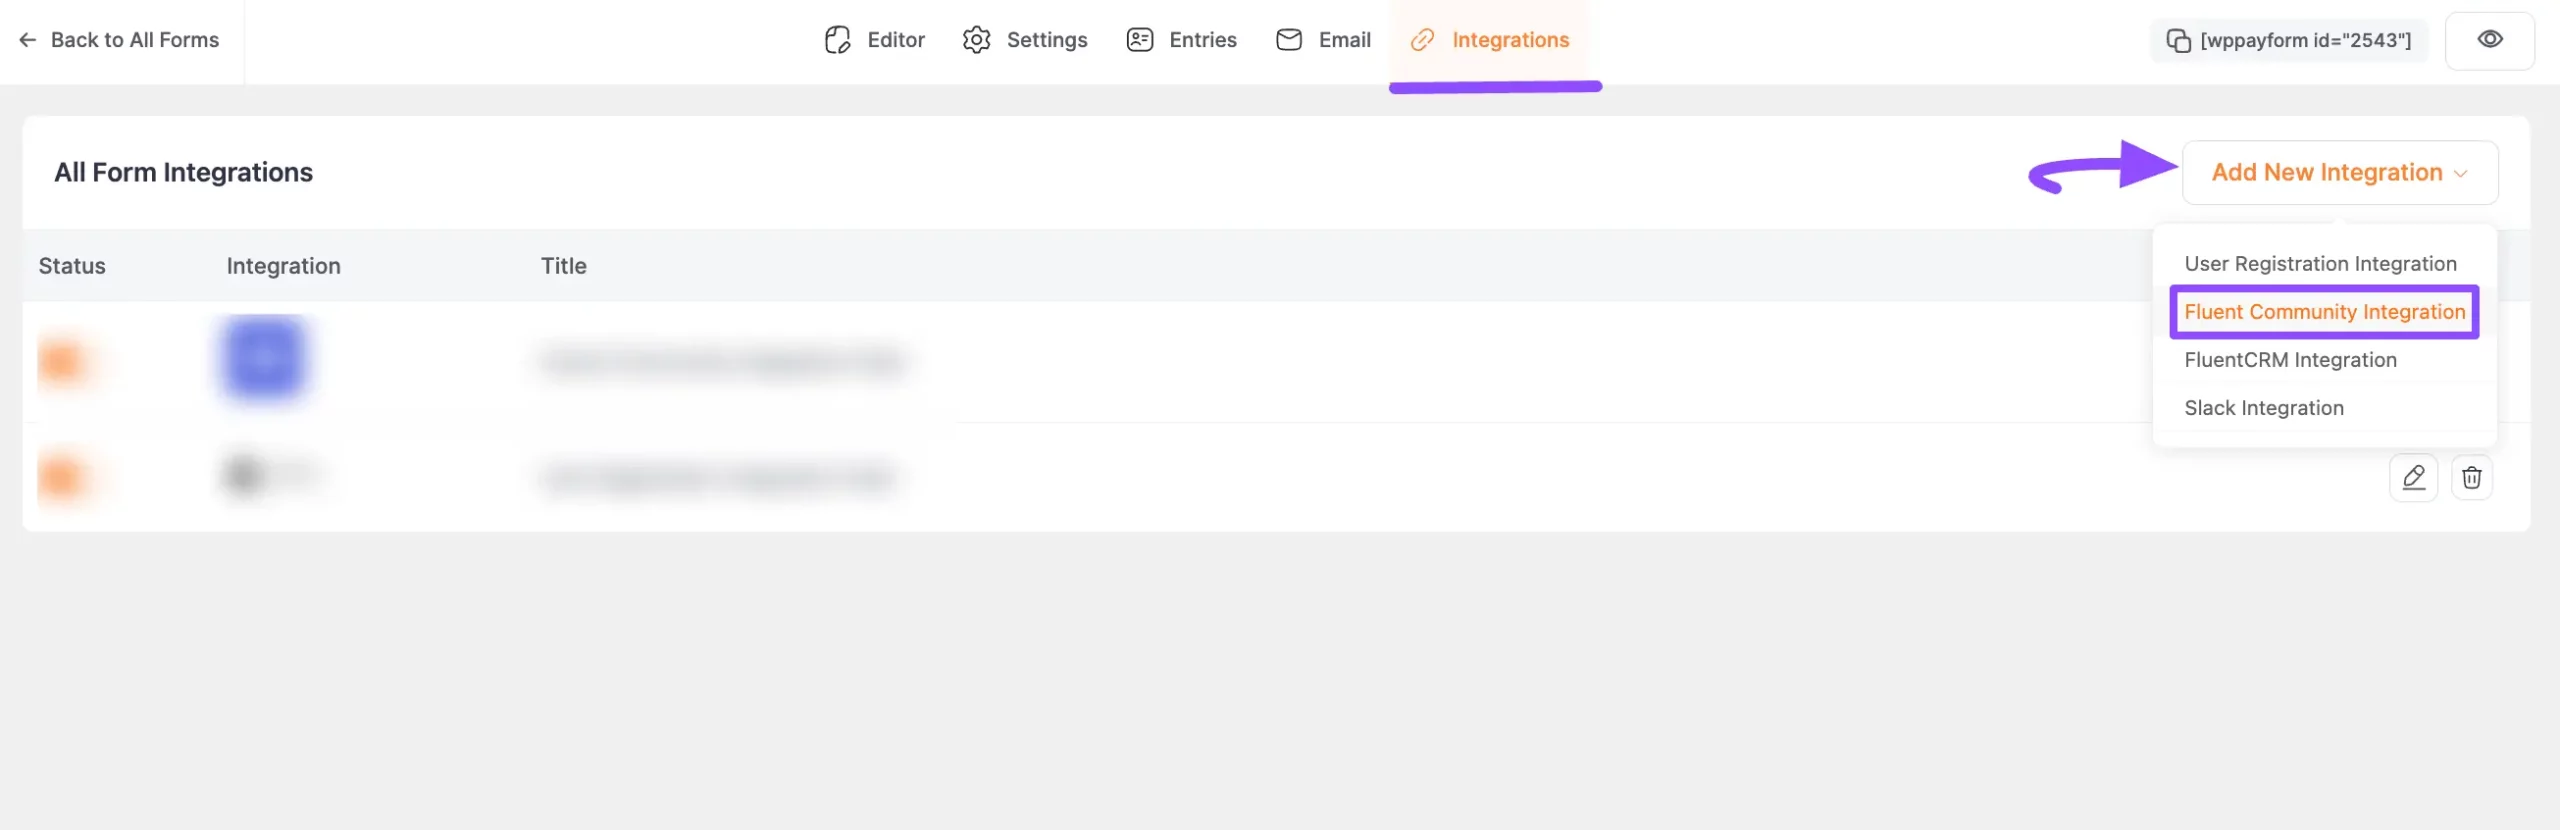
Now, a pop-up page will appear with various settings options for configuring FluentCommunity.
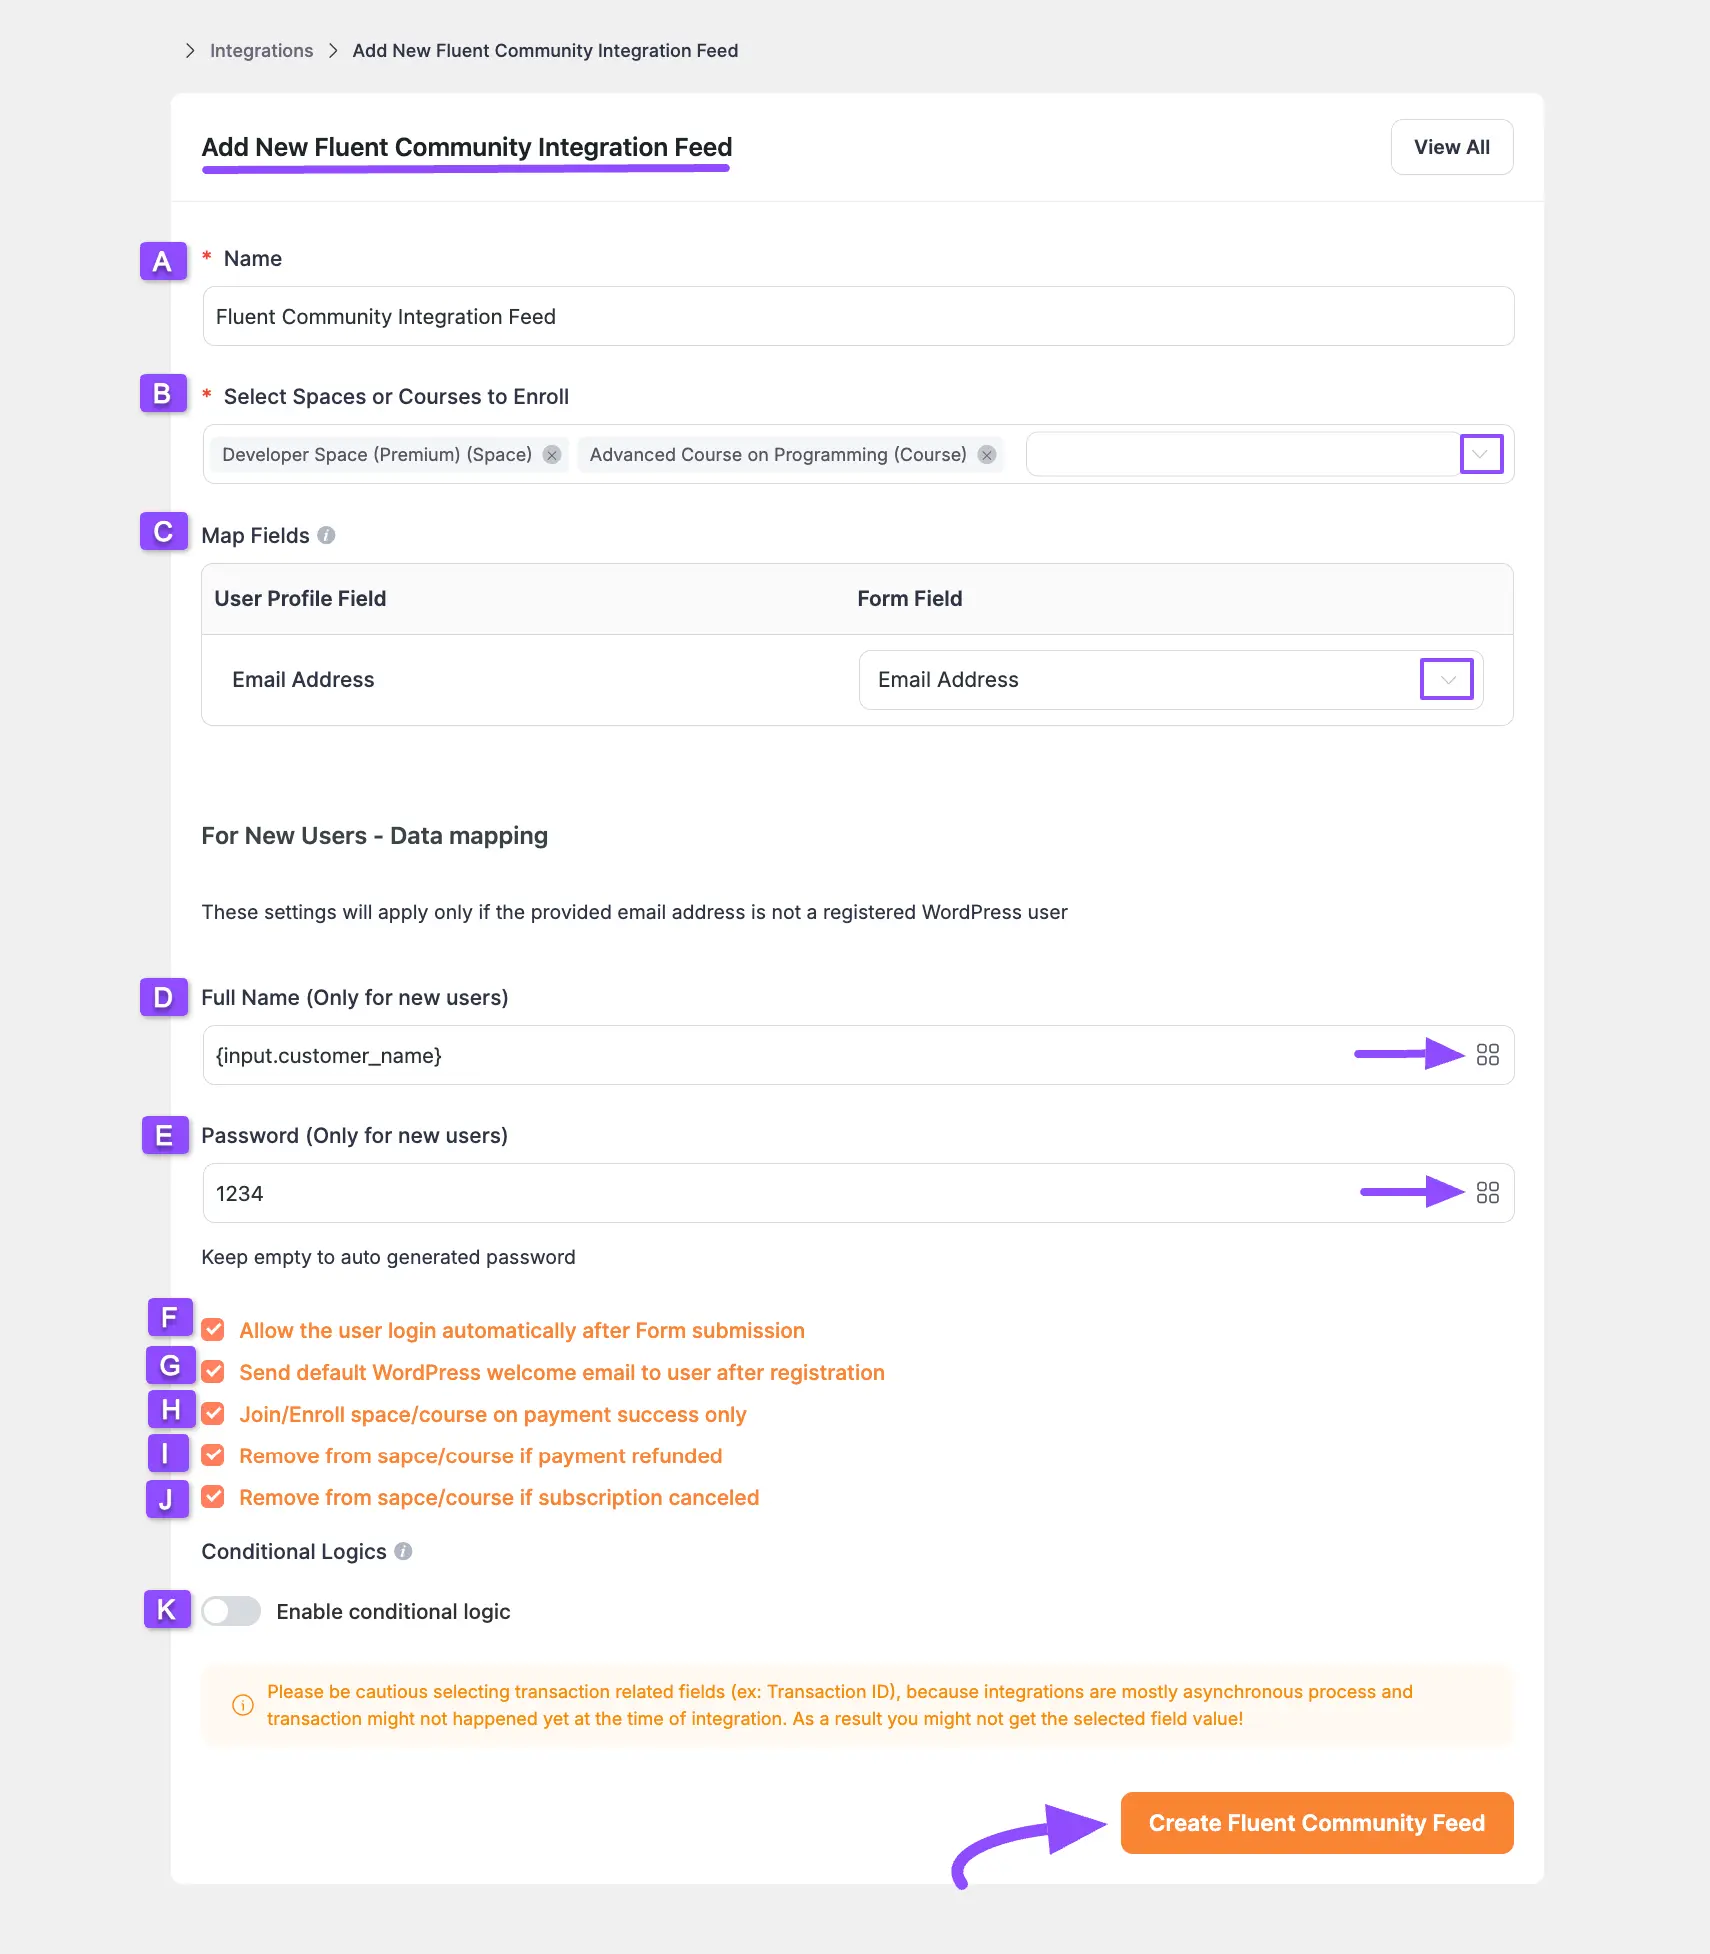
All the settings options mentioned in the screenshot below are briefly explained:
A. Name: Here, you can set a name according to your preference for your feed
B. Select Spaces or Courses to Enroll: Here, you can select your desired or all Space/s and Course/s to set where your users will add as members/students immediately after form submission. For example, I selected a Space (Developer Space) and a Course (Advanced Course on Programming).
C. Email Address: In this field, you need to select the Email Address.
D. Full Name (Only for new users): Here, use the {input.customer_name} shortcode by clicking the ShortCode Icon.
E. Password (Only for new users): Here, you can set a fixed password for every new user. Or, you can keep it empty to automatically generate a new password for each user.
F. Allow the user login automatically after Form submission: Enable this option and your user will be directly logged into your Paymattic User Dashboard after submitting the form.
G. Send default WordPress welcome email to a user after registration: Enable this option to send a welcome email notification to your users with login details including a password reset option.
H. Join/Enroll space/course on payment success only: Check this option if you want your users to Join/Enroll in a Space/Course only when the payment is successful. If you keep it unchecked, users can get access to the space/course without payment succeed.
I. Remove from space/course if payment refunded: Checking this option will allow you to remove users automatically from space/course if payment is refunded.
J. Remove from space/course if subscription canceled: Checking this option will allow you to remove users automatically from space/course if they cancel their subscription.
K. Enable conditional logic: Enable this toggle if you want to set any conditions on this form submission. To learn the details of the use of this Conditional Logic, read this Documentation. Plus, to get access to this feature, you need the Paymattic Pro Plugin.
Once you set up the page, click the Create Fluent Community Feed button and the feed will be added.
Publish Your Paymattic Subscription Form #
Once you added the desired FluentCommunity Space/Course into the Subscription Form, publish the form.
To learn the detailed process on how to publish a form, click here.
Start Collecting Your Recurring Payments from Space/Course #
After publishing the Subscription Form and adding the Form URL to the desired Space/Course, you can start collecting the recurring payments.
When users visit the Space/Course, they’ll see the Lock Screen with the CTA button directing them to the payment form. Upon completion, you can grant them access to the space/course
“Additionally, to learn more detailed guidelines on how to manage or cancel a Subscription, refer to the following Documentation.
This setup enables seamless space/course monetization within your FluentCommunity platform. If you have any further questions about this guide, please don’t hesitate to contact us.


