FluentCommunity allows you to Invite Members to join any specific Space using the Invitation feature. This article covers the detailed process of Inviting Members for Spaces.
Invite Members to a Space #
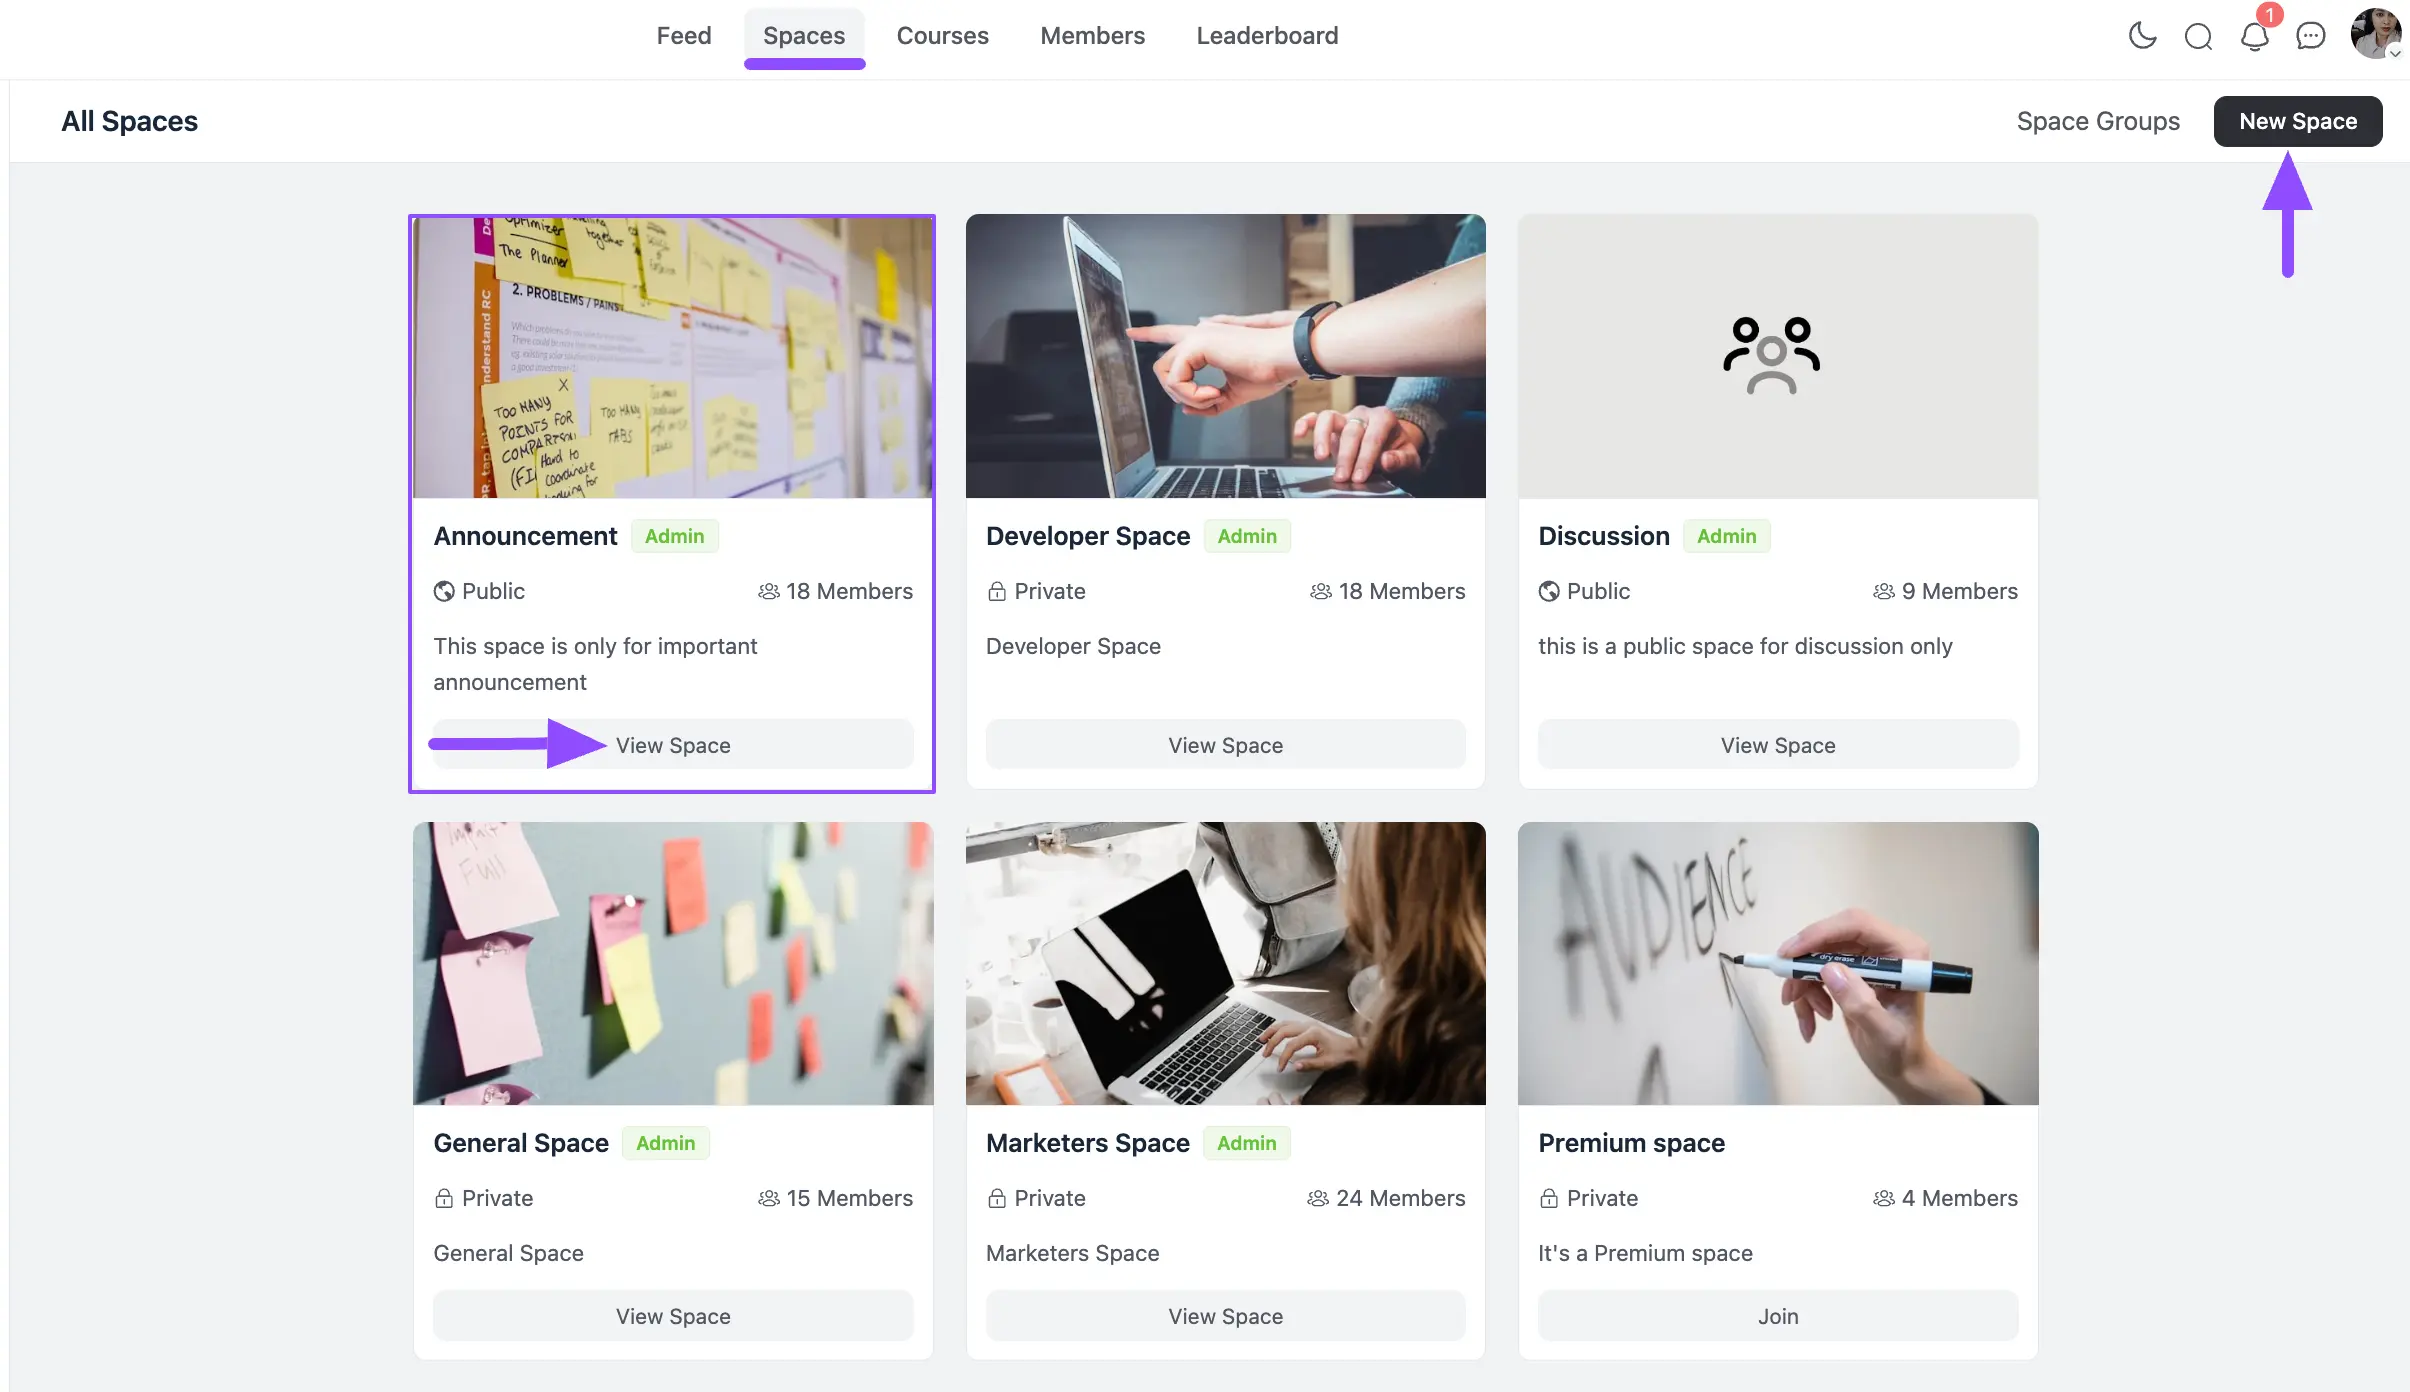
First, go to the Spaces section from the FluentCommunity Navbar and open a Desired Space by clicking the View Space button where you want to invite members to join.
You can also create a new space by clicking the New Space button in the top right corner. To learn the detailed process of creating a New Space, read this Documentation.
For example, I selected the Announcement space to invite the members to join it.
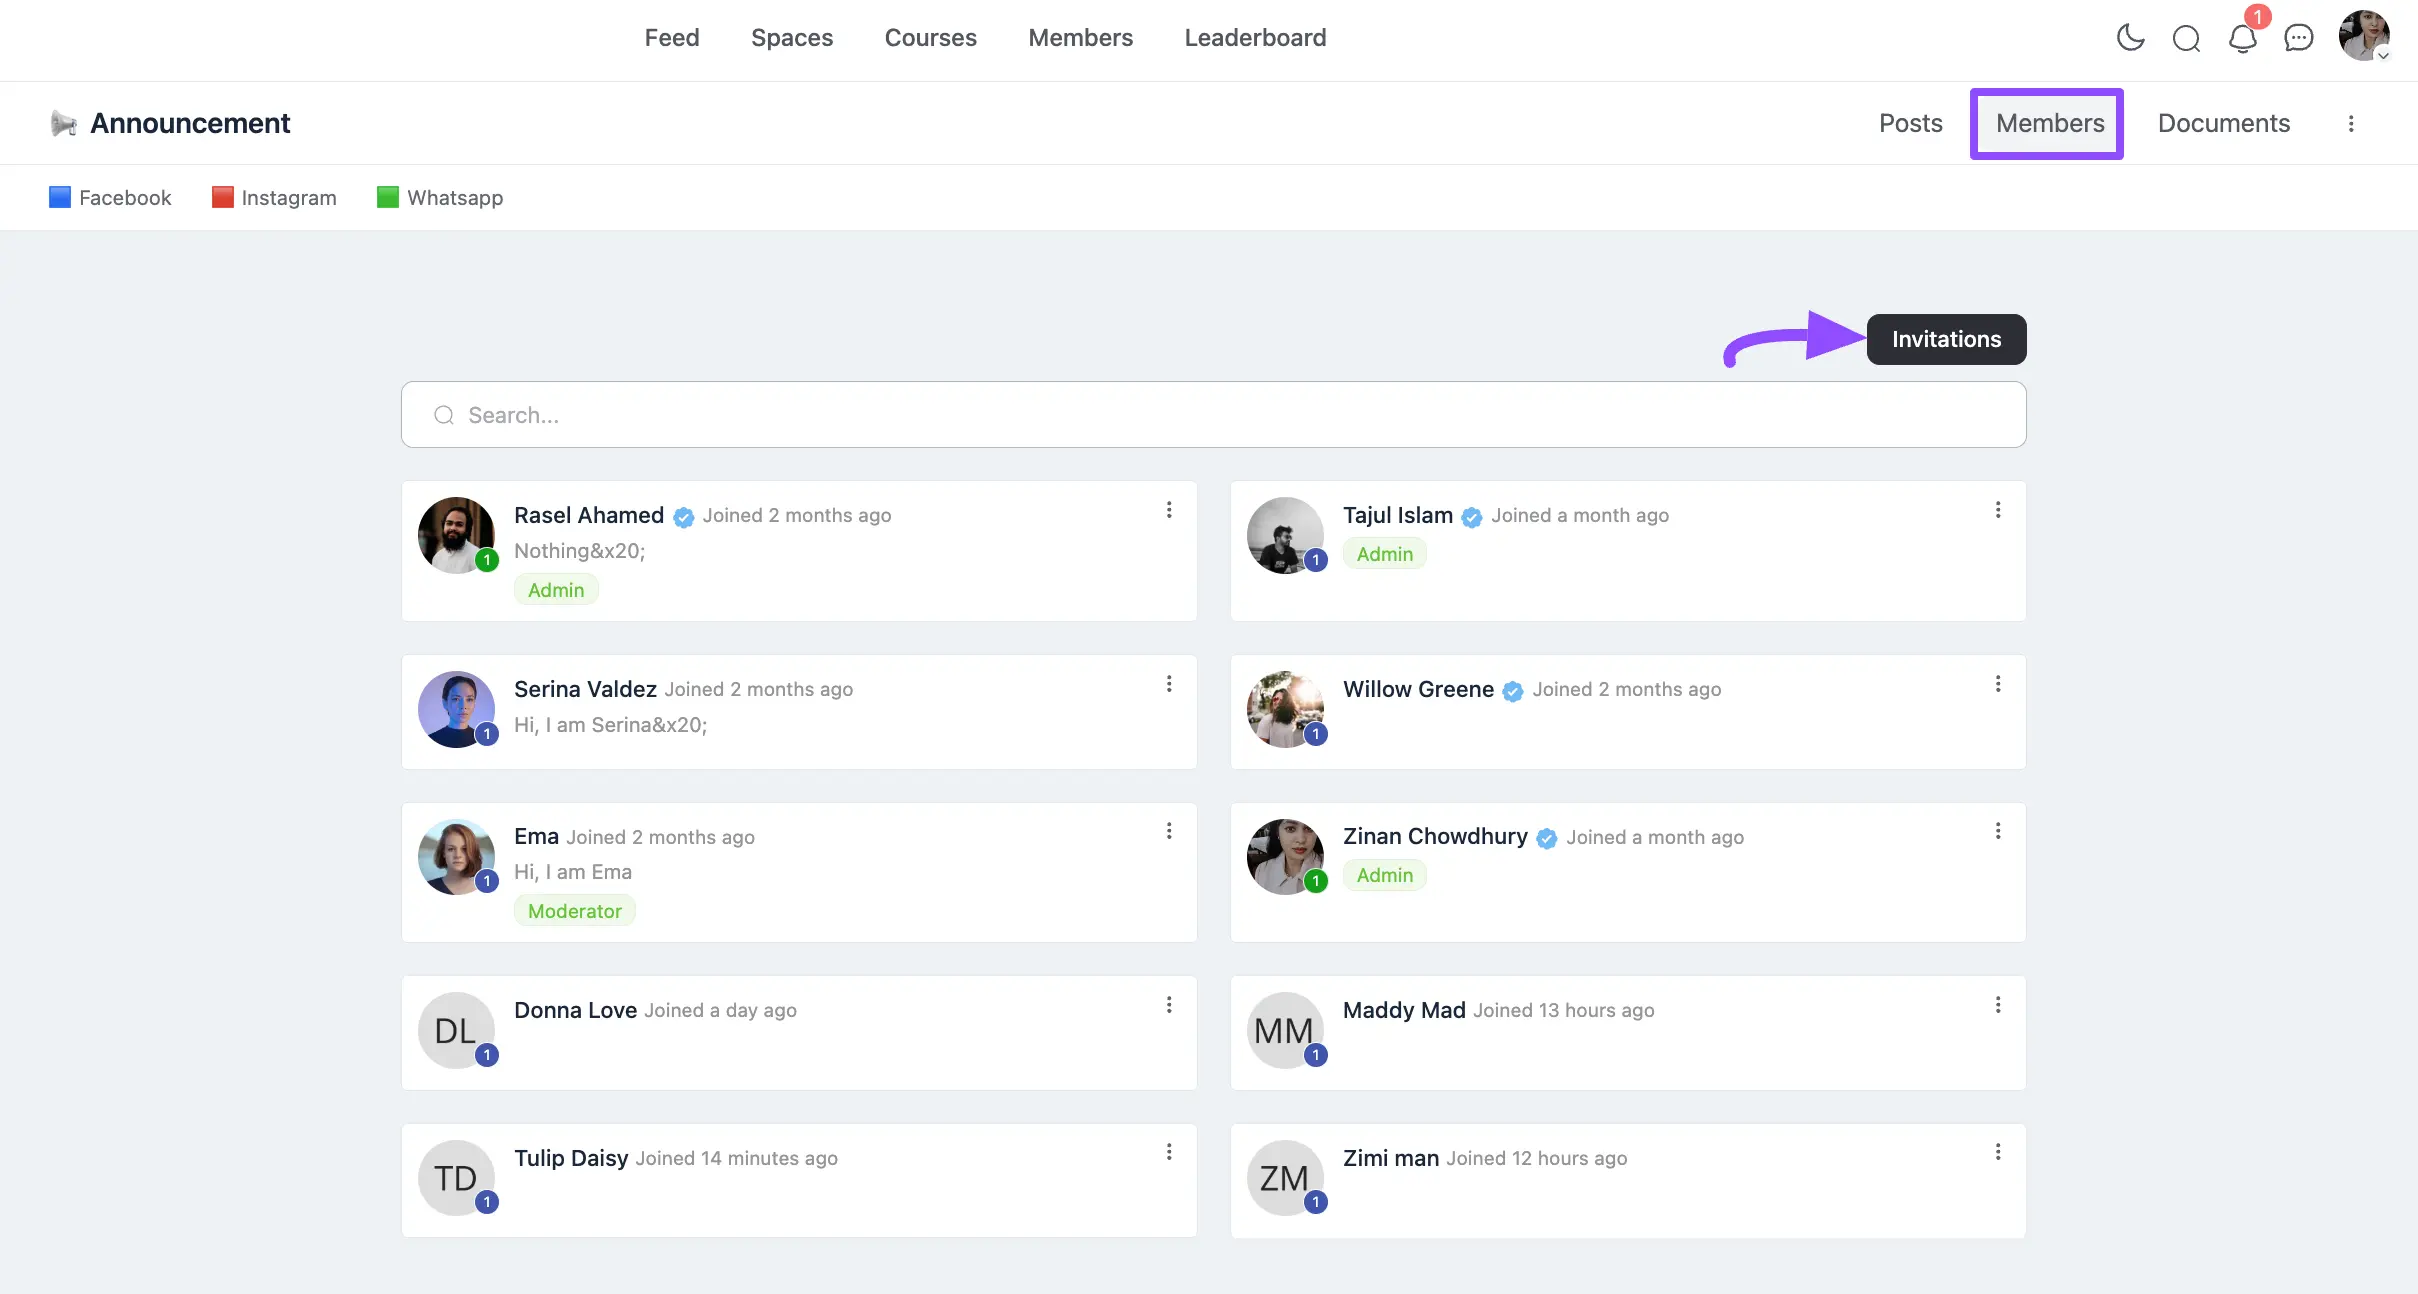
Now, go to the Members section and click the Invitation button.
Here, you will get Three major tabs. These are:
- Invitations
- New Invite
- New Invitation Link
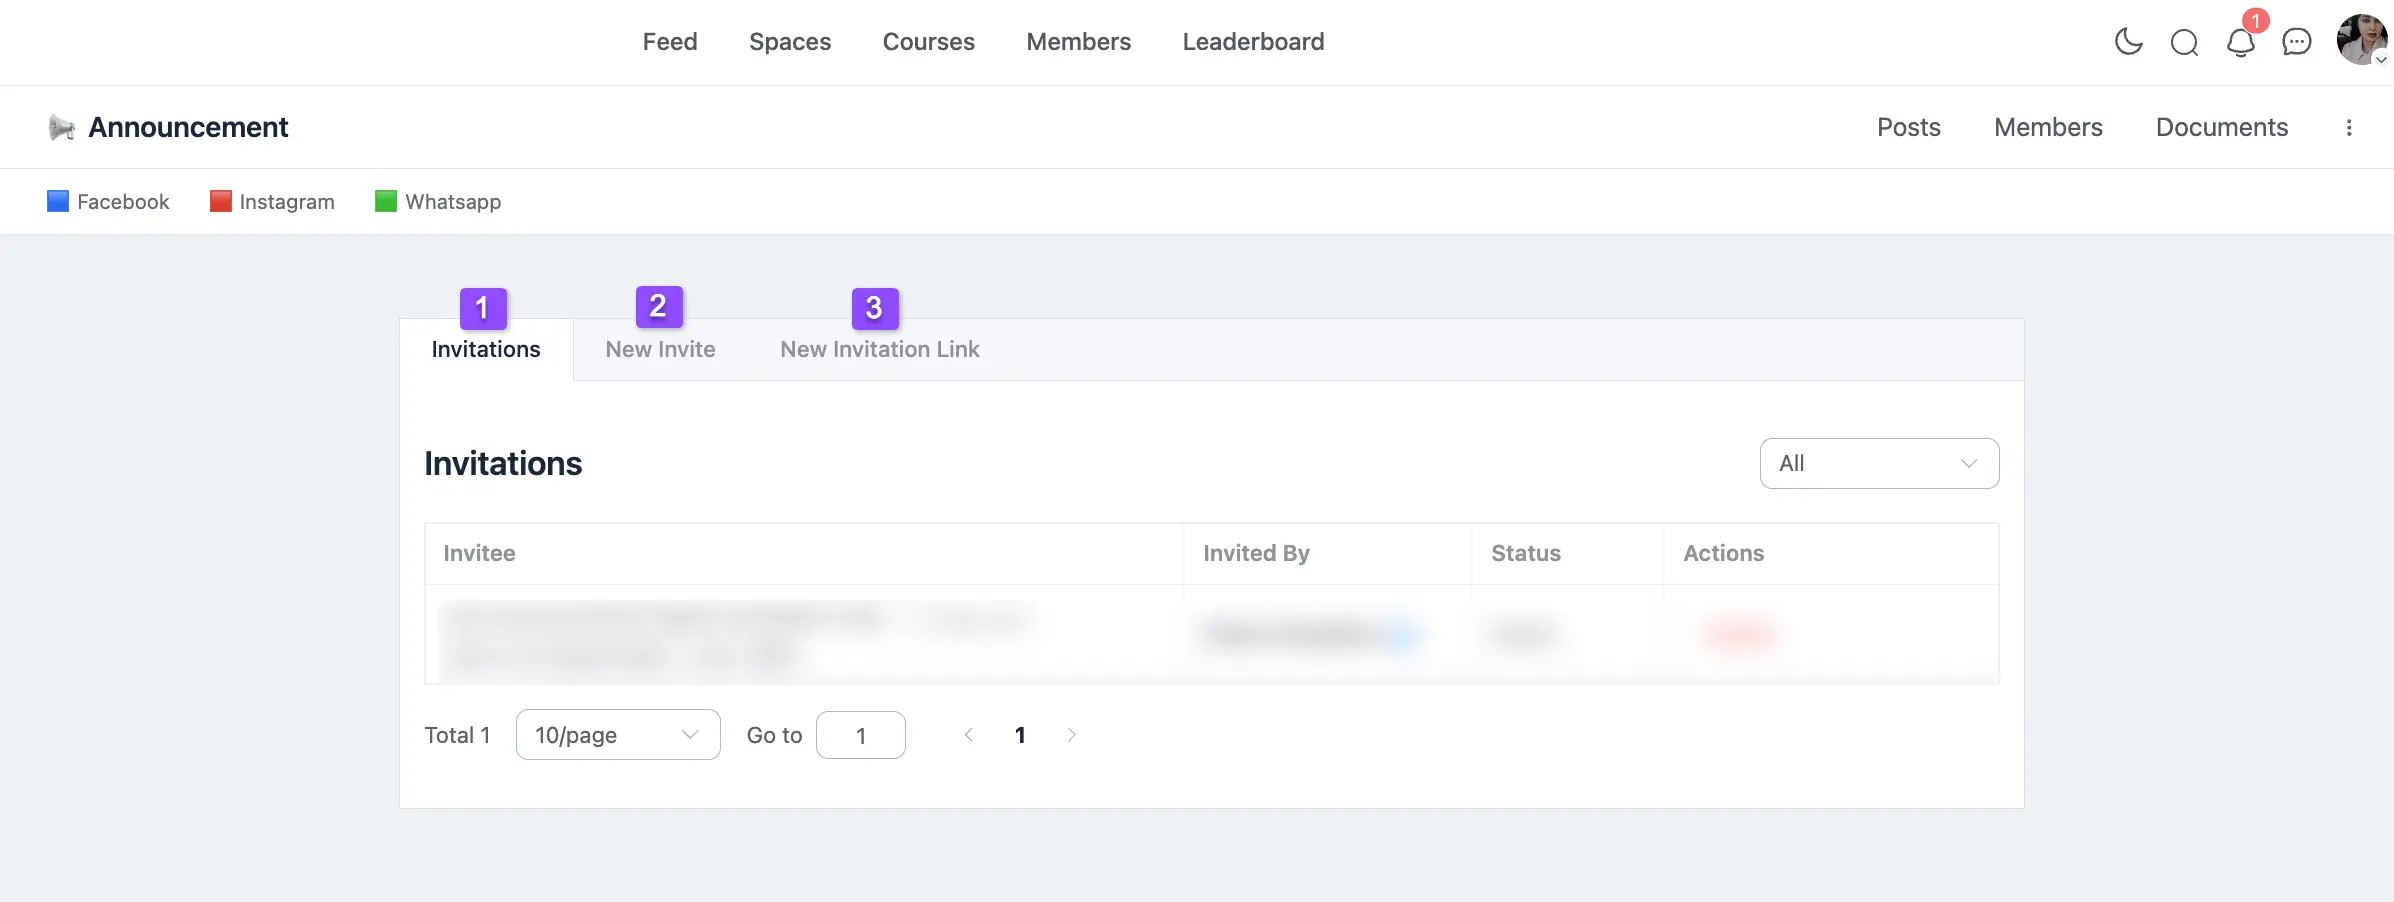
All three tabs mentioned above are explained below:
1. Invitations #
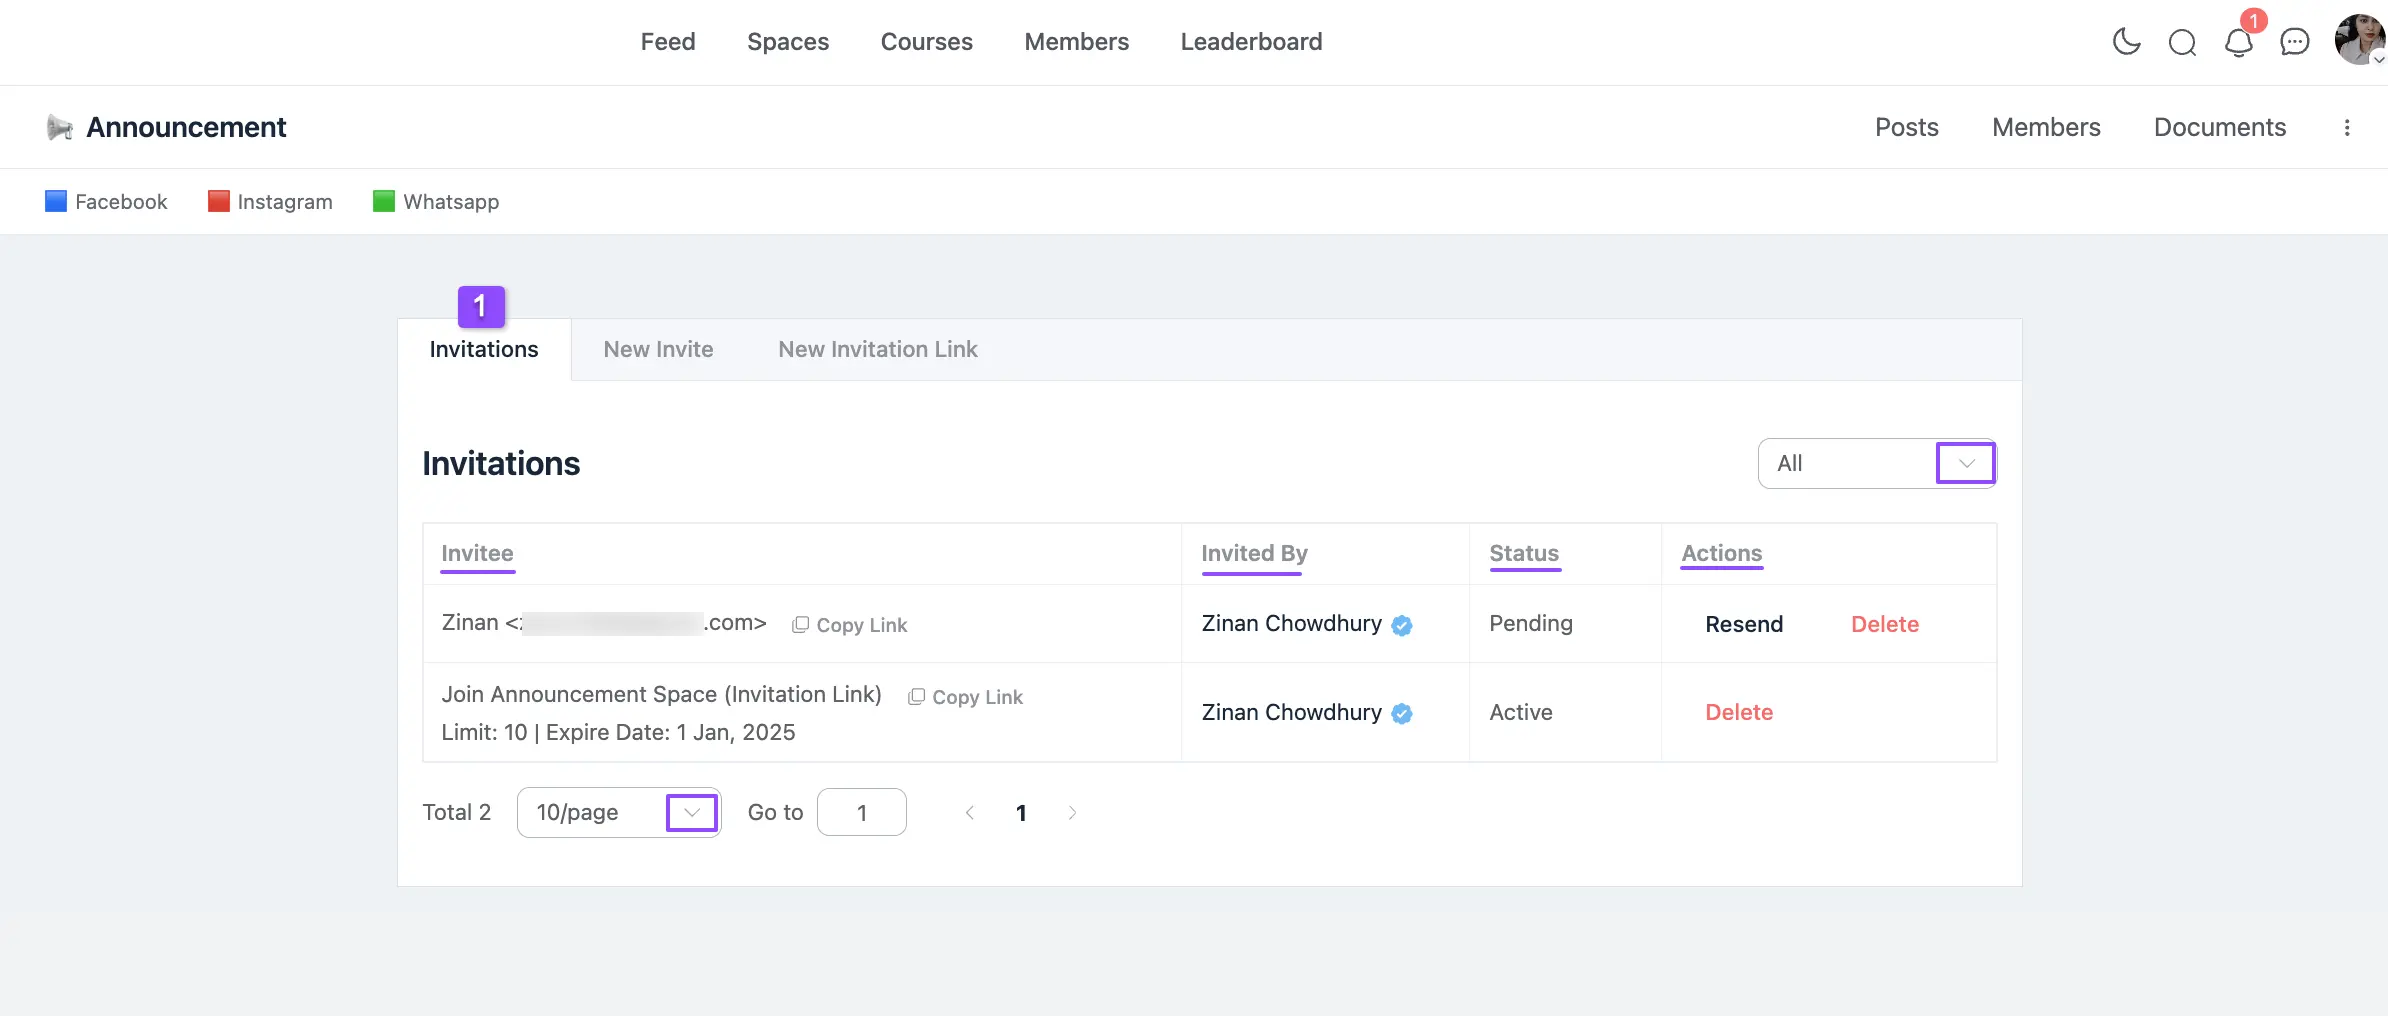
Under this tab, you will see detailed information about the Invitations you send to add members.
- Invitee: Here, you can see the list of all invitees you invited through email and the invitation links you created to add members to this space.
- Invited By: Here, you can see the user profile of the inviter/host.
- Status: You can check the status of your invitation to see if it has been Pending, Accepted, Active, or Expired.
- Actions: From here, you can delete any specific invitation from the Invitee list. Also, can resend the email for pending invitations.
- Filter: With this option, you can filter the invitations based on their status (Pending, Accepted, Active, and Expired) by clicking the Arrow Icon.
- Pagination: You can set how many invitations you want to see per page using the dropdown list by clicking the Arrow Icon in the below-left corner.
2. New Invite #
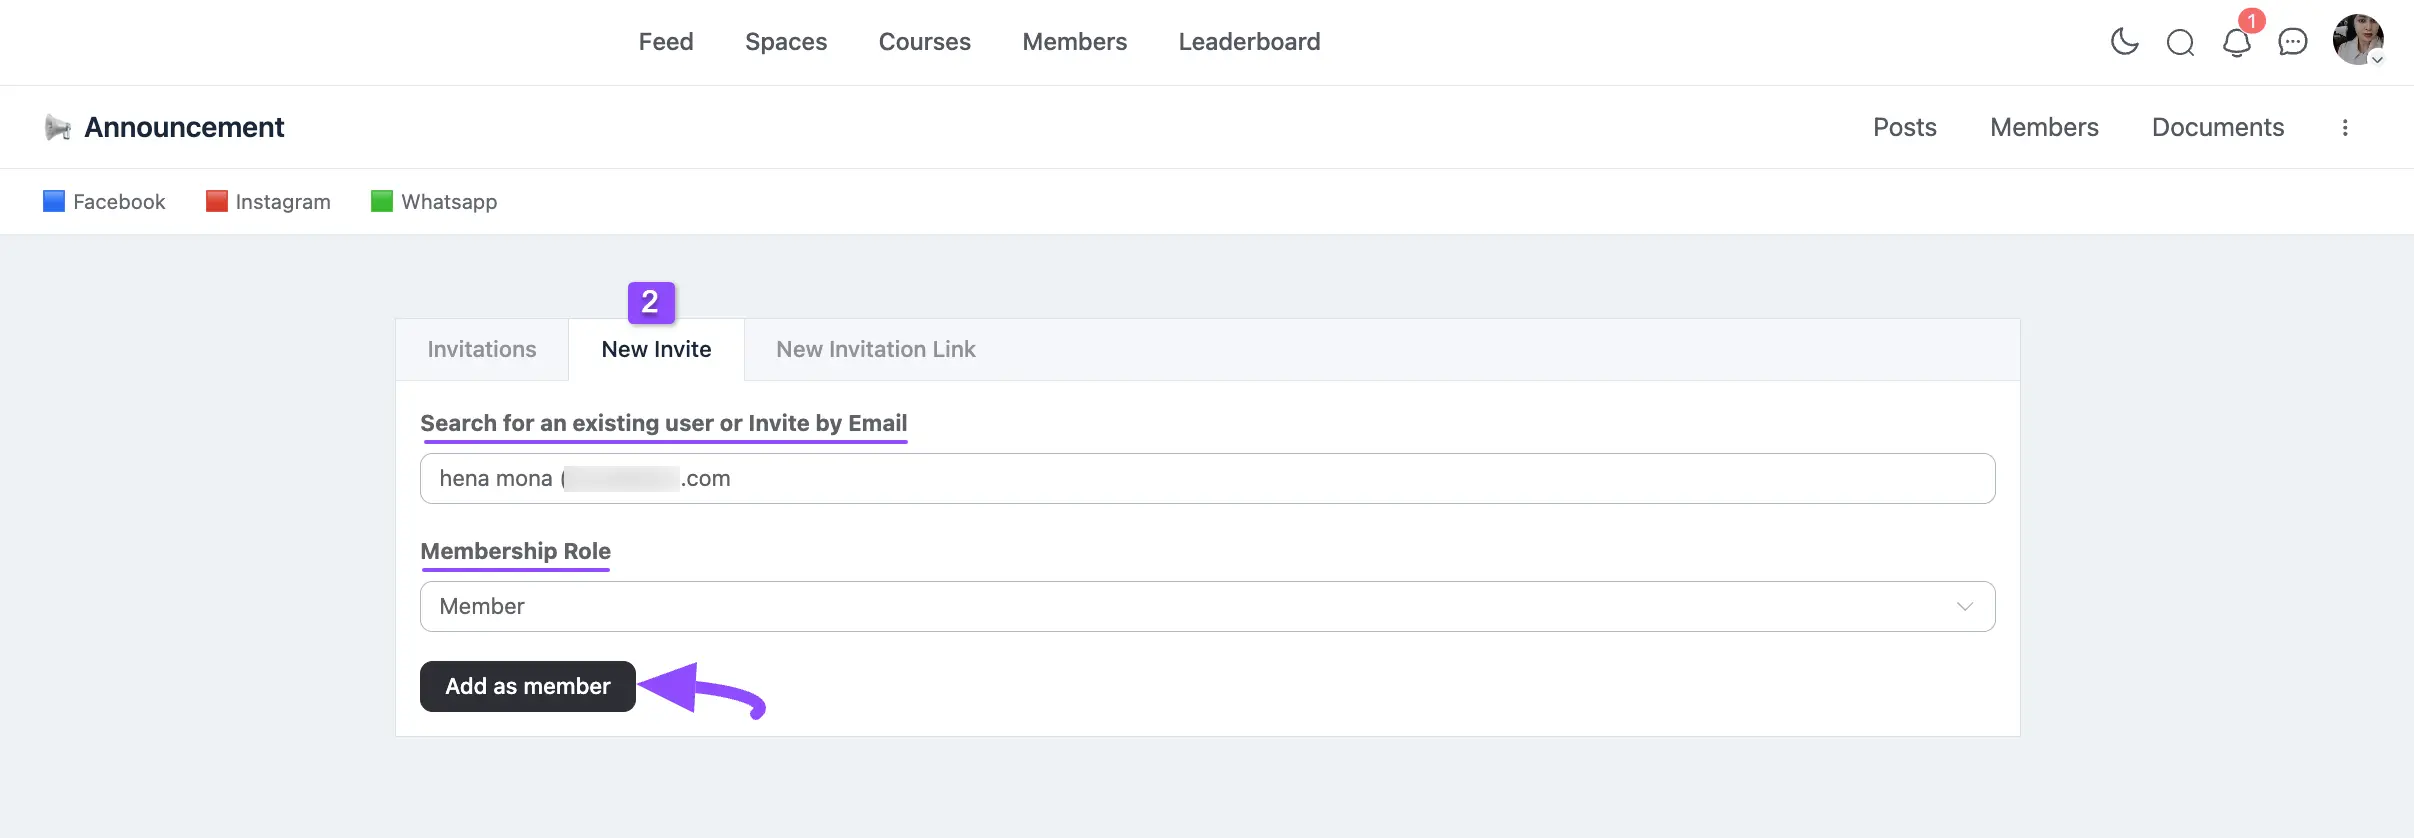
Under this tab, you will have the option to invite new members to the space through email.
- Search for an existing user or invite by Email: Here, you can add members from the existing community members or new user using their Email.
- Membership Role: Here, you can specify the user’s role as either Member, Moderator, or Admin. For example, I selected the Member role for this user.
Once you are done, click the Add as a member, and the member will be added to the space.
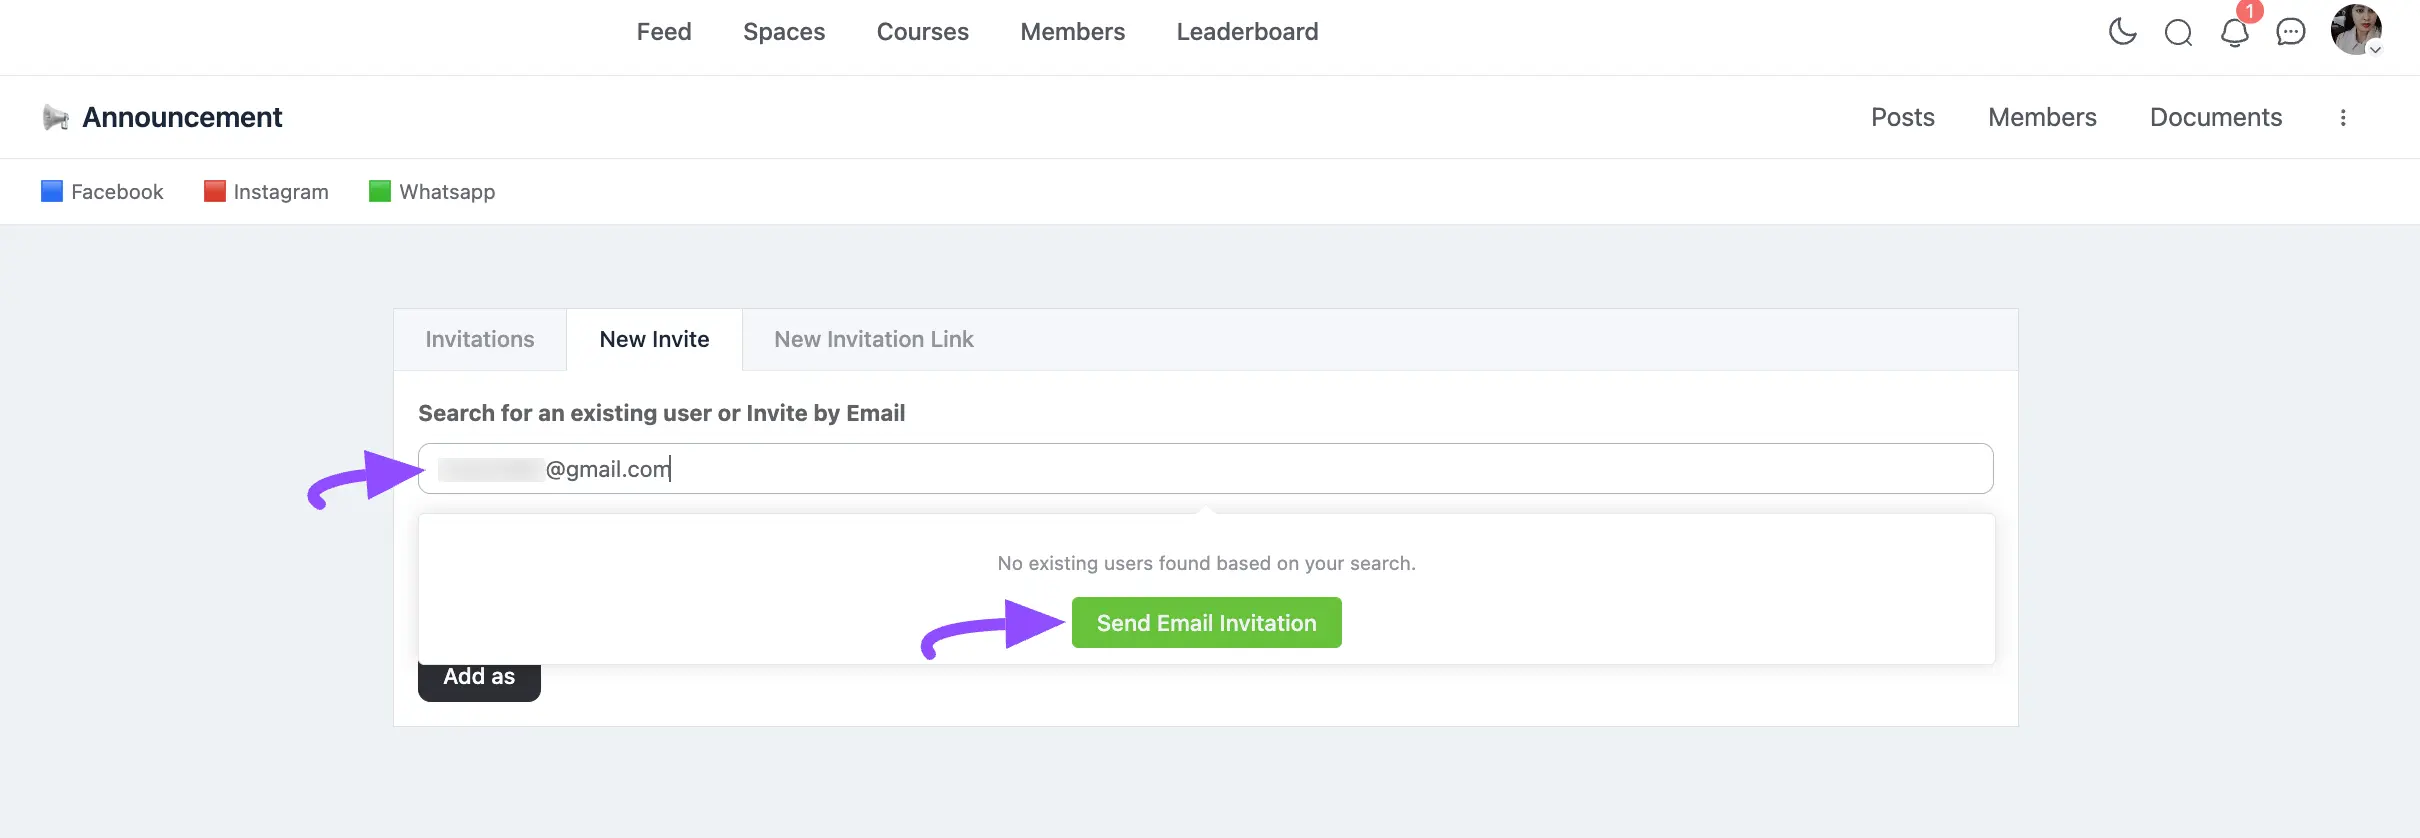
To send email invitations to those who are not community users, enter the desired email in the search bar and click the Send Email Invitation button.
Here, provide the email address of the invitee you wish to invite. Plus, can set the invitee name so that you can find it easily later.
Once you set everything, click the Send Invitation button and the invitation will be sent to the provided email address.

3. New Invitation Link #
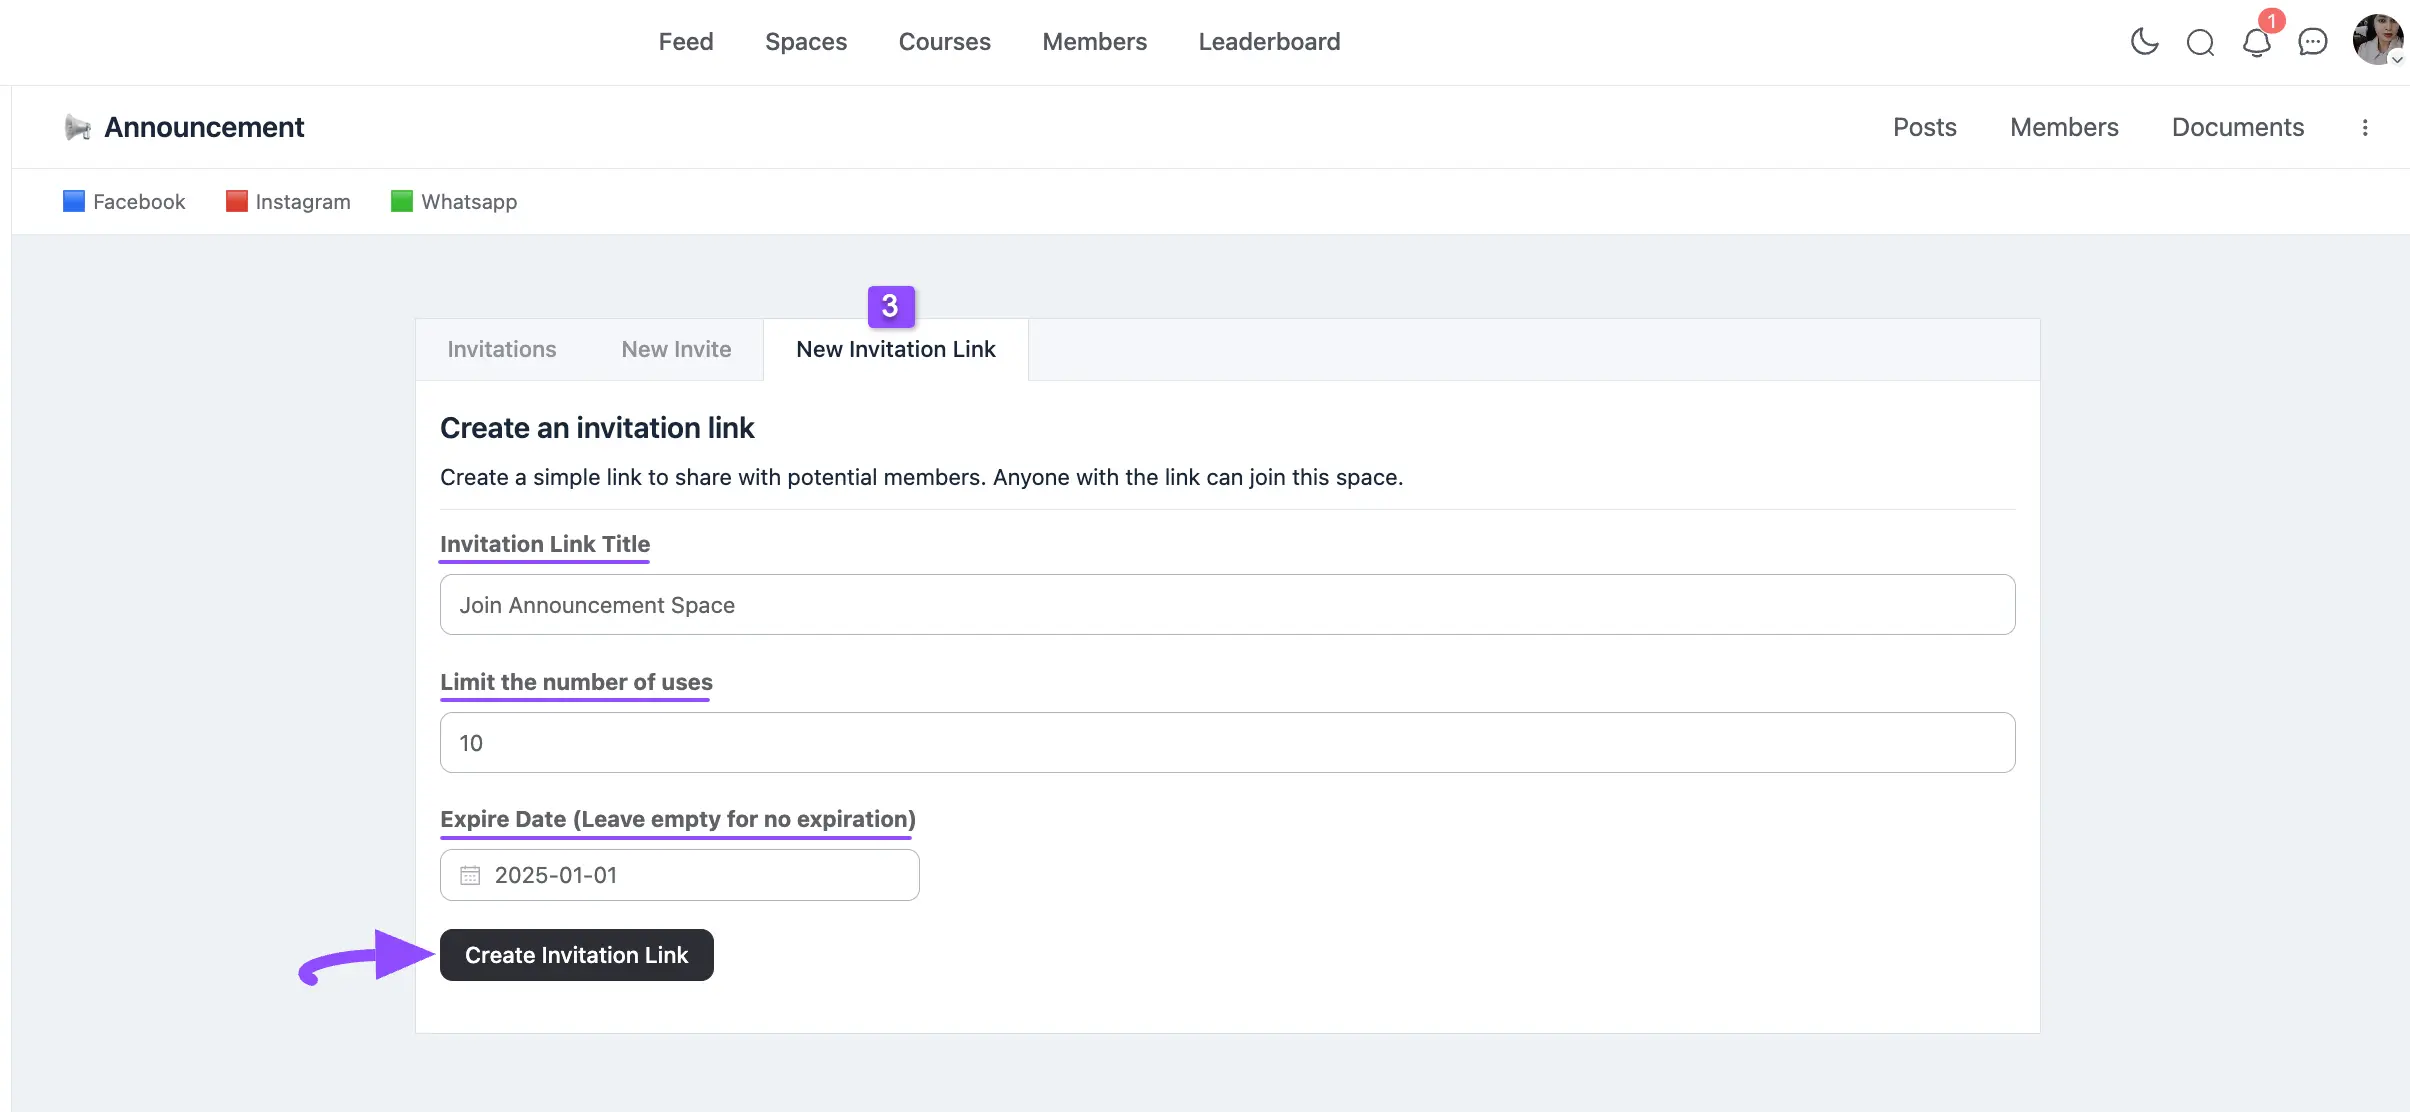
Under this tab, you will have the option to invite members to join the space through the invitation link.
- Invitation Link Title: Here, set a title for your Invitation Link as per your requirements.
- Limit the number of uses: Here, you can set the limit on the number of users who can join the space through this link. For example, I set a limit of 10, i.e., the link will expire after 10 users have joined the space.
- Expire Date (Leave empty for no expiration): Here, you can also set a specific date for the expiration of this link. Keep it empty if you don’t want your link to be expired ever.
Once you are done, click the Create Invitation Link button, and the Invitation Link will be created.
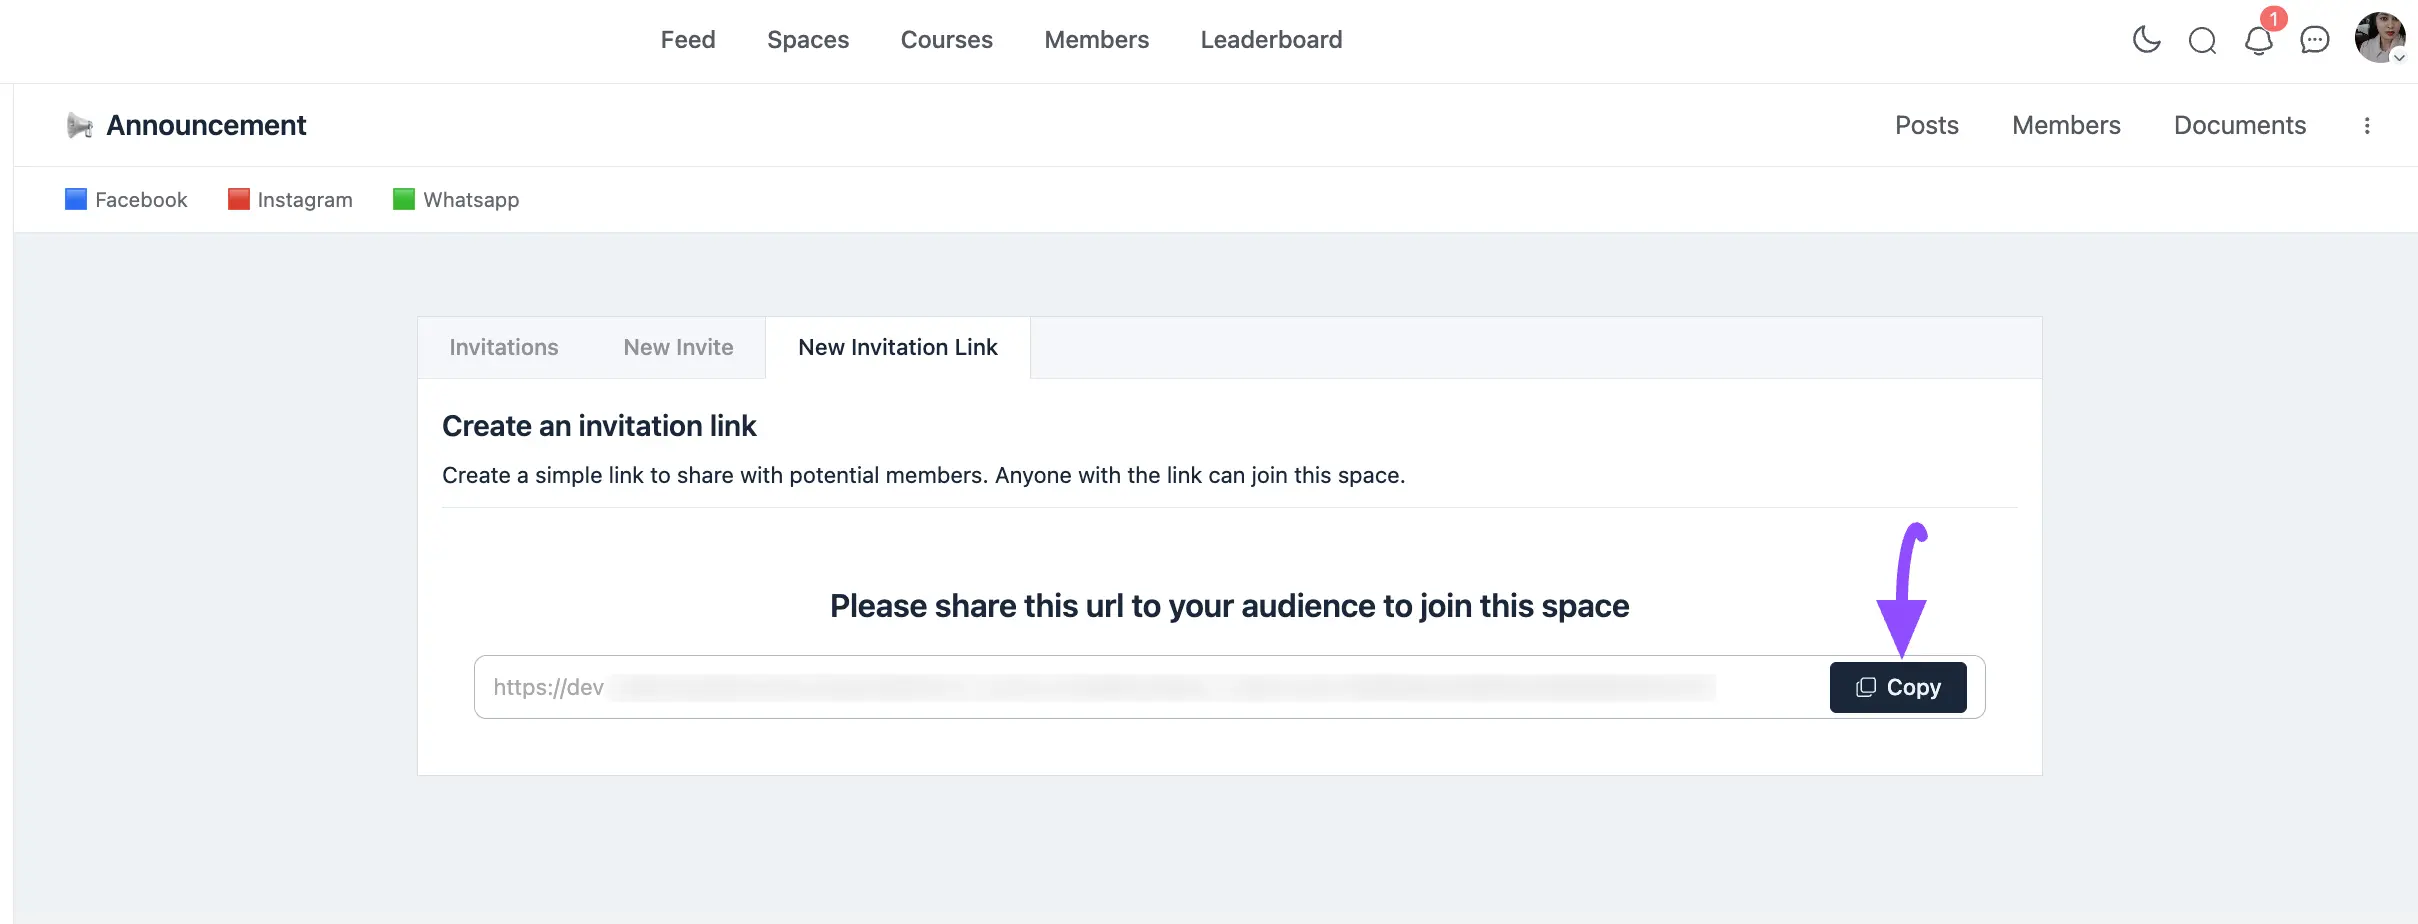
Now, copy the link and send it to the users you want to add to the space.
They can join through this link by accepting the invitation.
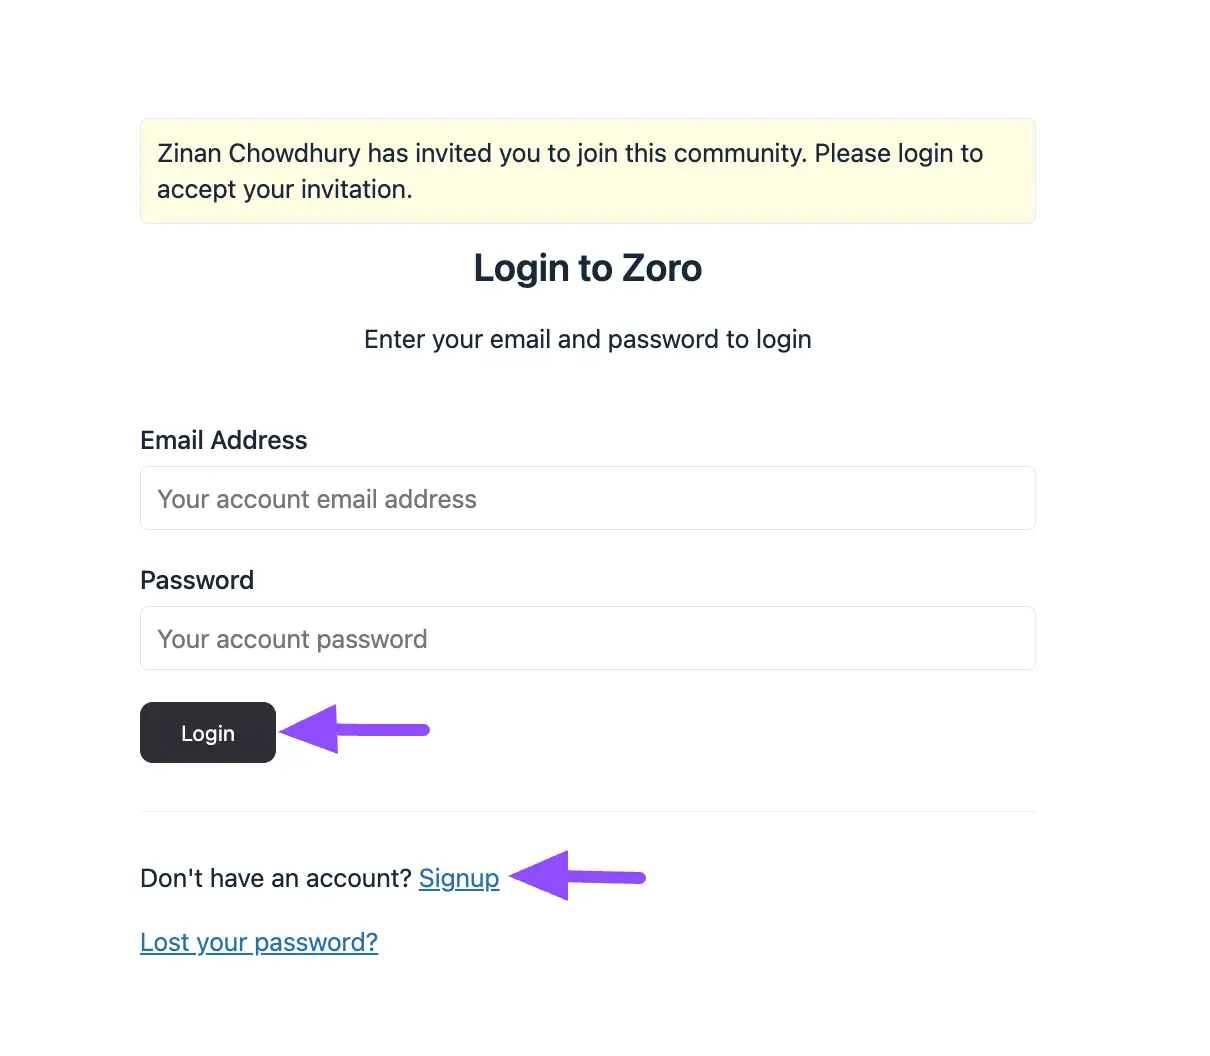
In this case, if they are already logged-in community users, they will be directly redirected to the space after clicking the link.
If not, they will see the Login/Registration Form for Login or Signup to join the space as shown in the screenshot below.
If you have any further questions, concerns, or suggestions, please do not hesitate to contact our @support team.


