FluentCommunity allows you to securely upload and manage files within specific course lessons. These files are accessible only to course students only, ensuring privacy and security.
This guide will walk you through the steps to add, edit, and manage documents in your course lessons.
Add Documents/Files to a Course Lesson #
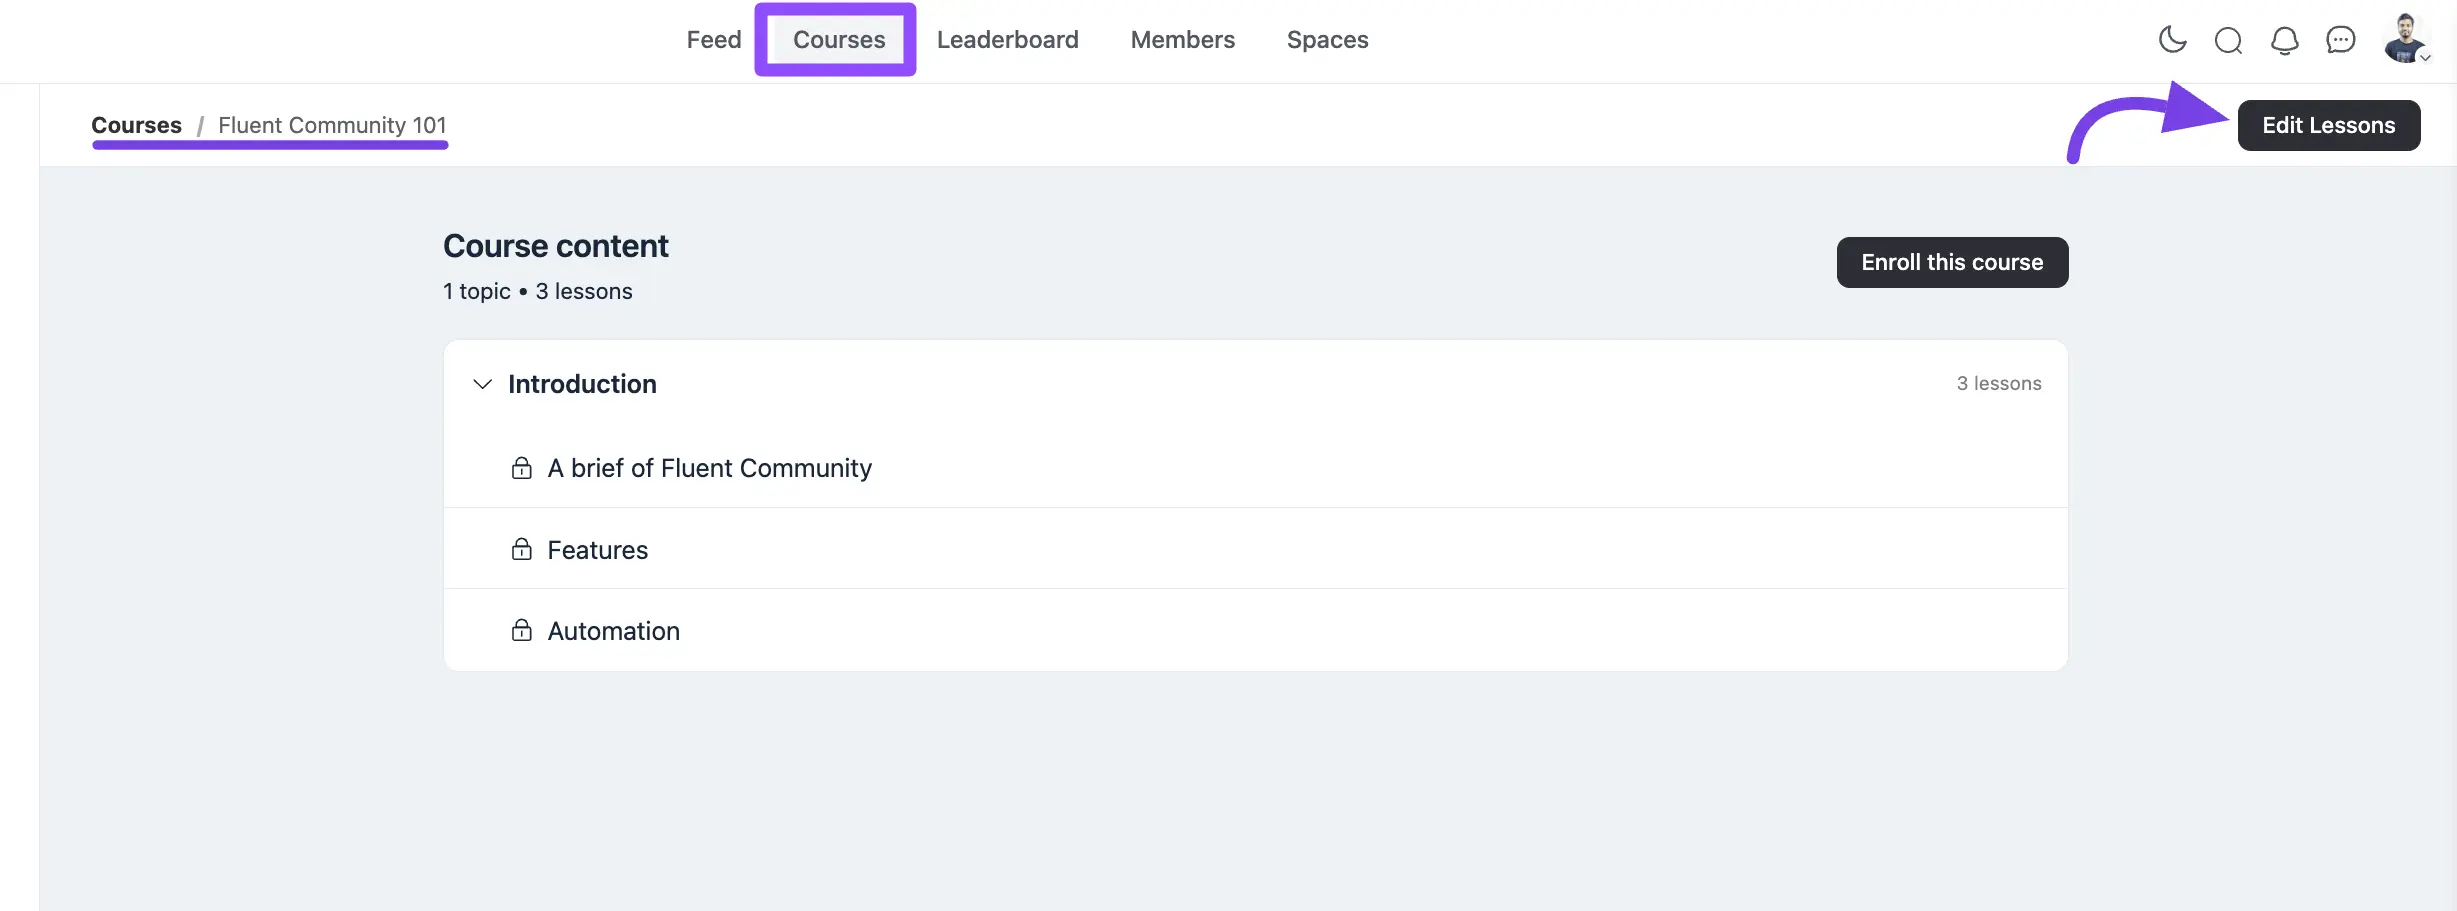
Go to the specific course where you want to add documents or files to a lesson. Click on the Edit Lessons button to access the lesson editor.
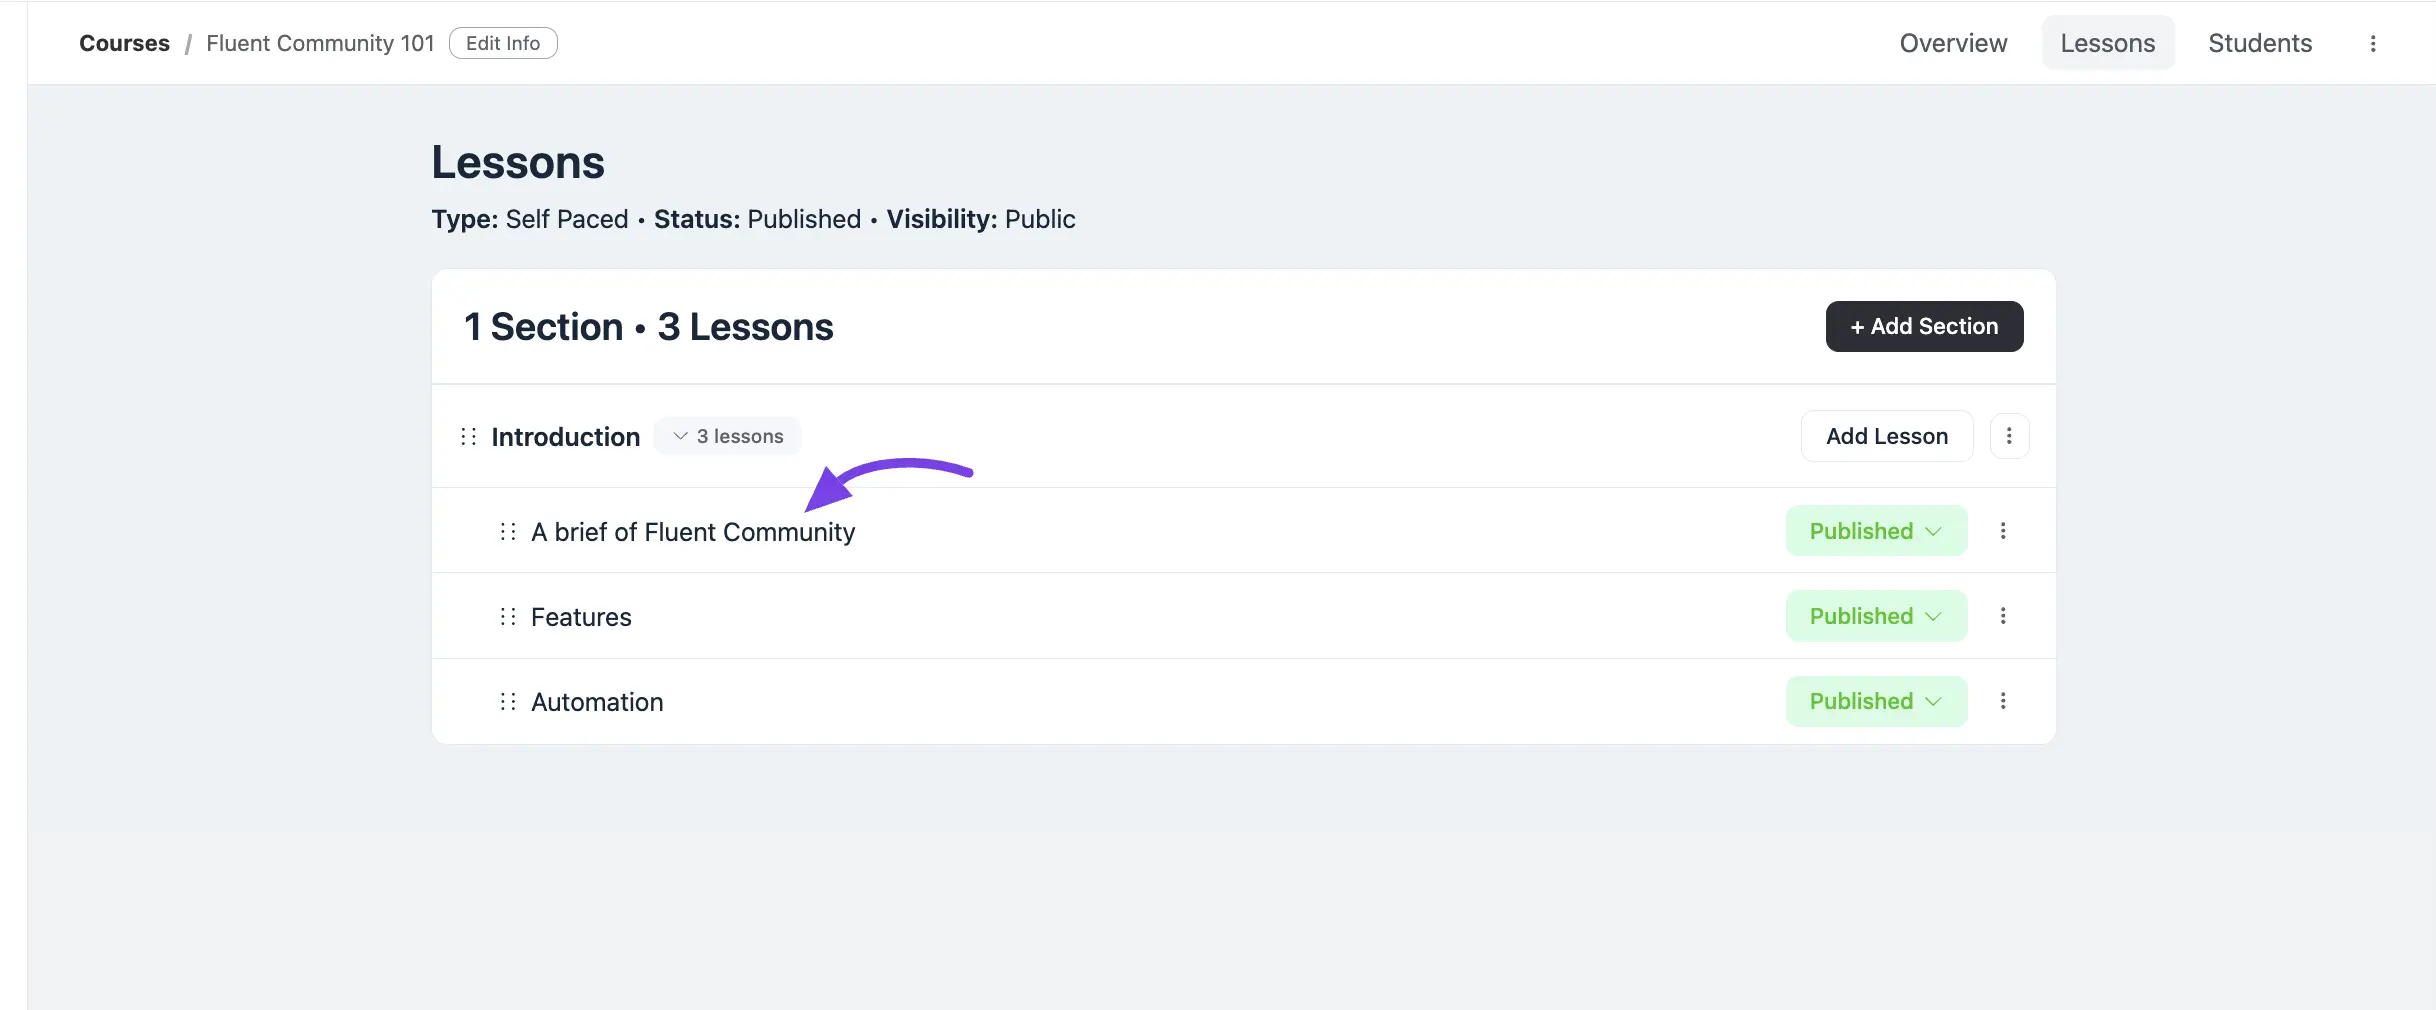
Choose the specific lesson where you want to add documents or files. Click on the lesson to open it.
Upload Documents #
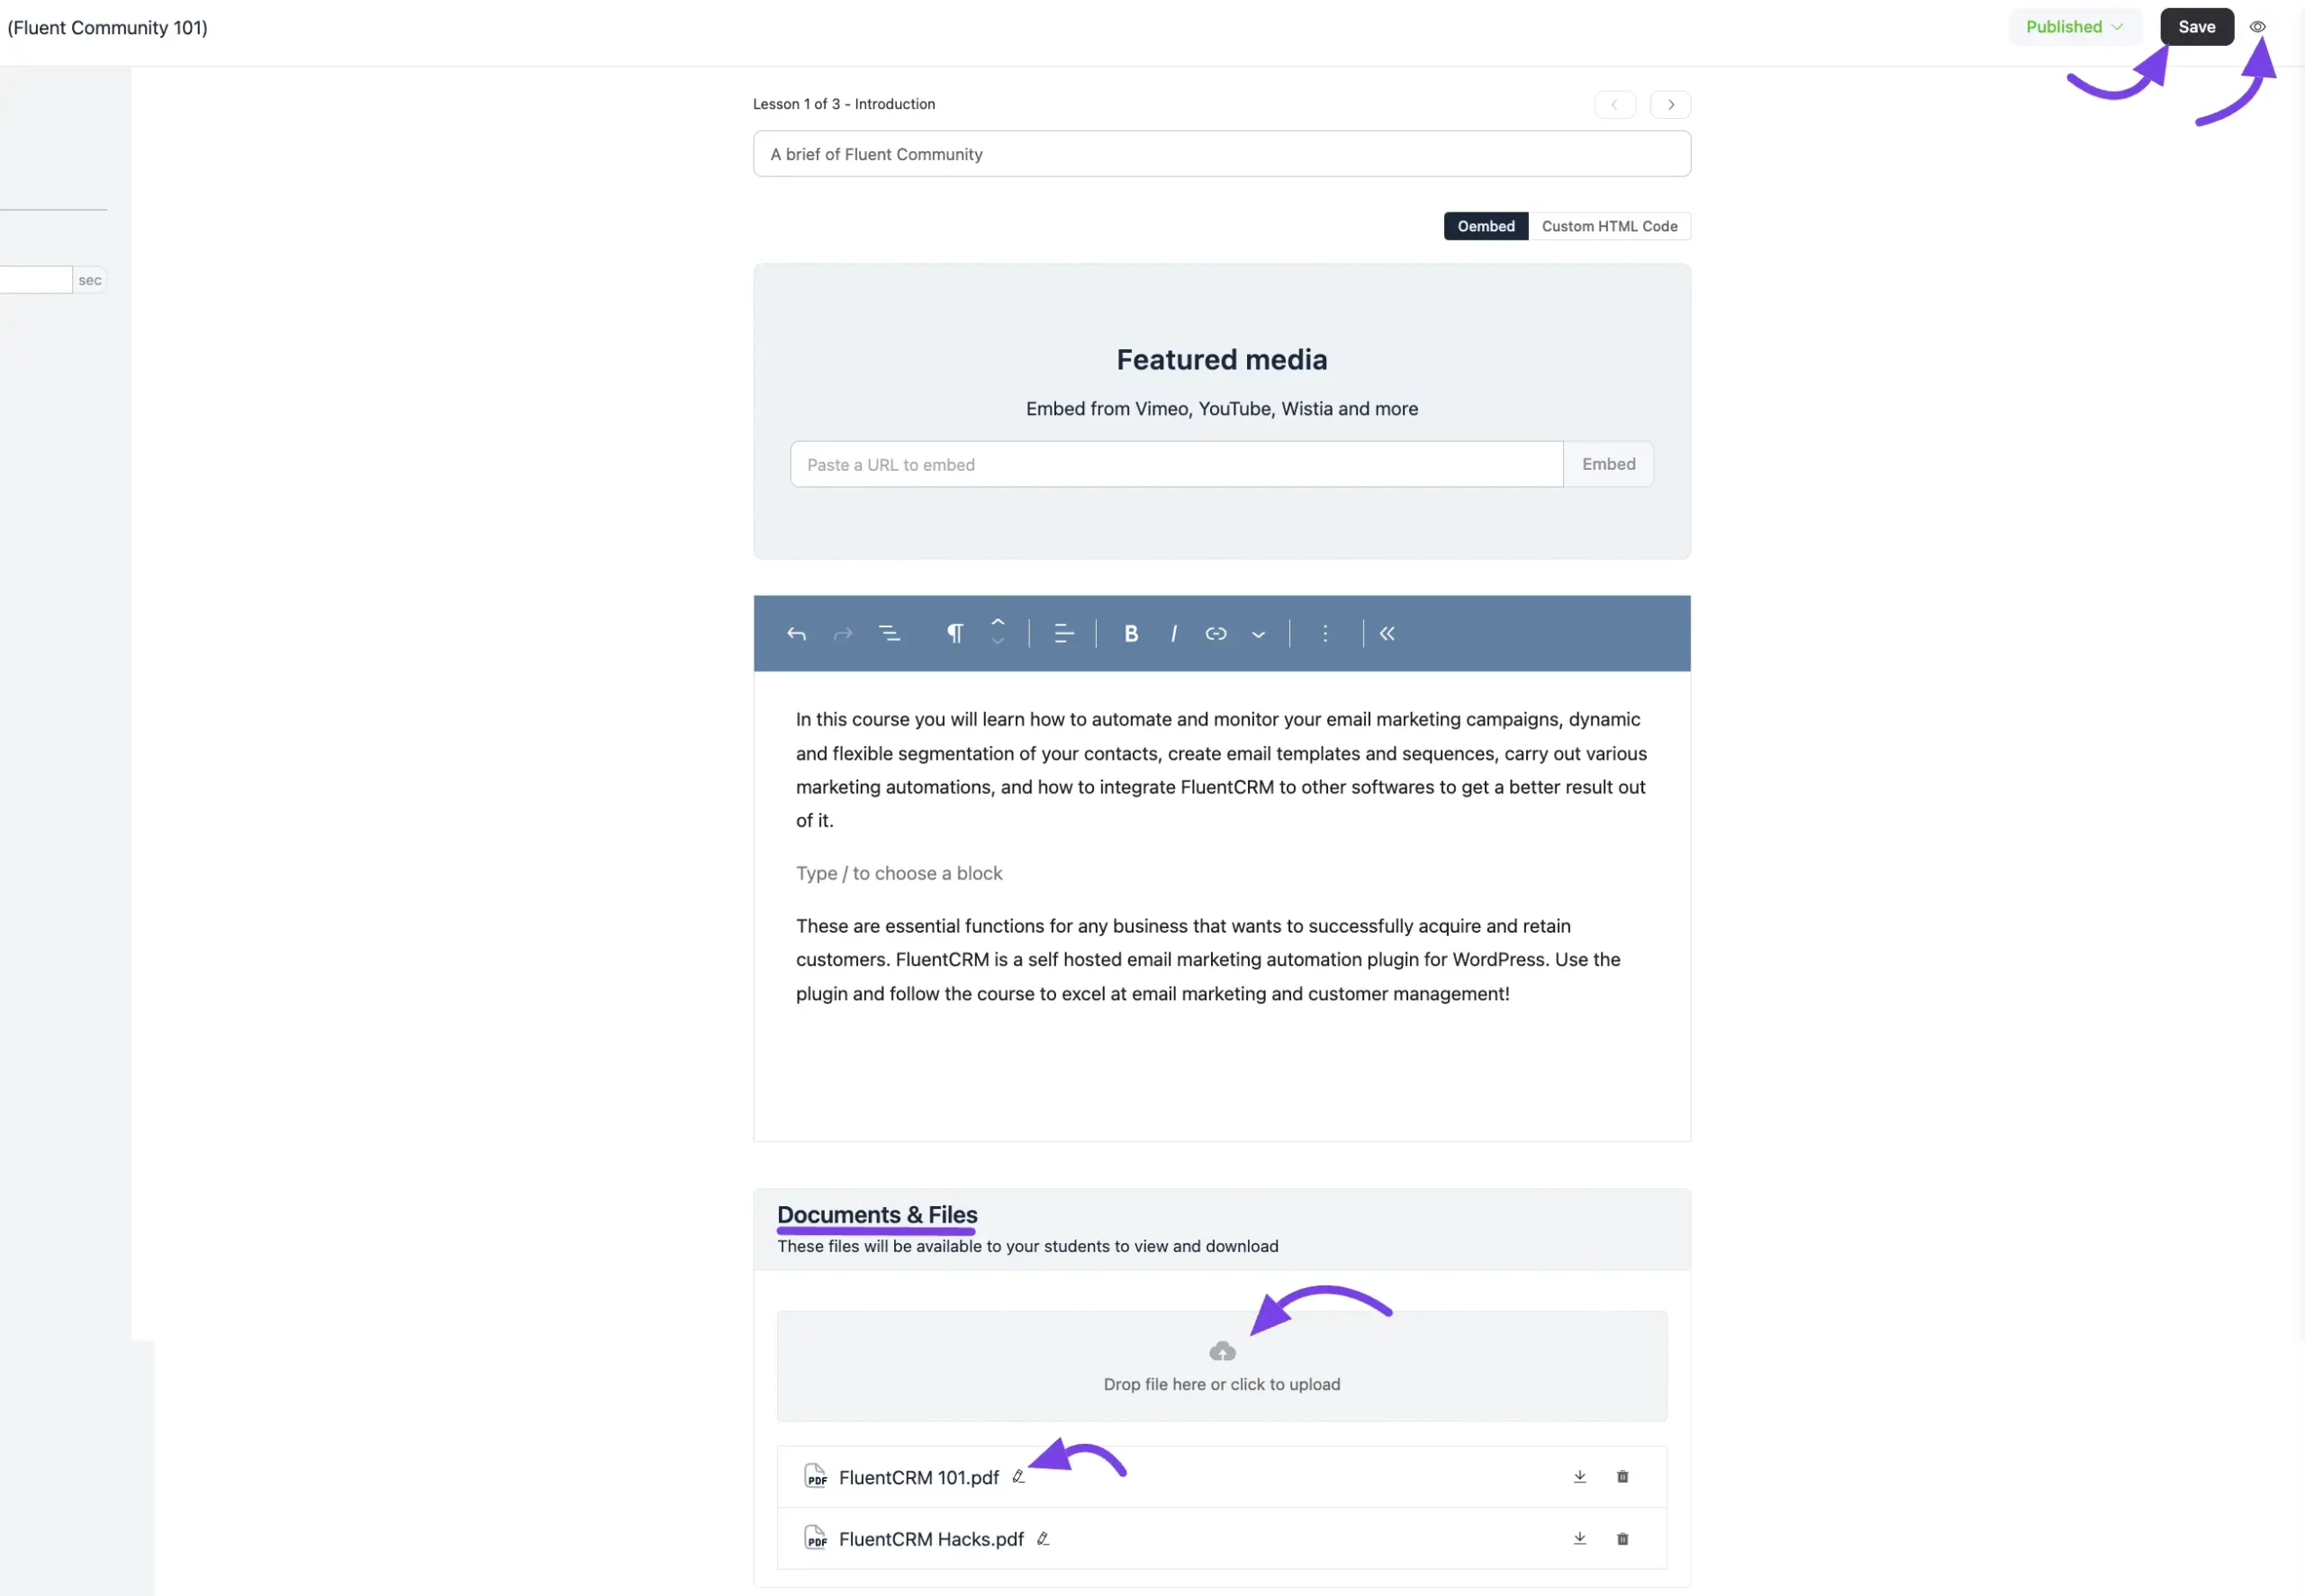
Scroll down to the Documents & Files section. Drag and drop your files into the designated area, or click to Upload them from your device.
Edit Files: To rename the file, click the Pencil icon button next to it. You can also download or delete the file by clicking the Download or Delete button.
After making the necessary changes click on the Save button.
Now, click the Eye Icon in the top corner to see the lesson preview.
File Access for Course Students #
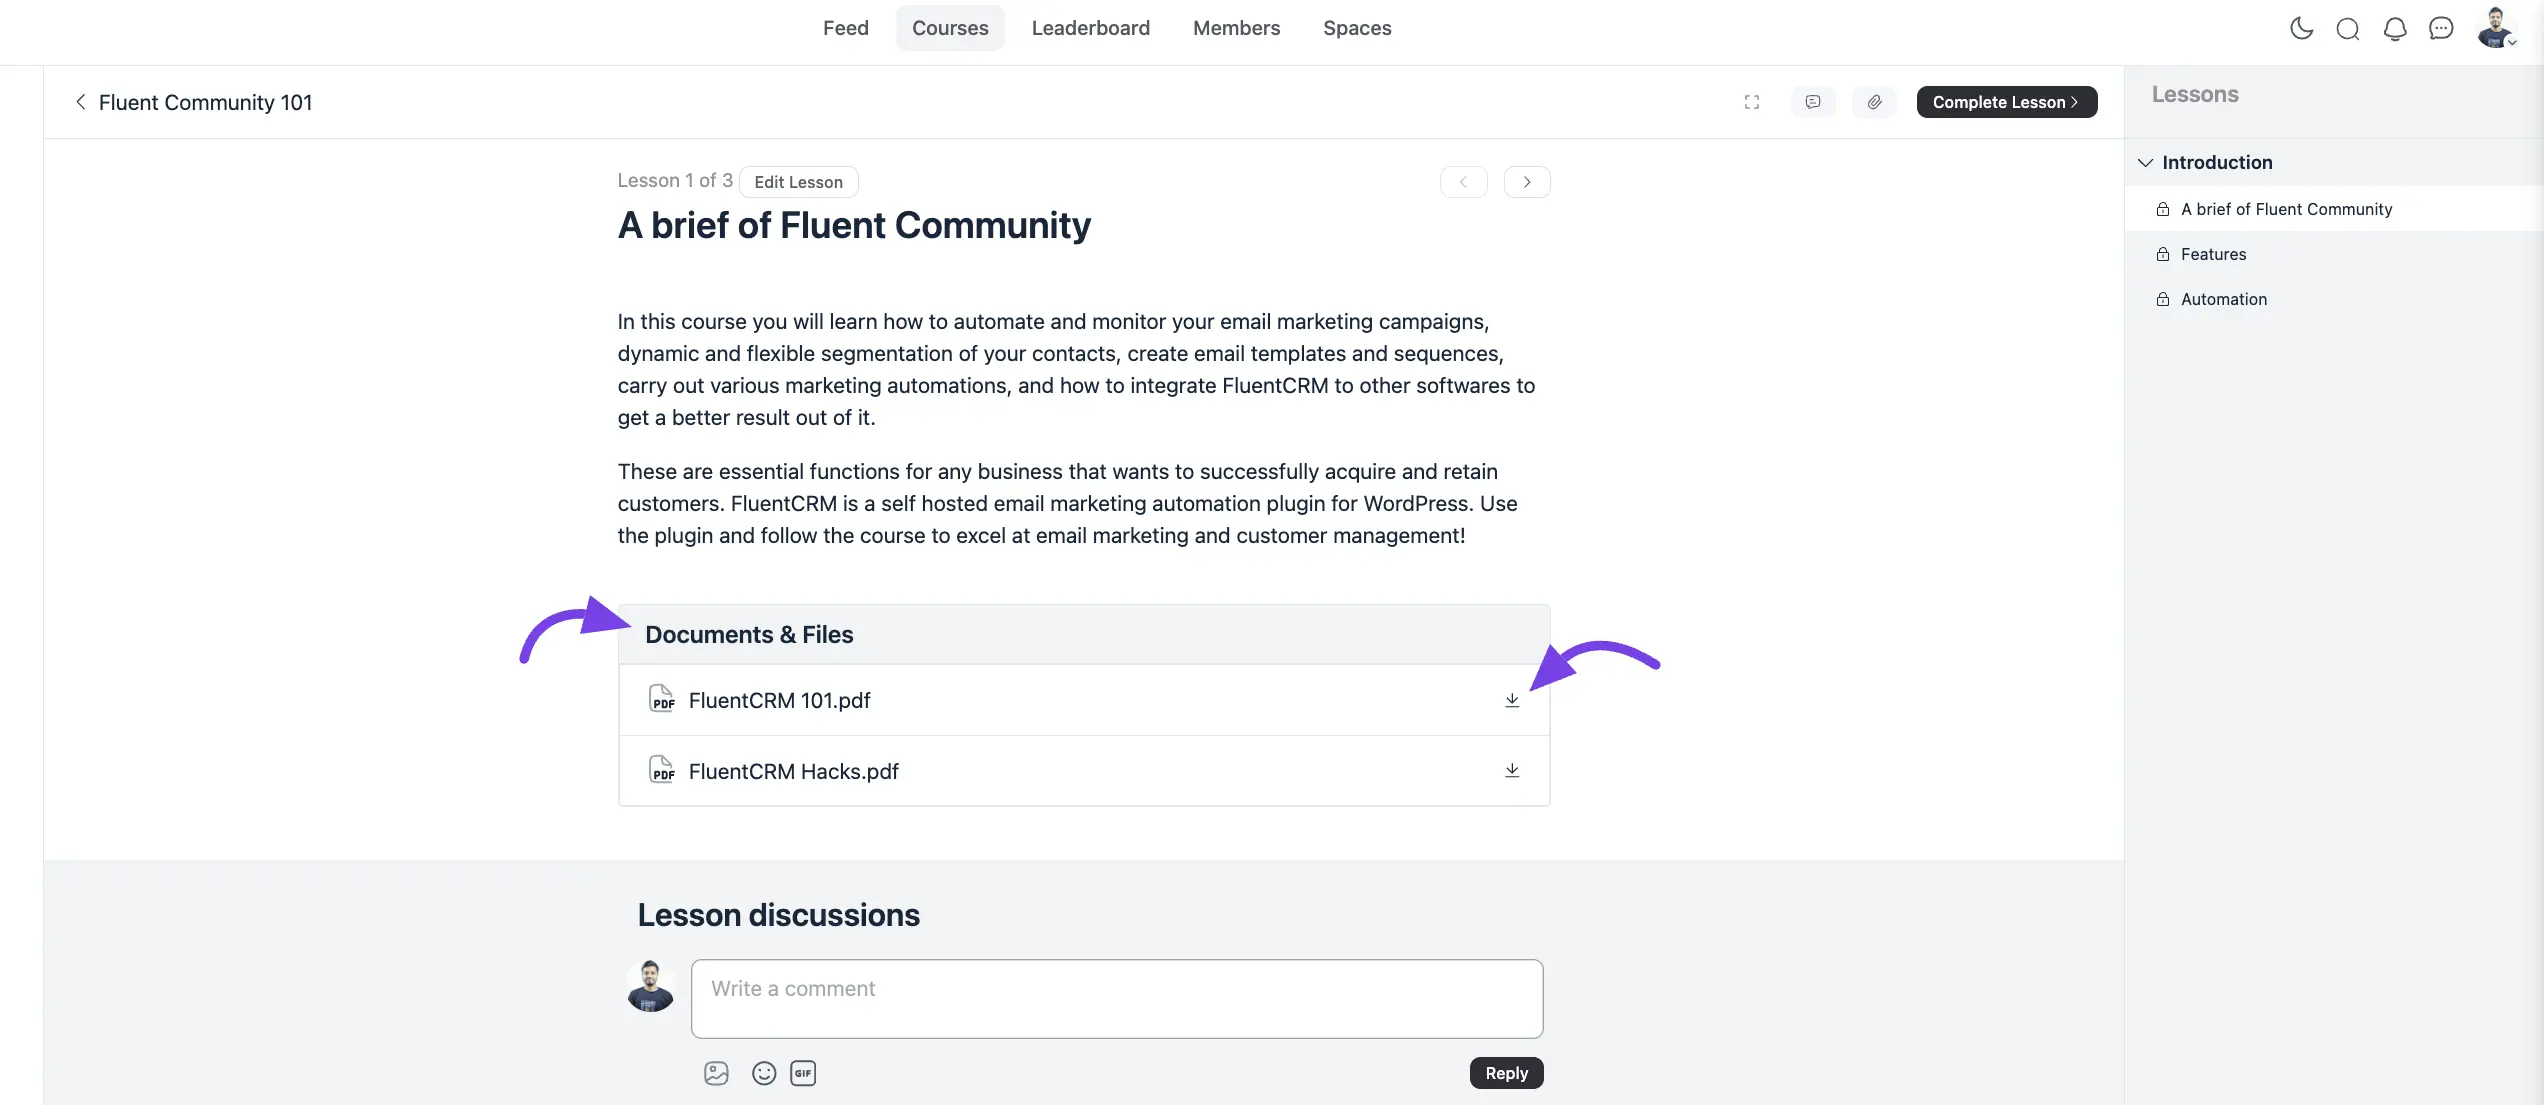
Students can download files by clicking the Download Button or directly accessing the files in the lesson. The feature is fully responsive, ensuring easy access on any device.
With this guide, you can effortlessly upload and manage secure documents for your course lessons. If you have further questions or need assistance, feel free to contact our Support Team.


