In FluentCommunity, both Admins and Members can edit their profiles, while certain settings are reserved for admins. This guide provides a walkthrough on how to view and edit your profile.
Accessing and Editing Your Profile #
Log in to your FluentCommunity account, and click your profile dropdown in the top-right corner. Select your name to open the profile edit section.

Profile Sections Overview #
To edit your profile details, click the Edit Profile button at the top right.
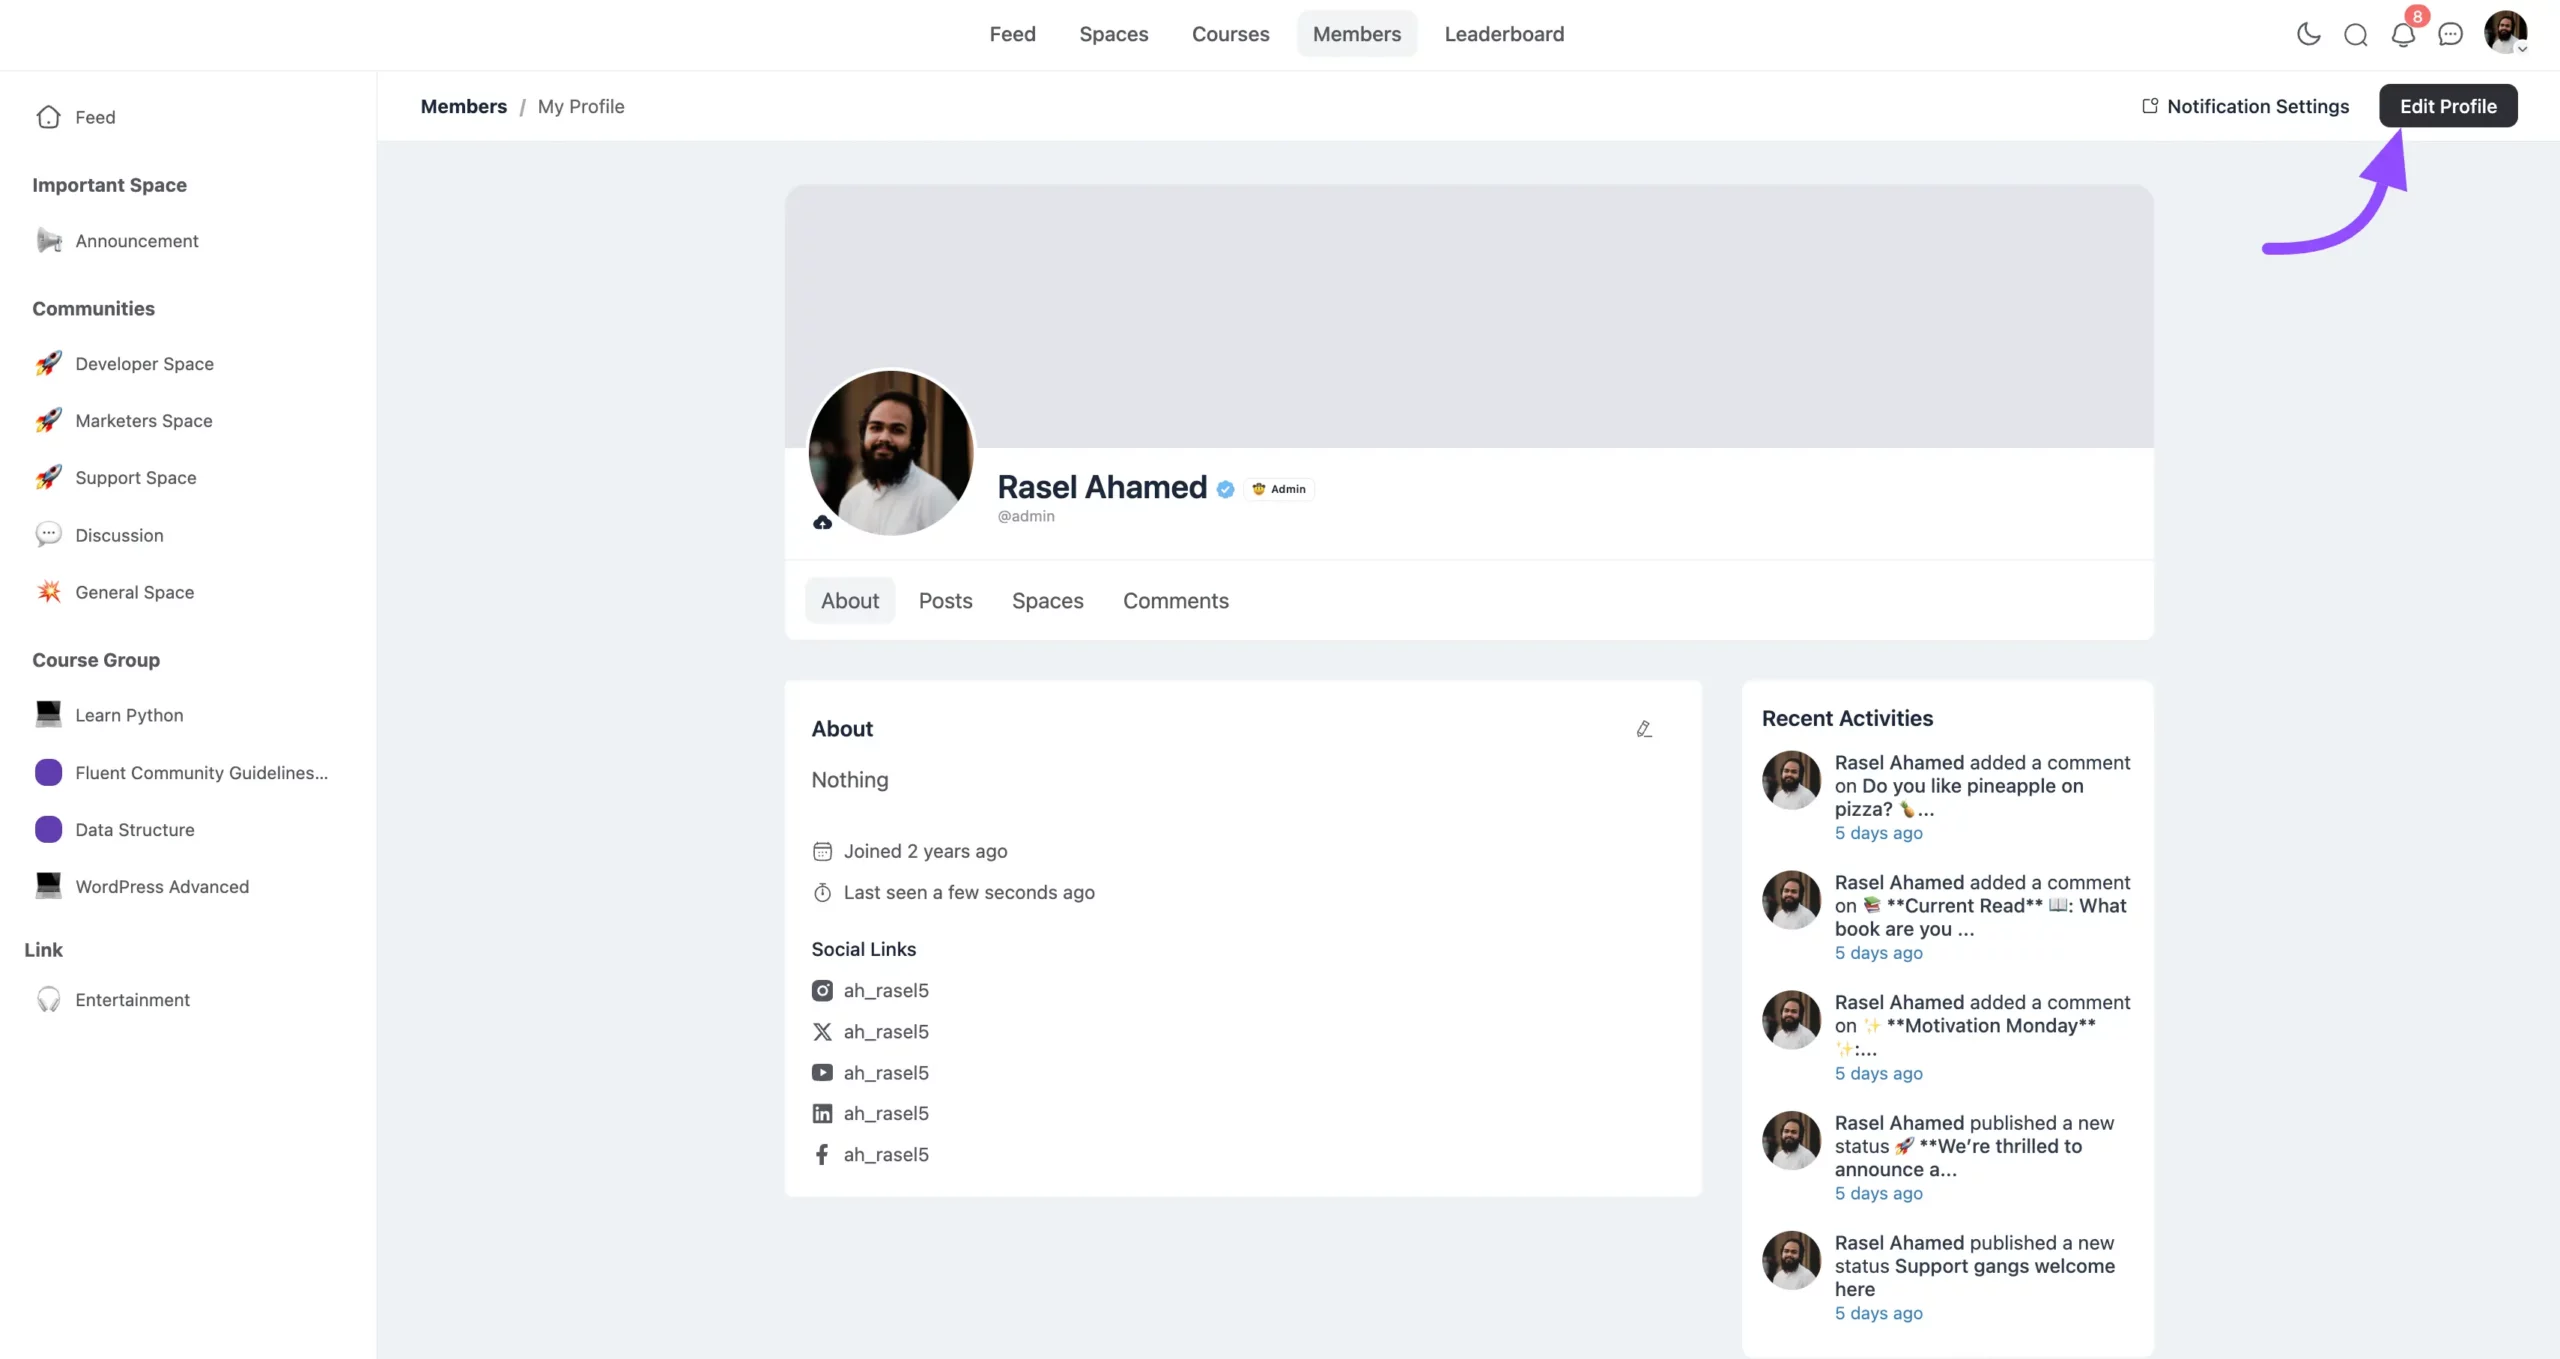
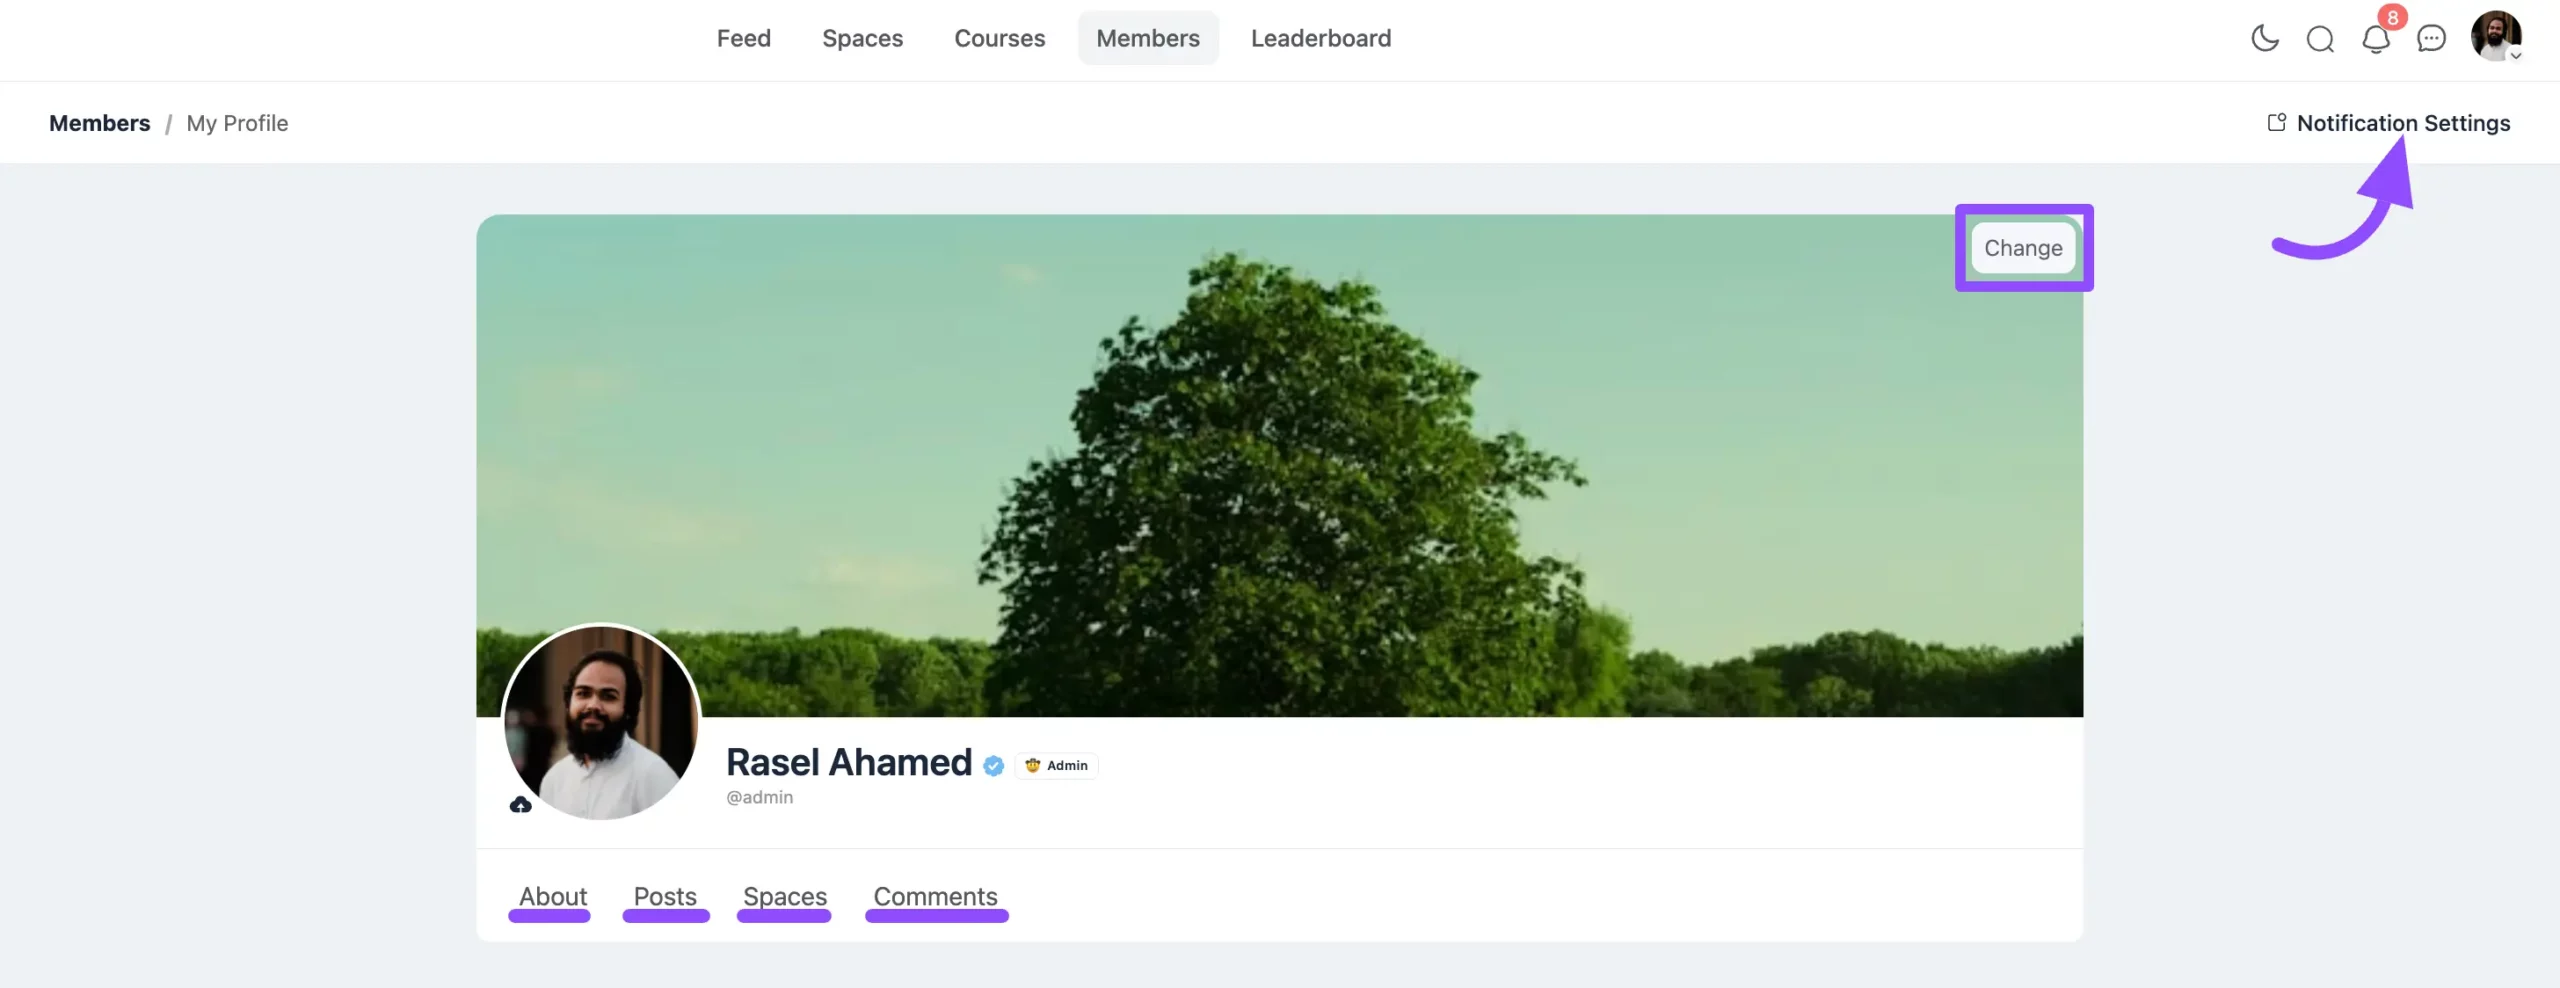
- Profile Photo: Click the cloud icon next to your current profile picture to upload or update your profile photo.
- Cover Photo: To change your cover image, click the Change button in the cover photo area.
- About: View or update your personal details by selecting About.
- Posts: See all your posts across different spaces by clicking on Posts.
- Spaces: View the spaces you’ve joined under the Spaces tab.
- Comments: Check all comments you’ve made by selecting Comments.
- Notification Settings: If you want to customize notifications for your profile click on the Notification Settings button.
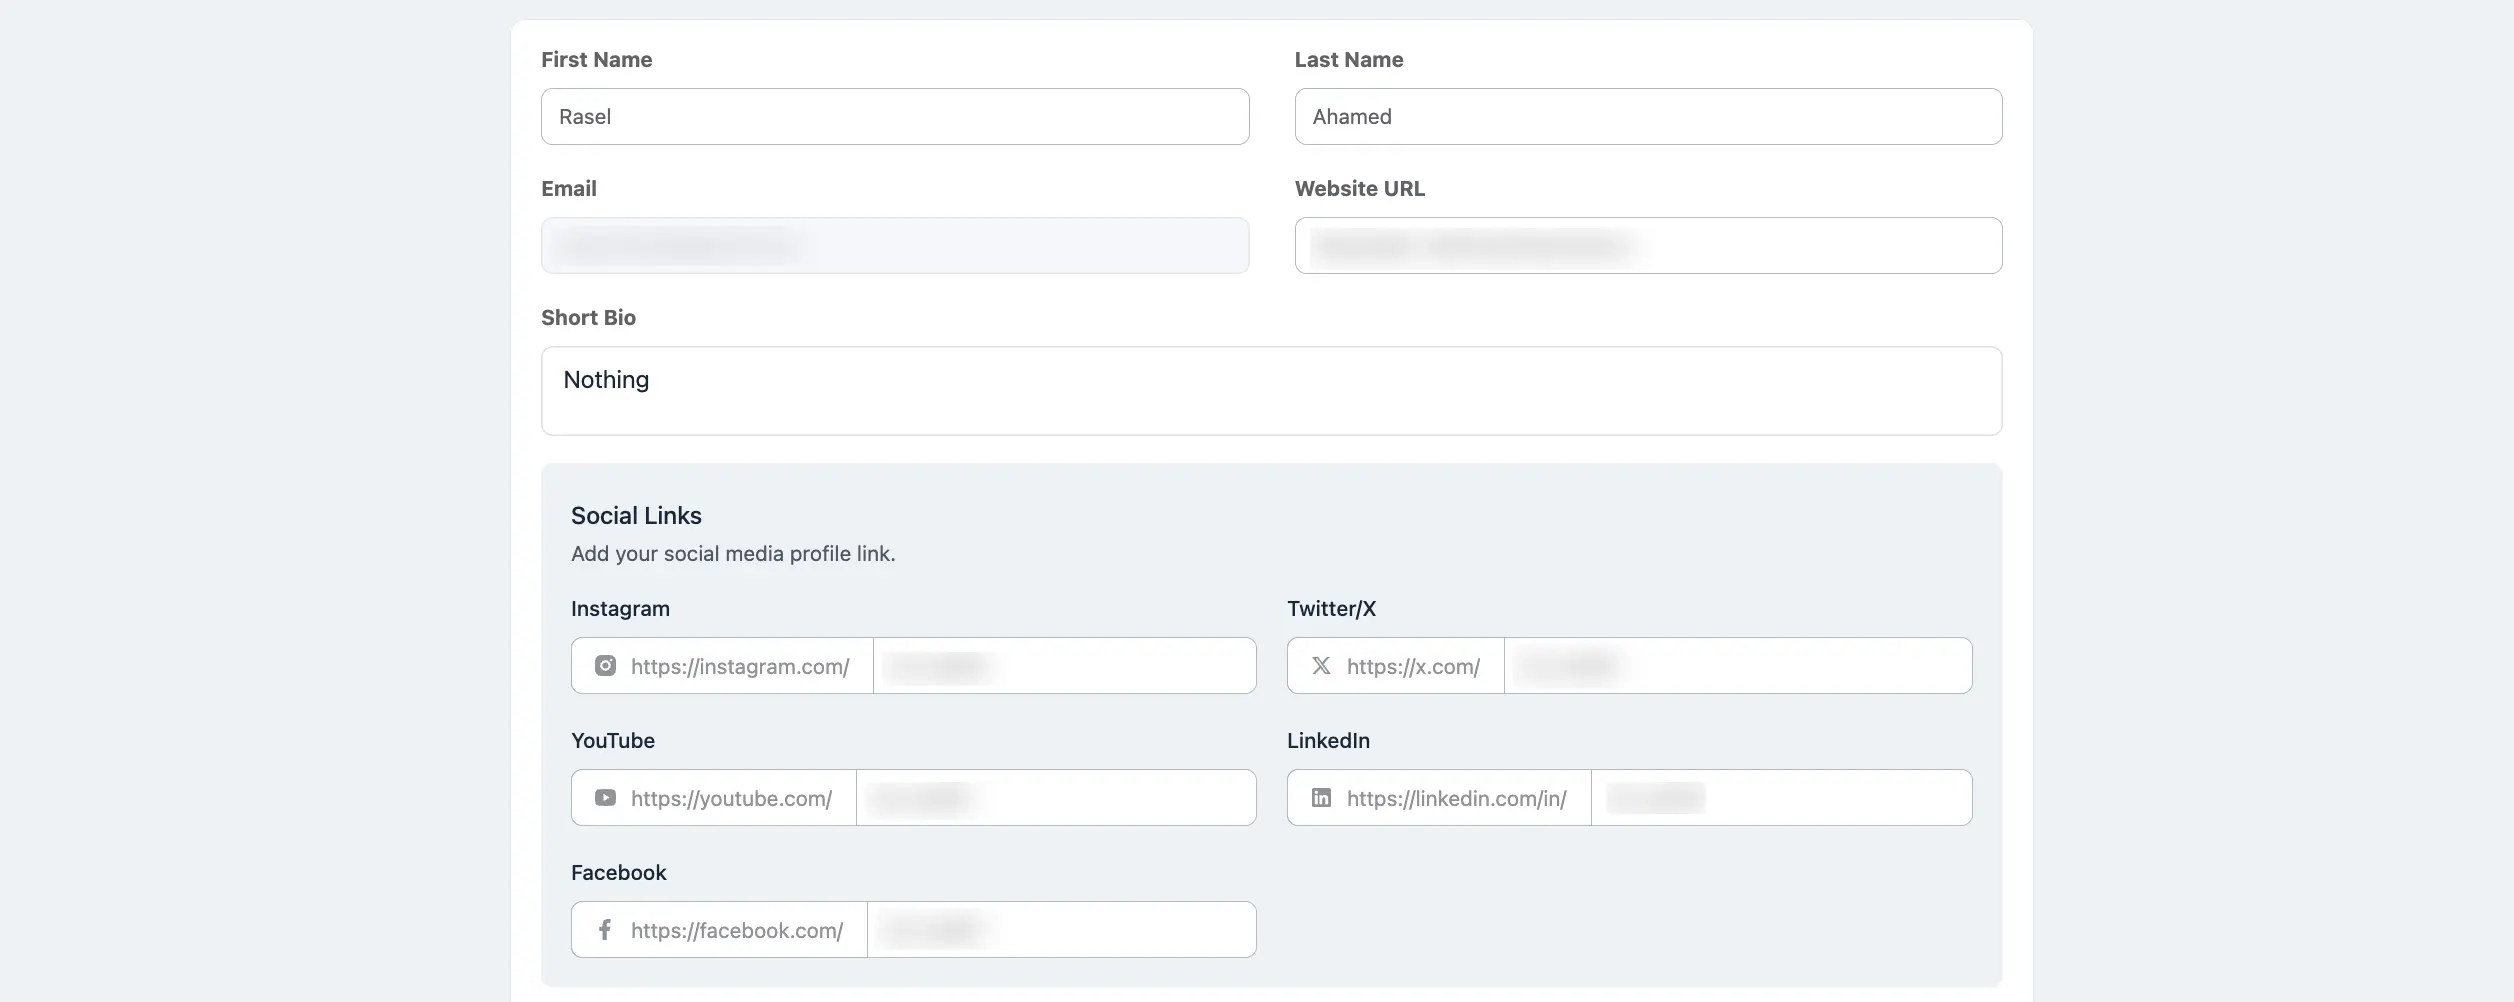
Editing Your Profile Details #
Here, you can update personal information and add social media links. Simply enter your changes in the relevant fields and save.
Admin Actions (For Admins Only) #
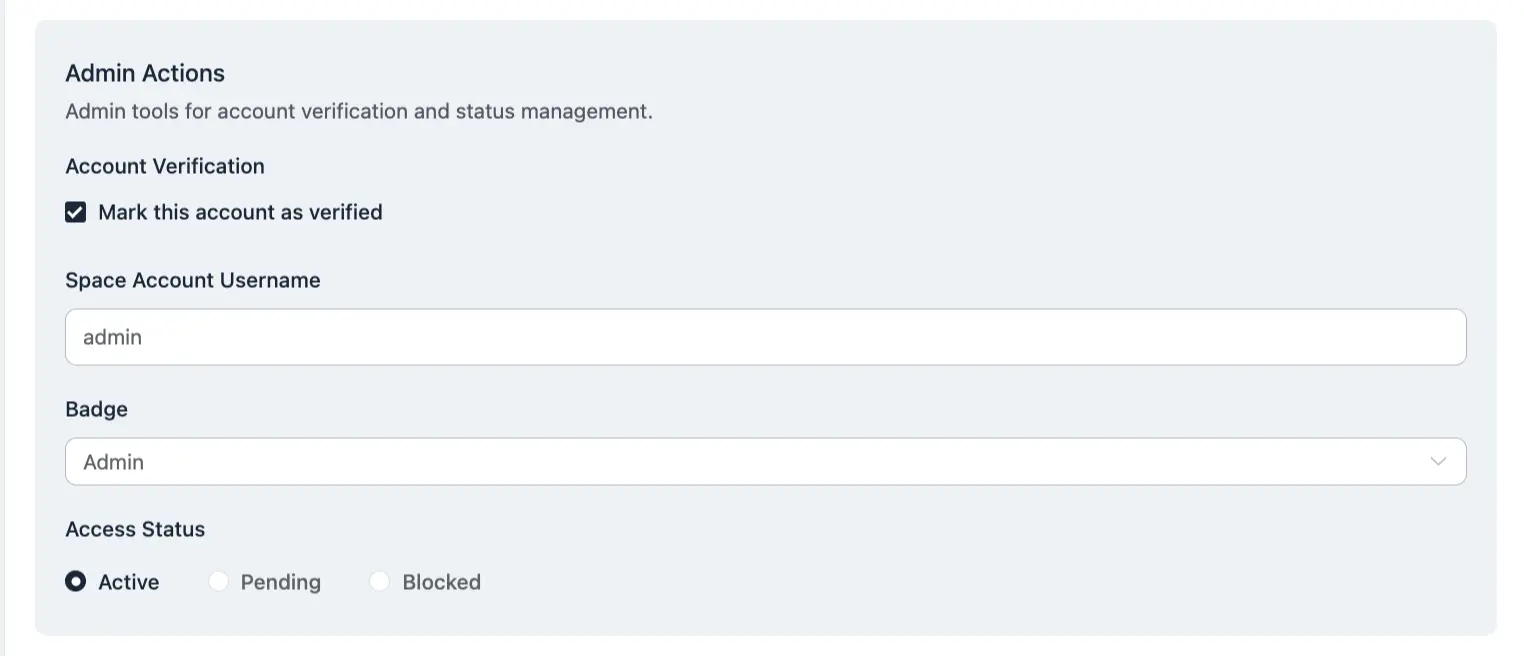
Admins have access to specific profile settings for managing community members profiles.
- Account Verification: Mark an account as verified by checking the Mark this Account as Verified option.
- Space Account Username: Admins can set or edit the username displayed in the community spaces.
- Badge Assignment: Choose a badge for the user profile from the dropdown menu.
- Access Status: Set a member’s account status as Active, Pending, or Blocked based on their role or permissions.
These settings help keep profiles consistent and verified within the community.
If you have further questions, please don’t hesitate to contact us for assistance.


