

How to Create Spaces in FluentCommunity to Organize Your Community

Table of Content
Subscribe To Get
WordPress Guides, Tips, and Tutorials


Every community starts the same way. You launch it, invite your first members, and for a while, one single feed is enough to hold all the conversation. Then your community grows past a hundred members, and that one feed turns into a wall of noise. Course questions sit next to general chit-chat. Announcements get buried under casual posts. Members who joined for one specific reason have to scroll past everything else to find what they actually care about.
This is the exact problem Spaces were built to solve.
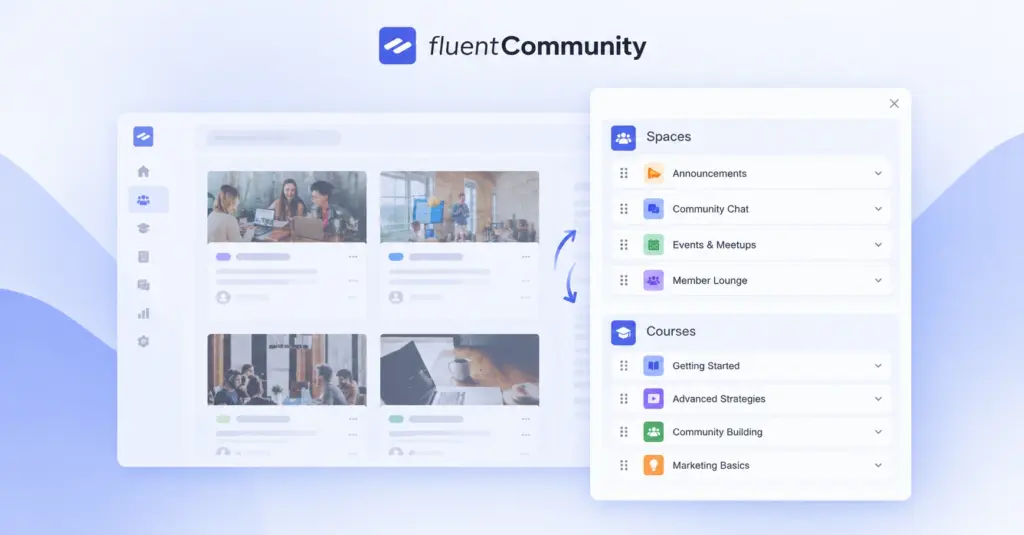
In FluentCommunity, Spaces let you break your community down into focused sections, so members can go straight to what matters to them instead of digging through one giant feed. Think of Spaces as rooms inside your community: one for course discussions, one for general networking, one for announcements, one for a specific cohort or project.
If you’re still running everything through a single feed, this post will walk you through what Spaces are, why they matter more as your community scales, and exactly how to set them up in FluentCommunity without overcomplicating your structure.
What are Spaces, Exactly?
A Space in FluentCommunity is a dedicated section within your community where a specific group of members can post, comment, and interact around a shared topic or purpose. Every Space has its own feed, its own members list, and its own settings, but it still lives inside your main community, so members never have to leave to find it.
If you’ve used BuddyBoss or BuddyPress before, Spaces work similarly to Groups. If you’re coming from Circle or Discord, they’re closer to what those platforms call Spaces or Channels. The core idea is the same everywhere: smaller, purpose-built sections rather than a single undifferentiated feed.
What makes FluentCommunity’s version useful is how lightweight it is to set up and how naturally it fits into the rest of your community structure; courses, chats, and leaderboards all sit right alongside it.
Why Spaces Matter More Than You Think?
It’s tempting to treat Spaces as a nice-to-have, something you’ll get around to once your community grows. In practice, waiting too long to introduce them causes real damage.
Members can’t find what they joined for. Someone who joined for your marketing course doesn’t want to scroll past a debate about industry news to find a lesson update. Spaces keep the signal clean.
Engagement drops when everything is public to everyone. Not every conversation needs an audience of your entire community. A small group working on a cohort project, a mastermind, or a private client group behaves differently when it has its own space versus being lumped into the general feed.
Admins lose visibility. When everything lives in one feed, it becomes genuinely hard to tell what’s happening in each part of your community. Separate Spaces give you a clearer picture of where the real activity is, and where it’s gone quiet.
Growth becomes harder to manage. A community with 50 members can survive without structure. A community with 5,000 can’t. The earlier you introduce Spaces, the less painful it is to reorganize later.
How to Set Up Spaces in FluentCommunity
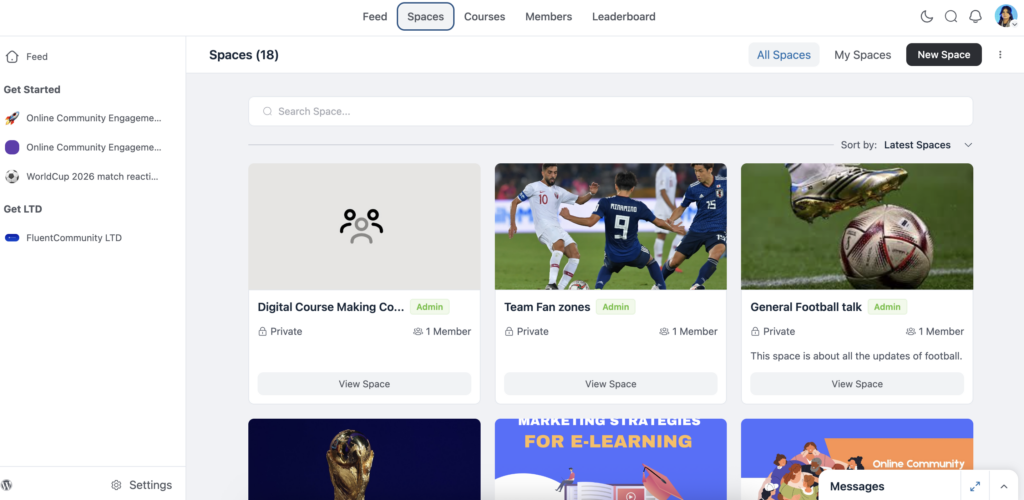
Setting up a Space takes a few minutes, and you don’t need any technical background to do it. From your FluentCommunity dashboard, click the Spaces option from the top.
Use the New Space option directly from your community’s main navigation.
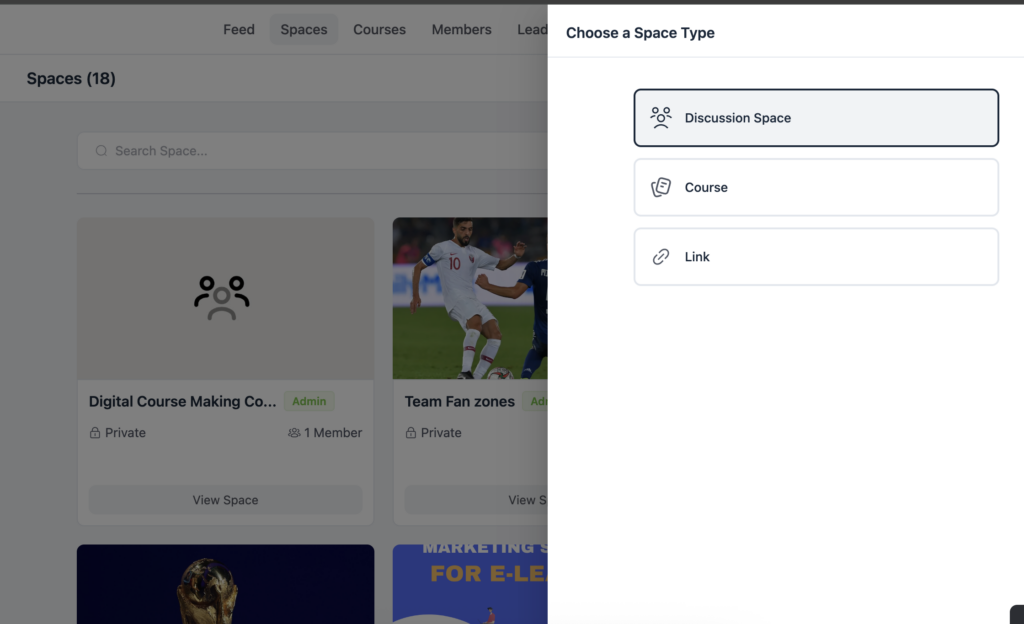
Choose a space type first.
Now, give your Space a name and a short description that tells members exactly what it’s for. Be specific here.
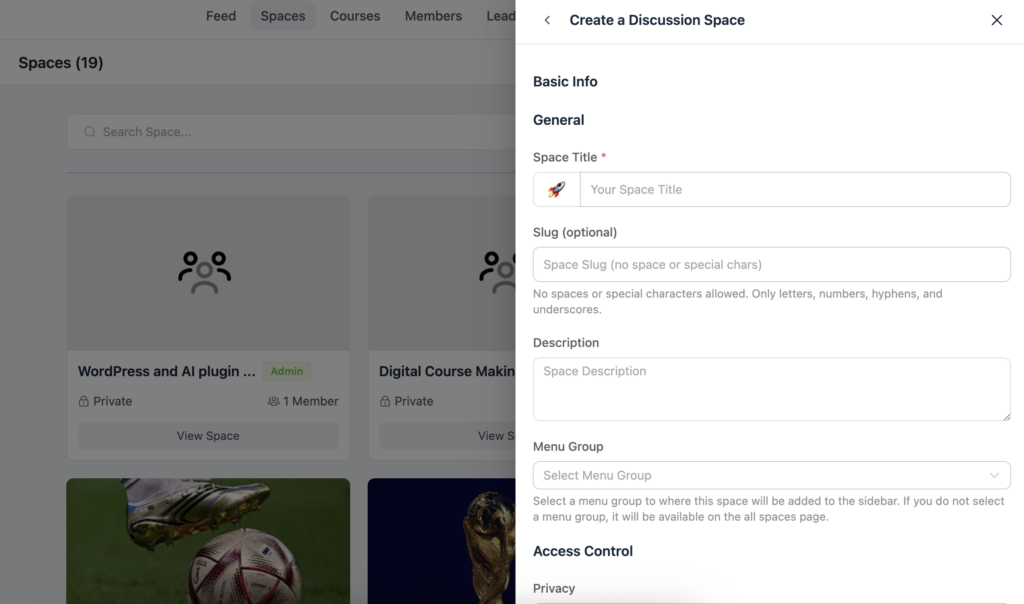
Choose the privacy level for the Space: public (anyone in the community can join), private (members must request to join), or secret (invite-only, not visible in search).
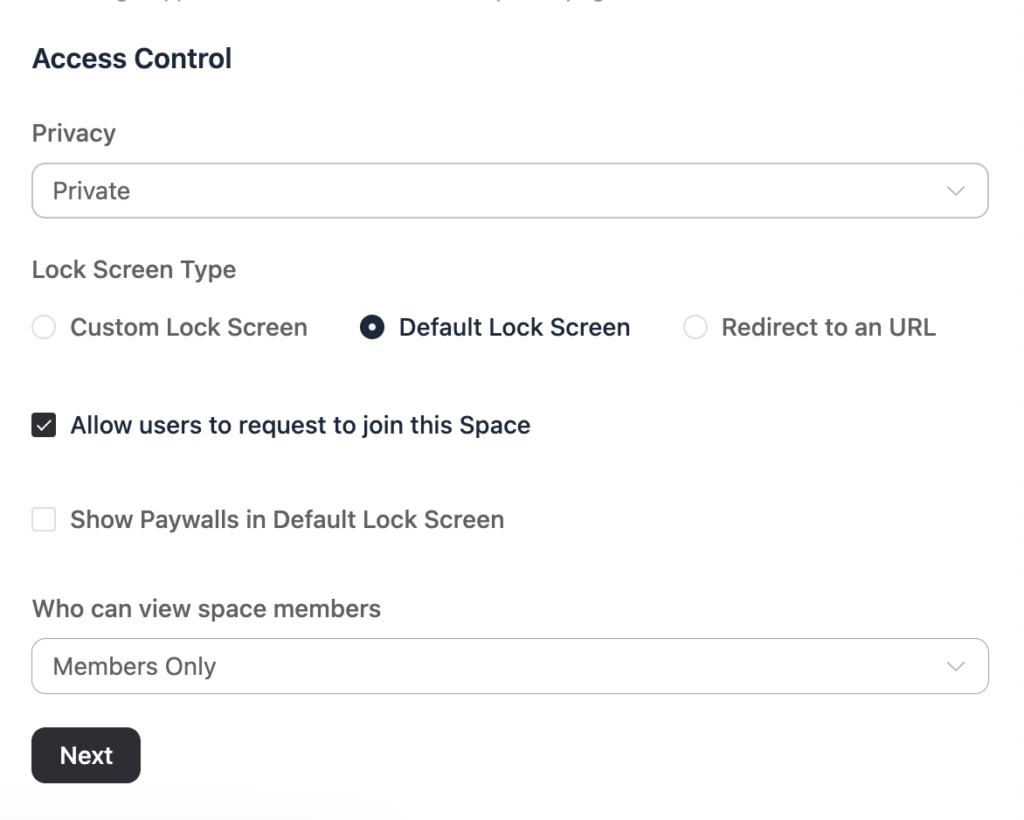
Add a cover image if you want the Space to feel distinct visually. This matters more than it sounds like it should. Members orient themselves visually before they read a single word.
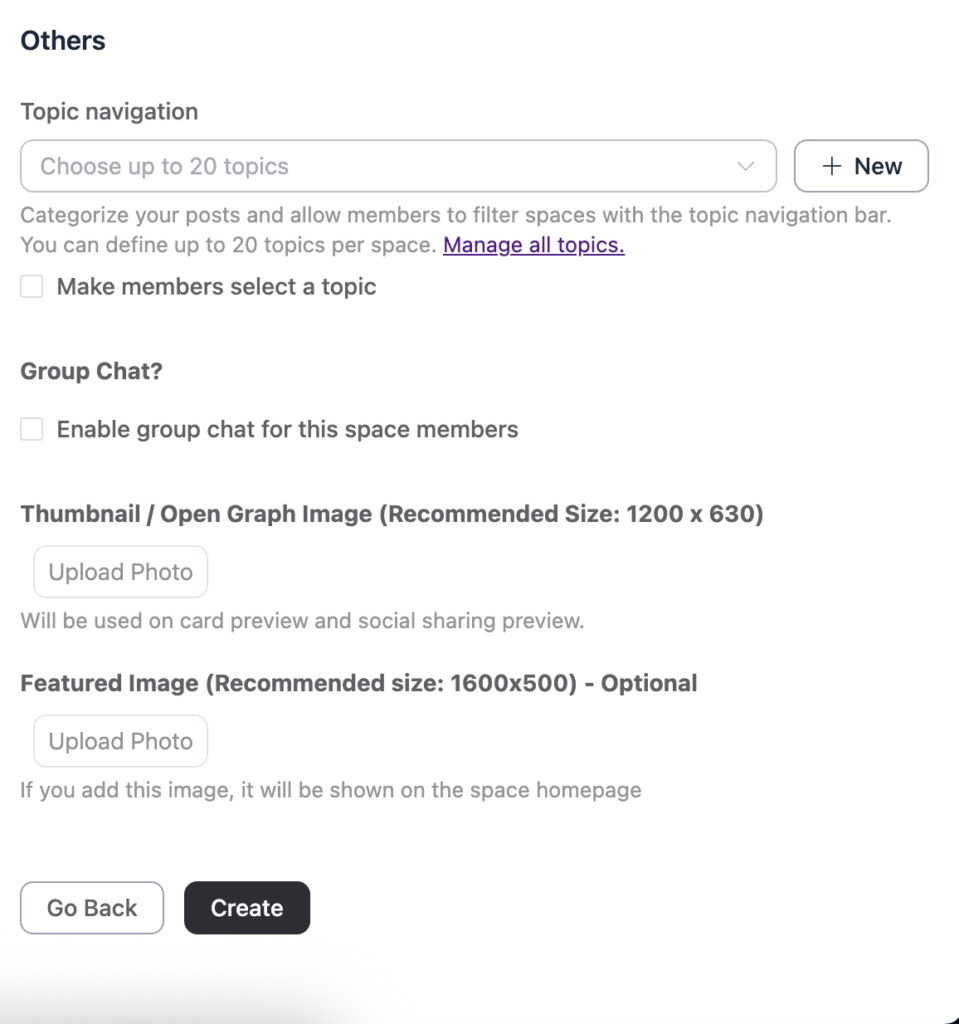
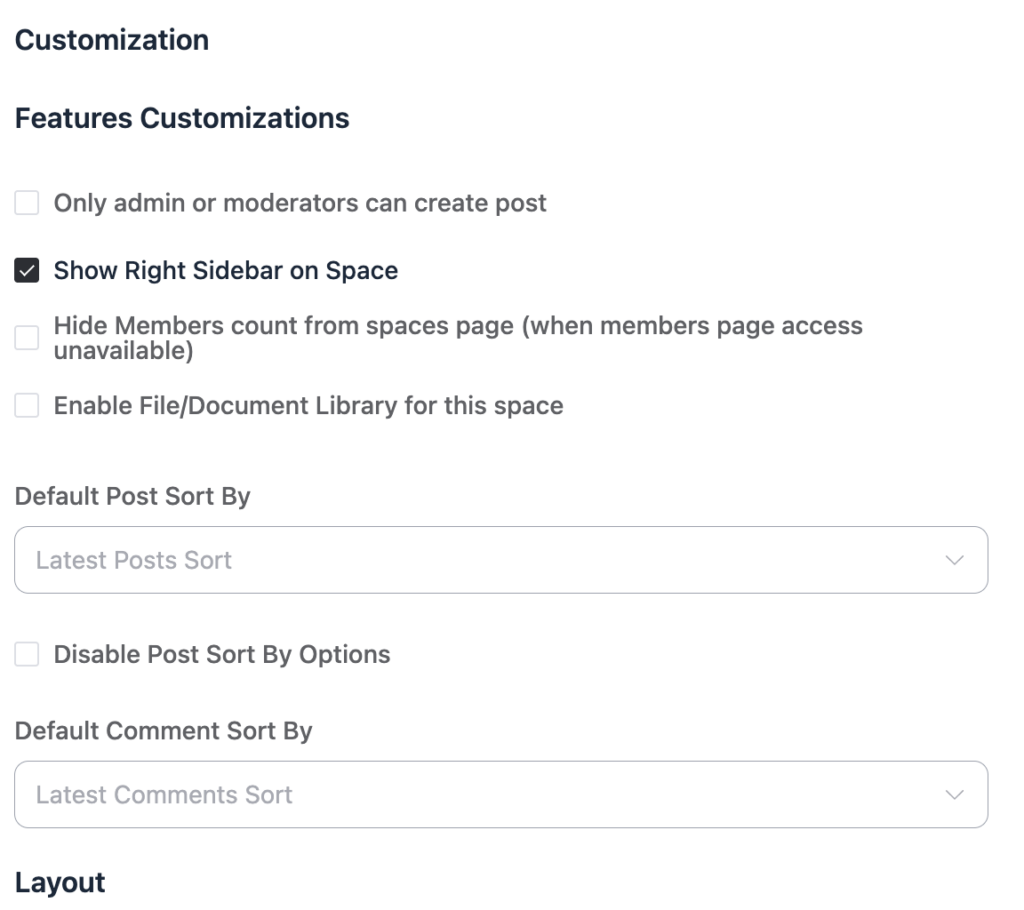
Decide who can post in this Space. For announcement-only Spaces, you may want to restrict posting to admins or moderators while keeping the Space visible to everyone.
Assign the Space to a category if you’re using group categories to organize multiple Spaces together. This becomes especially useful once you have more than five or six Spaces running.
Publish the Space and invite the right members, or make it discoverable if you want organic growth.
Once it’s live, the Space behaves like its own mini-community. Its own feed, its own member list, its own activity.
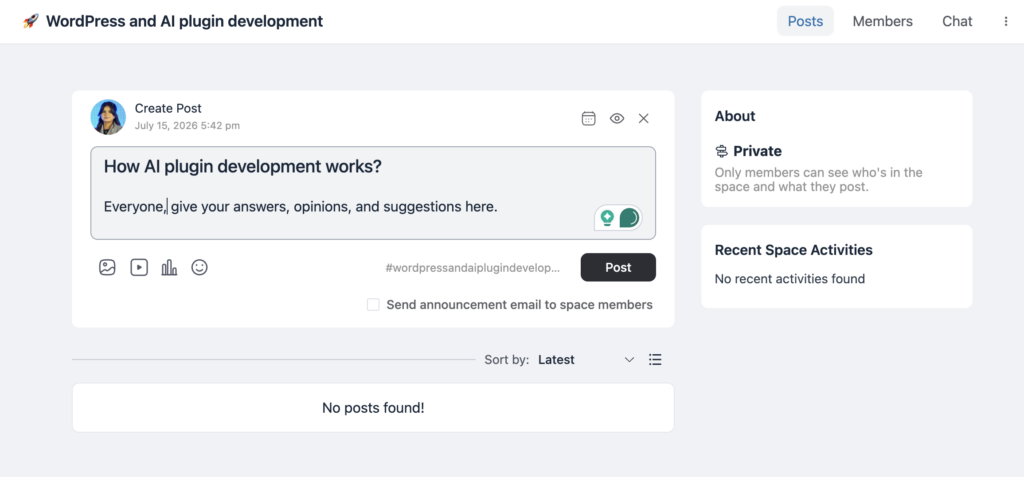
Getting the Structure Right From the Start
The biggest mistake community admins make with Spaces isn’t setting them up wrong. It’s creating too many of them too soon.
A brand-new community with 30 members doesn’t need ten Spaces. It needs two or three, tightly defined, that map to how members actually behave. Start with something like:
- A general discussion Space for open conversation
- A course or content-specific Space tied to what you’re actually selling
- An announcements Space for anything that needs to reach everyone
As your community grows and you notice recurring sub-topics or specific member segments, that’s your signal to add more Spaces, not before.
Common Mistakes to Avoid
A few things trip up admins consistently when they’re new to Spaces:
Don’t make every Space private by default. Privacy has its place, but overusing it makes your community feel closed off and harder to discover. Reserve private and secret Spaces for genuinely sensitive groups.
Don’t leave Spaces without a clear owner. Every active Space should have at least one admin or moderator paying attention to it. An abandoned Space with no one responding to posts kills engagement faster than not having the Space at all.
Don’t skip the description. New members decide whether to join a Space based on that one or two-line description. If it’s vague, they’ll skip it, even if the content inside would have been exactly what they needed.
Don’t forget to archive or merge Spaces that have gone quiet. A community full of dead Spaces looks abandoned, even if your active ones are thriving.
How Spaces Work Alongside Your Other Community Tools
Spaces rarely function well in isolation. They tend to work best when paired with a few other features you’re already using in FluentCommunity.
Role Manager, for instance, pairs directly with Spaces once you have more than a handful running. Rather than one admin trying to keep an eye on every Space, you can assign a moderator or space manager role scoped to a specific Space, giving it dedicated oversight without expanding that person’s access to your entire community.
User Approval is worth layering on top of specific Spaces too, even if your overall community stays open. A cohort Space, a paid mastermind, or a client-only group benefits from its own approval step, so you can keep general community access frictionless while still gating the Spaces that need it.
Search and the Directory both become more useful once you have multiple Spaces running, since members need a way to find the right one without browsing through every option manually. Make sure each Space has a clear, descriptive name and short description, since that’s exactly what shows up in search results and in the Directory when someone’s trying to figure out where they belong.
And once you’ve got a handful of Spaces live, All Activities becomes the easiest way to keep a pulse on all of them at once, rather than checking each Space’s feed individually every day.
None of these features require Spaces to function, but used together, they turn a simple grouping tool into the backbone of how your entire community is organized.
Final Thoughts
Spaces are one of those features that feels optional right up until the moment your community outgrows a single feed, and then it becomes the single most important structural decision you’ll make. The good news is that FluentCommunity makes it simple to set up, adjust, and scale as you grow, so there’s no reason to wait until your feed turns into noise before you organize it.
Start with a small, intentional set of Spaces that map to how your members actually use your community, and let the structure grow with you.

Prema Anjum
My full name is Anzuman Ara Chowdhury. But people know me as Prema Anjum. I’m a Digital Marketer by profession, a WordPress community contributor, and a travel enthusiast by heart.
![SEO Title: 5 Best Community Portal Software [WordPress + SaaS Options]](https://fluentcommunity.co/wp-content/uploads/2026/10/community-portal-software-featured-1-1024x536.webp)
Add your first comment to this post