

Community Events: How to Host Events in WordPress

Table of Content
Subscribe To Get
WordPress Guides, Tips, and Tutorials


If you run an online community, events are probably already part of it: a weekly Q&A, a live workshop, or a local meetup. Until now, FluentCommunity didn’t have a built-in place to create and manage them.
FluentCommunity 2.14 adds that. With the new FluentEvent add-on, you can create WordPress community events right inside your community, where your members already post, comment, and learn. This guide covers what FluentEvent does, how it works, and how to enable it.
What Is FluentEvent?
FluentEvent is the events add-on for FluentCommunity, released with version 2.14. It’s a separate, free plugin.
The main idea is simple: an event is a post. When you create an event, it shows up in the member feed like any other post. Members can comment on it, and it follows the permissions of the space it belongs to.
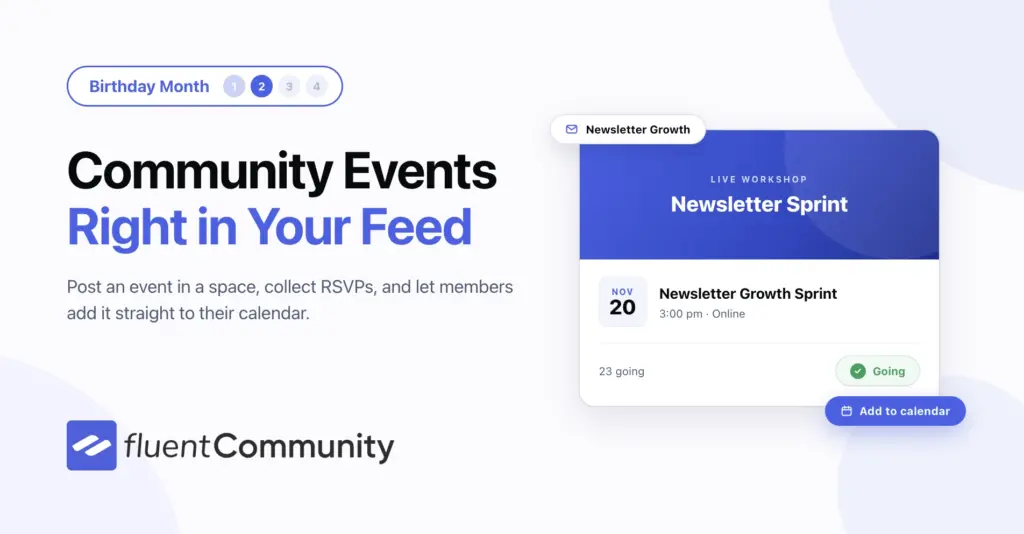
Each event post shows a card with the date, the location, and an RSVP button. Members can see the key details and respond right from the feed.
Why Events Inside Your Community Make Sense?
Because events are posts, they work the same way as everything else in your community.
Events appear in the feed. Members see them alongside regular posts, without having to visit another site. Comments live on the event. Questions and discussion stay attached to the event they belong to.
Space permissions apply. An event follows the permissions of its space, so an event in a private space stays private.
How to Create an Event in FluentCommunity
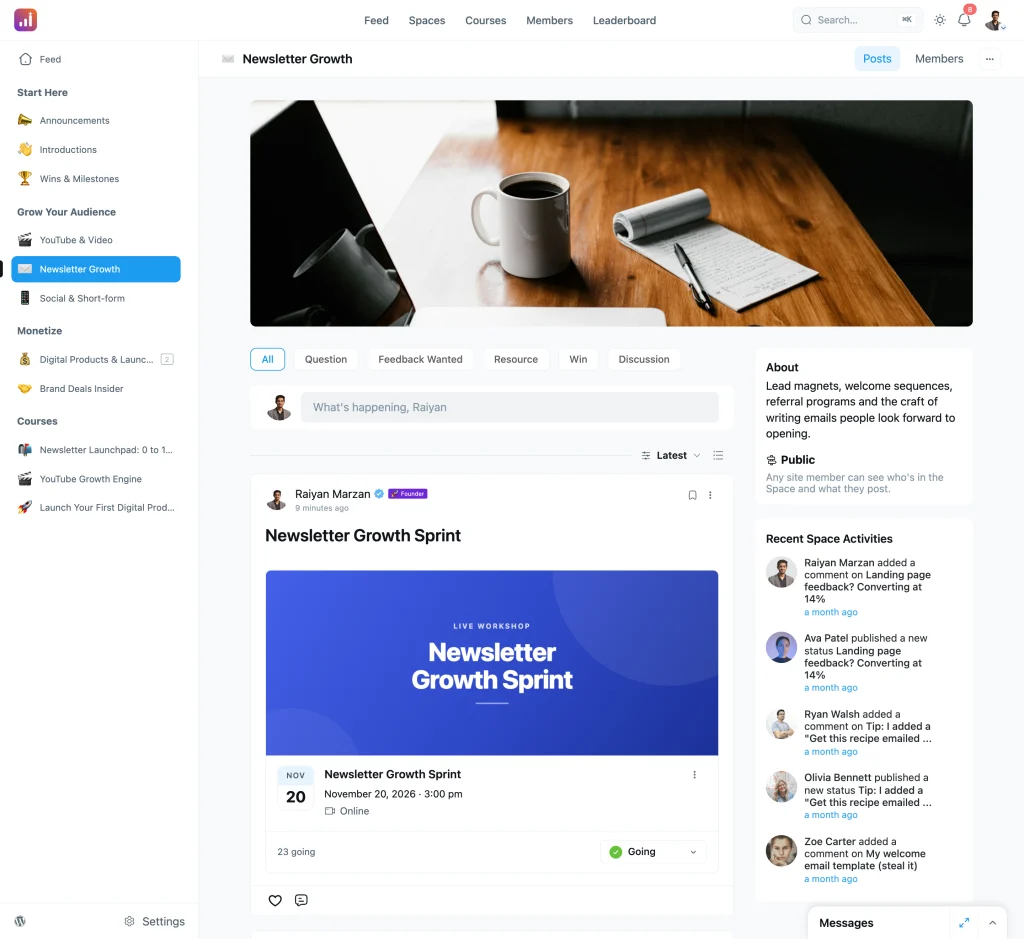
You create events from the Create Event screen. It makes the feed post and the event together in one step. You’ll fill in these fields: the target space, the post text, a cover image, the event name, the description, and the date. If your community allows community-wide posts, an event can also sit outside any specific space. Only admins and community managers can create events. Members can’t.
Online and In-Person Events
FluentEvent supports both online and in-person events. Online events include a meeting link. In-person events include a venue and an address.
So whether your community meets on a video call or in a physical location, the event shows members the details they need for that format. Event RSVP and Registration Options
Not every event needs the same kind of sign-up. For each event, organizers choose one of three modes.
RSVP registration lets members confirm that they’re attending.
Open joining without registering lets members join without signing up first.
Details only shares the event information without a joining action.
Event pages show a running guest count, along with each member’s own RSVP status. Members can see how many people are going and whether they’ve already responded.
The Events Page: Every Event in One Place
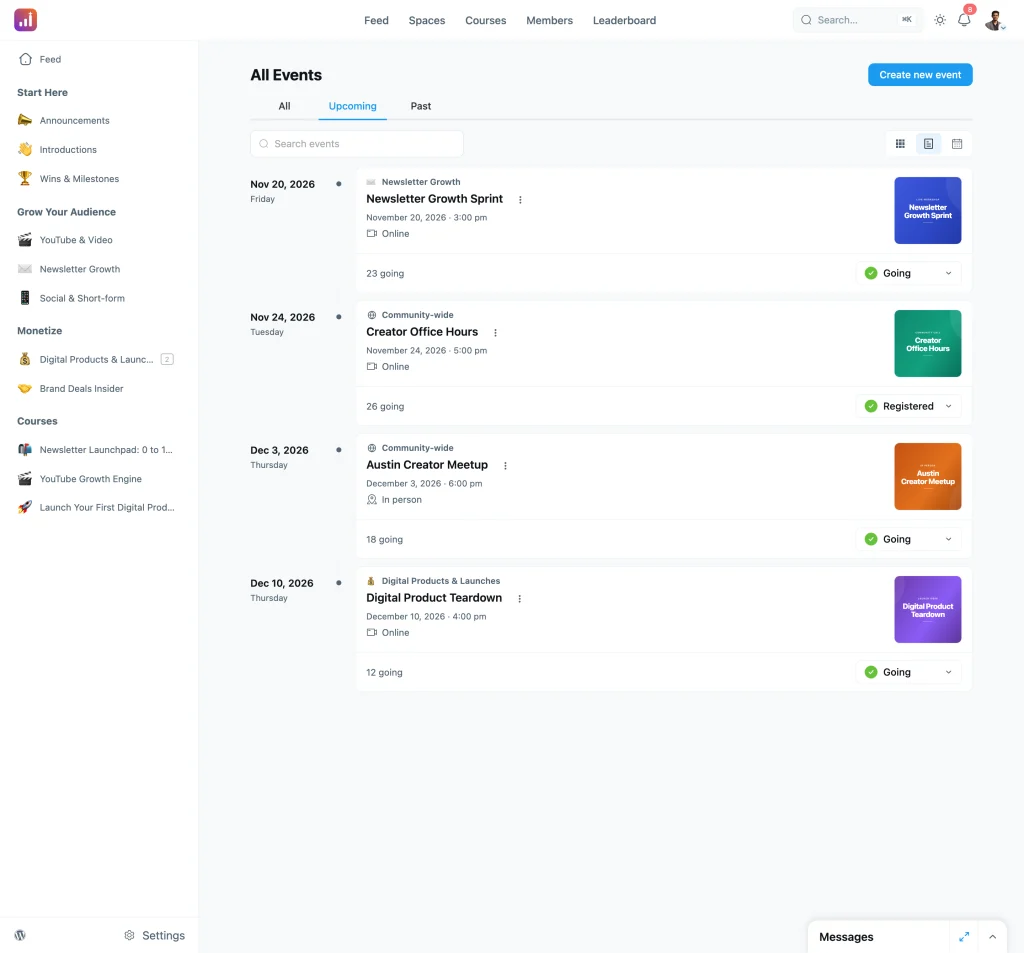
FluentEvent also adds a dedicated Events page to your community. It lists every event a member can see across all spaces.
The page has three tabs: All, Upcoming, and Past. Members can also search events by name.
Events can be shown in three views:
- List view
- Card view
- Calendar view
Each row shows the date, an online or in-person label, the number of people going, and the member’s own RSVP status.
Inside a Single Event Page
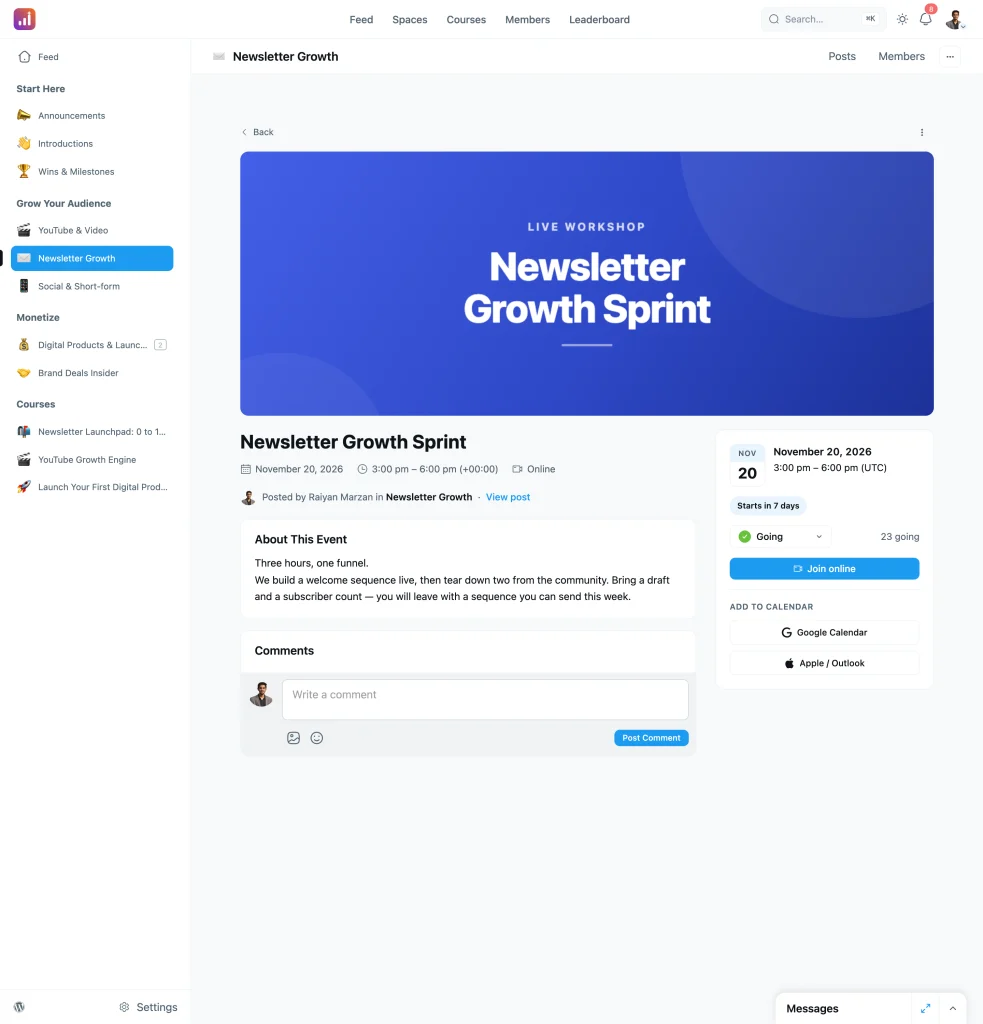
Each event has its own page with everything a member needs in one place. At the top, you’ll see the cover image, title, date, and location. Below that are a date card, a countdown, the RSVP control, the guest count, and the join link.
The page also includes an Add to Google Calendar button and a downloadable calendar file, so members can save the event to their own calendar. The event description and the comments sit on the same page, so members can read the details and join the discussion without going anywhere else.
How to Set Up FluentEvent
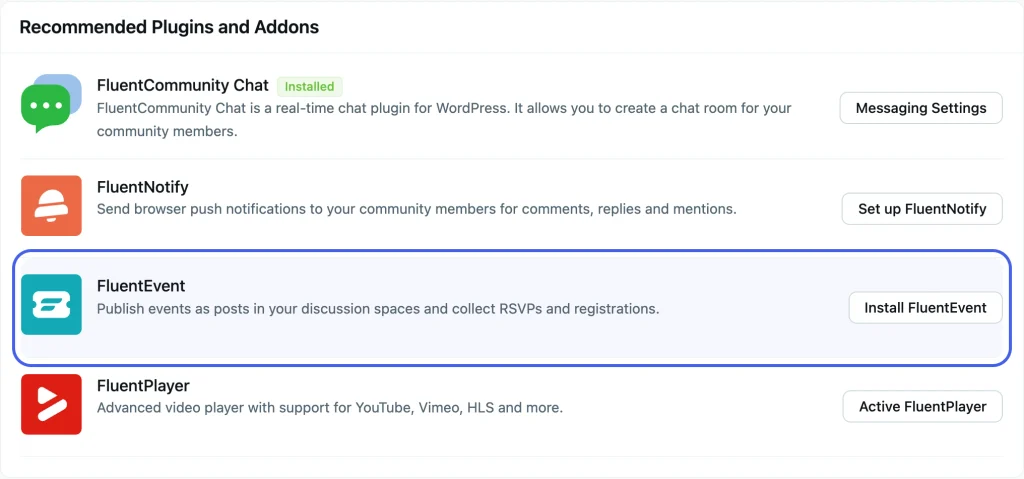
You’ll find FluentEvent in FluentCommunity under Settings → Features & Addons, in the Recommended Plugins section. If you’re using FluentCommunity Pro, you can install and activate it in one click.
If you’re using the free version of FluentCommunity, download the zip file and upload it manually. This step is needed because WordPress.org doesn’t allow plugins to install code from external servers.
Once it’s installed, enable Events with a checkbox. You can also customize the URL slug for your events page, for example /events or /meet-ups.
After you enable it, a short checklist points you to the menu, space, and create-button settings, so you know what to configure next. While FluentEvent is disabled, it adds nothing to your community.
Who Can Use FluentEvent?
FluentEvent fits any FluentCommunity site that holds scheduled sessions, online or in person.
Course creators can post live sessions in the same community where their members already learn.
Membership communities can create events inside private spaces, where the space’s permissions control who sees them. Local groups and clubs can share in-person meetups with the venue and address included. Brand and professional communities can list online sessions with a meeting link on the event page.
Get Started with Community Events
FluentEvent brings WordPress community events into FluentCommunity. You get event posts in the feed, three RSVP modes, an Events page with list, card, and calendar views, and an Add to Google Calendar option on every event page.
To start, update to FluentCommunity 2.14, enable FluentEvent from Features & Addons, and create your first event.

Prema Anjum
My full name is Anzuman Ara Chowdhury. But people know me as Prema Anjum. I’m a Digital Marketer by profession, a WordPress community contributor, and a travel enthusiast by heart.
Add your first comment to this post