
FluentCommunity Version 1.1.22: New Integration, Community Analytics, Multiple Media Upload, and Bug Fixes

Table of Content
Subscribe To Get
WordPress Guides, Tips, and Tutorials


Exciting new updates for FluentCommunity are on the way!
In our last four updates after the release of FluentCommunity, we have introduced
- Migration support for BuddyPress
- Migration support for BuddyBoss
- Added ability to change the space for a post
- Terms and Conditions field customization option
- Post Sharing Card when sharing community posts on the feed
- Secure Documents Feature for Spaces
- Secure Documents Feature for Course Lesson
- Added new member list/grid layout
- Invitation Links for Spaces
- Robust Access Management with FluentCRM tags
- Improved Auth Pages UI & UX & better integration with FluentAuth
- FluentCRM triggers for Course / Space left
- Contextual Smartcode for FluentCRM Automation
packed with feature enhancements and bug fixes based on your valuable feedback.
Now, we’re back with another update full of improvements and fixes to make FluentCommunity even better.
This update is special because we’re introducing some amazing features alongside numerous enhancements and fixes.
Let’s dive in!
1. Integration with Paymattic
FluentCommunity integrates with Paymattic, allowing you to collect payments and add members from the Paid Course and VIP Spaces of FluentCommunity directly through Paymattic’s Payment Forms or Subscriptions Forms.
This article will guide you through integrating FluentCommunity with Paymattic and help you make the most of your community features.
“Before starting the process, make sure you install and activate the FluentCommunity Pro Plugin on your WordPress Site to set up this integration.”
Connect FluentCommunity with Paymattic
Before starting the process, you must connect the FluentCommunity with Paymattic from the FluentCommunity Plugin.
To learn how to connect FluentCommunity with Paymattic, follow the steps below.
First, go to Settings of FluentCommunity from the below-left corner.
Open the Features & Addons tab from the left sidebar and scroll down to the Recommended Plugins and Addons section.
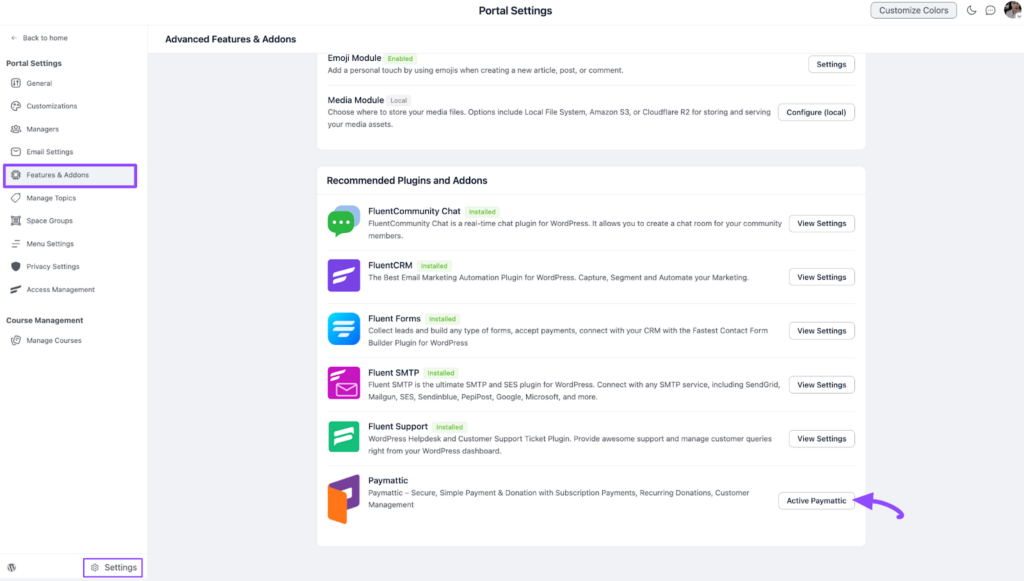
Click the Activate Paymattic button to automatically set up the Paymattic (free version) plugin with your FluentCommunity.
“Remember, you need to install and activate the Paymattic Pro Plugin to perform all the tasks (e.g., using conditional logics, adding the user dashboard, etc.) for FluentCommunity.”
Now, click the View Settings button and it redirects you to the Paymattic Dashboard.
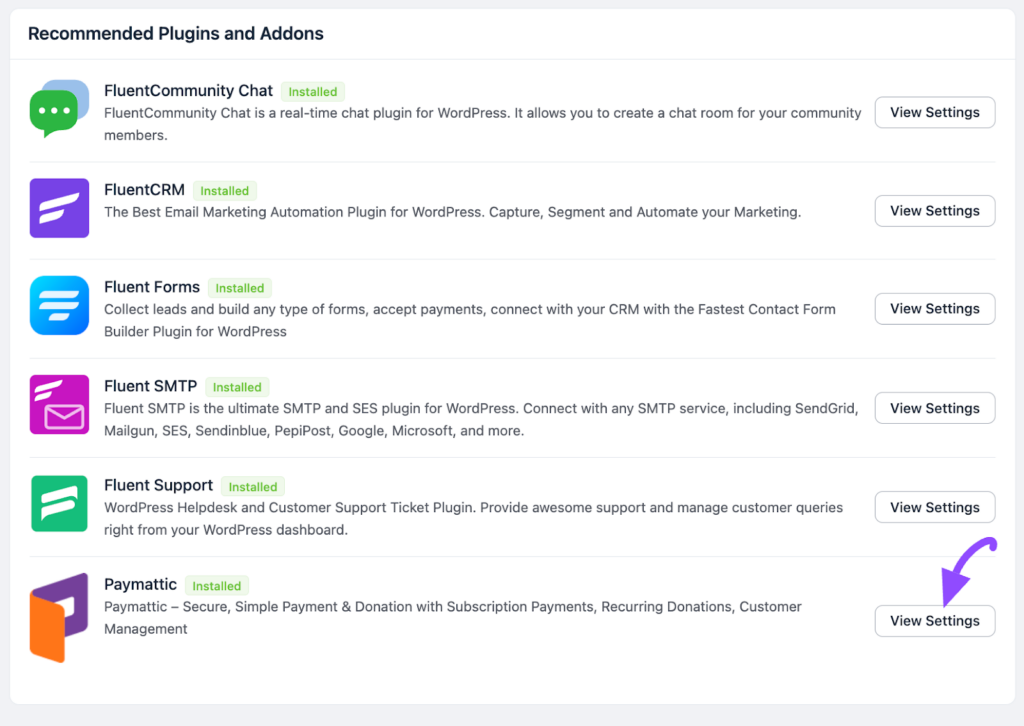
Enable FluentCommunity Integrations
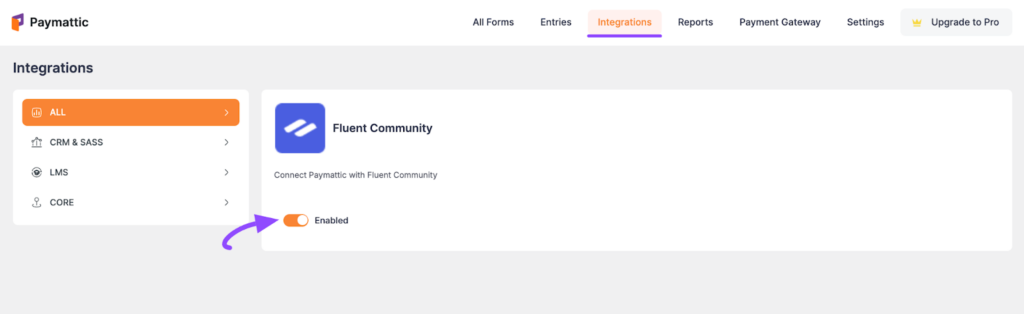
By default, the FluentCommunity module will be enabled in your Paymattic.
If not, go to the Integrations from the Paymattic Navbar, search for the FluentCommunity through the search bar, and manually Enable it by turning on the toggle to get access to the FluentCommunity Integration Feed.
Integrate FluentCommunity into Paymattic Forms
To learn how to integrate FluentCommunity into any specific Form in Paymattic, follow the steps with the screenshots below:
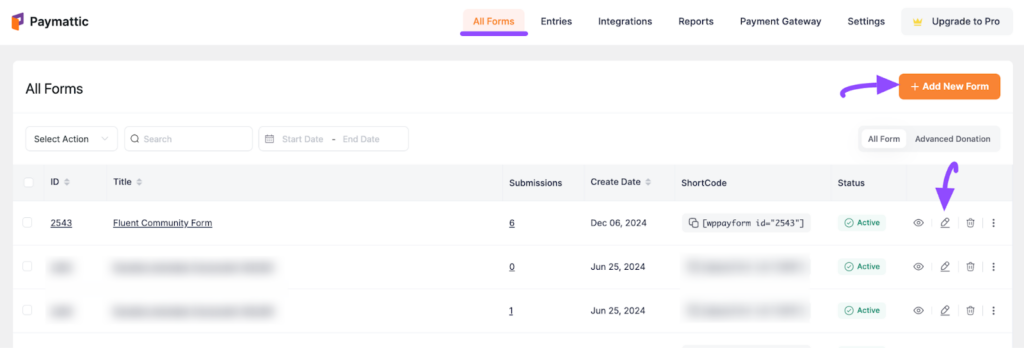
First, go to All Forms from the Paymattic Navbar, open an existing desired form by clicking the Pencil/Edit Icon, or create a new form by clicking the + Add New Form button to integrate FluentCommunity.
“To learn the detailed process of creating a new form to collect payments, read this Payment Form or Subscriptions Form documentation.”
For example, we used an existing payment form to show you the integration process.
Once you are on the Editor page of your desired form, go to the Integrations tab, open the Add New Integration dropdown list, and select the FluentCommunity Integration option.
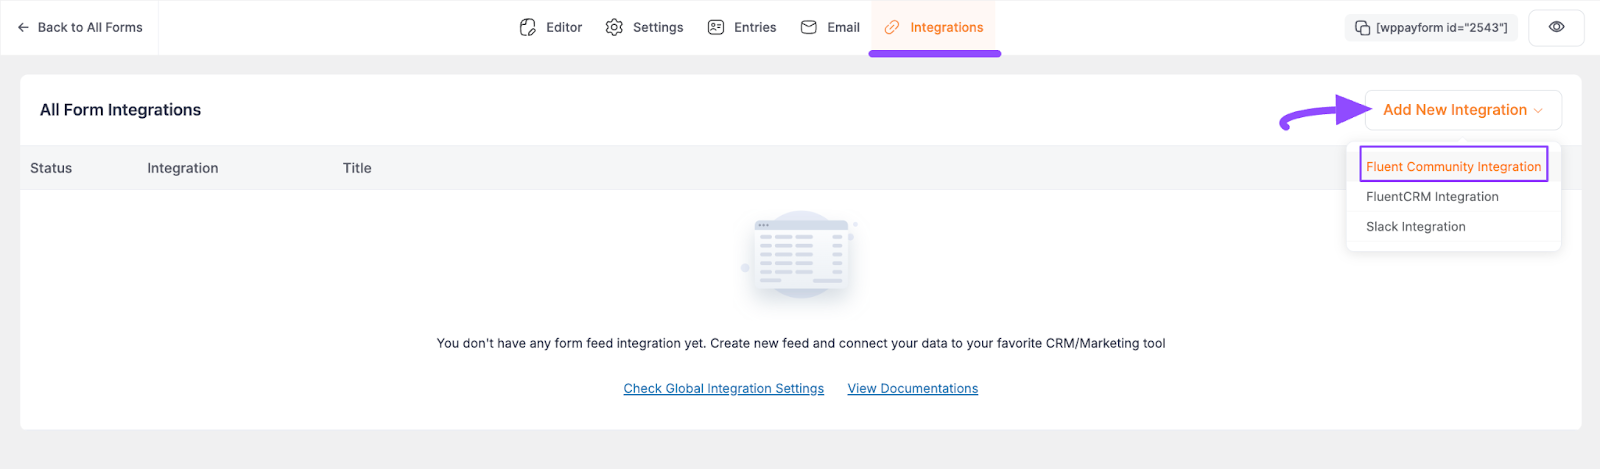
Now, a pop-up page will appear with various settings options for configuring FluentCommunity.
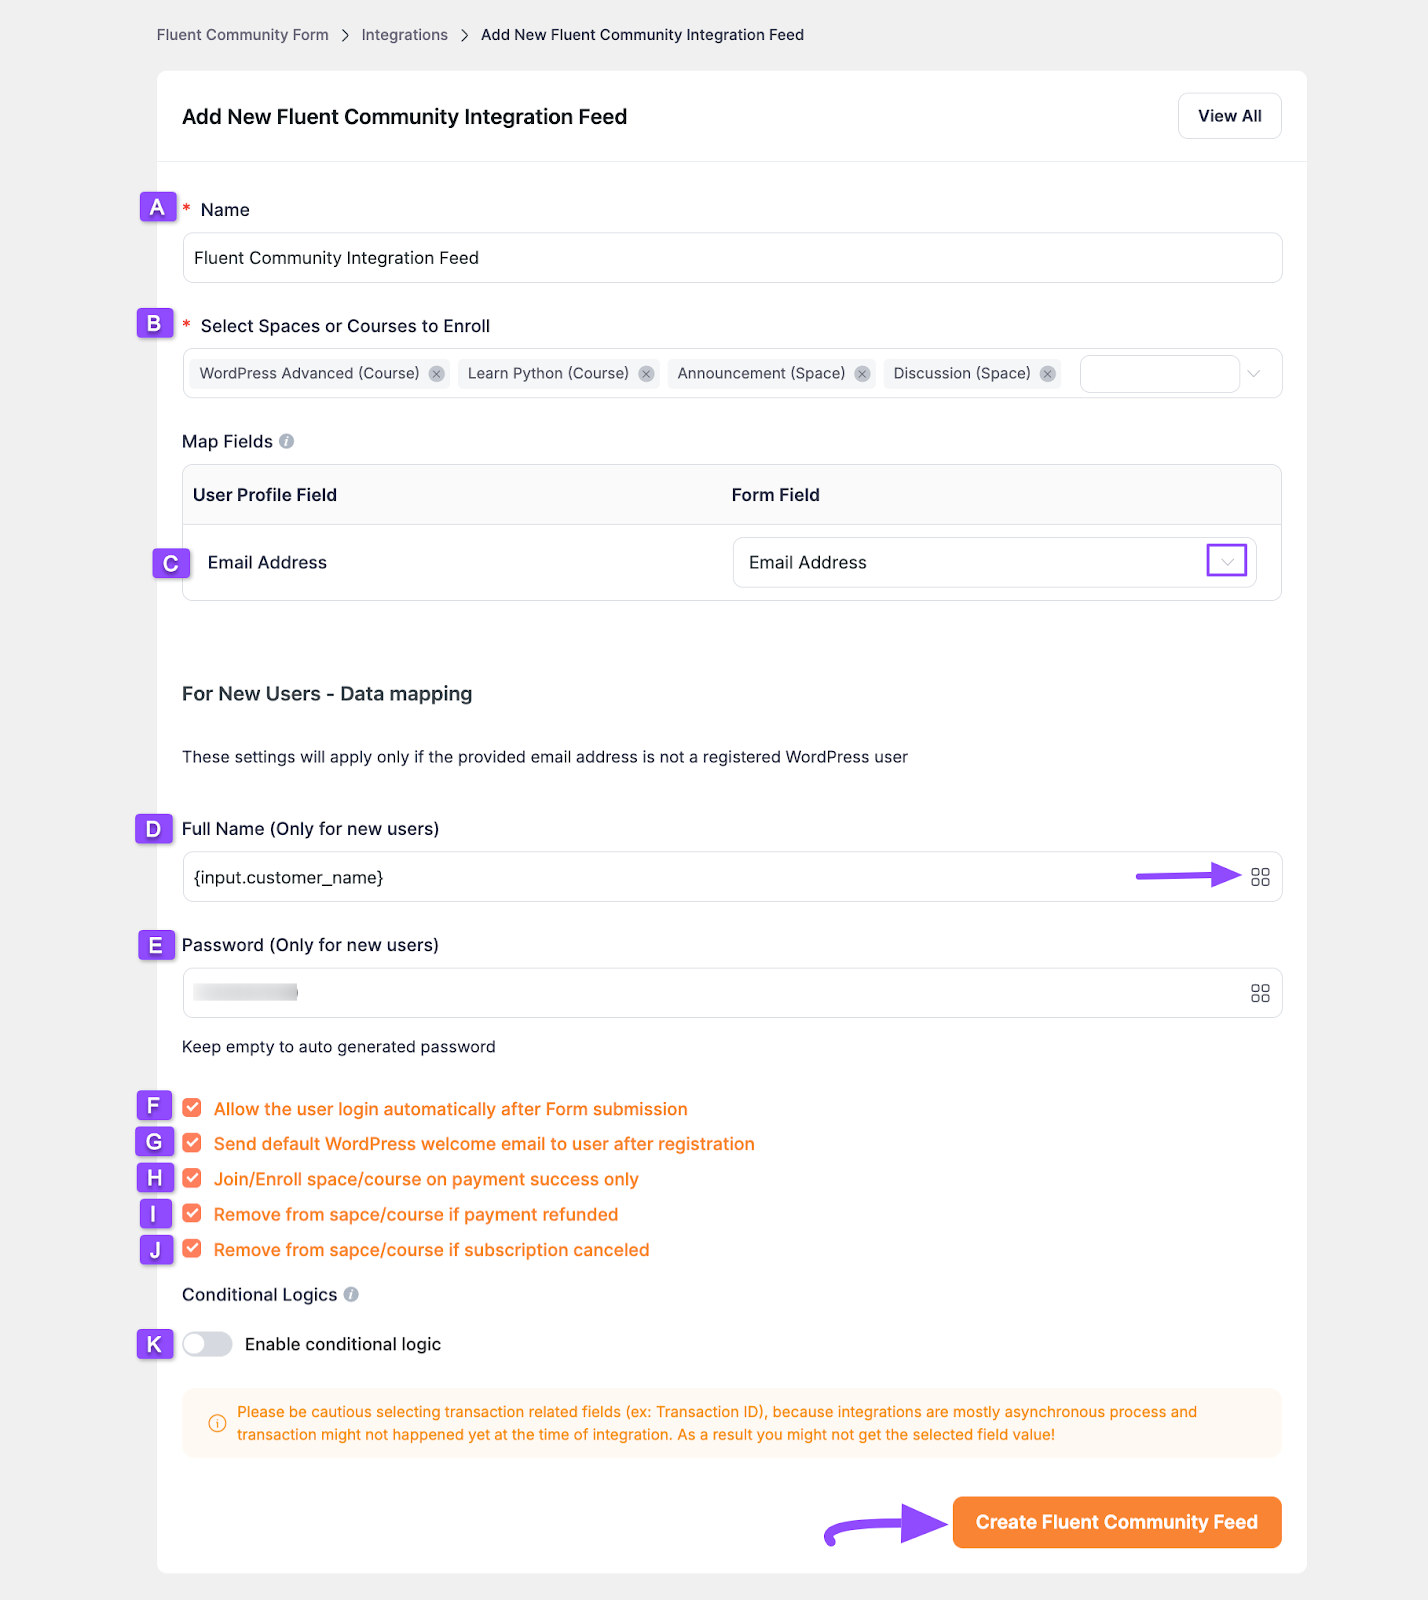
All the settings options mentioned in the screenshot below are briefly explained:
A. Name: Here, you can set a name according to your preference for your feed
B. Select Spaces or Courses to Enroll: Here, you can select your desired or all Space/s and Course/s to set where your users will add as members/students immediately after form submission.
C. Email Address: In this field, you need to select the Email Address.
D. Full Name (Only for new users): Here, use the {input.customer_name} shortcode by clicking the ShortCode Icon.
E. Password (Only for new users): Here, you can set a fixed password for every new user. Or, you can keep it empty to automatically generate a new password for each user.
F. Allow the user log in automatically after Form submission: Enable this option and your user will be directly logged into your Paymattic User Dashboard after submitting the form.
G. Send default WordPress welcome email to a user after registration: Enable this option to send a welcome email notification to your users with login details including a password reset option.
H. Join/Enroll space/course on payment success only: Check this option if you want your users to Join/Enroll in a Space/Course only when the payment is successful. If you keep it unchecked, users can get access to the space/course without payment succeed.
I. Remove from space/course if payment is refunded: Checking this option will allow you to remove users automatically from space/course if payment is refunded.
J. Remove from space/course if subscription canceled: Checking this option will allow you to remove users automatically from space/course if they cancel their subscriptions.
K. Enable conditional logic: Enable this toggle if you want to set any conditions on this form submission. To learn the details of the use of this Conditional Logic, read this Documentation. Plus, to get access to this feature, you need the Paymattic Pro Plugin.
Once you set up the page, click the Create FluentCommunity Feed button and the feed will be integrated into this specific form.
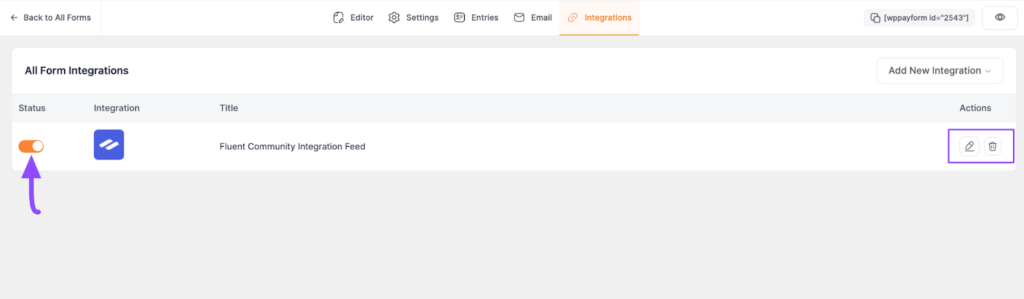
Now you will see that your FluentCommunity Integration Feed has been added here.
You can modify your FluentCommunity Feed anytime by clicking the Pencil Icon and delete it from here by clicking the Trash Icon.
Also, you can disable or enable this feed anytime by clicking the Toggle button if needed.
Display Form into Front End
To display your FluentCommunity Form on the front end of your desired WordPress Site, Copy the Shortcode of your desired Form.
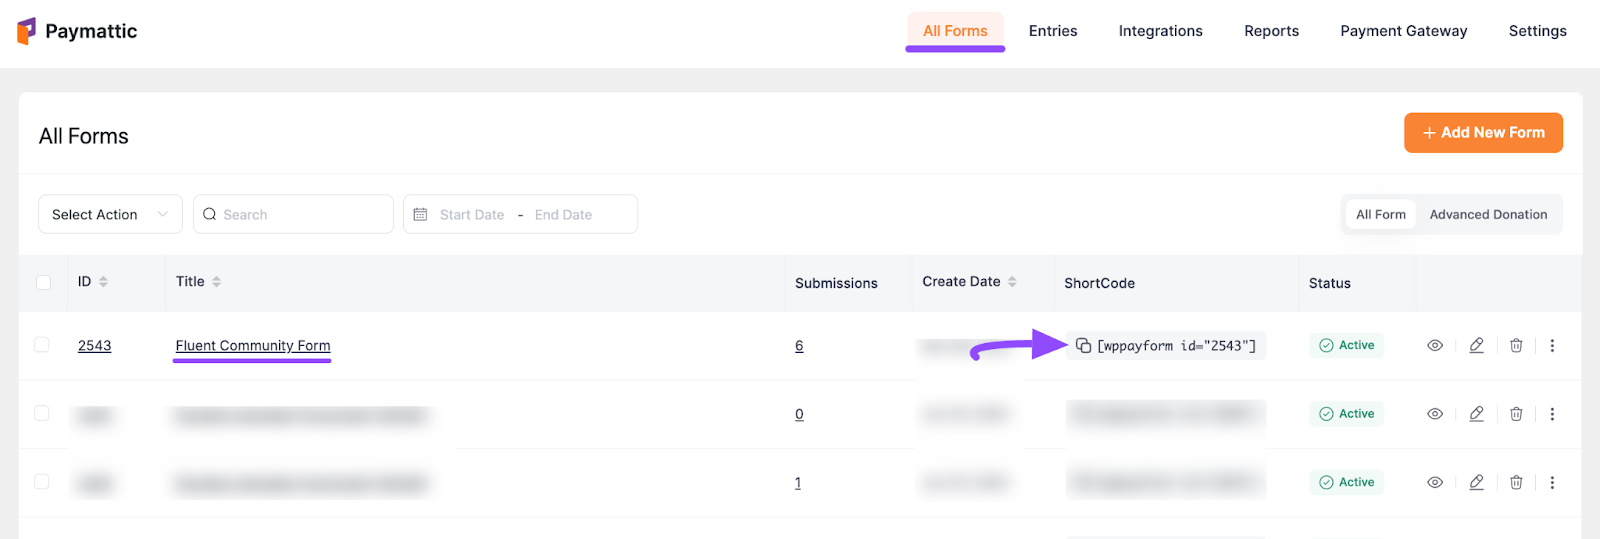
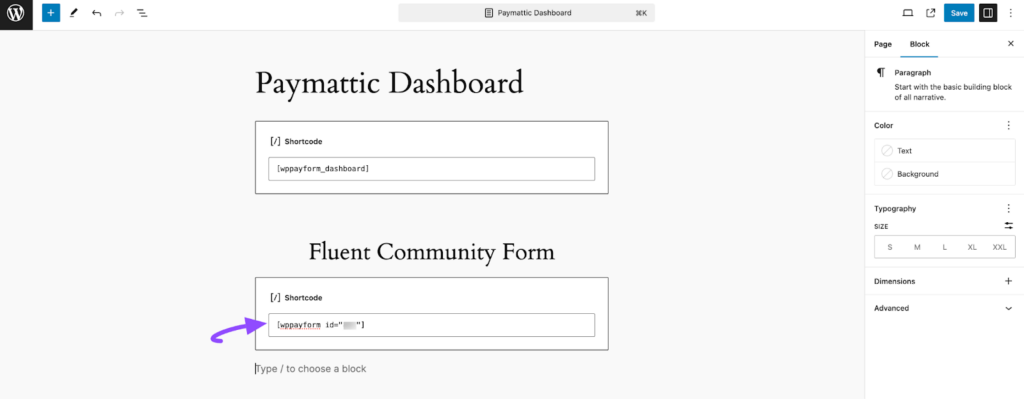
Then, paste the shortcode to the Page/Post where you want to display your FluentCommunity Form.
For example, I pasted the ShortCode to the default Paymattic Dashboard Page.
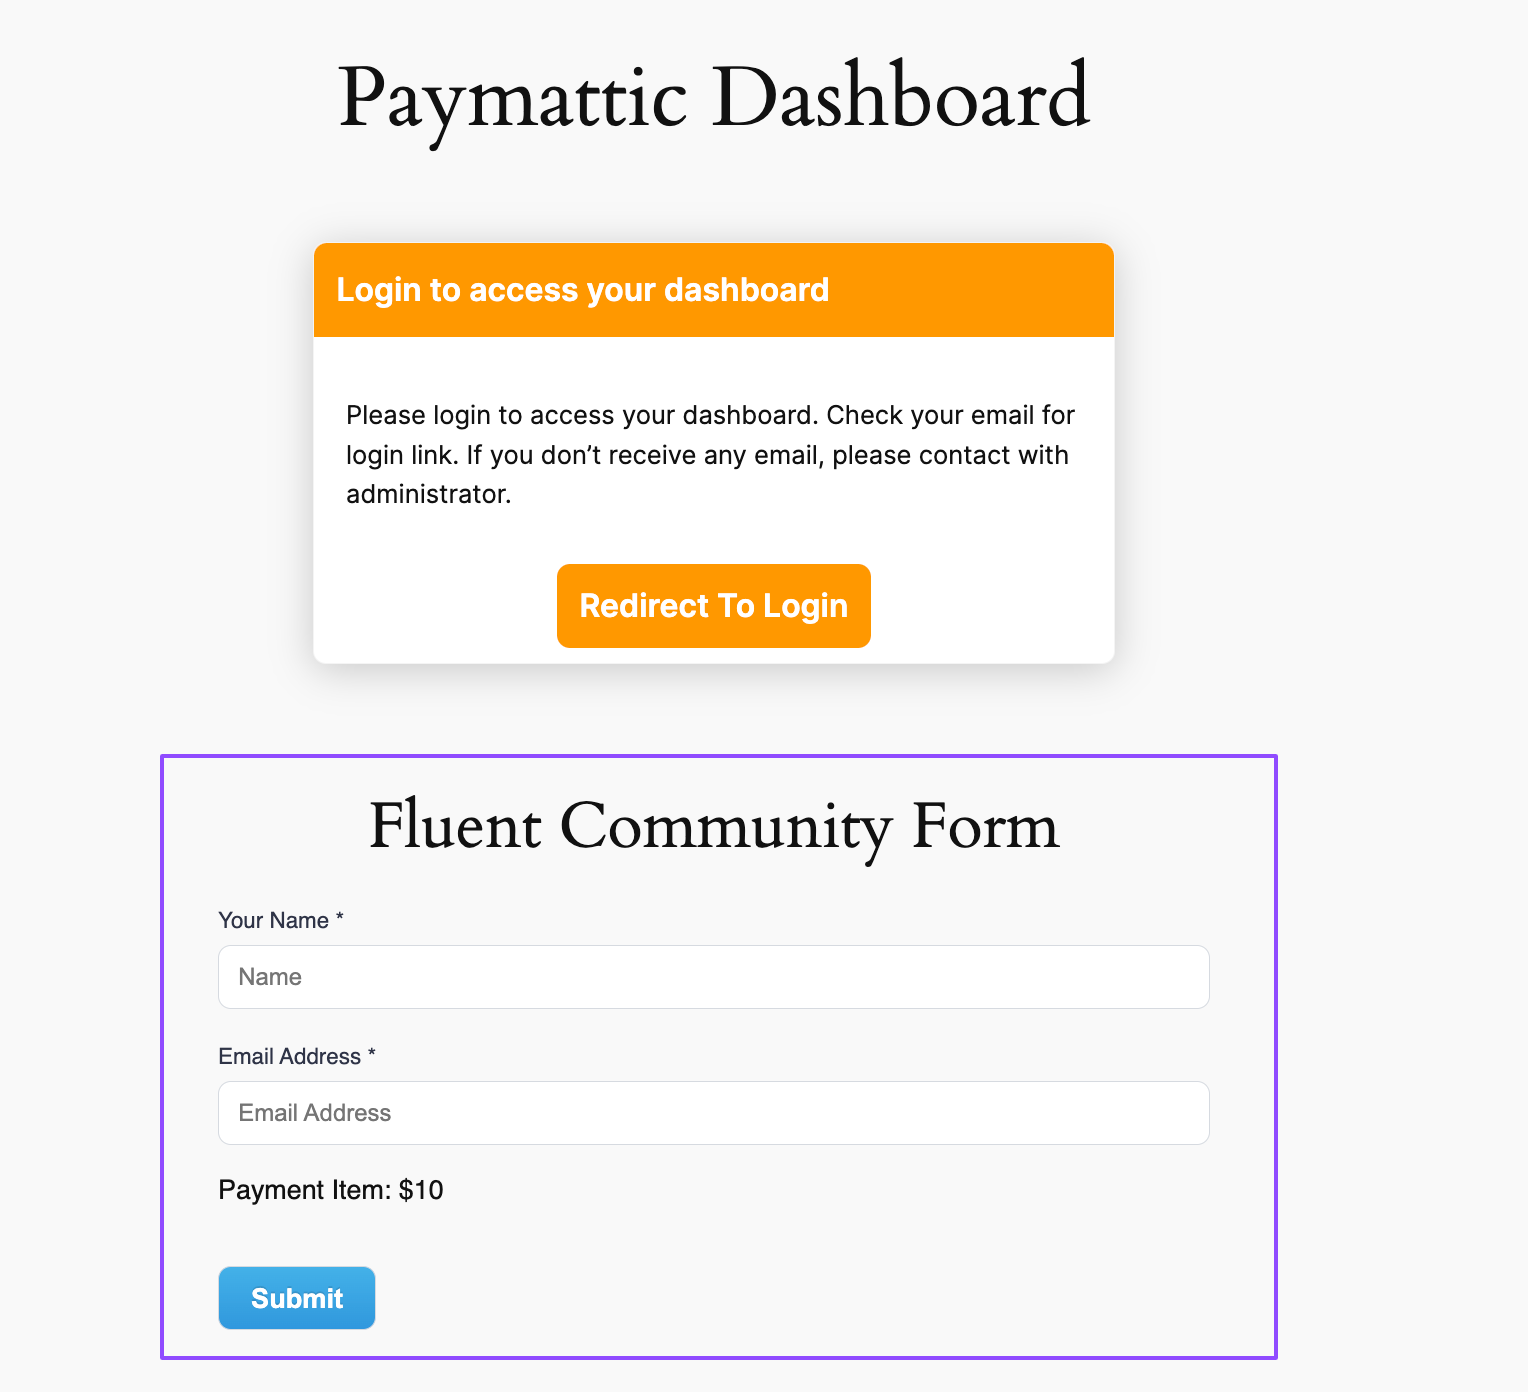
Now in your front end, you will see your FluentCommunity Form like the screenshot below. Here, your user needs to fill up the form for logging into the FluentCommunity Portal.
Plus, the Paymattic Form User will automatically be added to the Members list of selected Spaces and Courses of FluentCommunity.
Paymattic User Dashboard
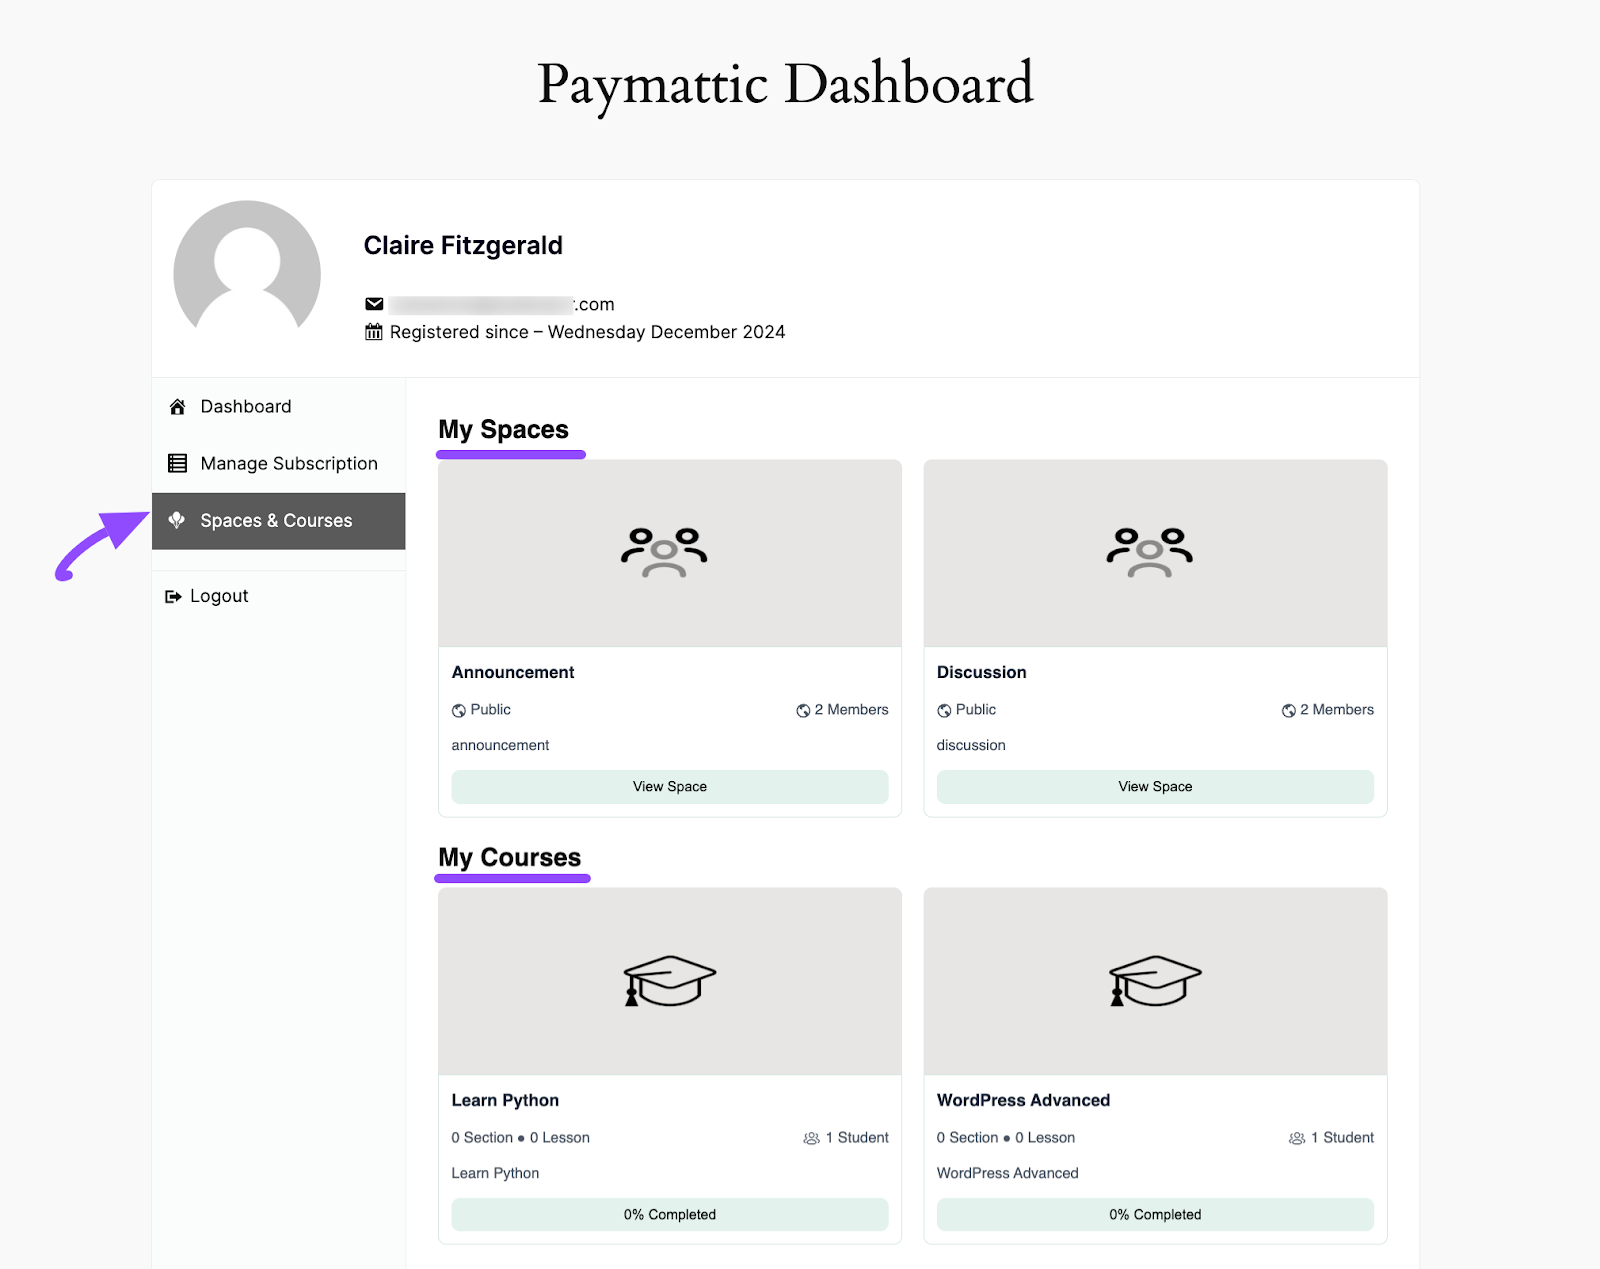
After completing the integration, Paymattic users or FluentCommunity members who access the Community through Paymattic will see a dedicated section called “Spaces & Courses” in their User Dashboard.
This section provides an overview of their community activities, such as the spaces they have joined and the courses they are enrolled in.
Also, they can manage and see the payment history of their subscriptions through this dashboard.
“To learn more details about the Paymattic User Dashboard, read this Documentation. Plus, to get access to this feature, you need the Paymattic Pro Plugin.
Once your users fill in the form, the user dashboard will look like the screenshot below.
This way you can easily integrate FluentCommunity with Paymattic!
If you have any further questions, concerns, or suggestions, please do not hesitate to contact our @support team.
2. Community analytics
Another amazing update we have introduced in this release is the community analytics where you can see the number of community members, posts, comments, and spaces inside the community.
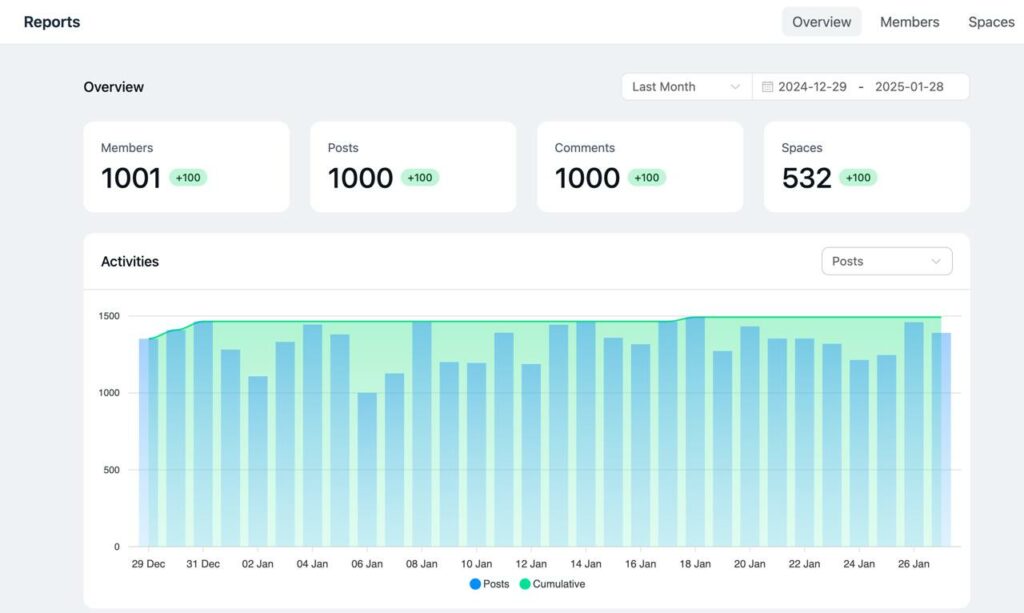
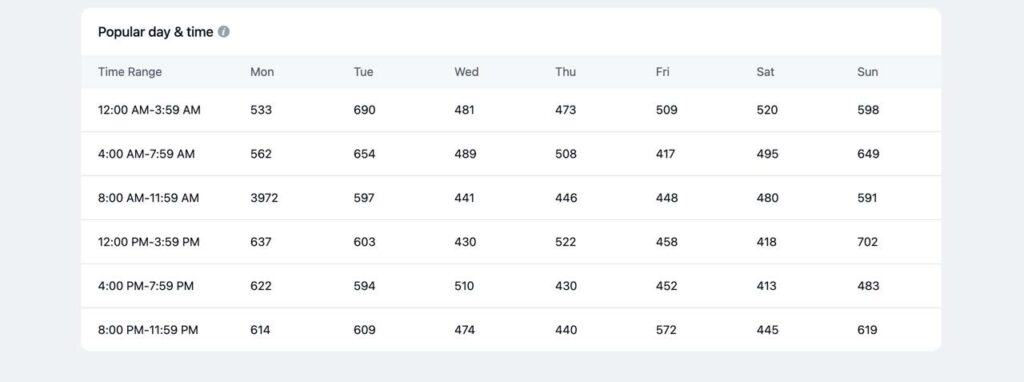
You can also view the number of interactions at a specific time of the day.
Now you can add multiple media attachments to your post inside your community.
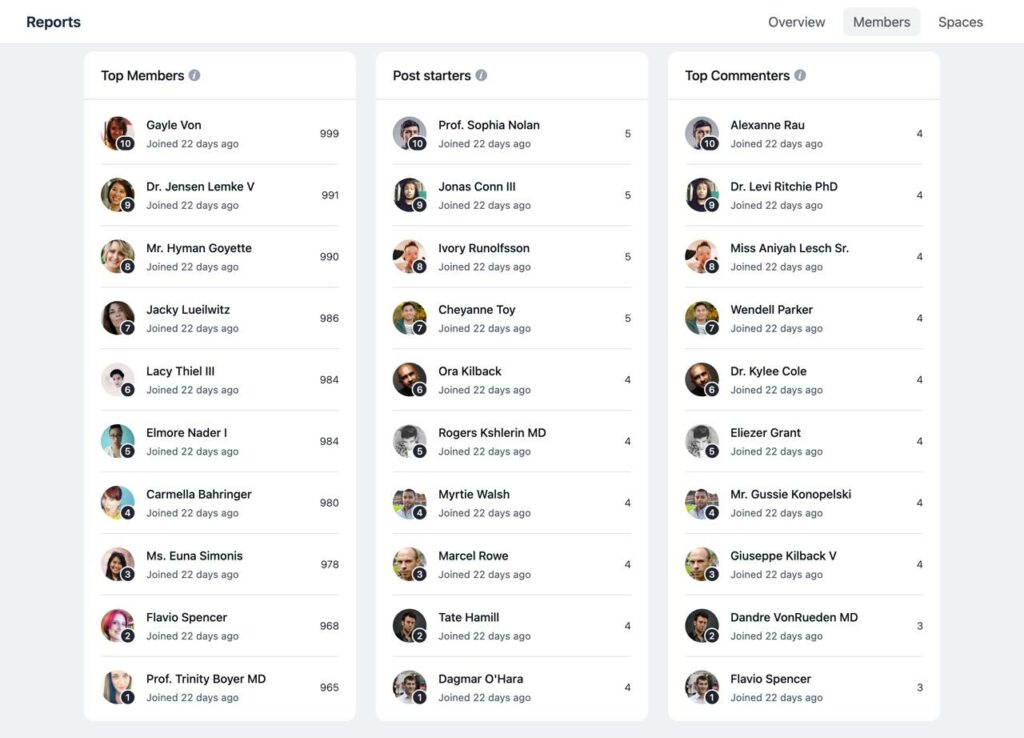
Besides, on the Members bar, you can view the top members, post starters, and top commenters of your community.
Last but not least, when you click on the Spaces button from the top right corner, you’ll see the names of popular spaces, and posts on that space, along with the comments, and members of the space.
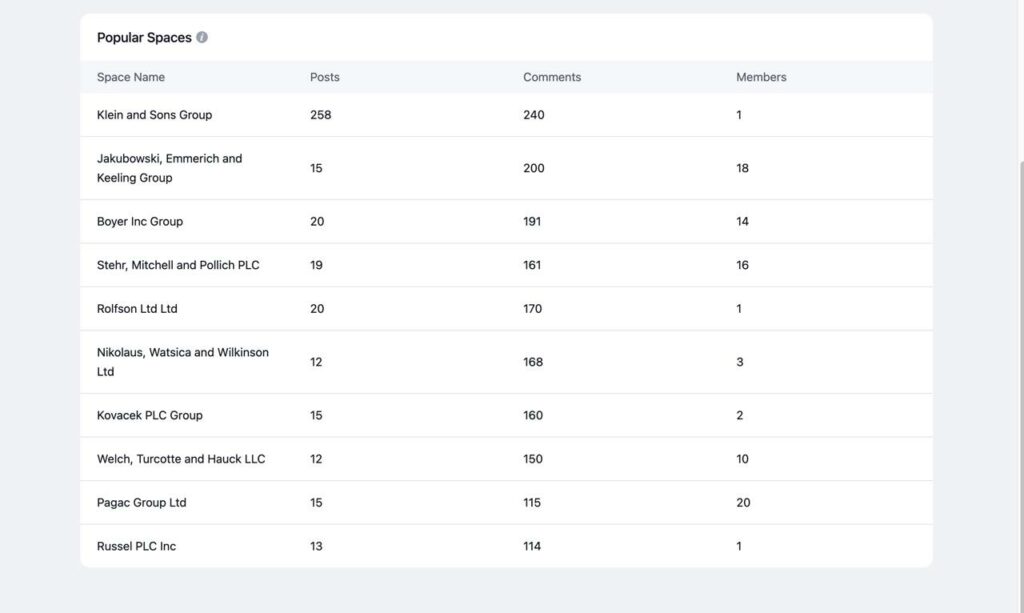
How cool! Isn’t it?
3. Added multiple media for comments
Now you can add multiple media attachments to your post inside your community.

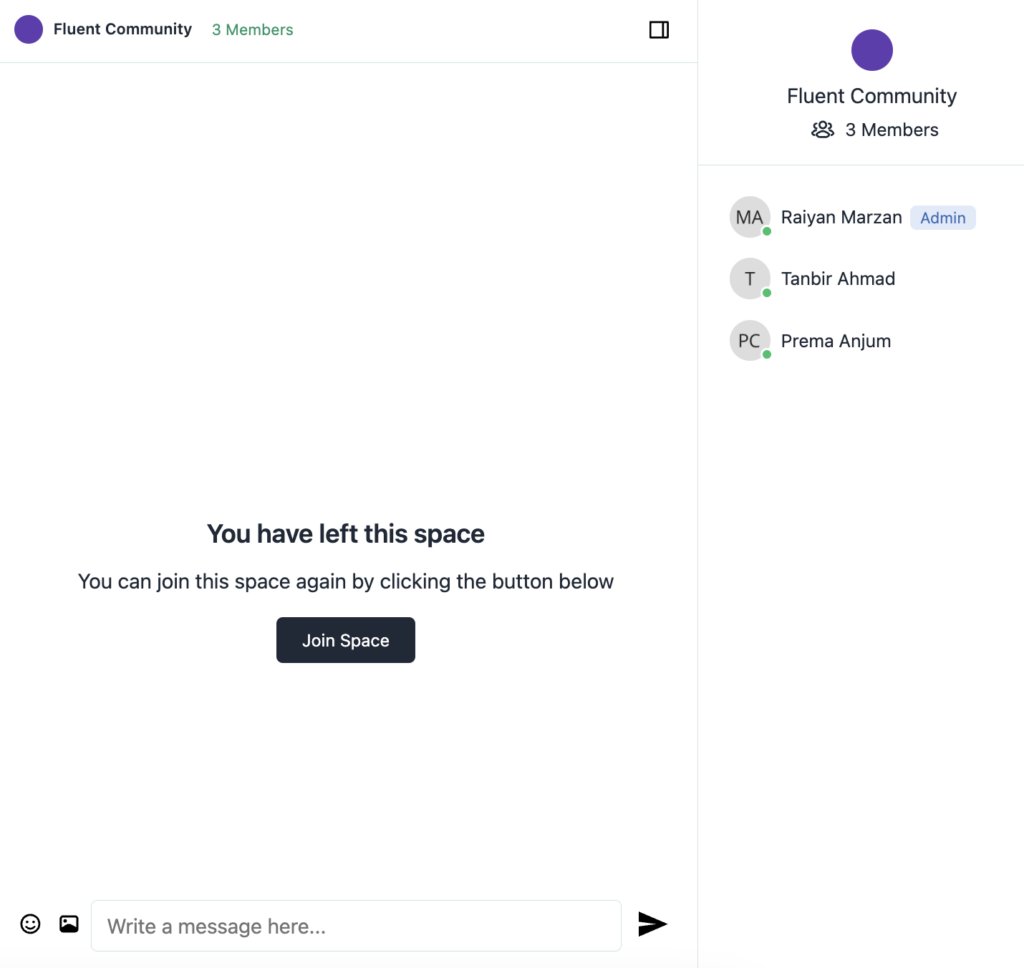
4. Allow users to leave/join group chat
In this update, your community users can easily leave a group chat of he/she doesn’t want to be a pat of that conversion. Even, that person can join the chat again when he/she feels it necessary.
Bug fixes
- Duplicate Post Validation Limited to Current Space
- Resolved: Video Embed Issue with Custom HTML
- Resolved: Space Remove from Group Issue
- Fixed: Login Button Label Not Updating Issue
- Fixed: Group Space Menu Visibility for Public
- Fixed: Space Permission Handling Issue
- Fixed: Flags Emoji Saving Issue
- Fixed: Slug Not Updating Issue
To the end
First, make sure to update both FluentCommunity Free and Pro versions. This update includes an important security fix, so it’s crucial to stay up-to-date. We’re dedicated to regularly providing fixes and improvements, so don’t forget to check our changelog and blog for updates.
Stay connected by following our FluentCommunity pages on Facebook and Twitter. If you come across any bugs or have suggestions for improvement, we’d love to hear from you. We’re also open to new feature ideas, so feel free to share your thoughts with us and the community.
If you have a moment, consider leaving us a review—it means the world to us and keeps us motivated. Thank you for your ongoing support and love.
Have a wonderful day!

Prema Anjum
My full name is Anzuman Ara Chowdhury. But people know me as Prema Anjum. I’m a Digital Marketer by profession, a WordPress community contributor, and a travel enthusiast by heart.


Leave a Reply